Produced by: Science Popularization China
Produced by: “Radio” Magazine
Supervised by: Computer Network Information Center, Chinese Academy of Sciences
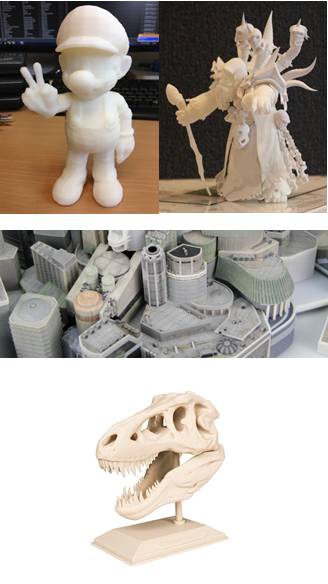 Figure 1 3D Printing Works Display
In legend, Nüwa used herself as a model to create humans with yellow clay. Initially, she molded them one by one, but after a long time, she found it difficult to quickly populate the world with humans. Just think about it, if she spent 5 minutes molding one, it would take about… 6600 years to create 7 billion people today. Chinese culture has a history of 5000 years, meaning Nüwa would still be molding today. So, Nüwa cleverly took a rope (or a vine) and swung it with yellow mud, and voila! She created a large number of people at once.
 Figure 2 Most of us are actually “3D printed”
Of course, this is just a myth, but since humans developed craftsmanship, they have longed for a rope that could create shapes at a swing. For thousands of years, humans could only imagine this until science emerged, machines were invented, electricity was harnessed, and finally, we arrived at 3D printing today.
The predecessor of 3D printing is rapid prototyping, which was already applied in industrial design and production processes in the 1980s. Most of the common 3D printing technologies were already developed at that time. In fact, the term “3D printing” came later; it was not until 1995 that two graduates from MIT, Jim Bredt and Tim Anderson, first proposed the concept of “3D printing.”
The reason they named this technology “3D printing” was not only because the prototype concept was to manufacture products like printing documents but also because they hoped this technology would eventually enter every household like printers.
Principles and Classification
Although there are many types of 3D printing technology, the approach is the same, and the technical term is “distributed material manufacturing.” For example, if one person makes a cabinet, it takes a long time. To speed up, more hands are needed, but if the number of people is fixed, what other ways can there be to increase manufacturing speed? That is to make a pile of building blocks and find someone to stack them together according to a specific shape and then glue them—provided they can understand the instructions.
Distributed material manufacturing works by dividing the product to be produced into small parts, manufacturing them separately, and then stacking them together. However, these divided parts are very, very small, and with technological advancements, the manufacturing precision will continuously improve, and the divided parts will become smaller. We can think of a 3D printer as a worker who strictly follows the instructions, and those small parts are the “ink” of 3D printing.
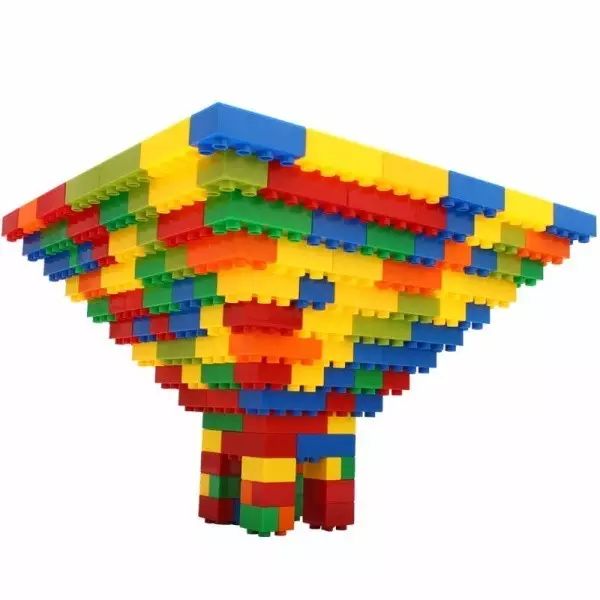 Figure 3 3D printing is like stacking building blocks
All roads lead to Rome; although the principles are the same, there are many ways to implement them. Simply put, they can be divided into selective laser sintering, fused deposition modeling, stereolithography, and layered manufacturing.
Selectively laser sintering involves placing a large amount of metal powder and using a laser to melt and sinter it layer by layer to create a shape. This method is highly reliable and can manufacture metal components, but the equipment is expensive and technically demanding. Currently, apart from a few manufacturers developing similar concepts for home use, it is mainly applied in high-end industrial fields, such as aerospace and automotive manufacturing.
Fused deposition modeling is easier to understand; it involves melting raw materials into a semi-fluid state, then extruding them through a nozzle to form layers, similar to making toothpick crafts. The diameter of this filament is the precision of the 3D printer. Currently, this is the most commonly used method in mainstream 3D printers.
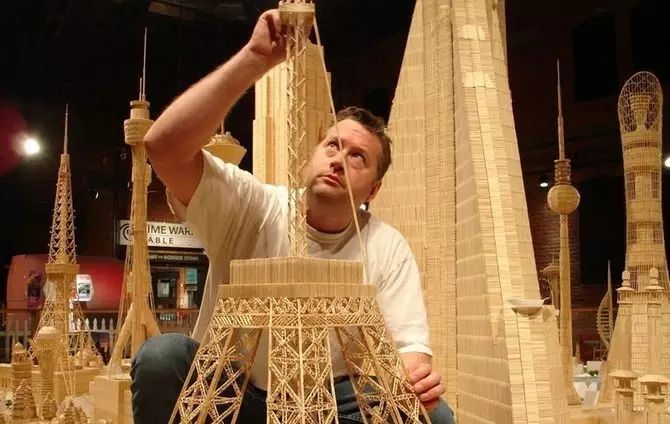 Figure 4 The principle of mainstream 3D printers is essentially like this
Stereolithography and layered manufacturing are similar processes; they both transform three-dimensional shapes into two-dimensional layers and then stack them up. However, stereolithography is a subtractive process, while layered manufacturing is an additive process. Currently, stereolithography has advantages such as high precision and strong controllability, making it suitable for manufacturing intricate crafts, such as exquisite chess pieces, but its equipment costs are high and space-consuming. Although there are some home models, they are not yet widely adopted. Layered manufacturing is more often used for making crafts, with low costs and widely available materials being advantages, but there are basically no plans for home adoption.
3D Modeling and 3D Printing Process
After discussing hardware, we need to talk about software. Having just the equipment does not enable 3D printing; we need to provide the 3D printer with an assembly instruction manual, which is the 3D model.
Almost all 3D modeling software on the market can create 3D models that can be used by 3D printers, including established CAD software like AutoCAD, Solidworks, or CG software like 3DMAX, Maya, etc. However, there are some minor issues, such as whether the file format is compatible and whether interpretation and modification are convenient.
However, for non-professionals, these software are too expensive and inconvenient. Currently, the main 3D modeling software used for 3D printing is some free open-source software, such as OpenSCAD, Tinkercad, Meshmixer, etc. Here, special mention should be made of OpenSCAD, which allows drawing through programming code. As long as the relevant code is input, it can generate graphics. Many websites provide this code in open-source form, so mastering OpenSCAD offers an additional modeling method without being limited to STL files.
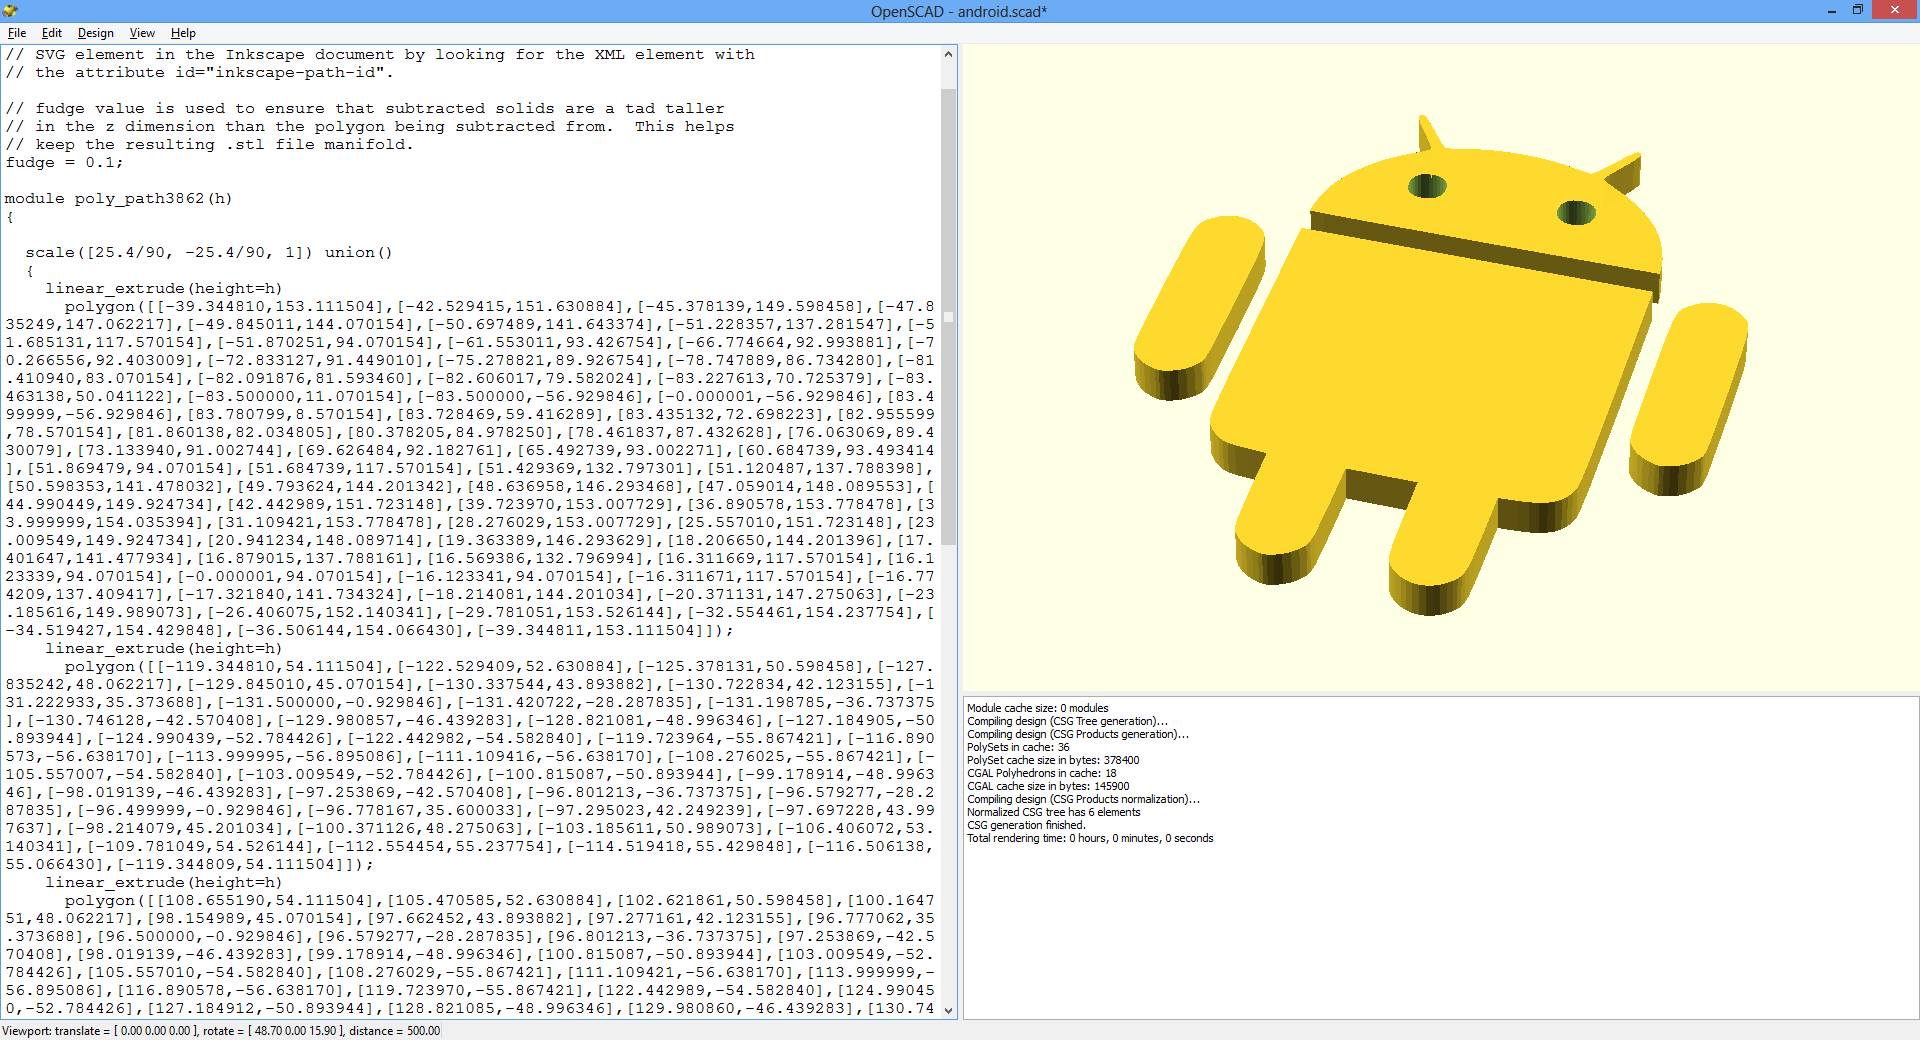 Figure 5 An example of code input in OpenSCAD
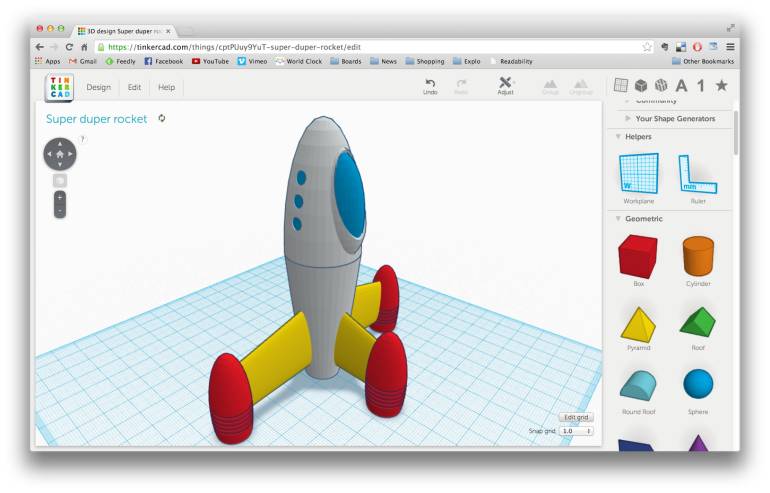 Figure 6 The interface of Tinkercad, isn’t it interesting?
However, just having this instruction manual is not enough; it also needs to be translated for the 3D printer to “understand.” Before the original graphic file enters the 3D printer, it must be processed by a control software to “slice” the graphic into operational steps for the 3D printer. Most of this software is also open-source, so there are many options available. Common examples include Cura, MakerBot, Repetier, Slic3r, etc., allowing users to choose software suitable for their 3D printing equipment.
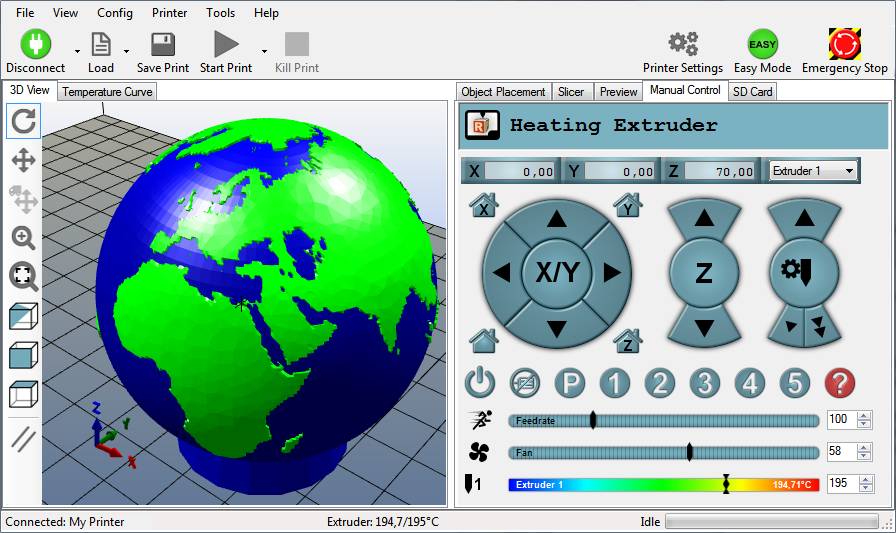 Figure 7 Repetier interface
Once these tasks are completed, you can instruct the 3D printer to start printing! Currently, printing a small project takes about ten to several dozen minutes, so you can make a cup of coffee and wait patiently.
The finished product of 3D printing varies in roughness depending on the printer’s precision. Additionally, since the hardening process of materials is not completely controllable, when printing more complex works, material overflow and deformation are often unavoidable. Therefore, post-processing like polishing and finishing can be performed based on the actual situation. After completing these steps, a 3D printed work is finished!
For beginners venturing into 3D modeling, there are a large number of ready-made products available online, which is a good way to get started. Thingiverse is one of the largest websites for this, and there are also many works available on the established open-source site GitHub, along with some projects that can be found in creative forums, which I won’t introduce one by one. By exploring these open works, you can familiarize yourself with the software and understand 3D printing, gradually modifying them, and after gaining some insights, you can create your own works and share them on open platforms, transforming from a novice to a maker.
 Figure 8 Thingiverse interface
3D Printing Robots
Making robots with 3D printing is another interesting experience, but this involves programming and assembly processes in addition to simply printing small objects, which complicates things a bit. However, the project webpage will provide detailed production steps, so you can create your own 3D printing robot without much effort.
3D printing robots mainly consist of two parts: parts that can be 3D printed and parts that cannot be 3D printed (which sounds obvious, I know). The specified 3D printable components can be made through 3D printing, but other components such as circuit boards, motors, bolts, nuts, etc., still need to be purchased. If you are an experienced maker, you can completely create your original 3D robot. For most beginners trying 3D printing, there are many open-source 3D robot projects available online, and many interesting works can be found on GitHub to try.
Taking GitHub as an example, first find the 3D printing robot project you want to try on the website. Most of the 3D printed components on GitHub are created based on OpenSCAD, so you can simply copy the program code and input it into OpenSCAD to obtain the 3D model. After completing the 3D modeling, follow the previous steps to deliver it to the 3D printer for printing.
 Figure 9 Open-source project metabot on GitHub
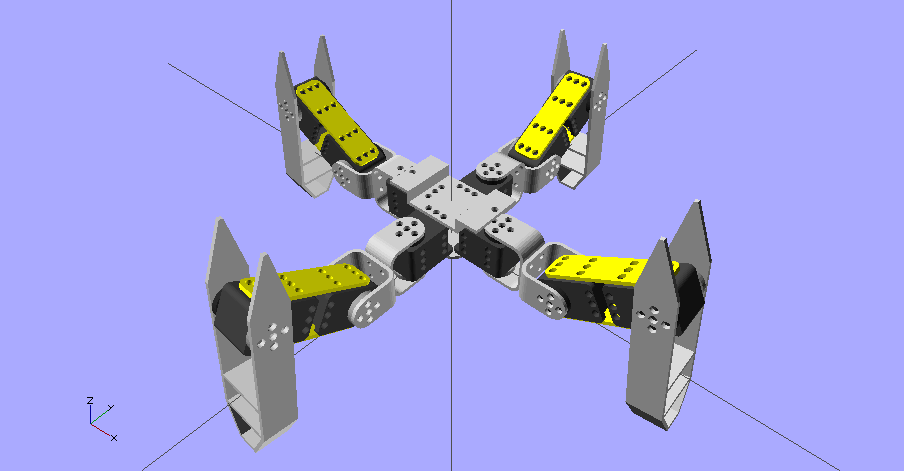 Figure 10 The 3D printed parts of metabot
Then check the parts list for other required components, such as motors, circuit boards, Bluetooth modules, and connecting parts like bolts and nuts. Most open-source projects will provide procurement links for the parts; if direct purchase is inconvenient, you can note down the model for self-purchasing. Of course, besides program-related components, other parts can be somewhat flexible, allowing for changes based on your actual situation.
Once you have a circuit board with a chip, you can load the program onto the circuit board. This requires some professional skills and related equipment, but it is not too complicated, and various tutorials are widely available online, or you can consult experienced individuals. The related program files are provided on the same project webpage, so using the existing ones will suffice.
Finally, assemble all the parts according to the assembly instructions provided on the webpage. This will test your hands-on skills; without hardware or software, no one can help you! After completing these steps, you will have a “cute” 3D printing robot.
Of course, if you have the energy, you can also modify this project to create your own 3D little robot. Making a 3D printing robot takes about 10 to 20 hours, which is a new form of leisure and entertainment that can also teach you a lot of new knowledge.

“Science Popularization China” is an authoritative scientific brand for scientific dissemination, developed by the China Association for Science and Technology in collaboration with various sectors using information technology.
This article is produced by Science Popularization China mobile terminal. Please indicate the source when reprinting.
We welcome everyone to recommend articles to BoLan Jun!~
For “Reprint Articles”, “Feedback”, or “Cooperation Matters”, please email[email protected]!
Please scan the QR code to follow the WeChat account of China Science Popularization Exhibition
(ID: kepubolan)