
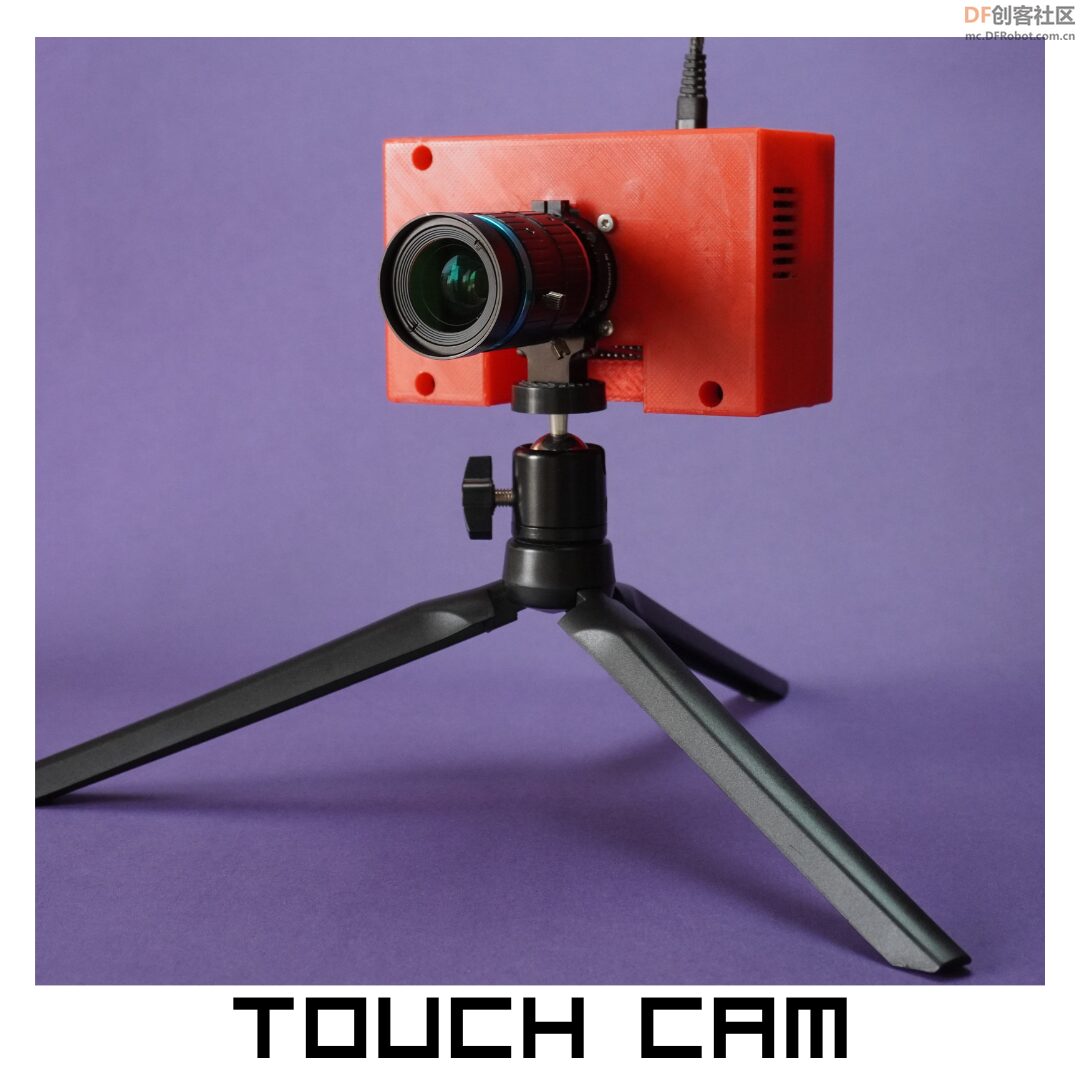
Project Overview
Touch Cam is a desktop camera server based on Raspberry Pi, integrating a touch display and touch sensor, aimed at providing users with a good experience. This project combines the powerful features of Raspberry Pi, custom CAD design, and an innovative touch interface, allowing users to conveniently capture photos, videos, and time-lapse shots.
Main Features
-
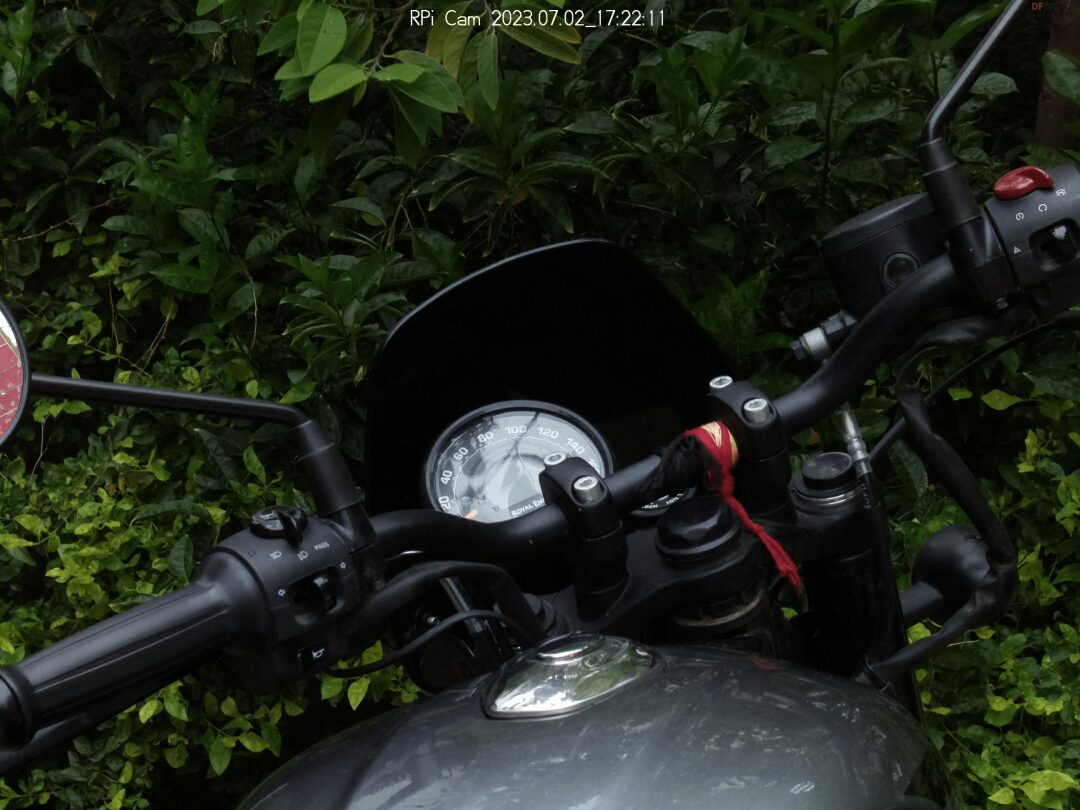
Touch Display: Touch Cam features a high-resolution touch display that provides a visual interface for camera control, image preview, and video playback. Using the touch display, users can easily navigate menus and view live images and videos. -
Touch Sensor: The design includes a touch sensor that enables seamless operation for capturing photos and initiating time-lapse shooting. A light touch on the touch sensor activates the camera functions, whether capturing a photo or starting time-lapse shooting. -
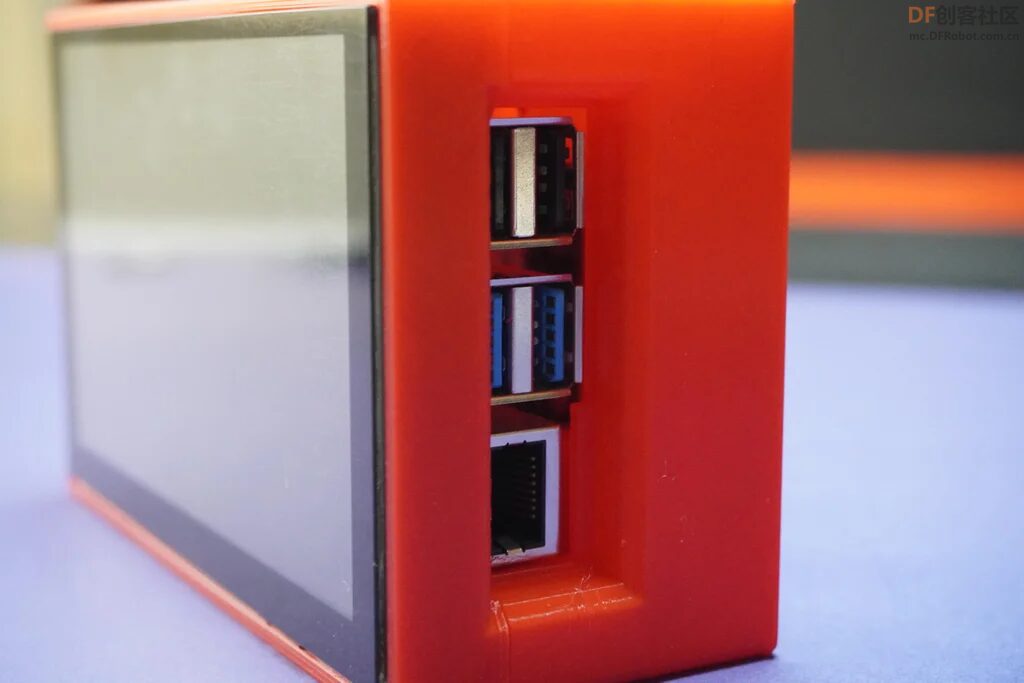
Raspberry Pi Desktop Camera Server: Fully utilizes the computing power of Raspberry Pi as a multifunctional camera server. Touch Cam provides a web-based interface accessible from any device connected to the same network, allowing users to remotely control and access the camera’s features. -
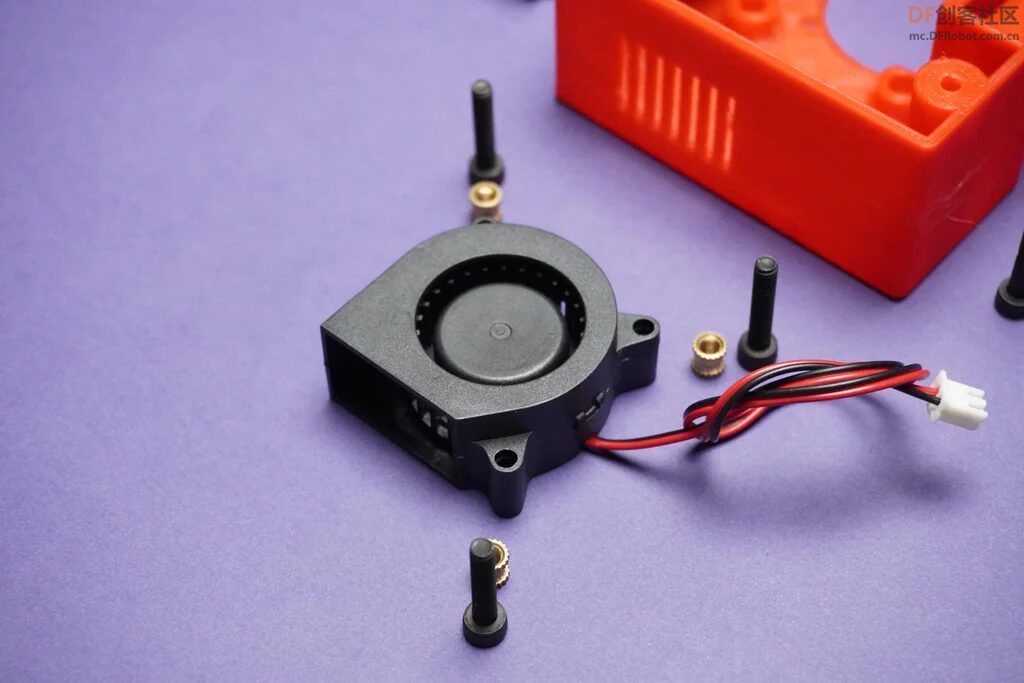
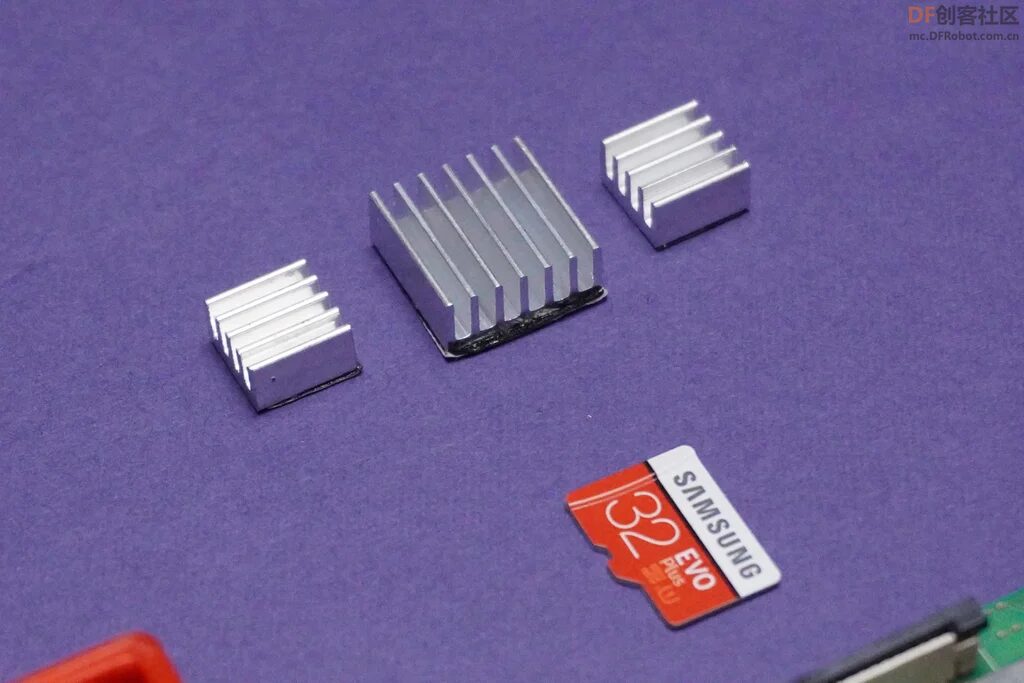
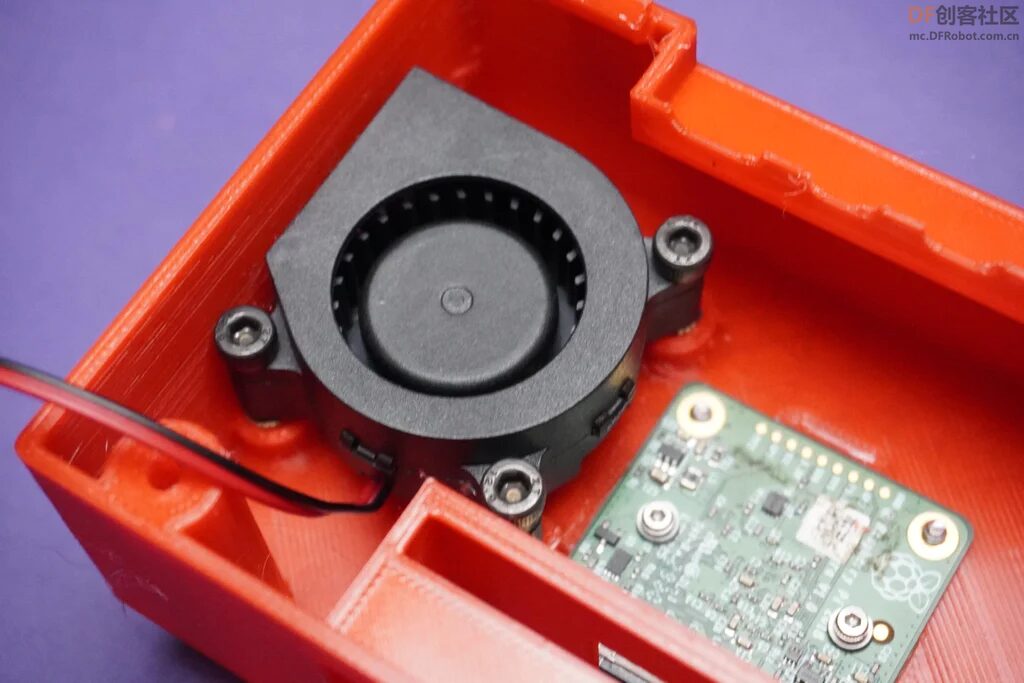
Cooling System: Touch Cam is equipped with a 5V cooling fan and heatsink to ensure effective temperature management. This cooling system ensures that the Raspberry Pi does not overheat during extended operation, maintaining stable performance. -
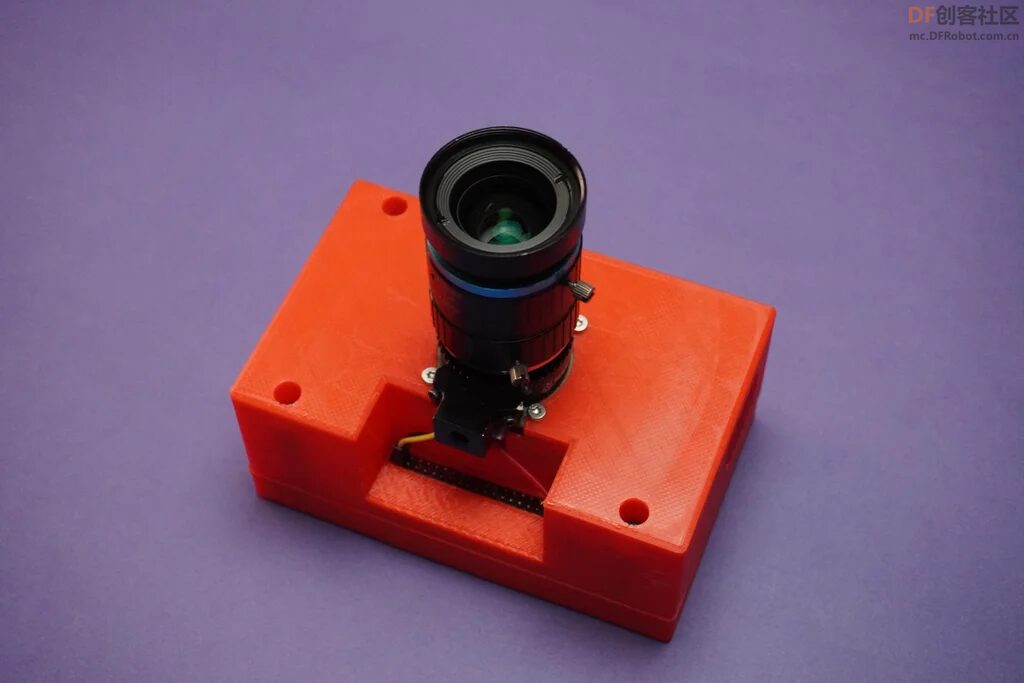
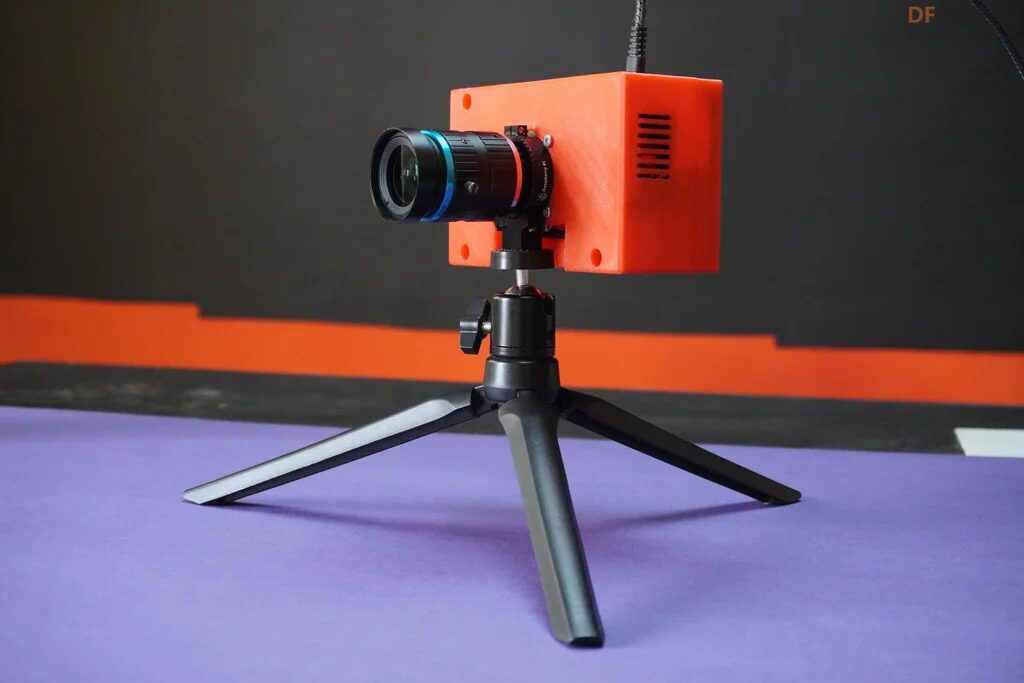
Custom CAD Design: This custom CAD design not only enhances functionality but also focuses on aesthetics and practicality, integrating the touch display, touch sensor, cooling fan, heatsink, and Raspberry Pi HQ camera module into an elegant camera case. -
Easy Setup and Configuration: Configuring the touch camera is simple and does not require extensive professional background. Following clear documentation and step-by-step guidance, users can quickly assemble the hardware, install the necessary software, and start capturing excellent photos and conducting time-lapse shooting.
In this tutorial, I will detail the design process for the Touch Cam project using Fusion 360. Fusion 360 is a powerful CAD (Computer-Aided Design) software that assists users in building complex 3D models and designs.
Note: You can further customize and expand the project.
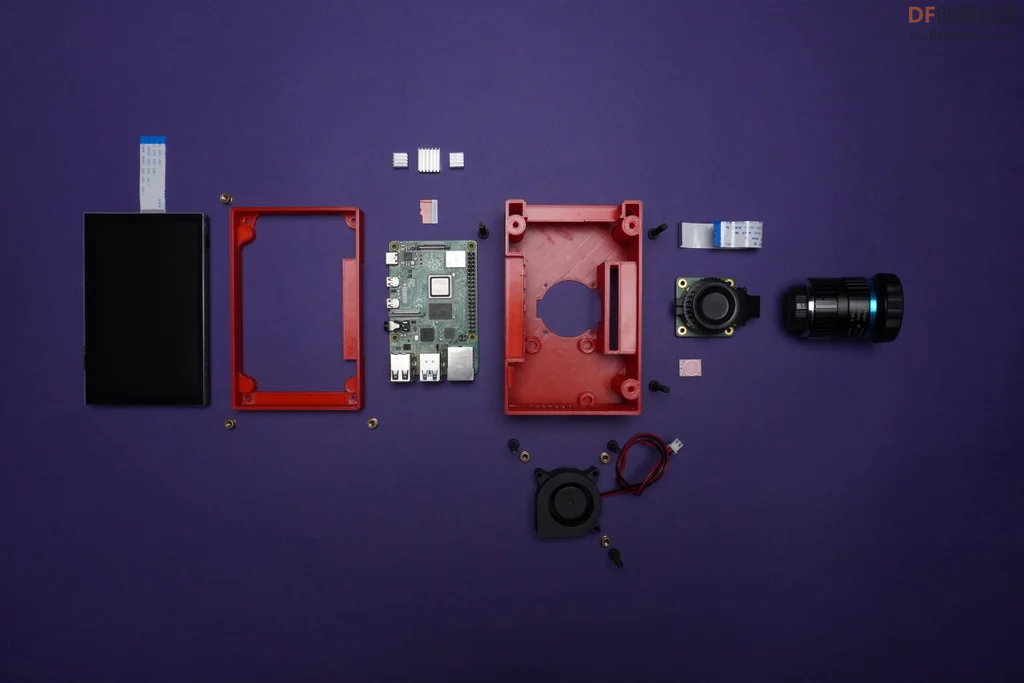
Hardware List
Required Components:
-
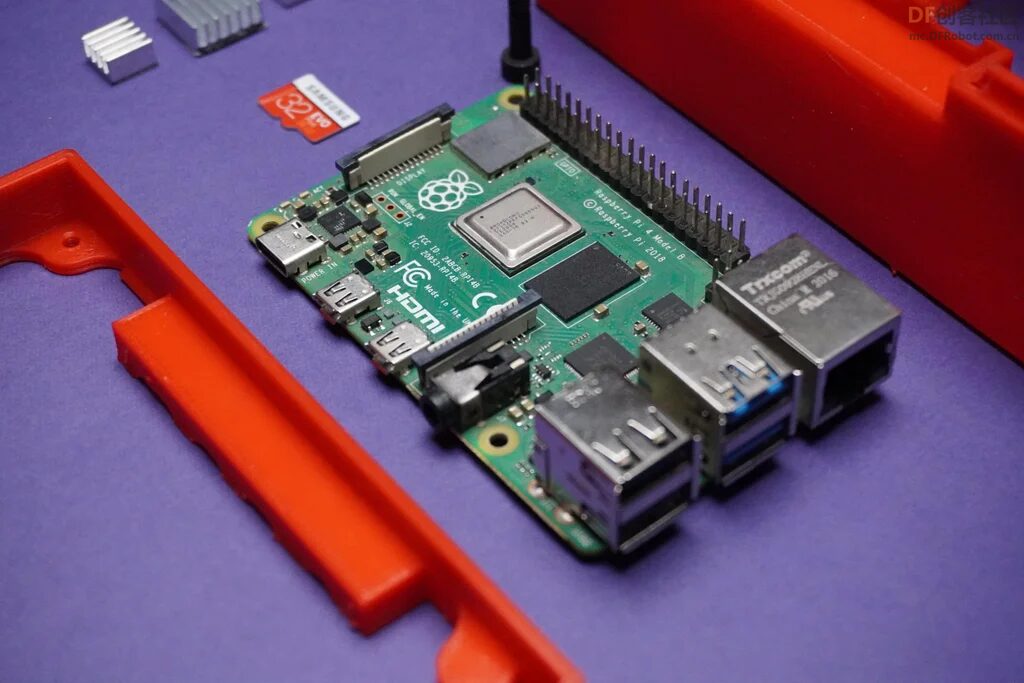
Raspberry Pi 4 x1 -
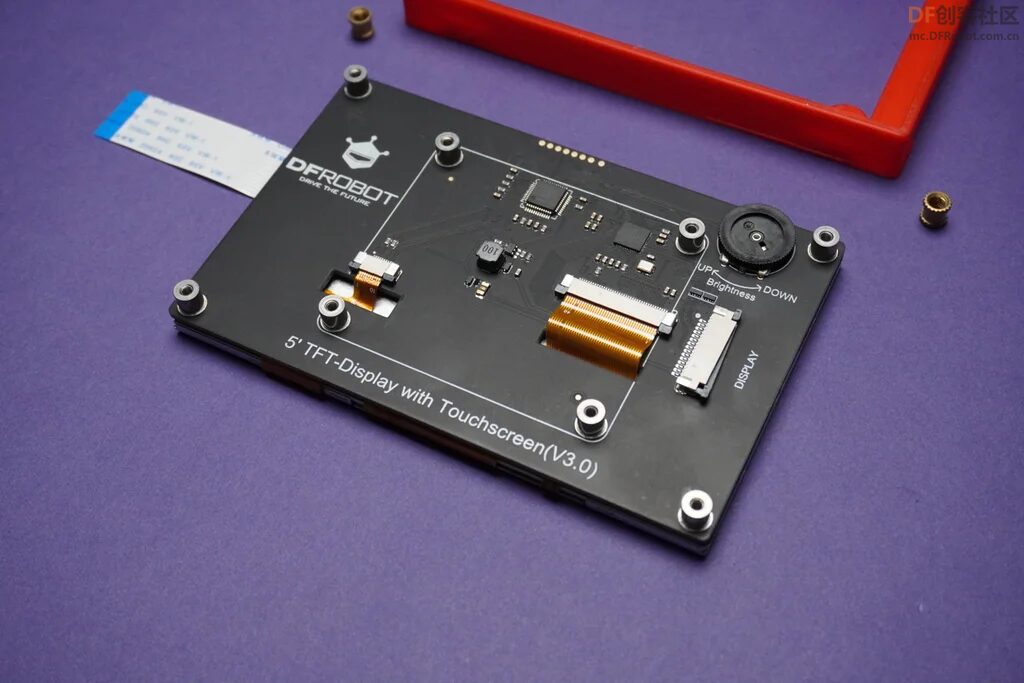
DFRobot Raspberry Pi Touch Display x1 -
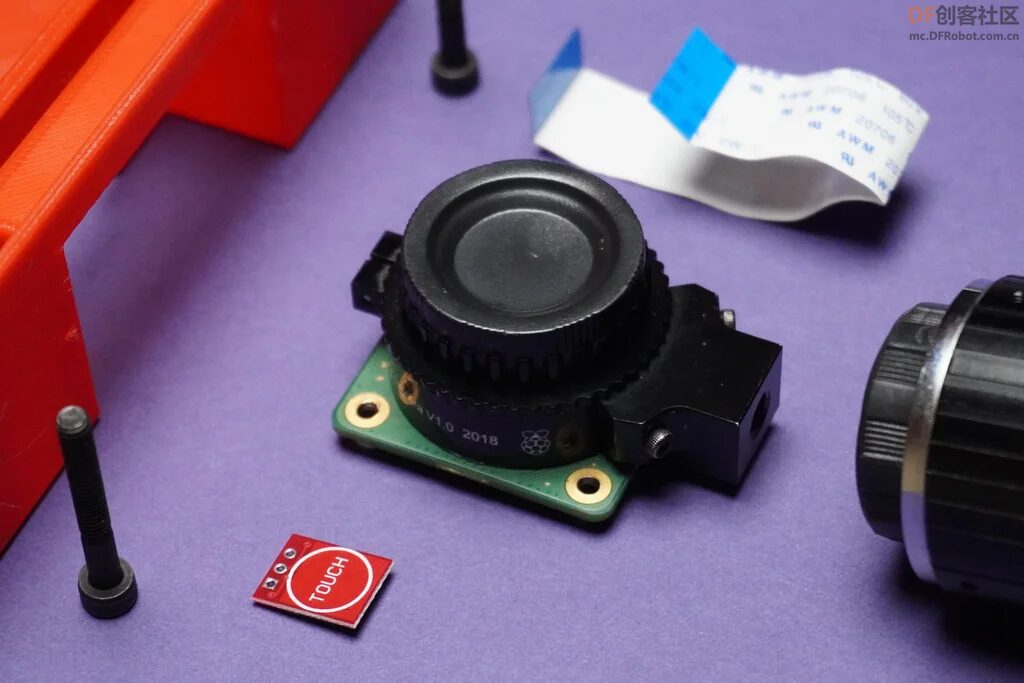
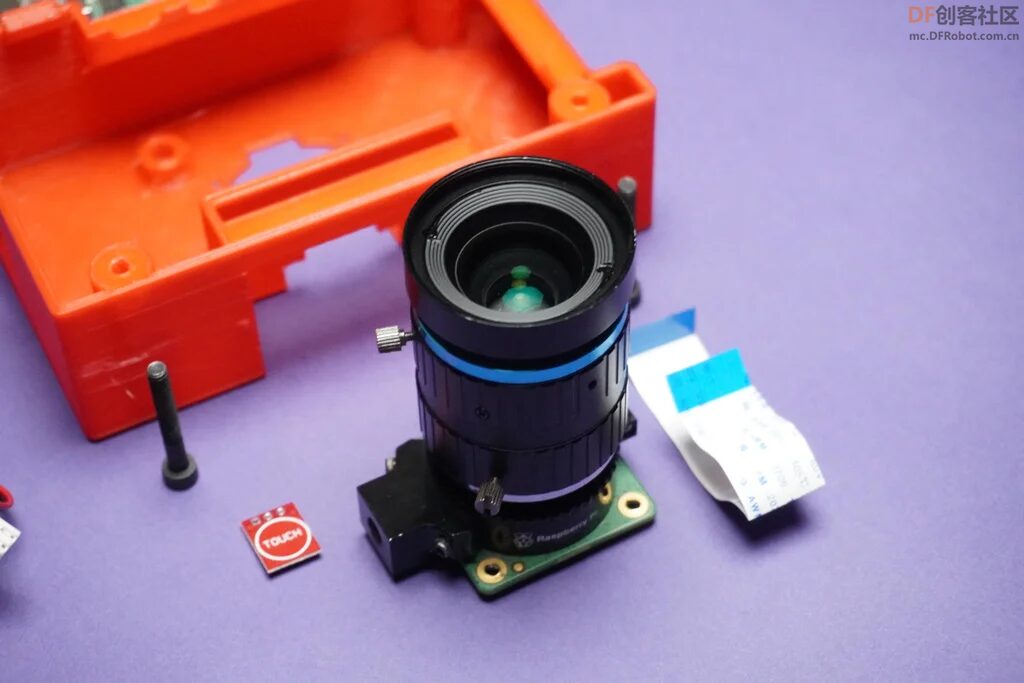
Raspberry Pi HQ Camera Module x1 -
16mm Lens or 6mm Lens x1 -
Touch Sensor x1 -
5V 4020 Fan x1 -
Raspberry Pi Heatsink Kit x1 -
SD Card x1 -
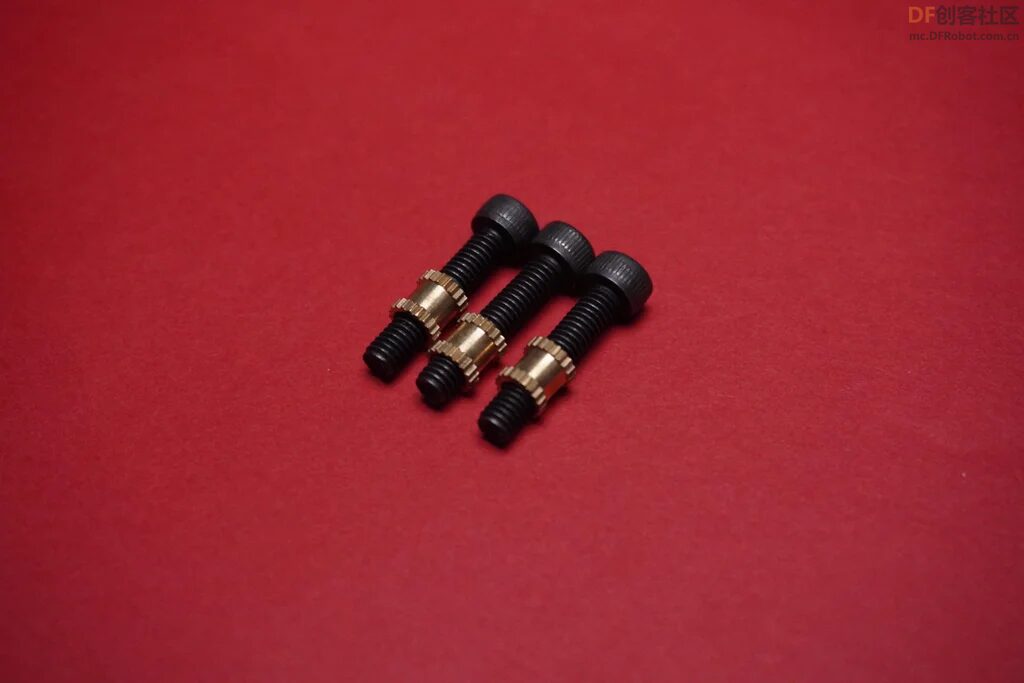
M3 30mm Screws x3 -
M3 20mm Screws x3 -
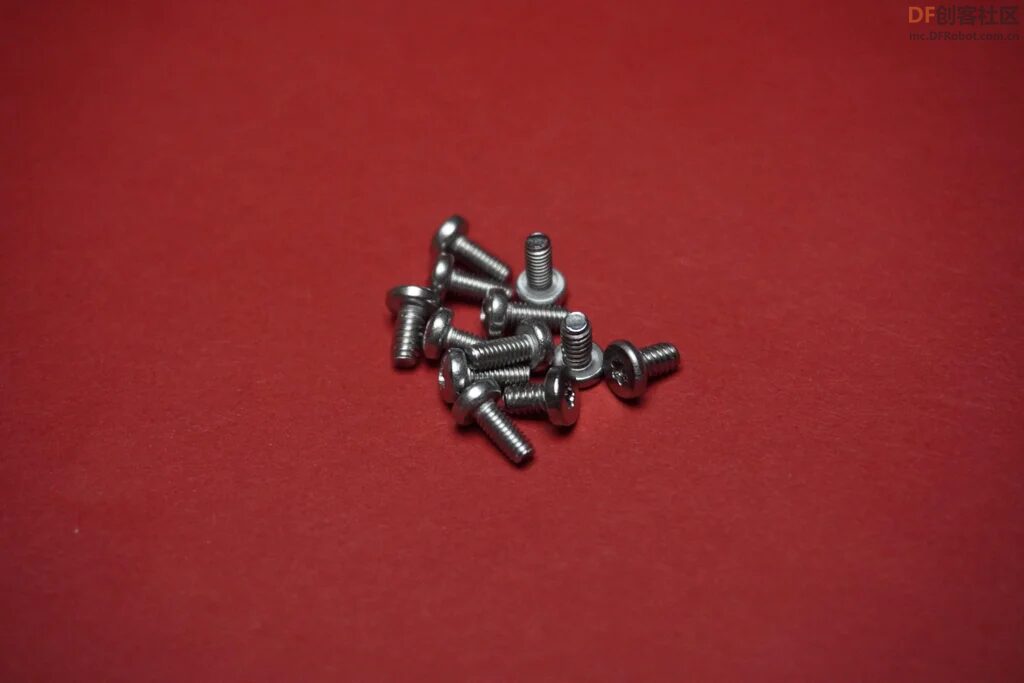
M2.5 8mm Screws x12 -
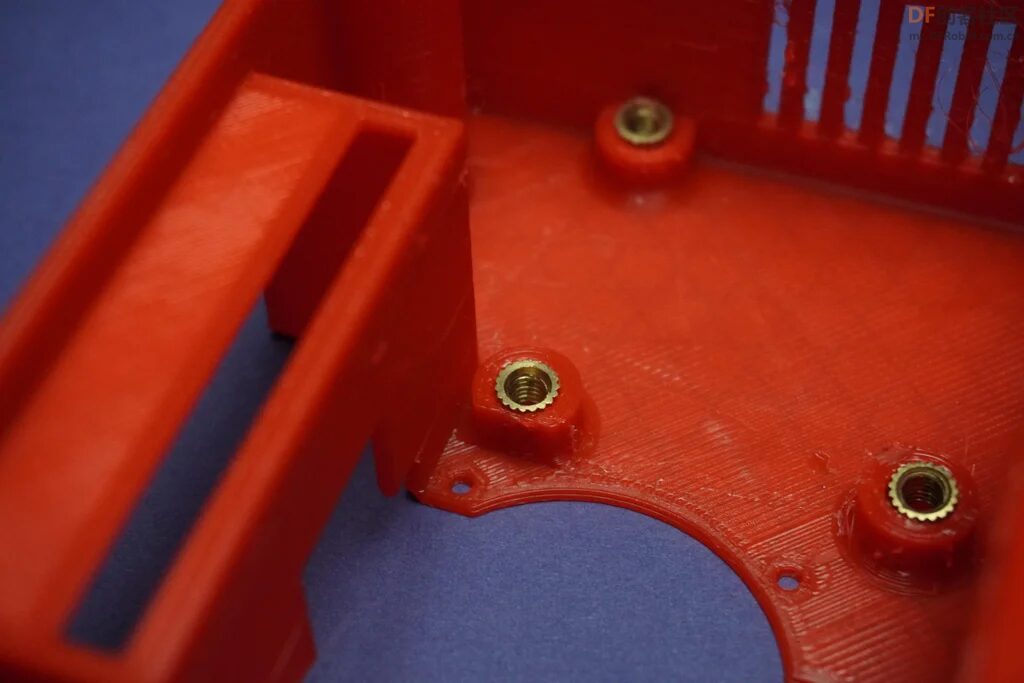
M3 Metal Inserts x6
Required Tools:
-
Soldering Kit -
Screwdriver Set -
3D Printer
Steps
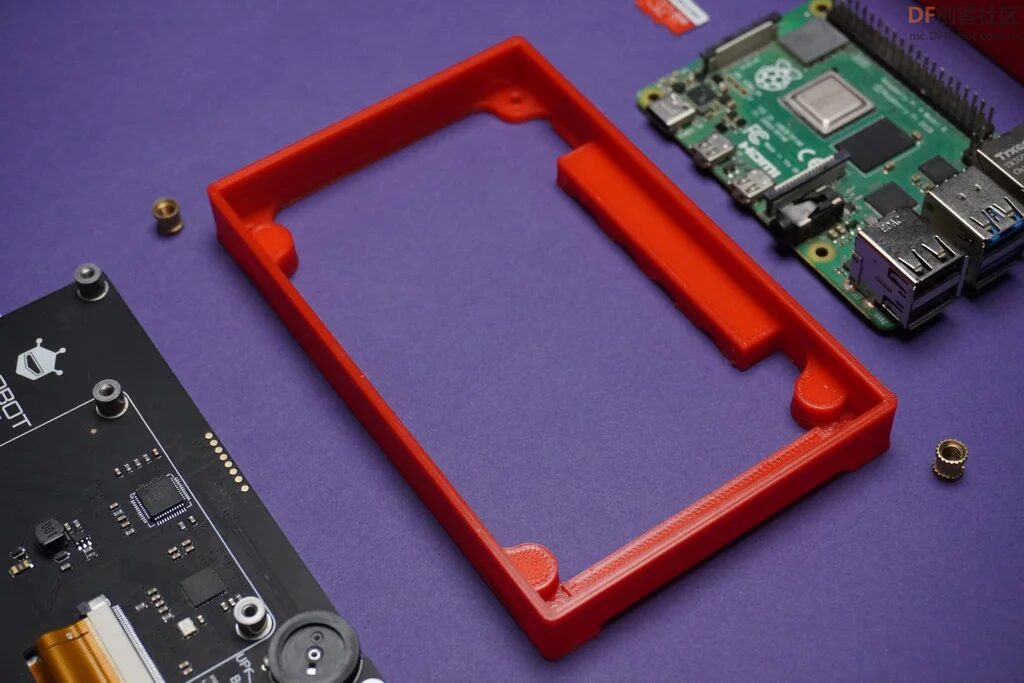
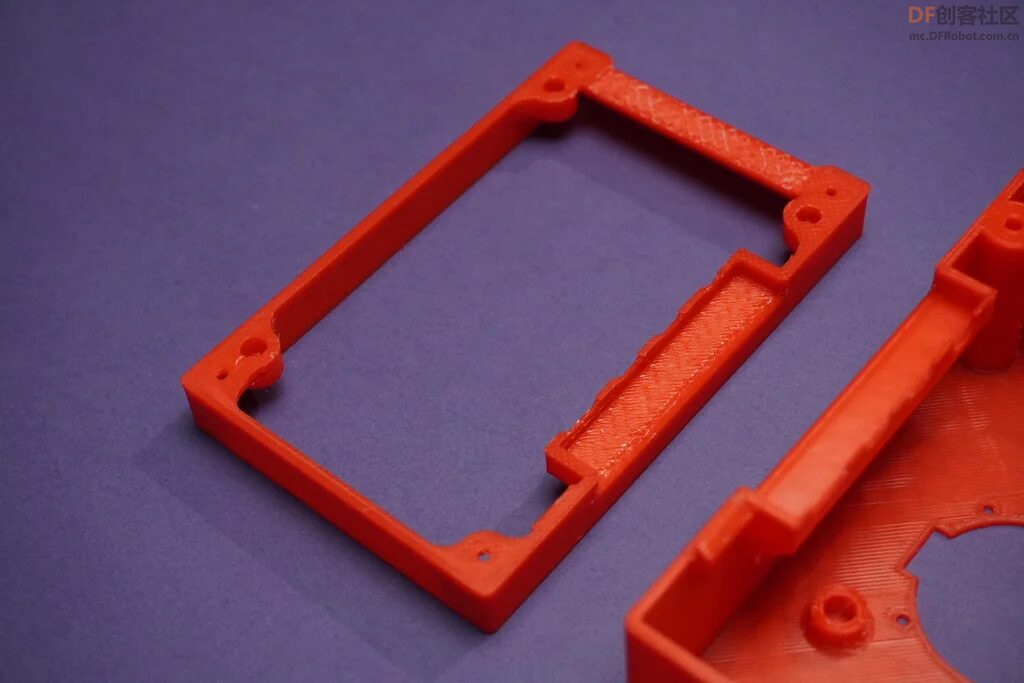
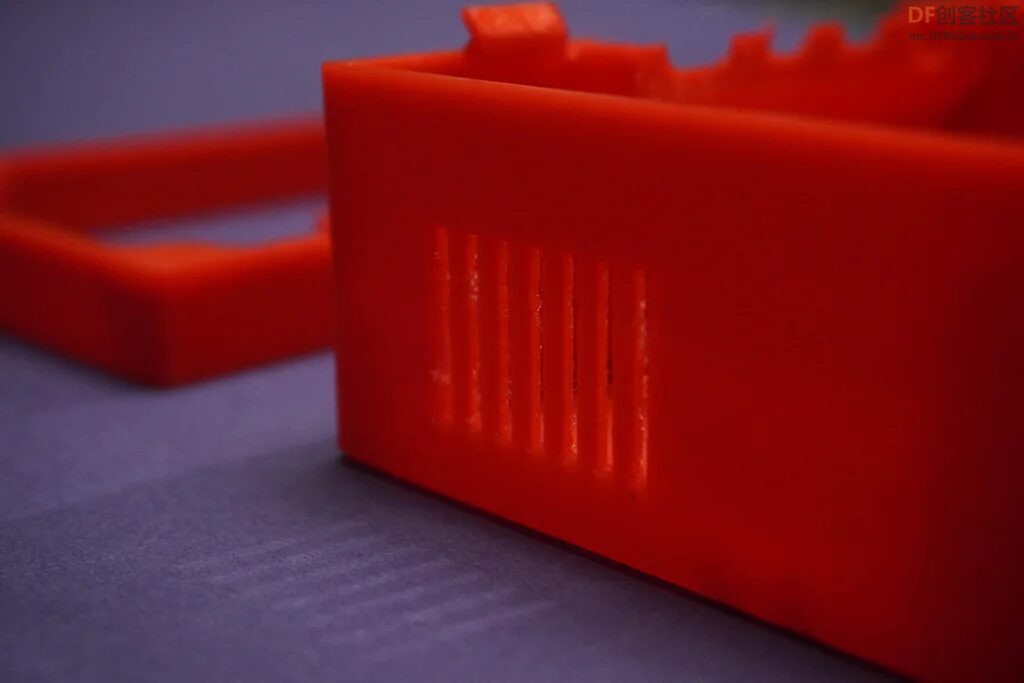
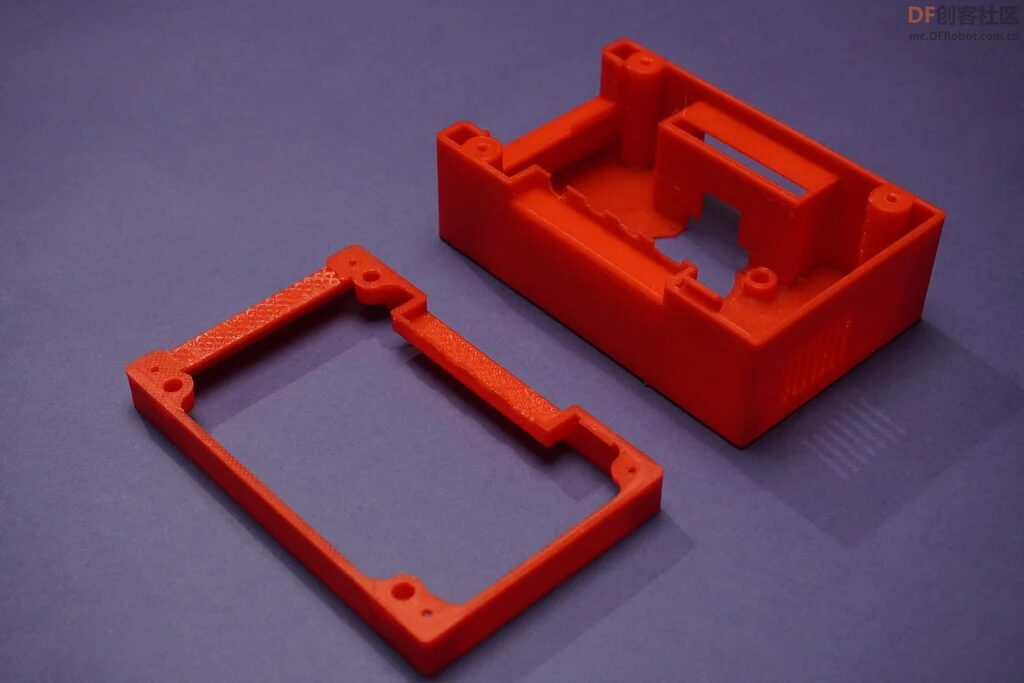
Step 1: 3D Printing
Please download the following STL files and print them using a 3D printer (you can download through the link at the end of the article):
1. FrontPannel.stl
2. BasePannel.stl
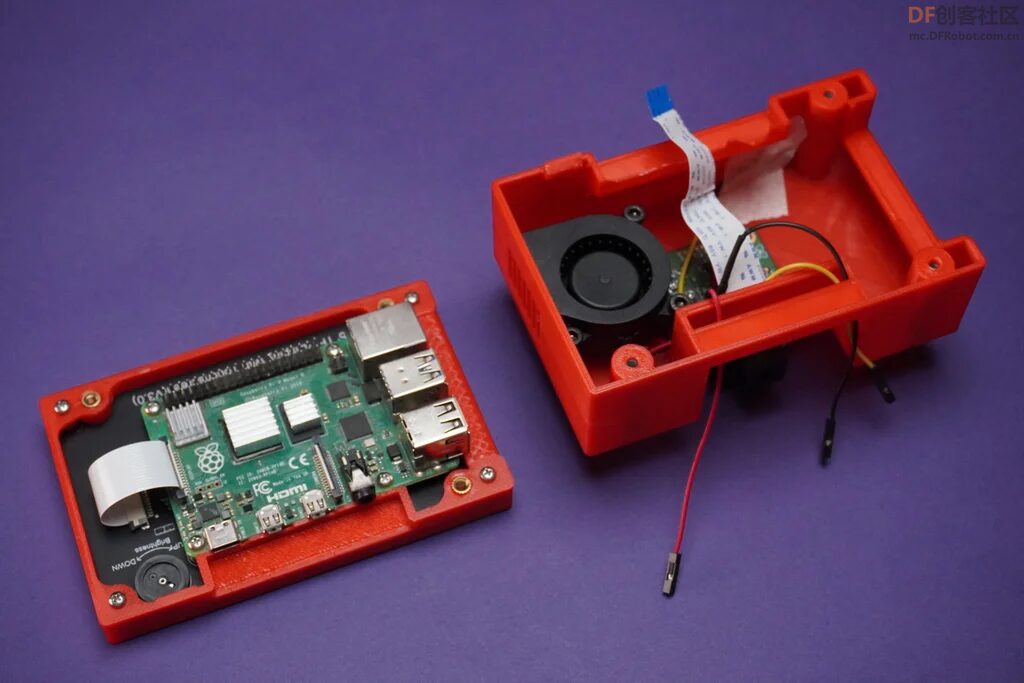
Step 2: Assemble Part 1
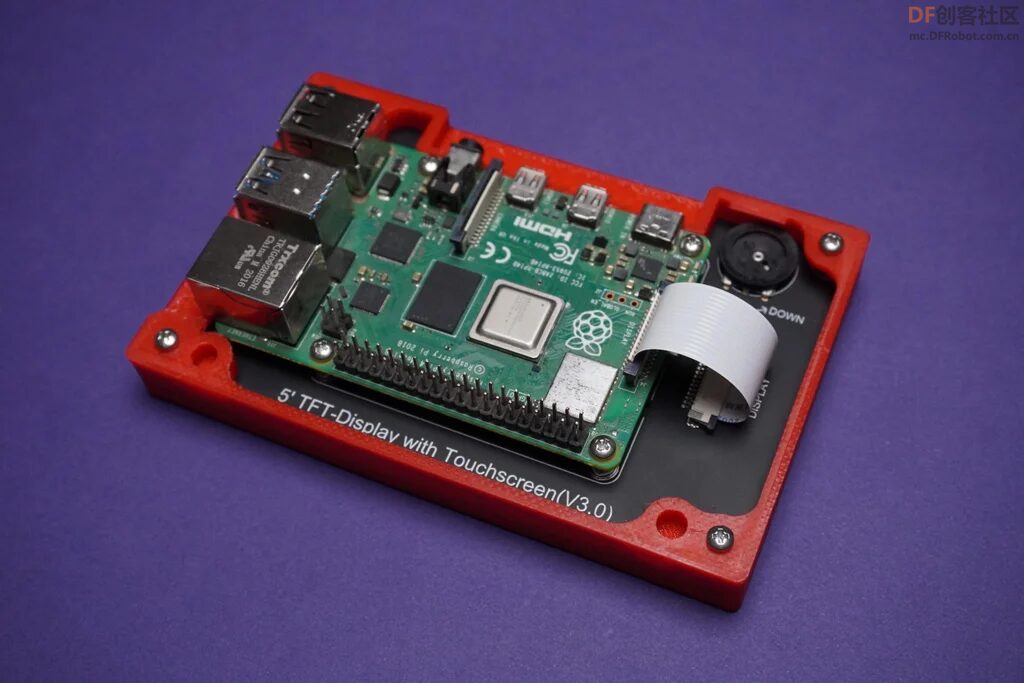
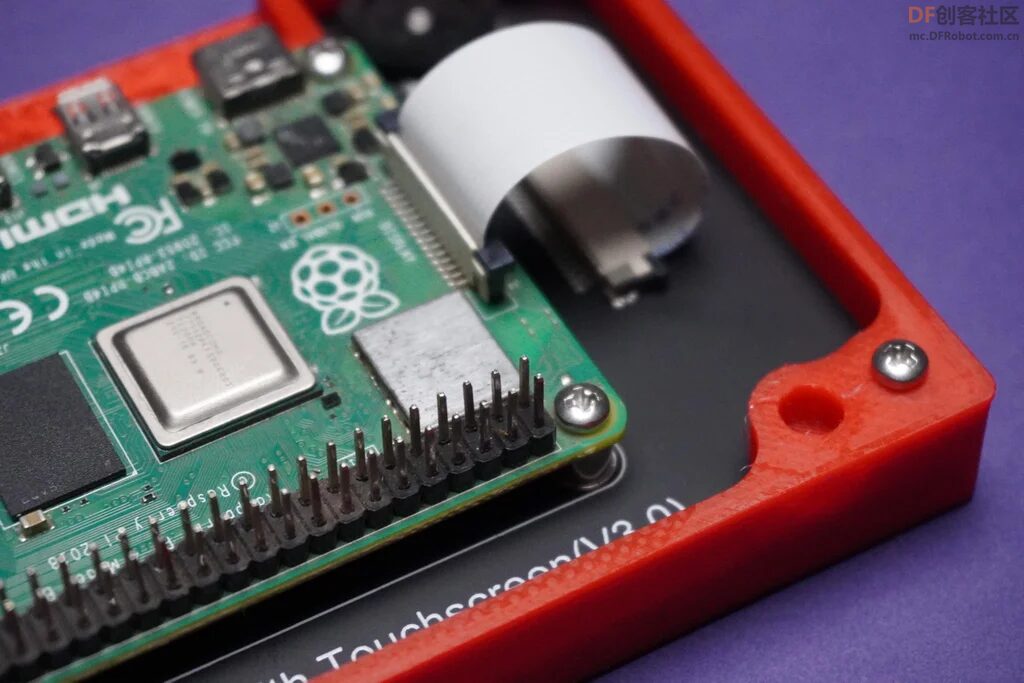
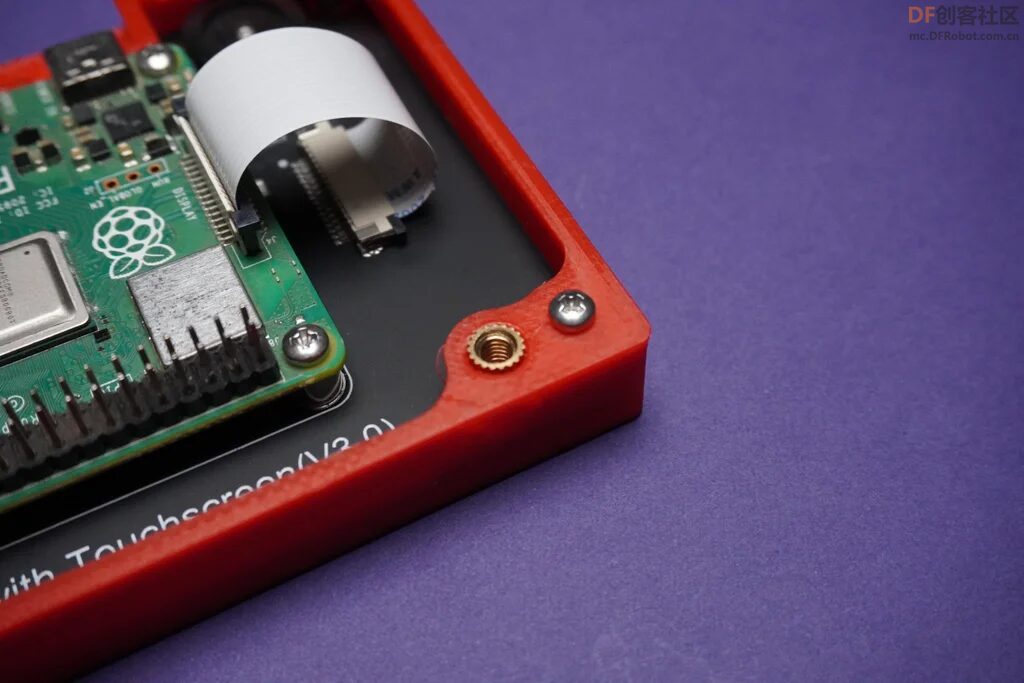
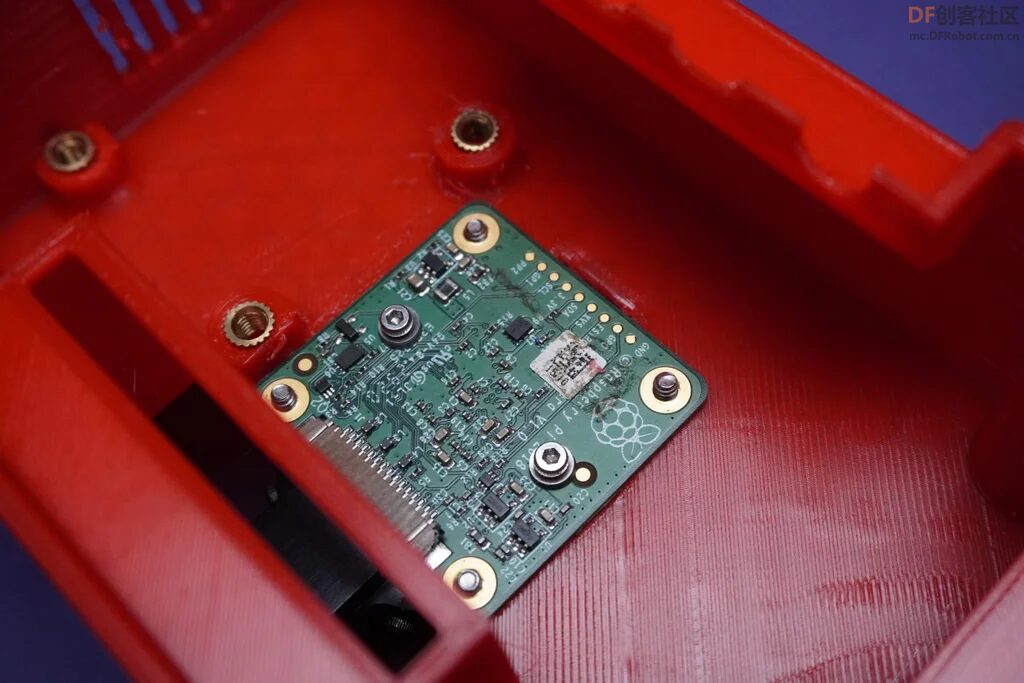
Install the display on the front panel and secure it with M2.5 screws.
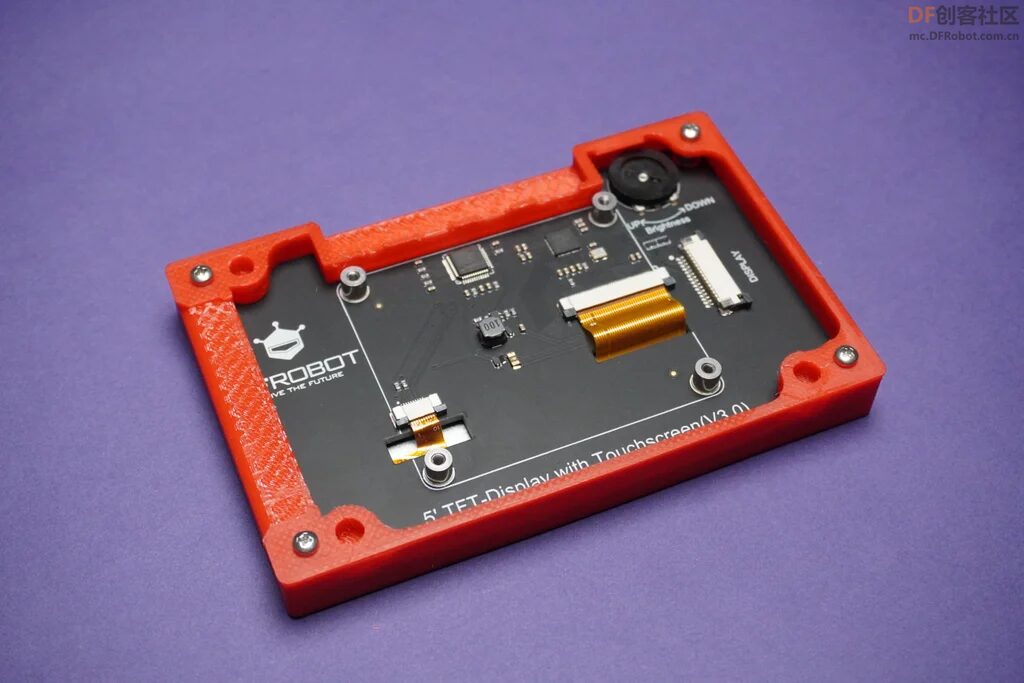
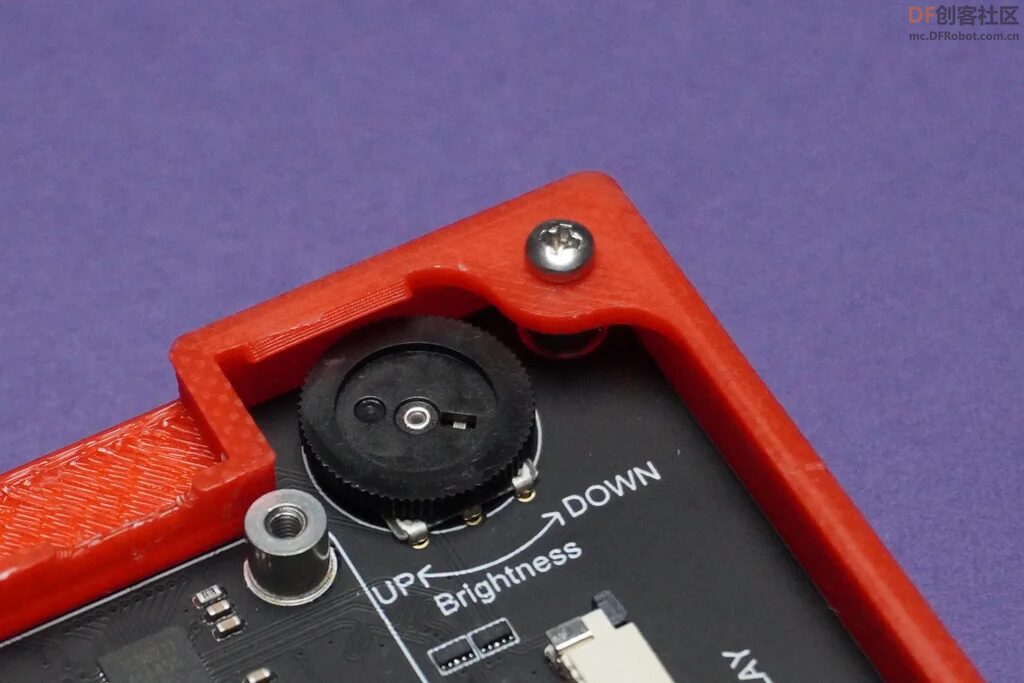
Then, install the Raspberry Pi operating system on the SD card, insert it into the Raspberry Pi motherboard. Finally, secure the Raspberry Pi motherboard to the display using screws and connect the display data cable.
Step 3: How to Use Metal Inserts in 3D Printed Parts
Complete this step before Step 2. Heat all metal inserts (use a soldering iron to heat the metal inserts) and then insert them into the 3D printed parts.
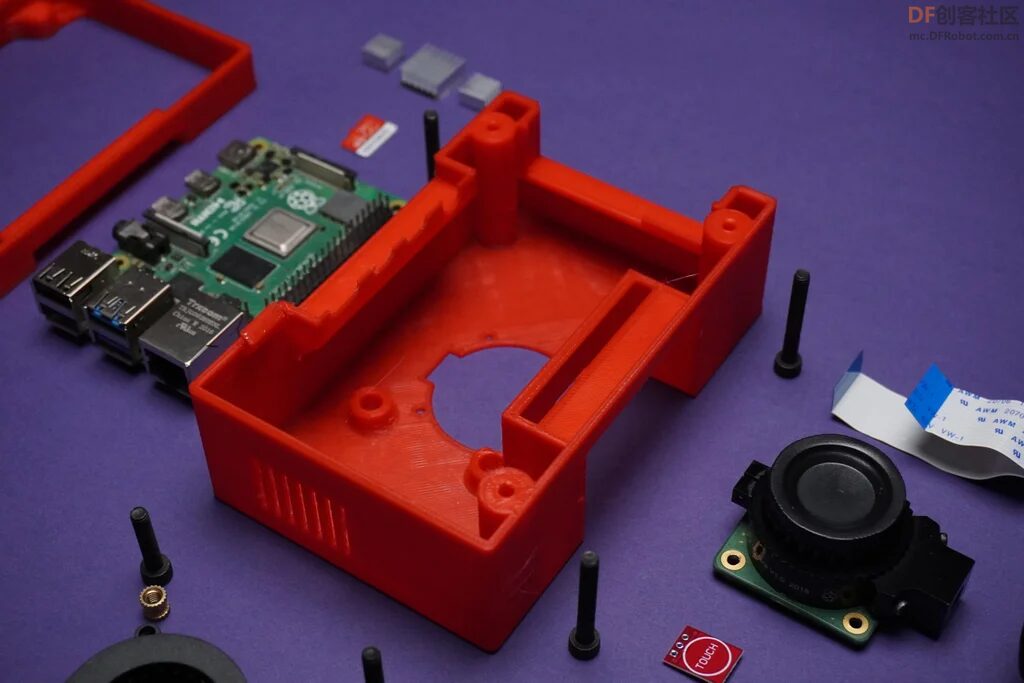
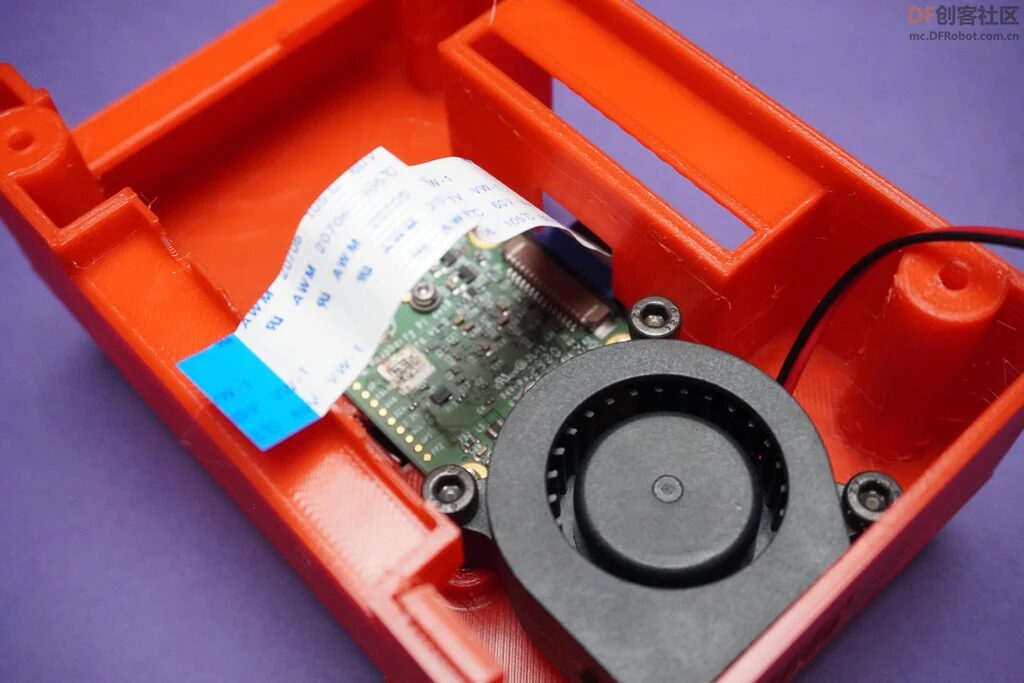
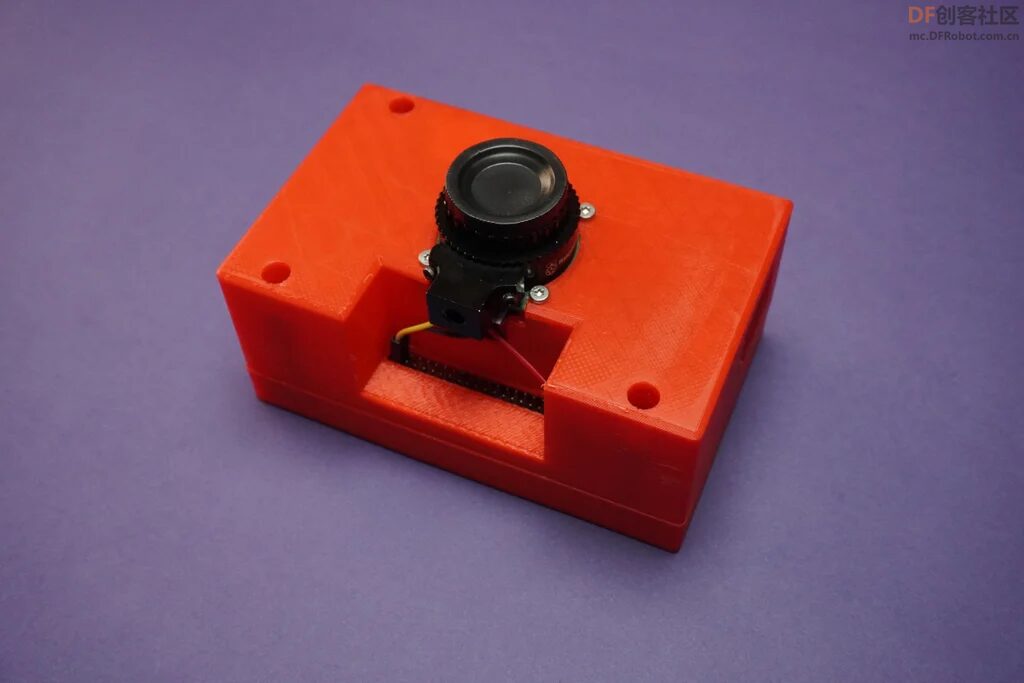
Step 4: Assemble Part 2
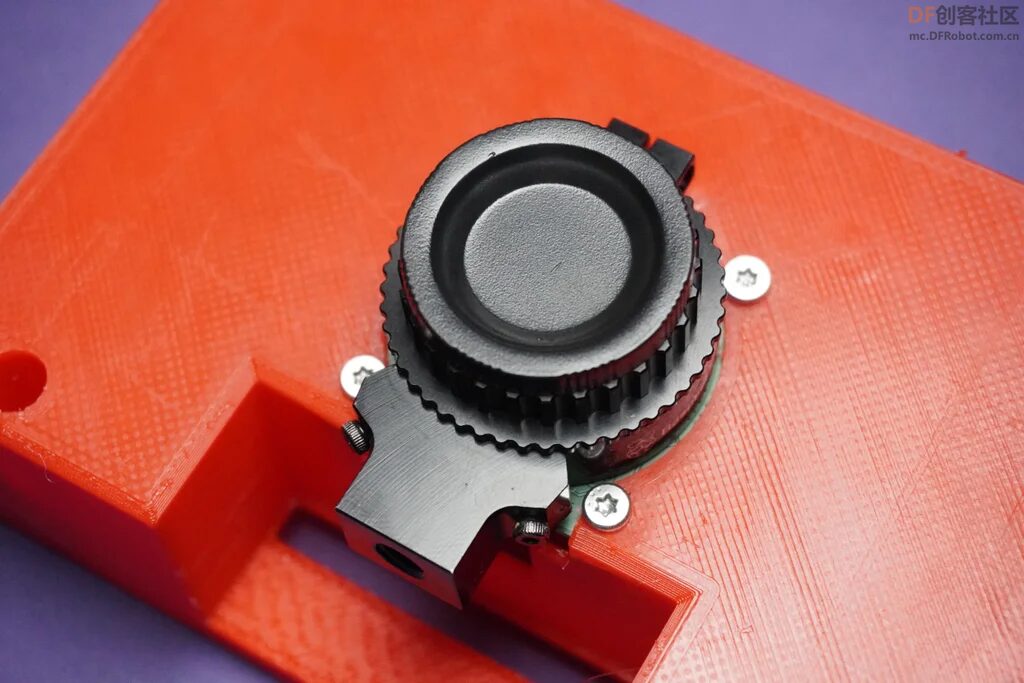
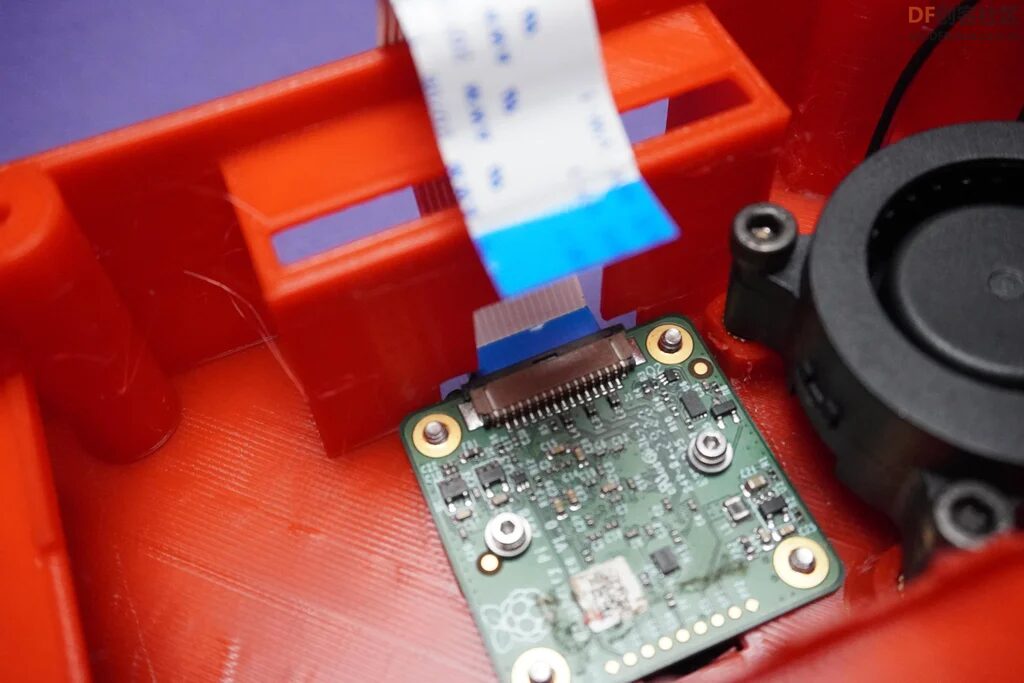
Use M2.5 screws and M3 screws to secure the camera module and fan.
Then, connect the camera data cable from the outside and insert it internally.
Step 5: Circuit Connection
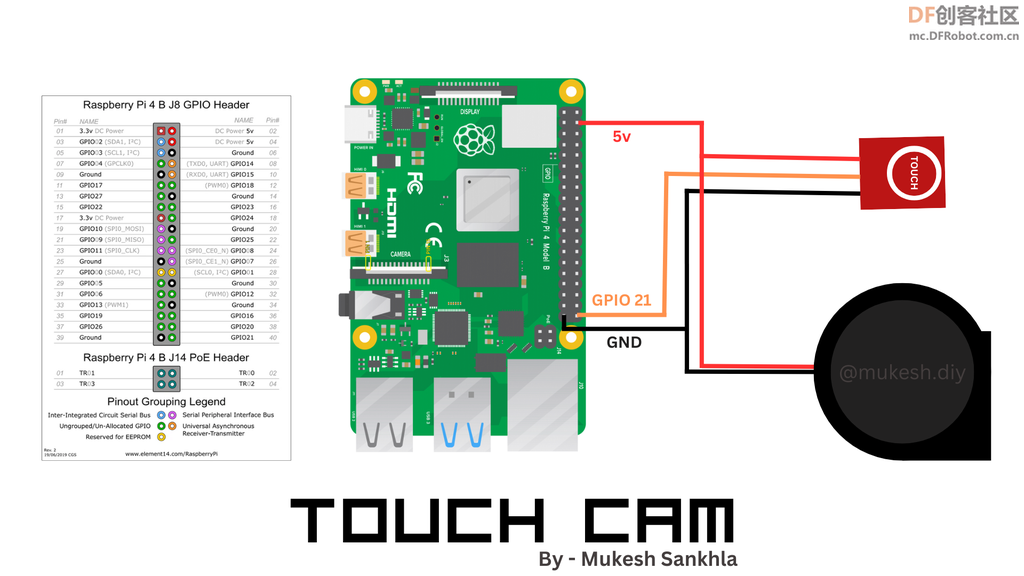
Connect the touch sensor input and power the fan according to the diagram.
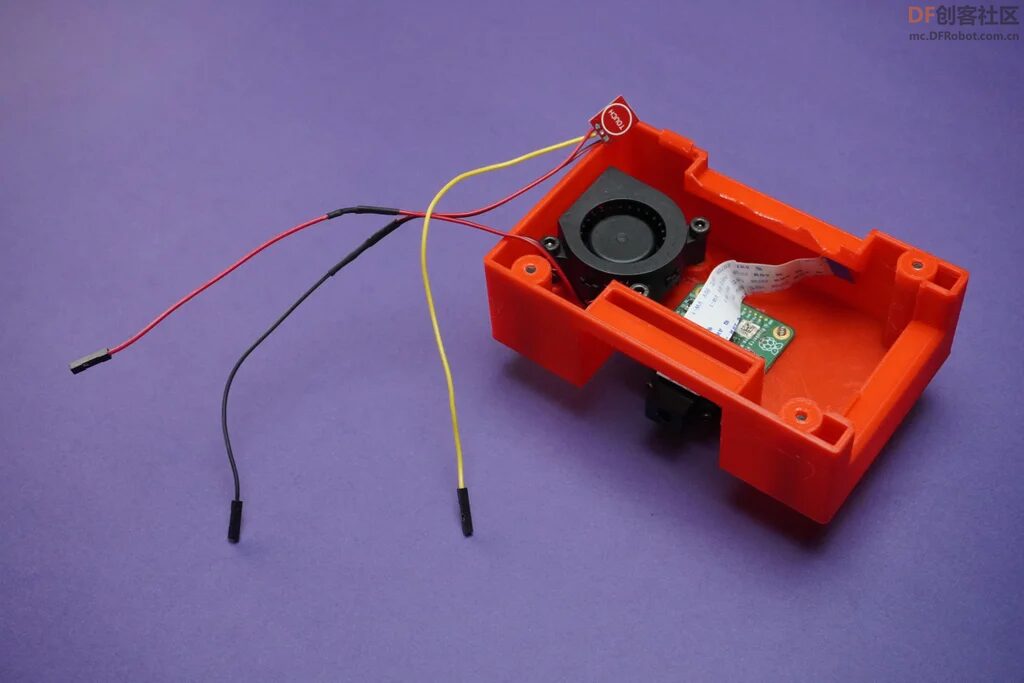
Step 6: Assemble Part 3
I did not use any tape to secure the sensor.
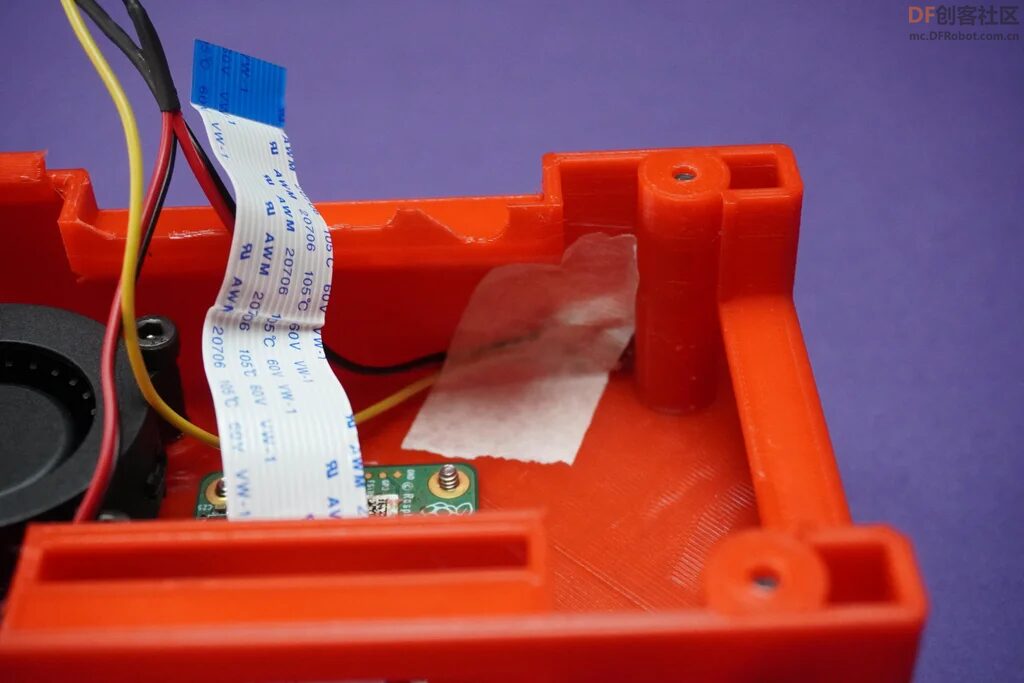
Assemble all components with M3 screws and connect the wires.
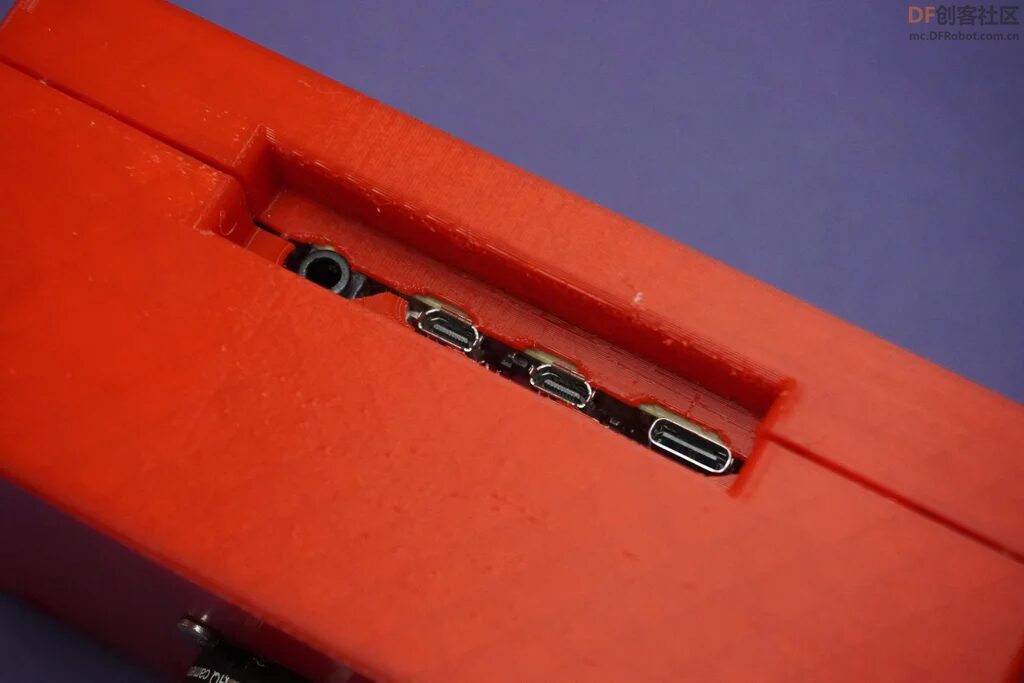
The entire design has a slight error, I trimmed some plastic to widen the port opening, but don’t worry, I have corrected this issue in the STL files you downloaded.
Step 7: Software Setup
Copy the following code into your Raspberry Pi and save it as <span>Any_File_Name.py</span> or download it at the end of the article
import RPi.GPIO as GPIO
import time
from picamera import PiCamera


# Set the GPIO mode to BCM
GPIO.setmode(GPIO.BCM)


# Set up GPIO pin 21 as input
GPIO.setup(21, GPIO.IN)


# Create an instance of the PiCamera
camera = PiCamera()


def capture_picture():
    # Get the current timestamp for the picture filename
    timestamp = time.strftime("%Y%m%d%H%M%S")
    image_filename = f"picture_{timestamp}.jpg"

    # Capture the picture
    camera.capture(image_filename)
    print(f"Picture captured: {image_filename}")


try:
    # Start the camera preview
    camera.start_preview()


    while True:
        # Check if GPIO pin 21 is high
        if GPIO.input(21) == GPIO.HIGH:
            # Call the capture_picture function
            capture_picture()


        # Add a small delay to avoid excessive checking
        time.sleep(0.1)


except KeyboardInterrupt:
    # Stop the camera preview
    camera.stop_preview()


    # Clean up GPIO on program exit
    GPIO.cleanup()
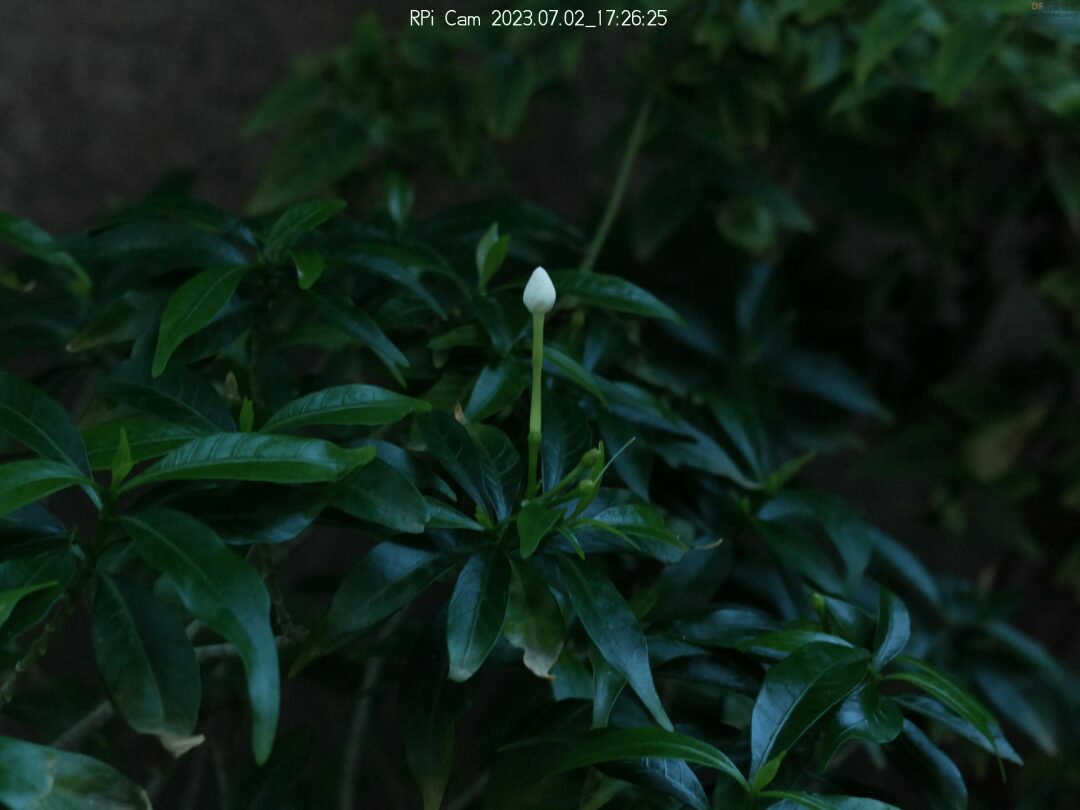
This code allows you to open the camera preview after running it, and automatically take a picture when the touch sensor is touched. The captured photo will be saved directly to the folder where the code is located. If you want a more user-friendly operation, you can refer to my previous Pi Cam project setup (<span>https://www.instructables.com/Pi-Cam-a-Remote-Raspberry-Pi-DesktopCameraServer/</span>), following the instructions in step 8 of the Pi Cam to set up <span>https://app.remote.it/</span> on the Raspberry Pi for remote access.
Then by setting ‘localhost:80’, you can easily preview and control your camera remotely from various devices.
If you want to know how I designed and built this 3D model, you can refer to the complete tutorial “Touch Cam – Raspberry Pi Camera” – <span>https://www.instructables.com/Touch-Cam-a-Raspberry-Pi-Camera/</span>.
Thank you very much for your attention and participation! Looking forward to our next project!
Original link: https://community.dfrobot.com/makelog-313385.html
Original author: Mukesh Sankhla
Please indicate the source information when reprinting
Hardware Arsenal
Click to learn more👆

DFRobot Official Brand Store https://dfrobot.taobao.com/
DFRobot Official Flagship Store https://dfrobot.jd.com/
If you have anything to say, feel free toleave a message!
The code involved in the article, if it is inconvenient to download from GitHub, you can click“Read the original text“or reply “Raspberry Pi Camera” to download.
Review of Past Projects
Understand the entire series of Raspberry Pi in one article!
Learn these 20 Linux commands to master your Raspberry Pi!
Raspberry Pi Cyberdeck with 6 screens, check it out!
Light up the Christmas tree with Raspberry Pi
Homemade Raspberry Pi cloud server, portable!
Create a digital microscope with Raspberry Pi
With the arrival of spring, you need a retro-style Raspberry Pi camera
3D printed Raspberry Pi spider robot
Make a handheld computer with Raspberry Pi and ESP32!
Create a retro game console based on Raspberry Pi Zero
The most comprehensive! How to choose Raspberry Pi expansion boards? A video to solve it!
Click to read👆