Version Information
Host Machine: <span>ubuntu 20.04.6 LTS (Focal Fossa)</span>
Virtual Machine: <span>ubuntu 20.04.6 LTS (Focal Fossa)</span>
The steps for installing the host machine are omitted, as they are no different from installing a virtual machine in <span>vmware</span>.
It is important to ensure that <span>Intel VT-x</span> is enabled.
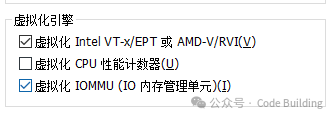
If the virtual machine reports <span>This platform does not support virtualization Intel VT-x/EPT. Do you want to continue without using virtualization Intel VT-x/EPT?</span>, refer to the article below for a solution.
https://blog.csdn.net/2301_77695535/article/details/146309899
Installing QEMU/KVM and Virsh on the Host Machine
<span>Virsh</span> is short for <span>Virtual Shell</span>, a command-line tool for managing virtual machines. You can use Virsh to create, edit, start, stop, shut down, and delete VMs. Virsh currently supports <span>KVM</span>, <span>LXC</span>, <span>Xen</span>, <span>QEMU</span>, <span>OpenVZ</span>, <span>VirtualBox</span>, and <span>VMware ESX</span>. Here we will use <span>Virsh</span> to manage <span>QEMU/KVM</span> virtual machines.
Before installation, first confirm whether your <span>CPU</span> supports virtualization technology. Use <span>grep</span> to check <span>cpuinfo</span> for the presence of “<span>vmx</span>” (Intel-VT technology) or “<span>svm</span>” (AMD-V support) output:
egrep "(svm|vmx)" /proc/cpuinfo
Some <span>CPU</span> models may have VT support disabled in the <span>BIOS</span> by default. We need to check the <span>BIOS</span> settings to ensure that <span>VT</span> support is enabled. Use the <span>kvm-ok</span> command to check:
sudo apt install cpu-checker
kvm-ok
If the output is:
INFO: /dev/kvm exists
KVM acceleration can be used
This indicates that the <span>CPU</span> virtualization support has been enabled in the <span>BIOS</span>.
Run the following command to install <span>QEMU/KVM</span> and <span>Virsh</span>:
sudo apt install qemu-kvm libvirt-daemon-system libvirt-clients bridge-utils virtinst virt-manager
Check if the <span>libvirt</span> daemon is active:
sudo systemctl is-active libvirtd
active
If there is no output of <span>active</span>, run the following command to start the <span>libvertd</span> service:
sudo systemctl enable libvirtd
sudo systemctl start libvirtd
Installing QEMU Virtual Machine on the Host Machine
Create a virtual machine image with a size of <span>40G</span>, in <span>qcow2</span> format with dynamically allocated disk space.
qemu-img create -f qcow2 ubuntutest.img 40G
Create a virtual machine system and install the operating system:
qemu-system-x86_64 \
-name ubuntutest \
-smp 2 \
-m 4096 \
-hda ubuntutest.img \
-cdrom ubuntu-20.04.6-live-server-amd64.iso \
-boot d
Follow the steps to configure the installation; this step is no different from a normal virtual machine installation.
Note that I did not add <span>-enable-kvm</span>, which may affect <span>gdb</span> software breakpoints.
Configuring Internet Access
Option 1: Build a TAP Network Card for NAT Internet Access
Create TAP Device on Host Machine
sudo ip tuntap add dev tap0 mode tap
sudo ip addr add 192.168.100.1/24 dev tap0
sudo ip link set tap0 up
Configure IP Forwarding and NAT Rules on Host Machine
sudo sysctl -w net.ipv4.ip_forward=1
sudo iptables -t nat -A POSTROUTING -s 192.168.100.0/24 -o ens33 -j MASQUERADE
sudo iptables -A FORWARD -i tap0 -j ACCEPT
Start QEMU with TAP
qemu-system-x86_64 \
-enable-kvm \
-m 4096 \
-drive file=./ubuntutest.img \
-boot d \
-net nic -net tap,ifname=tap0,script=no,downscript=no
Configure the virtual machine’s network to any address in the <span>192.168.100.0/24</span> subnet (for example, <span>192.168.100.10</span>).
Open the <span>netplan</span> configuration file, modify the address, and use <span>sudo netplan apply</span> to restart the network.
# This is the network config written by 'subiquity'
network:
  ethernets:
    ens3:
      dhcp4: no
      addresses:
        - 192.168.100.10/24
      routes:
        - to: default
          via: 192.168.100.1
      nameservers:
        addresses: [8.8.8.8]
  version: 2
Using virbr0 for NAT Internet Access
Create and configure <span>bridge.conf</span>
- File Path: Usually located at
<span>/etc/qemu/</span>or<span>/usr/local/etc/qemu/</span>(depending on the installation method). Create it using the following command:
sudo mkdir -p /etc/qemu
sudo vim /etc/qemu/bridge.conf
Example content:
allow virbr0 # If using the default bridge interface of libvirt
Next, specify to use the <span>virbr0 bridge</span> for internet access when starting.
qemu-system-x86_64 \
-enable-kvm \
-m 4096 \
-drive file=./ubuntutest.img -boot d \
-netdev bridge,id=net0,br=virbr0 \
-device virtio-net-pci,netdev=net0
When configuring the virtual machine network, set it to be in the same subnet as <span>virbr0</span>, which is <span>192.168.122.0/24</span> (for example, <span>192.168.122.10</span>).
Downloading and Compiling the Linux Kernel
Installing Compilation Dependencies
First, we need to install the dependency packages required for compiling the kernel. I am compiling the Linux kernel code on the host machine, so the following commands are executed directly on the host machine.
sudo apt install libncurses5-dev libssl-dev bison flex libelf-dev gcc make openssl libc6-dev dwarves
Downloading Linux Kernel Code and Building
Download the Linux kernel code; here I am using version <span>5.10.209</span>.
https://www.kernel.org/pub/linux/kernel/v5.x/linux-5.10.209.tar.gz
Use the following command to compile:
sudo make menuconfig
To build a debuggable kernel, we need to configure the following parameters.
<span>CONFIG_DEBUG_INFO</span>includes debugging information in the kernel and kernel modules; this option adds the<span>-g</span>option to the compiler parameters used by<span>gcc</span>.
The menu path for this option is:
Kernel hacking  --->
Compile-time checks and compiler options  --->
 [*] Compile the kernel with debug info
You can also directly set <span>CONFIG_DEBUG_INFO</span> in the <span>.config</span> file.
CONFIG_DEBUG_INFO=y
<span>CONFIG_FRAME_POINTER</span>saves the call frame information in different locations in registers or on the stack, allowing<span>gdb</span>to construct stack back traces more accurately when debugging the kernel.
You can also set this in the <span>.config</span> file:
CONFIG_FRAME_POINTER=y
- Enable
<span>CONFIG_GDB_SCRIPTS</span>, but disable<span>CONFIG_DEBUG_INFO_REDUCED</span>.
CONFIG_GDB_SCRIPTS=y
CONFIG_DEBUG_INFO_REDUCED=n
<span>CONFIG_KGDB</span>enables the built-in kernel debugger, which allows for remote debugging.
Kernel hacking  --->
Generic Kernel Debugging Instruments  --->
 [*] KGDB: kernel debugger
CONFIG_KGDB=y
- Disable
<span>CONFIG_RANDOMIZE_BASE</span>setting.
<span>CONFIG_RANDOMIZE_BASE</span> can be found at the following location:
Processor type and features --->
Randomize the address of the kernel image (KASLR)
Or directly add the following statement in the <span>.config</span> file:
CONFIG_RANDOMIZE_BASE=n
<span>KASLR</span> changes the base address where the kernel code is placed at boot time. If you enable <span>KASLR</span> in the kernel configuration (<span>CONFIG_RANDOMIZE_BASE=y</span>), you will not be able to set breakpoints from <span>gdb</span>. After setting the necessary kernel parameters, we can start compiling the kernel:
sudo make -j8
sudo make INSTALL_MOD_STRIP=1 modules_install
sudo make install
<span>make modules_install</span> will install the <span>module</span> files to <span>/lib/modules/5.10.209</span>, and it is best to add <span>INSTALL_MOD_STRIP=1</span>, otherwise the <span>initrd.img</span> will be very large.
The compilation requires approximately <span>30G</span> of space, so ensure you have at least <span>>=30G</span> of disk space prepared.
After completing these steps, we will have the required Linux kernel image <span>bzImage</span> (<span>vmlinuz</span>) and <span>initrd.img</span>
xu@xu-dev:~/work/linux-5.10.209$ ls /boot/ -alh |grep 5.10.209
-rw-r--r--  1 root root 243K 4月  20 19:34 config-5.10.209
lrwxrwxrwx  1 root root   19 4月  20 19:34 initrd.img -> initrd.img-5.10.209
-rw-r--r--  1 root root  60M 4月  20 19:34 initrd.img-5.10.209
-rw-r--r--  1 root root 5.5M 4月  20 19:34 System.map-5.10.209
lrwxrwxrwx  1 root root   16 4月  20 19:34 vmlinuz -> vmlinuz-5.10.209
-rw-r--r--  1 root root  14M 4月  20 19:34 vmlinuz-5.10.209
Introduction to Compiled Products
During the Linux kernel compilation process, the generated files can be categorized based on functionality. Below is a detailed introduction to the corresponding file roles and sources:
Core Executable Files
<span>vmlinux</span>
- Description: The original, uncompressed kernel executable file, containing a complete symbol table and debugging information, and is relatively large.
- Generation Path: Located in the kernel source root directory or in the
<span>arch/<architecture>/boot/compressed/</span>directory. - Usage: Used for debugging and analyzing kernel crash issues, not directly used to boot the system.
- Source: Generated during the compilation process by linking target files such as
<span>head-y</span>,<span>init-y</span>, and<span>core-y</span>.
<span>zImage</span> ** and ** <span>bzImage</span>- Description: Compressed kernel image files, where
<span>bzImage</span>(Big zImage) supports larger kernel sizes (used when exceeding 512KB). - Generation Path: Located in the
<span>arch/<architecture>/boot/</span>directory (e.g.,<span>arch/x86/boot/bzImage</span>). - Structure: Composed of
<span>setup.bin</span>(bootloader) and the compressed<span>vmlinux</span>, with additional decompression header information. - Usage: Directly used for system booting, and is the default kernel file for most Linux distributions.
<span>uImage</span>- Description: An image file designed for the U-Boot bootloader, adding U-Boot header information to the
<span>zImage</span>. - Generation Path: Must be processed using the
<span>mkimage</span>tool from the<span>zImage</span>. - Usage: Used in embedded systems in conjunction with U-Boot.
Boot-Related Files
<span>System.map</span>
- Description: Kernel symbol mapping file, records the memory addresses of all functions and variables.
- Generation Path: Located in the kernel source root directory.
- Usage: Used to associate addresses with symbols during debugging, such as analyzing kernel crash logs.
<span>initrd.img</span> ** or ** <span>initramfs</span>- Description: Initial memory file system, containing temporary drivers and tools needed for early boot (such as disk drivers, filesystem modules).
- Generation Path: Generated by
<span>mkinitramfs</span>or<span>dracut</span>, stored in the<span>/boot/</span>directory. - Usage: Resolves dependencies before mounting the root filesystem.
Kernel Module Files
<span>.ko</span>** files (Kernel Object) **
- Description: Dynamically loadable kernel modules, inserted into the kernel as needed.
- Generation Path: Located in the directories of various drivers or functional modules (e.g.,
<span>drivers/net/ethernet/</span>). - Installation Path: Installed to
<span>/lib/modules/<kernel version>/</span>directory via<span>make modules_install</span>. - Usage: Flexibly extend kernel functionality (e.g., adding new hardware drivers).
Configuration Files and Logs
<span>.config</span>
- Description: Kernel compilation configuration file, records all selected functional options (e.g.,
<span>CONFIG_DEBUG_INFO=y</span>). - Generation Path: Located in the kernel source root directory.
- Source: Generated via
<span>make menuconfig</span>or by copying the default configuration (e.g.,<span>arch/arm/configs/s5pv210_defconfig</span>).
<span>vmlinux.lds</span>- Description: Linker script file that defines the memory layout of various segments (code, data, stack) in the kernel.
- Generation Path: Located in the
<span>arch/<architecture>/kernel/</span>directory. - Usage: Guides the linker in generating
<span>vmlinux</span>.
Intermediate Files and Tool Generated Files
<span>.o</span>** and **<span>built-in.o</span>
- Description: Intermediate object files generated during the compilation process, where
<span>built-in.o</span>is the merge of all<span>.o</span>files in the same directory. - Generation Path: Located in the directories of various submodules (e.g.,
<span>init/built-in.o</span>). - Usage: Gradually builds the final kernel image.
<span>.dtb</span>)- Description: Binary files describing the hardware topology, used in embedded systems (e.g., ARM architecture).
- Generation Path: Generated from
<span>.dts</span>files using the device tree compiler (DTC), located in<span>arch/<architecture>/boot/dts/</span>. - Usage: Adapts to different hardware platforms.
Boot Management and Version Identification
<span>vmlinuz-<version number></span>
- Description: Compressed kernel image installed in the
<span>/boot/</span>directory, usually a symbolic link to<span>bzImage</span>. - Usage: Loaded by bootloaders like Grub to start the kernel.
<span>config-<version number></span>- Description: A backup of the
<span>.config</span>file, preserving the complete configuration used during compilation. - Generation Path: Located in the
<span>/boot/</span>directory.
Summary Comparison Table
| File Type | Key Files | Function | Generation Command |
|---|---|---|---|
| Core Image | <span>vmlinux</span>, <span>bzImage</span> |
Kernel execution and booting | <span>make</span>, <span>make bzImage</span> |
| Modules | <span>.ko</span> |
Dynamically extend kernel functionality | <span>make modules</span> |
| Configuration | <span>.config</span> |
Records compilation options | <span>make menuconfig</span> |
| Boot Support | <span>initrd.img</span> |
Load early boot dependencies | <span>mkinitramfs</span> |
| Symbol Mapping | <span>System.map</span> |
Debug symbol address mapping | Automatically generated |
| Device Tree | <span>.dtb</span> |
Embedded hardware description | <span>make dtbs</span> |
Kernel Debugging
After obtaining the kernel image <span>bzImage</span> and <span>initrd.img</span>, you can use them to boot the <span>qemu</span> virtual machine.
Note that my debugging uses QEMU’s <span>-kernel</span> and <span>-initrd</span> to directly load the kernel, rather than using <span>grub</span> to load the kernel.
My <span>qemu</span> startup script is as follows:
qemu-system-x86_64 \
-smp 2 \
-m 4096 \
-S -s \
-drive file=/home/xu/work/ubuntutest.img \
-netdev bridge,id=net0,br=virbr0 \
-device virtio-net-pci,netdev=net0  \
-kernel /home/xu/work/kernel-with-rwx/bzImage \
-initrd /home/xu/work/kernel-with-rwx/initrd.img-5.10.209 \
-append "root=/dev/mapper/ubuntu--vg-ubuntu--lv ro maybe-ubiquity console=ttyS0\
-nographic
<span>-smp 2</span>allocates 2 virtual CPU cores (vCPU), with each core being single-threaded and single-socket by default. For finer control (e.g., multi-socket, multi-thread), it can be expanded to<span>-smp 2,sockets=1,cores=2,threads=1</span><span>-m 4096</span>allocates 4096MB (4GB) of memory to the virtual machine. QEMU defaults to allocating 128MB, and this parameter should be adjusted based on host resources and virtual machine needs.<span>-S</span>pauses CPU execution at startup, waiting for an external debugger (like GDB) to connect before continuing, commonly used for kernel debugging.<span>-s</span>enables the GDB debugging server, which listens on the local port 1234 by default. Combined with<span>-S</span>, it allows debugging the kernel from the startup phase.<span>-drive file=/home/xu/work/ubuntutest.img</span>loads the disk image named<span>ubuntutest.img</span>as the primary hard drive. The default interface type is<span>if=virtio</span>(high-performance virtualization driver), and if the format is not specified, QEMU automatically detects it (e.g., qcow2 or raw).<span>-netdev bridge,id=net0,br=virbr0</span>creates a bridged network backend, connecting to the host’s<span>virbr0</span>bridge, allowing the virtual machine to access the external network through the host’s network interface.<span>-device virtio-net-pci,netdev=net0</span>adds a virtual network card to the virtual machine, using the<span>virtio-net-pci</span>driver (high-performance paravirtualized network card), bound to the above network backend.<span>-kernel /home/xu/work/kernel-with-rwx/bzImage</span>specifies the Linux kernel image file<span>bzImage</span>, bypassing the virtual machine’s BIOS boot to directly load the kernel.<span>-initrd /home/xu/work/kernel-with-rwx/initrd.img-5.10.209</span>uses<span>initrd.img-5.10.209</span>as the initial memory file system, containing the modules and tools needed for early boot.<span>-append "root=/dev/mapper/ubuntu--vg-ubuntu--lv ro maybe-ubiquity console=ttyS0"</span><code><span>: specifies the location of the root filesystem (LVM logical volume).</span><span>ro</span>: mounts the root filesystem in read-only mode, which usually needs to be switched to read-write mode later.<span>console=ttyS0</span>: redirects console output to the serial port<span>ttyS0</span>, used in conjunction with<span>-nographic</span>. (The root filesystem path can be checked using<span>df -h</span>on Ubuntu systems).
As mentioned above, there is also a method to use <span>grub</span> to boot the kernel, which is relatively more complicated. It requires copying the kernel from the host machine to the virtual machine and executing <span>make modules_install</span> and <span>make install</span>, then starting with <span>-boot d</span> to load the kernel from the hard drive.
qemu-system-x86_64 \
-enable-kvm \
-smp 2 \
-m 4096 \
-drive file=./ubuntutest.img -boot d \
-netdev bridge,id=net0,br=virbr0 \
-device virtio-net-pci,netdev=net0
However, I find using <span>-kernel</span> and <span>-initrd</span> to be more convenient and recommend it.
Next, start <span>gdb</span> for debugging. Use another terminal to open <span>gdb</span>:
xu@xu-dev:~/work/linux-5.10.209$ gdb vmlinux  -q
Reading symbols from vmlinux...
warning: File "/home/xu/work/linux-5.10.209/scripts/gdb/vmlinux-gdb.py" auto-loading has been declined by your `auto-load safe-path' set to "$debugdir:$datadir/auto-load".
To enable execution of this file add
    add-auto-load-safe-path /home/xu/work/linux-5.10.209/scripts/gdb/vmlinux-gdb.py
line to your configuration file "/home/xu/.gdbinit".
To completely disable this security protection add
    set auto-load safe-path /
line to your configuration file "/home/xu/.gdbinit".
For more information about this security protection see the
"Auto-loading safe path" section in the GDB manual.  E.g., run from the shell:
    info "(gdb)Auto-loading safe path"
Use <span>gdb</span> for remote connection:
(gdb) target remote :1234
Remote debugging using :1234
0x000000000000fff0 in exception_stacks ()
Set a breakpoint:
(gdb) b start_kernel
Breakpoint 1 at 0xffffffff82daad61: file init/main.c, line 847.
Continue execution to hit the breakpoint:
(gdb) c
Continuing.

Thread 1 hit Breakpoint 1, start_kernel () at init/main.c:847
Step through debugging:
847	{
(gdb) n
851		set_task_stack_end_magic(&init_task);
(gdb) n
852		smp_setup_processor_id();
(gdb) n
855		cgroup_init_early();
(gdb)
Issues
Certificate Not Found
  CC [M]  kernel/kheaders.o
  CC      certs/system_keyring.o
make[1]: *** No rule to make target 'debian/canonical-certs.pem', needed by 'certs/x509_certificate_list'.  Stop.
make: *** [Makefile:1832: certs] Error 2
Solution:
1. Modify <span>CONFIG_SYSTEM_TRUSTED_KEYS</span> to empty value:
<span>CONFIG_SYSTEM_TRUSTED_KEYS=""

</span>
2. Modify <span>CONFIG_SYSTEM_REVOCATION_KEYS</span> (optional) to empty value if it is not already empty:
Before modification: original variable has value <span>CONFIG_SYSTEM_REVOCATION_KEYS="debian/canonical-revoked-certs.pem"</span> After modification: assign an empty value<span>CONFIG_SYSTEM_REVOCATION_KEYS=""
</span>
Kernel Stuck on “loading initial ramdisk” for a Long Time and Kernel Crash Report on Boot with Error: Kernel panic not syncing: System is deadlocked on memory
During the kernel compilation process, if the kernel modules are installed without using <span>INSTALL_MOD_STRIP=1</span>, it can lead to an excessively large <span>initrd</span> file, causing the boot process to get stuck decompressing the <span>initrd</span> for too long.
For example, my <span>initrd.img</span> is <span>1.2G</span>.

To resolve this issue, you need to add <span>INSTALL_MOD_STRIP=1</span> when installing the modules:
sudo make INSTALL_MOD_STRIP=1 modules_install
sudo make install
<span>kernel crash</span> report on boot with error <span>Kernel panic not syncing: System is deadlocked on memory</span> is related to the <span>initrd.img</span>. One way to resolve it is by reducing the size of <span>initrd.img</span>, or alternatively, increasing the virtual machine’s memory.
GDB Software Breakpoints Not Triggering, Hardware Breakpoints Can Trigger
<span>qemu</span> may cause this issue if started with the <span>-enable-kvm</span> option.
If you specify <span>-enable-kvm</span> at startup, you need to use hardware breakpoints when setting breakpoints, for example:
hb start_kernel
PS
How to Clean Up Kernel Compilation Artifacts
If you wish to uninstall after compiling and installing the Linux kernel, here are the specific steps and precautions:
Step 1: Confirm Kernel Version and Installation Path
- Check Installed Kernel Versions:
ls /boot | grep vmlinuz    # List all kernel files
uname -r                  # Check the currently running kernel version (to avoid accidental deletion)
- Confirm the Manually Compiled Kernel Version: Assume the target kernel version to uninstall is
<span>5.18.8</span>, ensure it is not in the output of<span>uname -r</span>, otherwise deleting it may cause the system to fail to boot.
Step 2: Manually Delete Kernel-Related Files
Manually compiled kernel files are scattered across multiple directories and need to be deleted one by one by path:
- Delete Kernel Files in the
<span>/boot</span>Directory:
sudo rm -rf /boot/vmlinuz-5.18.8
sudo rm -rf /boot/initrd.img-5.18.8
sudo rm -rf /boot/config-5.18.8
sudo rm -rf /boot/System.map-5.18.8
- Delete Kernel Module Directory:
sudo rm -rf /lib/modules/5.18.8
- Delete Kernel Source Directory (Optional):
sudo rm -rf /usr/src/linux-5.18.8
- Clean Up initramfs Residue:
sudo rm -rf /var/lib/initramfs-tools/5.18.8
Step 3: Update GRUB Boot Configuration
After deleting the kernel, update GRUB to avoid residual invalid boot entries:
sudo update-grub
Step 4: Reboot the System
sudo reboot
After rebooting, use <span>uname -r</span> to confirm whether the current kernel version has switched to another available version.
Reference Articles
https://github.com/mz1999/blog/blob/master/docs/gdb-kernel-debugging.md