If you don’t want to miss my updates, remember to check the public account in the top right corner and set it as a star, take down the star and give it to me.
Today, I will share an interesting open-source Arduino/ESP32 + 3D printing project, which uses a gyroscope sensor and an accelerometer to detect the movement of a balancing object and adjust the speed and direction of the wheels accordingly, allowing control of the device through changes in weight. In simple terms, the cube below can maintain balance with just one point or one edge. You will understand after watching the video demonstration —
This project demonstrates how to create a self-balancing cube using Arduino and 3D printing technology. By using a gyroscope sensor and an accelerometer to detect the motion of the cube, the speed and direction of the wheels inside the cube can be adjusted accordingly, enabling the cube to maintain balance through weight changes. In other words, the cube can sense its own motion and achieve self-balance by adjusting the speed and direction of its internal wheels.
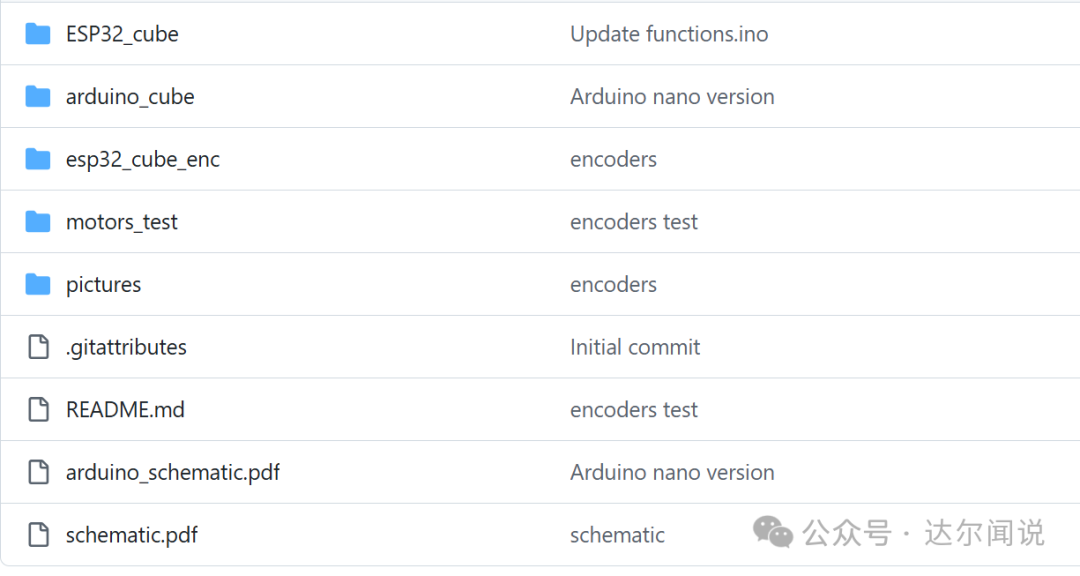
This self-balancing cube has two versions created by the author: Arduino version and ESP32 version.
The main hardware used includes:
-
-
-
-
-
-
General-purpose NPN transistor
-
Lithium-ion battery 1000mAh x 3
-
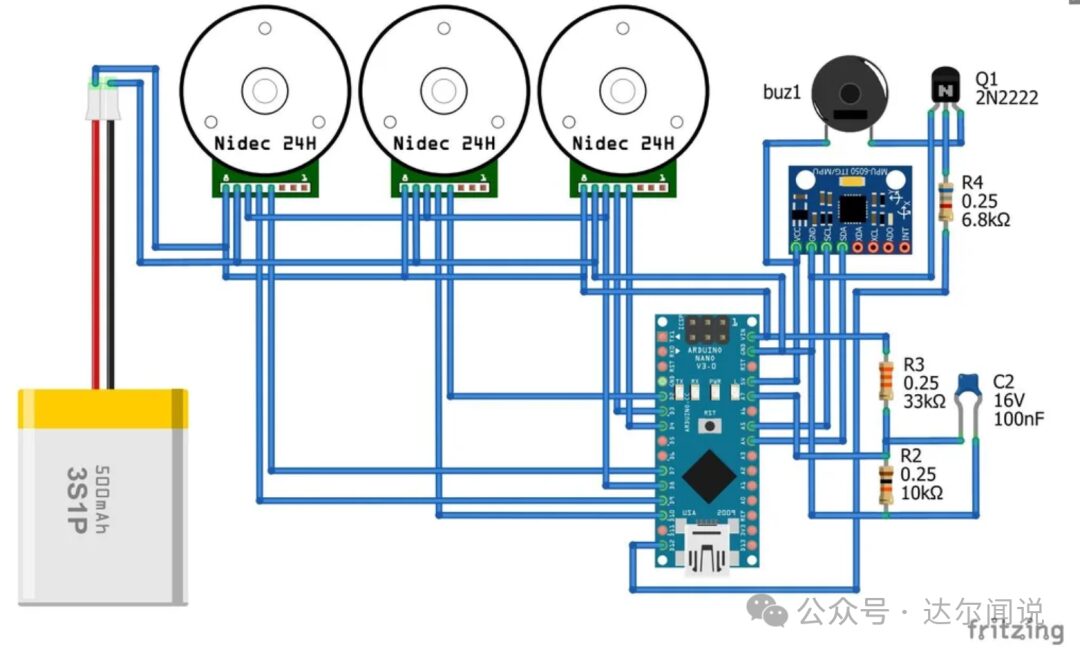
The hardware connection method is as follows:

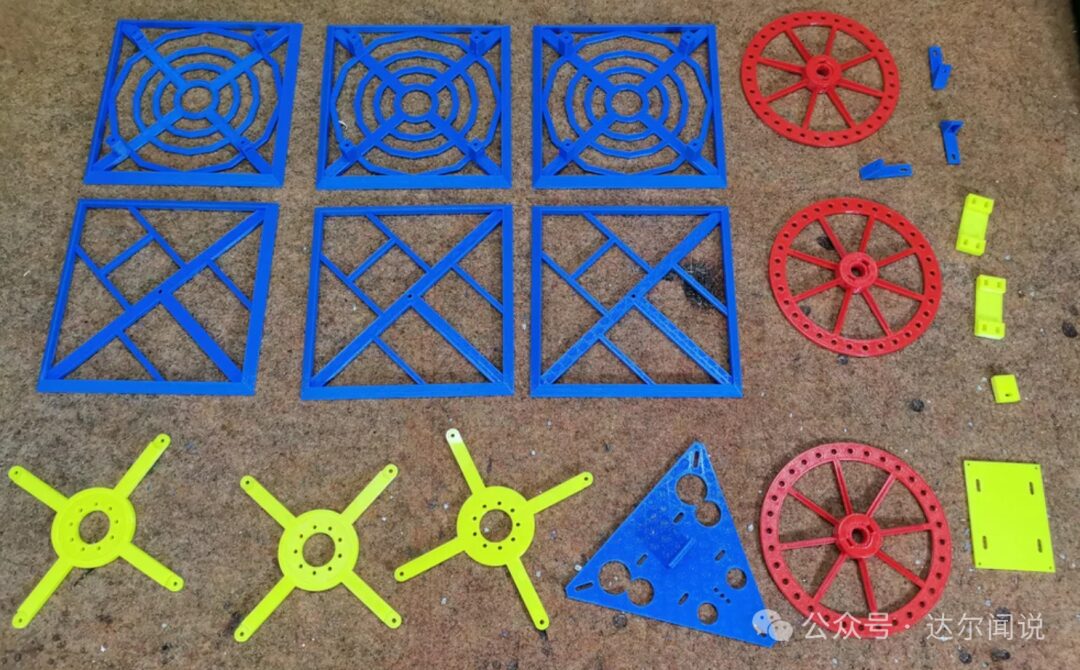
Besides the hardware, the rest of the cube is entirely 3D printed, with the main components including:
– 3 reaction wheels on the sides,
– The other three faces of the cube
– Reaction wheels used for balancing the cube
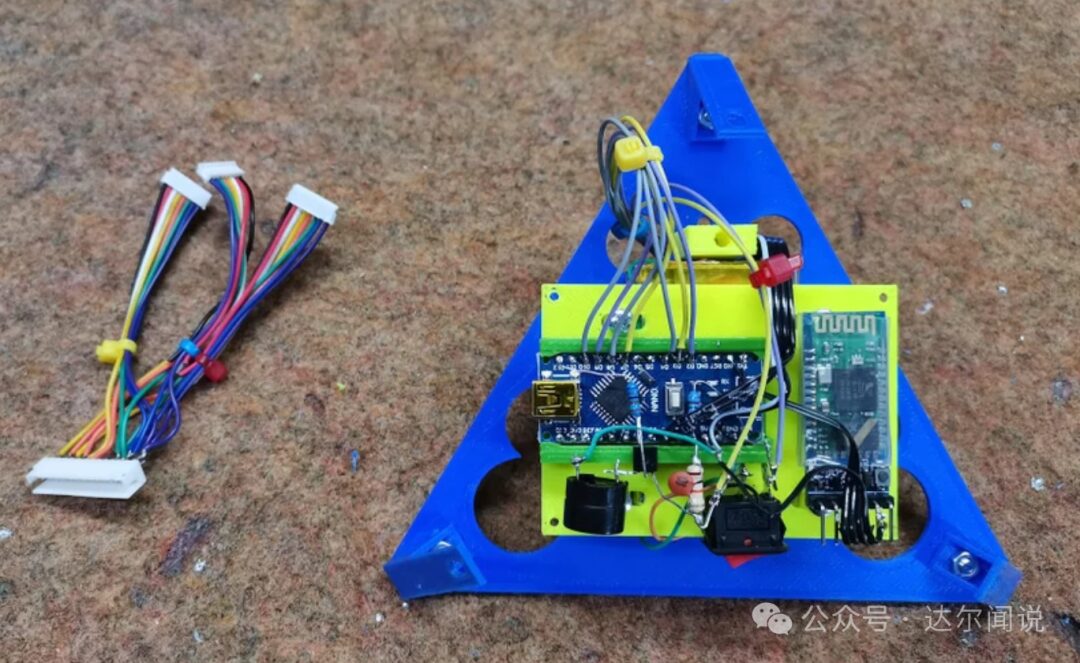
– A mounting plate for the battery and controller, which has a mounting surface for the MPU6050 sensor board.
– Battery holder
– And the controller mounting plate and its bracket
Each large component takes 2-3 hours to print, so it requires some time to print all parts.
The software code for the cube is shared on GitHub, and you can check the link at the end:
Once everything is ready and assembled, the first step is to calibrate the cube; the setup process is very simple:
First, connect to the controller via Bluetooth. You will see a message indicating that you need to calibrate the balance point.
Send c+ from the serial monitor. This will activate the calibration program.
Set the cube to one of the balance points (edge or vertex).
Keep still when the cube is not tipping to either side. Send c- from the serial monitor.
This will write the offset to EEPROM.
Repeat this process four times (3 edges and a vertex). After calibrating all offsets, the cube will start balancing.
The design materials for this project are open-sourced, and the hardware used is quite common, making it easy for interested friends to replicate this interesting electronic device.
Original link:
https://www.instructables.com/Arduino-3D-Printed-Self-Balancing-Cube/
GitHub data download:
https://github.com/remrc/Self-Balancing-Cube/tree/main
3D printing materials:
https://www.thingiverse.com/thing:5380306
Copyright belongs to: mircemk
More Practical Project Recommendations:
<<<STM32 Project Collection>>>
<<<Raspberry Pi Project Collection>>>
<<<ESP32 Project Collection>>>
<<<ESP8266 Project Collection>>>
<<<Arduino Project Collection>>>
<<<Darwin Project Sharing Series>>>
Project Sharing | Competition Series | Artificial Intelligence | Postgraduate Entrance Exam
Essential Knowledge Points | Graduation Project | Switch Power Supply | Job Seeking
We are Nimo, the founder of Darwin, who only talks about technology and not flirting. The Darwin online education platform aims to serve professionals in the electronics industry, providing skill training videos covering popular topics in various subfields, such as embedded systems, FPGA, artificial intelligence, etc. It customizes layered learning content for different groups, such as common knowledge points, disassembly assessments, competition/intelligent vehicle/postgraduate entrance exam, etc. Welcome to follow.
Official website: www.darwinlearns.com