This article introduces the method for packaging the Linux development board file system and creating images, demonstrating the packaging of the Linux file system and image creation, suitable for those who want to package a configured system environment into an image for batch burning.Tactile Intelligence RK3562 Development Board demonstration, equipped with a quad-core A53 processor, with a frequency of up to 2.0GHz; it has a built-in independent 1 Tops computing power NPU, applicable in industries such as IoT gateways, tablets, smart homes, educational electronics, and industrial displays and controls.
 Tool Acquisition
The methods described in this article require some tools in a Linux environment. Tools can be obtained by contacting Tactile Intelligence customer service or leaving a message. After downloading the Ubuntu PC environment, it needs to be unpacked and used. The unpacking method is as follows:
$ tar -vxf ido-pack-tools.tar -C ./The contents of the unpacked files are as follows: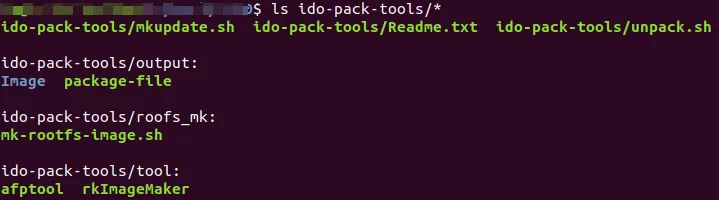 The script in the tool package defaults to chip information for rk3562. If using another chip, the chip information needs to be modified in the corresponding pathido-pack-tools/mkupdate.sh.
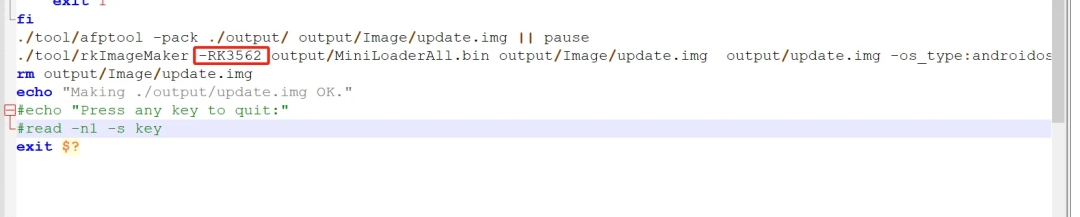
 File System Packaging and Image Creation
- Packaging the file system from the development board
First, insert a USB drive or TF card into the development board, then use the mount command to check the file system partition nodes, as shown below:
root@ido:/# mount/dev/mmcblk2p8 on / type ext4 (rw,relatime)devtmpfs on /dev type devtmpfs (rw,relatime,size=996844k,nr_inodes=249211,mode=755)sysfs on /sys type sysfs (rw,nosuid,nodev,noexec,relatime)proc on /proc type proc (rw,nosuid,nodev,noexec,relatime)securityfs on /sys/kernel/security type securityfs (rw,nosuid,nodev,noexec,relatime)tmpfs on /dev/shm type tmpfs (rw,nosuid,nodev,size=1008396k,nr_inodes=252099)devpts on /dev/pts type devpts (rw,nosuid,noexec,relatime,gid=5,mode=620,ptmxmode=000)tmpfs on /run type tmpfs (rw,nosuid,nodev,size=201680k,nr_inodes=252099,mode=755)tmpfs on /run/lock type tmpfs (rw,nosuid,nodev,noexec,relatime,size=5120k,nr_inodes=252099)tmpfs on /sys/fs/cgroup type tmpfs (ro,nosuid,nodev,noexec,size=1008396k,nr_inodes=252099,mode=755)cgroup2 on /sys/fs/cgroup/unified type cgroup2 (rw,nosuid,nodev,noexec,relatime,nsdelegate)cgroup on /sys/fs/cgroup/systemd type cgroup (rw,nosuid,nodev,noexec,relatime,xattr,name=systemd)pstore on /sys/fs/pstore type pstore (rw,relatime)cgroup on /sys/fs/cgroup/cpu,cpuacct type cgroup (rw,nosuid,nodev,noexec,relatime,cpu,cpuacct)cgroup on /sys/fs/cgroup/cpuset type cgroup (rw,nosuid,nodev,noexec,relatime,cpuset)cgroup on /sys/fs/cgroup/devices type cgroup (rw,nosuid,nodev,noexec,relatime,devices)cgroup on /sys/fs/cgroup/freezer type cgroup (rw,nosuid,nodev,noexec,relatime,freezer)debugfs on /sys/kernel/debug type debugfs (rw,relatime)tracefs on /sys/kernel/tracing type tracefs (rw,nosuid,nodev,noexec,relatime)configfs on /sys/kernel/config type configfs (rw,nosuid,nodev,noexec,relatime)fusectl on /sys/fs/fuse/connections type fusectl (rw,nosuid,nodev,noexec,relatime)adb on /dev/usb-ffs/adb type functionfs (rw,relatime)tmpfs on /run/user/0 type tmpfs (rw,nosuid,nodev,relatime,size=201676k,nr_inodes=252099,mode=700)tmpfs on /run/user/1001 type tmpfs (rw,nosuid,nodev,relatime,size=201676k,nr_inodes=252099,mode=700,uid=1001,gid=1001)gvfsd-fuse on /run/user/1001/gvfs type fuse.gvfsd-fuse (rw,nosuid,nodev,relatime,user_id=1001,group_id=1001)/dev/mmcblk2p7 on /media/ido/oem type ext4 (rw,nosuid,nodev,relatime,uhelper=udisks2)/dev/mmcblk2p6 on /media/ido/userdata type ext4 (rw,nosuid,nodev,relatime,uhelper=udisks2)/dev/sda1 on /media/ido/U type vfat (rw,nosuid,nodev,relatime,uid=1001,gid=1001,fmask=0022,dmask=0022,codepage=936,iocharset=utf8,shortname=mixed,showexec,utf8,flush,errors=remount-ro,uhelper=udisks2)From the above command, lines 2 and 29 show that/dev/mmcblk2p8 on/type ext4 (rw,relatime), /dev/mmcblk2p8 is mounted to the root directory, /dev/mmcblk2p8 is the node we need. The USB drive is mounted at /media/ido/U.
# Mount the root file directory$ sudo mount /dev/mmcblk2p8 /mnt# Enter the mounted folder$ cd /mnt$ rm var/lib/misc/firstrun$ sudo tar -czf /media/ido/U/ido-rootfs.tar.gz ./*$ syncNote: The packaging using the tar command requires sudo privileges.
- Unpacking the compressed package
Unpack the compressed package created, to the Ubuntu PC environment, the command is as follows:
$ mkdir -p your/target/path/$ sudo tar -xzf ido-rootfs.tar.gz -C your/target/path/- Creating the file system image
Check the size of the file system, as shown below:
$ sudo du -sh your/target/path/The script file needed to create the image is mk-rootfs-image.sh, located in the tool package’s pack-tools/roofs_mk/ directory. Modify the parameter in line 25 of the mk-rootfs-image.sh script according to the system size, the default image size is set to 4096MB.
dd if=/dev/zero of=${ROOTFSIMAGE} bs=1M count=0 seek=4096Note: The image size set in the script generally needs to be greater than the value returned by du.
$ sudo cd pack-tools/roofs_mk/$ sudo ./mk-rootfs-image.sh ../../your/target/path/After the script runs successfully, you will obtain the file system image named rootfs.img in the directory. Creating the complete firmware update.imgIn the previous article, we obtained the rootfs.img scattered firmware, next we will create the update.img complete firmware. There are two situations here: 1. Only modify the file system, just unpack the originally burned update.img image, and replace it with the newly created rootfs.img. 2. If there are other modifications besides the file system, you can modify the SDK source compilation script and use a custom file system during compilation.
- Case of only modifying the file system
Copy the complete image file that needs to be unpacked to the tool package’s pack-tools directory, taking the complete image IDO-EVB3562-V1B_MIPI-800x1280_Ubuntu20_QT5_240719.img as an example.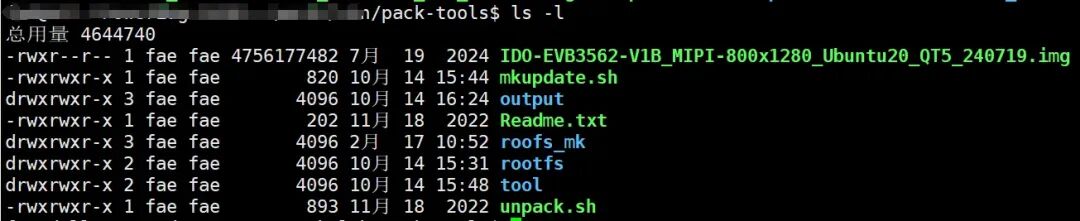 Execute the unpacking script to split the update image into partition images.
$ ./unpack.sh IDO-EVB3562-V1B_MIPI-800x1280_Ubuntu20_QT5_240719.imgThe execution result is as follows: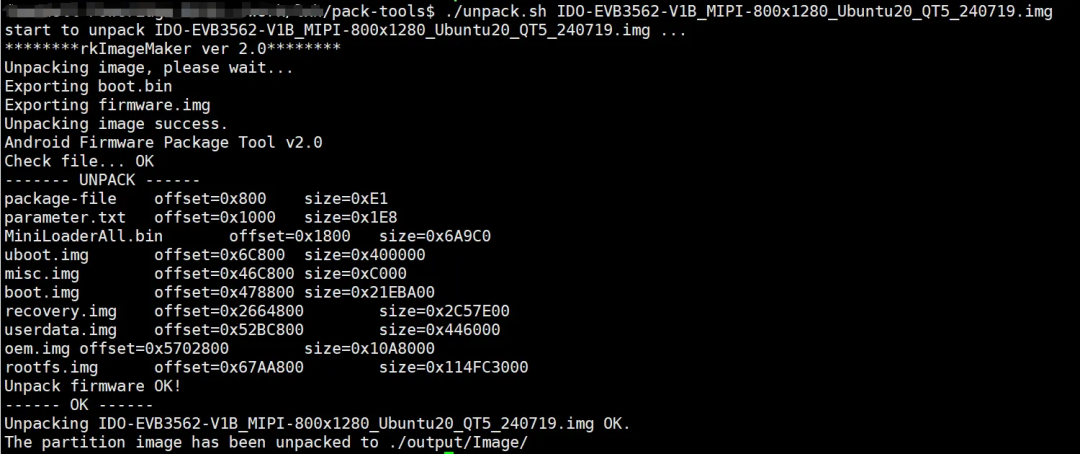 The partition files are unpacked and stored in the ./output/ directory..
 Copy the file system image packaged in section 2 of the article and replace it in ./output/rootfs.img, the file name must be rootfs.img. Finally, execute the ./mkupdate.sh script to merge the partition images into a complete image update.img.
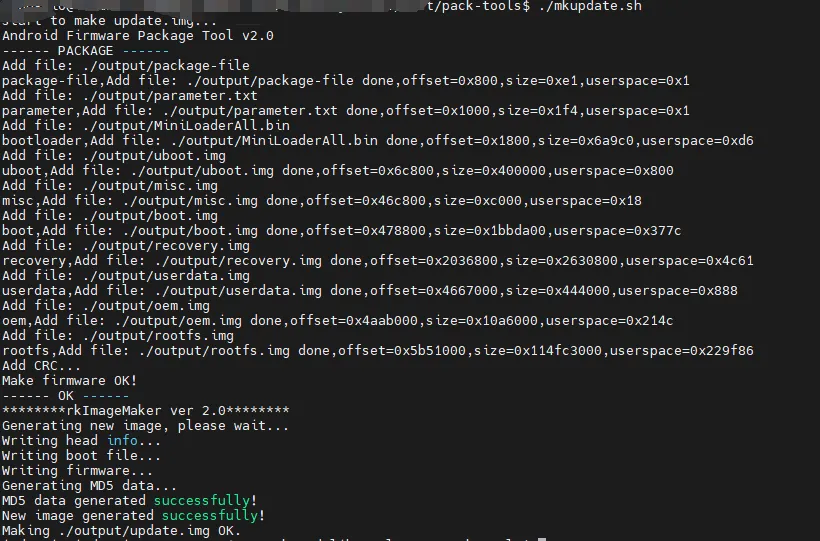 After the script runs successfully, a new complete package file will be generated at ./output/update.img.
- Case of other modifications besides the file system
The modifications in different SDKs are inconsistent. Create a custom directory in the SDK named myrootfs, and place rootfs.img inside (the myrootfs directory should be at the same level as build.sh).
mkdir myrootfs# Place rootfs.img into myrootfsls myrootfs/rootfs.imgSituation 1: Directly modify build.sh to use our rootfs.img during packaging. In the function build_rootfs() of build.sh, add lines 24-27 of code.
function build_rootfs(){ check_config RK_ROOTFS_IMG || return 0 RK_ROOTFS_DIR=.rootfs ROOTFS_IMG=${RK_ROOTFS_IMG##*/} rm -rf $RK_ROOTFS_IMG $RK_ROOTFS_DIR mkdir -p ${RK_ROOTFS_IMG%/*} $RK_ROOTFS_DIR case "$1" in yocto) build_yocto ln -rsf yocto/build/latest/rootfs.img \\ $RK_ROOTFS_DIR/rootfs.ext4 ;; debian) build_debian ln -rsf debian/linaro-rootfs.img \\ $RK_ROOTFS_DIR/rootfs.ext4 ;; distro) build_distro for f in $(ls distro/output/images/rootfs.*);do ln -rsf $f $RK_ROOTFS_DIR/ done ;; myrootfs) ln -rsf myrootfs/rootfs.img \\ $RK_ROOTFS_DIR/rootfs.ext4 ;; *) build_buildroot for f in $(ls buildroot/output/$RK_CFG_BUILDROOT/images/rootfs.*);do ln -rsf $f $RK_ROOTFS_DIR/ done ;; esacAfter executing build.sh lunch, execute the following command:
export RK_ROOTFS_SYSTEM=myrootfs
Finally, executing build.sh will generate the update.img complete firmware containing rootfs.img.
./build.sh
rockdev/update.img is the complete firmware we need.
Situation 2: If the build.sh script does not have the function build_rootfs() function, modify ./device/rockchip/common/scripts/mk-rootfs.sh and add the following lines of code 8-12 and 35:
....省略部分代码........build_ubuntu20(){ln -rsf "$PWD/ubuntu/rootfs-ubuntu20.04-desktop.img" $ROOTFS_DIR/rootfs.ext4 finish_build build_ubuntu20 $@}build_myrootfs(){ln -rsf "$PWD/myrootfs/rootfs.img" $ROOTFS_DIR/rootfs.ext4 finish_build build_myrootfs $@}....省略部分代码........build_hook(){ check_config RK_ROOTFS_TYPE || return 0if [ -z "$1" -o "$1" = rootfs ]; then ROOTFS=${RK_ROOTFS_SYSTEM:-buildroot}else ROOTFS=$1fi ROOTFS_IMG=rootfs.${RK_ROOTFS_TYPE} ROOTFS_DIR="$RK_OUTDIR/rootfs"echo "=========================================="echo " Start building rootfs($ROOTFS)"echo "=========================================="rm -rf "$ROOTFS_DIR"mkdir -p "$ROOTFS_DIR"case "$ROOTFS" in yocto) build_yocto "$ROOTFS_DIR" ;; debian) build_debian "$ROOTFS_DIR" ;; buildroot) build_buildroot "$ROOTFS_DIR" ;; ubuntu) build_ubuntu20 "$ROOTFS_DIR" ;; myrootfs)build_myrootfs "$ROOTFS_DIR" ;; *) usage ;;esacModify ./device/rockchip/common/configs/Config.in.rootfs and add the following lines of code 7, 20, 21:
config RK_ROOTFS_SYSTEM string default "buildroot" if RK_ROOTFS_SYSTEM_BUILDROOT default "debian" if RK_ROOTFS_SYSTEM_DEBIAN default "yocto" if RK_ROOTFS_SYSTEM_YOCTO default "ubuntu" if RK_ROOTFS_SYSTEM_UBUNTU default "myrootfs" if RK_ROOTFS_SYSTEM_MYROOTFSchoice prompt "default rootfs system" help Default rootfs system.config RK_ROOTFS_SYSTEM_BUILDROOT bool "buildroot" depends on RK_BUILDROOT_BASE_CFG != ""config RK_ROOTFS_SYSTEM_DEBIAN bool "debian" depends on RK_DEBIAN_VERSION != ""config RK_ROOTFS_SYSTEM_UBUNTU bool "ubuntu"config RK_ROOTFS_SYSTEM_MYROOTFS bool "myrootfs"After executing the build.sh lunch command, execute the following command:
export RK_ROOTFS_SYSTEM=myrootfsFinally, executing the build.sh command will generate the update.img complete firmware containing rootfs.img.
./build.shrockdev/update.img is the complete firmware we need.

 Product IntroductionTactile IntelligenceRK3562 Development Board (Model EVB3562), designed based on Rockchip’s new generation SoC RK3562/RK3562J, can be used for lightweight artificial intelligence applications. The EVB3562 development board is equipped with various interfaces such as PCIe 2.1/USB 3.0 OTG/gigabit Ethernet, supporting 4G/5G communication, multiple cameras, and various video interfaces, applicable in industries such as IoT gateways, tablets, smart homes, educational electronics, industrial displays, and industrial control.
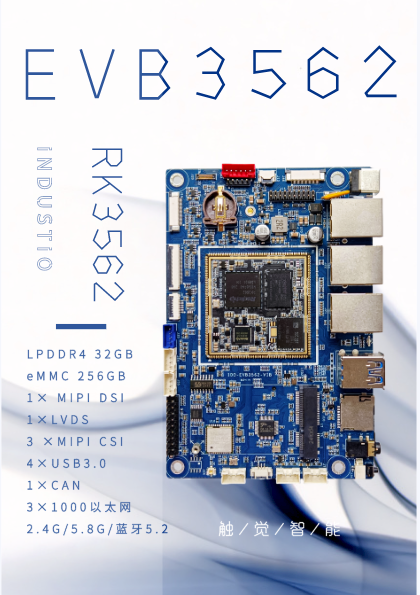
- Equipped with Rockchip’s new generation RK3562/RK3562J chip;
- 1 TOPS computing power NPU, supporting INT8/INT16/FP16 and other data type operations;
- Supports 4K@30FPS and 1080P@60 FPS video decoding;
- 13M ISP, supports HDR and multi-camera video acquisition;
- Single MIPI-DSI, up to 2048×1080@60fps;
- Single-channel LVDS, up to 1366×768@60fps;
- Three independent Ethernet ports, two of which are gigabit Ethernet ports, and one is a hundred megabit port (the 2025 new version development board will have USB OTG + dual Ethernet ports);
- Supports 5G/4G/WiFi/Bluetooth wireless communication;
- Supports Android and Linux operating systems;
Taobao Purchase Link (Corporate users can consult customer service for discounts)https://item.taobao.com/item.htm?ft=t&id=739666345147END