This article is a lab note for Lab7 of the MIT6.S081 Operating Systems course. The task is to simulate kernel process switching by implementing a user-level thread switching functionality. Additionally, I will introduce how xv6 achieves process switching by examining the source code.
- Lab7 address: https://pdos.csail.mit.edu/6.828/2020/labs/thread.html
- My lab records: https://github.com/yibaoshan/xv6-labs-2020/tree/thread
Before starting the experiment, you need to:
- Watch the recorded video of Lecture 10: Multiprocessors and Locks
- YouTube original version: https://www.youtube.com/watch?v=NGXu3vN7yAk
- Bilibili translated version: https://www.bilibili.com/video/BV19k4y1C7kA?vd_source=6bce9c6d7d453b39efb8a96f5c8ebb7f&p=9
- Translated text version: https://mit-public-courses-cn-translatio.gitbook.io/mit6-s081/lec10-multiprocessors-and-locking
- English original version: https://pdos.csail.mit.edu/6.828/2020/xv6/book-riscv-rev1.pdf
- Translated version: https://xv6.dgs.zone/tranlate_books/book-riscv-rev1/c6/s0.html
- YouTube original version: https://www.youtube.com/watch?v=vsgrTHY5tkg
- Bilibili translated version: https://www.bilibili.com/video/BV19k4y1C7kA?vd_source=6bce9c6d7d453b39efb8a96f5c8ebb7f&p=10
- Translated text version: https://mit-public-courses-cn-translatio.gitbook.io/mit6-s081/lec11-thread-switching-robert
- English original version: https://pdos.csail.mit.edu/6.828/2020/xv6/book-riscv-rev1.pdf
- Translated version: https://xv6.dgs.zone/tranlate_books/book-riscv-rev1/c7/s0.html
How does xv6 achieve process switching?
Lab7 is the easiest among the recent experiments, even simpler than Lab1. However, to successfully complete Lab7, we need to have a basic understanding of xv6’s process switching mechanism.
xv6 process switching mainly relies on two functions: the scheduler <span>scheduler()</span> and the assembly-implemented <span>swtch()</span>:
<span>scheduler()</span>: The scheduler function traverses the process table to find a process in the<span>runnable</span>state and then calls<span>swtch()</span>to switch to that process.<span>swtch()</span>: The context switch function, implemented in assembly code swtch.S, takes two<span>context</span>structures as parameters:<span>old</span>and<span>new</span>, used to swap the contexts of two processes (writing the current CPU state into<span>old</span>and then loading the state of the target process represented by<span>new</span>into the CPU to complete the switch).
1. swtch()
<span>swtch()</span> performs very simple tasks: it switches the contexts of the two parameters and then returns to the address pointed to by the new context’s <span>ra</span> register to continue execution.
# Context switch implementation in assembly language
#
#   void swtch(struct context *old, struct context *new);
#
# 1. Save current registers to old
# 2. Load registers from new
# 3. Return to the address pointed to by new's ra register

.globl swtch
swtch:
        # Save the current CPU context to old (a0 parameter)
        sd ra, 0(a0)    # Save ra register pointing to the return address
        sd sp, 8(a0)    # Save stack pointer
        sd s0-s11...    # Save callee-saved registers

        # Load new context new (a1 parameter) into CPU
        ld ra, 0(a1)    # Load new return address
        ld sp, 8(a1)    # Load new stack pointer
        ld s0-s11...    # Load new register values

        ret             # Return to the address specified by new's ra (ra has been set)
<span>swtch()</span> runs in kernel mode, at this point, the state of the user process has already been saved in the <span>trapframe</span> when switching to kernel mode, so the assembly program here only needs to save/restore the registers related to function calls.
2. scheduler()
When the board is powered on, each CPU will run the flow from <span>enter.S</span> -> <span>start.c</span> -> <span>main.c</span> -> <span>scheduler()</span>.
kernel/main.c
// start() jumps here in supervisor mode on all CPUs.
void
main()
{
if(cpuid() == 0){
    ... // A series of initialization tasks
    __sync_synchronize();
    started = 1;
  } else {
    while(started == 0) // Other CPUs wait for CPU 0 to complete initialization before executing
      ;
    __sync_synchronize();
    kvminithart();    // turn on paging
    trapinithart();   // install kernel trap vector
    ...
  }

  scheduler(); // Enter its own scheduler
}
- For CPU 0, it is responsible for initializing memory, processes, file management, and starting the first user program. After the global initialization is completed, it enters **
<span>scheduler()</span>**. - For other CPUs, after waiting for CPU 0 to complete the global initialization, they will then enable their own paging (each CPU’s registers are independent), register interrupts, etc., and finally also enter **
<span>scheduler()</span>**.
In xv6, the structure <span>cpu</span> saves the current CPU’s context <span>context</span> and the currently running process on that CPU <span>proc</span>.
// Per-CPU state.
struct cpu {
  struct proc *proc;          // The process running on this cpu, or null.
  struct context context;     // swtch() here to enter scheduler().
};
Next, the key point is that the core logic of the <span>scheduler()</span> function is:
- Traverse the process table to find a process in the
<span>runnable</span>state and then call<span>swtch()</span>to switch to that process. - If there are no processes to execute, execute the
<span>wfi</span>instruction to put the CPU into a low-power wait state until an interrupt occurs.
void
scheduler(void)
{
struct proc *p;
struct cpu *c = mycpu();
  c->proc = 0;
for(;;){
    // Allow interrupts so that I/O interrupts can wake waiting processes
    intr_on();
    // Traverse the process table to select a process in runnable state
    for(p = proc; p < &proc[NPROC]; p++){
      // Ensure that only one CPU modifies the state of each process
      acquire(&p->lock);
      // Caught it! (in Sichuan dialect)
      if(p->state == RUNNABLE){
        p->state = RUNNING;
        c->proc = p;
        // Save the current scheduler (c->context) state, restore p->context (which saved the kernel context of process p when it last left)
        swtch(&c->context, &p->context);
        // When process p is switched back to the CPU, continue executing here, i.e., the address returned by the ra register
        c->proc = 0;
      }
      release(&p->lock);
    }
    if(nproc <= 2) {   // only init and sh exist
      intr_on();
      asm volatile("wfi");
    }
  }
}
If there is a process to schedule, call the <span>swtch()</span> function, with parameters <span>old</span> = <span>c->context</span>,<span>new</span> = <span>p->context</span>
In the previous section, we introduced the functionality of the <span>swtch</span> assembly program:
- The current CPU’s state will be saved to
<span>c->context</span>.
- Here, the value of the
<span>ra</span>register saves the address of the next instruction after the<span>swtch()</span>returns, which is **<span>c->proc = 0</span>**. - When process p returns, the
<span>ra</span>will be restored to the value when the scheduler called<span>swtch()</span>, which means it will continue executing from<span>c->proc = 0</span>.
<span>p->context</span> will be loaded into the CPU, and then return to the address pointed to by the <span>ra</span> register to continue execution.<span>p->context</span><span>ra</span>saves the last execution position of the process; if it is a new process,<span>ra</span>points to the<span>forkret()</span>function (<span>forkret</span>is responsible for completing the cleanup work after process creation, which will not be elaborated here).<span>swtch</span>assembly program executes the last line<span>ret</span>, at that moment, the process has completed the switch.
xv6 creates a new process by creating a context <span>context</span>, which ensures that: if a newly created process is selected by the scheduler for the first time, <span>p->context</span> will not be null.
static struct proc*
allocproc(void)
{
  ...
  // Set up new context to start executing at forkret,
  // which returns to user space.
  memset(&p->context, 0, sizeof(p->context));
  p->context.ra = (uint64)forkret;
  p->context.sp = p->kstack + PGSIZE;
  ...
}
The process of switching from the kernel schedule() to the user process for the first time is roughly as follows:
First switch:
scheduler() runs
    ↓
swtch(&c->context, &p->context)
    ↓ Save the context of scheduler() to c->context
    ↓ Load the process's context (obtained from p->context)
    ↓ usertrapret() -> trampoline.S:
      1. Switch to user page table
      2. Restore all user registers from trapframe
      3. Return to user mode to continue execution
The kernel code switching to the user process has been explained. Next, let’s see how the OS switches back to the <span>scheduler()</span> kernel code.
3. Triggering Scheduling
In xv6, there are three main entry points that call <span>swtch()</span> to switch back to <span>scheduler()</span>:
<span>yield()</span>: Actively yield the CPU
void yield(void) {
  struct proc *p = myproc();
  acquire(&p->lock);
  p->state = RUNNABLE;
  sched();  // Call swtch to switch to scheduler
  release(&p->lock);
}
<span>exit()</span>: Process exit
void exit(int status) {
  // ... Clean up process resources ...
  p->state = ZOMBIE;
  release(&original_parent->lock);
  sched();  // Switch to scheduler, never returns
  panic("zombie exit");
}
<span>sleep()</span>: Process sleep
void sleep(void *chan, struct spinlock *lk) {
  // ... Set sleep conditions ...
  p->chan = chan;
  p->state = SLEEPING;
  sched();  // Switch to scheduler
  // ... Cleanup work after waking up ...
}
These three scenarios will all call the <span>sched</span> function, ultimately using <span>swtch()</span> to switch to the kernel scheduler. They represent three typical situations of process scheduling: actively yielding the CPU (<span>yield</span>), process termination (<span>exit</span>), and process waiting for an event to occur (<span>sleep</span>).
In this section, we will discuss how the OS switches back to the scheduler, so we will focus only on the case when the user process’s time slice is exhausted, triggering a timer interrupt:
void
usertrap(void)
{
// ...
if(which_dev == 2) {  // Timer interrupt
    yield();
  }
}

void
kerneltrap(void)
{
// ...
if(which_dev == 2 && myproc() != 0 && myproc()->state == RUNNING) {
    yield();
  }
}
If <span>which_dev == 2</span>, it indicates a timer interrupt, which triggers the <span>yield()</span>.
The duration of the timer is set during the initialization work of CPU0:
kernel/start.c
// The clock interrupt interval for each CPU is 1000000 CPU cycles
void timerinit() {
    ...
    int interval = 1000000; // cycles; about 1/10th second in qemu.
    *(uint64*)CLINT_MTIMECMP(id) = *(uint64*)CLINT_MTIME + interval;
    ...
}
Each process is allowed to execute for 1000000 CPU cycles, after which a timer interrupt is triggered, and then <span>yield()</span> is called, which in turn calls the <span>sched()</span> function to yield the CPU.
void
sched(void)
{
  ...
  struct proc *p = myproc();
  swtch(&p->context, &mycpu()->context);
  ...
}
<span>sched()</span> function is very simple; it calls <span>swtch()</span> to perform the switch, with parameters <span>old</span> = <span>p->context</span>,<span>new</span> = <span>mycpu->context</span>
- Save the current CPU state to the context of the running process.
- Retrieve the previously saved context of
<span>mycpu->context</span>and restore it to the CPU. - When the last line of the switch assembly executes
<span>ret</span>, the switch back to<span>scheduler()</span>continues running (<span>c->proc = 0</span>).
void
scheduler(void)
{
  ...
  for(;;){
    ...
    for(p = proc; p < &proc[NPROC]; p++){
        ...
        swtch(&c->context, &p->context);
        c->proc = 0; // here!!! I am back!
    }
  }
}
After switching back to the scheduler, the <span>scheduler()</span> continues to look for the next process to schedule. The process’s time slice has expired, triggering a timer interrupt, calling <span>yield()</span> to switch back to the kernel scheduler<span>scheduler()</span>, and so on.
At this point, the explanation of how xv6 completes process switching is complete. Let’s summarize the CPU’s workflow with a diagram:

Next, let’s start the experiment.
Uthread: Switching Between Threads (Moderate)
In this exercise, you will design the context switch mechanism for a user-level threading system and then implement it. To get you started, your xv6 has two files <span>user/uthread.c</span> and <span>user/uthread_switch.S</span>, and a rule in the Makefile to build a uthread program. <span>uthread.c</span> contains most of a user-level threading package and code for three simple test threads. The threading package is missing some of the code to create a thread and to switch between threads.
Implement a context switching mechanism between threads in a user-level threading system, allowing multiple threads to “switch execution” within a single user program. The files <span>user/uthread.c</span> and <span>user/uthread_switch.S</span> are provided for you to fill in the code.
This is a simple task; you can copy the xv6 process scheduling code. Open user/uthread.c
#define STACK_SIZE  8192
#define MAX_THREAD  4

// Thread context structure
struct context {
  uint64 ra;
  uint64 sp;
  uint64 s0;
  uint64 s1;
  uint64 s2;
  uint64 s3;
  uint64 s4;
  uint64 s5;
  uint64 s6;
  uint64 s7;
  uint64 s8;
  uint64 s9;
  uint64 s10;
  uint64 s11;
};

struct thread {
char       stack[STACK_SIZE]; /* the thread's stack */
int        state;             /* FREE, RUNNING, RUNNABLE */
struct     context context; // Thread context
};
struct thread all_thread[MAX_THREAD];
...

void
thread_init(void)
{
// main() is thread 0, which will make the first invocation to
// thread_schedule().  it needs a stack so that the first thread_switch() can
// save thread 0's state.  thread_schedule() won't run the main thread ever
// again, because its state is set to RUNNING, and thread_schedule() selects
// a RUNNABLE thread.
  current_thread = &all_thread[0];
  current_thread->state = RUNNING;
}

void
thread_schedule(void)
{
  ...
if (current_thread != next_thread) {         /* switch threads?  */
    next_thread->state = RUNNING;
    t = current_thread;
    current_thread = next_thread;
    /* YOUR CODE HERE
     * Invoke thread_switch to switch from t to next_thread:
     * thread_switch(??, ??);
     */     // Call thread_switch for context switching
    thread_switch((uint64)&t->context, (uint64)&next_thread->context);
  } else
    next_thread = 0;
}

void
thread_create(void (*func)())
{
  ...
  t->state = RUNNABLE;
// YOUR CODE HERE
// Set up the new thread's context
memset(&t->context, 0, sizeof(t->context));
  t->context.ra = (uint64)func;  // Set return address to thread function
  t->context.sp = (uint64)t->stack + STACK_SIZE;  // Stack pointer points to the top of the stack
}
user/uthread_switch.S is even simpler; just copy the switch.S file from the kernel.
    .text

    /*
     * Save the old thread's registers,
     * Restore the new thread's registers.
     */

    .globl thread_switch
thread_switch:
    /* YOUR CODE HERE */
    # a0 saves the address of the current thread's context
    # a1 saves the address of the next thread's context

    # Save the current thread's registers
    sd ra, 0(a0)
    sd sp, 8(a0)
    sd s0, 16(a0)
    sd s1, 24(a0)
    sd s2, 32(a0)
    sd s3, 40(a0)
    sd s4, 48(a0)
    sd s5, 56(a0)
    sd s6, 64(a0)
    sd s7, 72(a0)
    sd s8, 80(a0)
    sd s9, 88(a0)
    sd s10, 96(a0)
    sd s11, 104(a0)

    # Restore the next thread's registers
    ld ra, 0(a1)
    ld sp, 8(a1)
    ld s0, 16(a1)
    ld s1, 24(a1)
    ld s2, 32(a1)
    ld s3, 40(a1)
    ld s4, 48(a1)
    ld s5, 56(a1)
    ld s6, 64(a1)
    ld s7, 72(a1)
    ld s8, 80(a1)
    ld s9, 88(a1)
    ld s10, 96(a1)
    ld s11, 104(a1)
    ret    /* return to ra */
<span>make qemu</span> to compile and execute <span>uthread</span> to see the results.
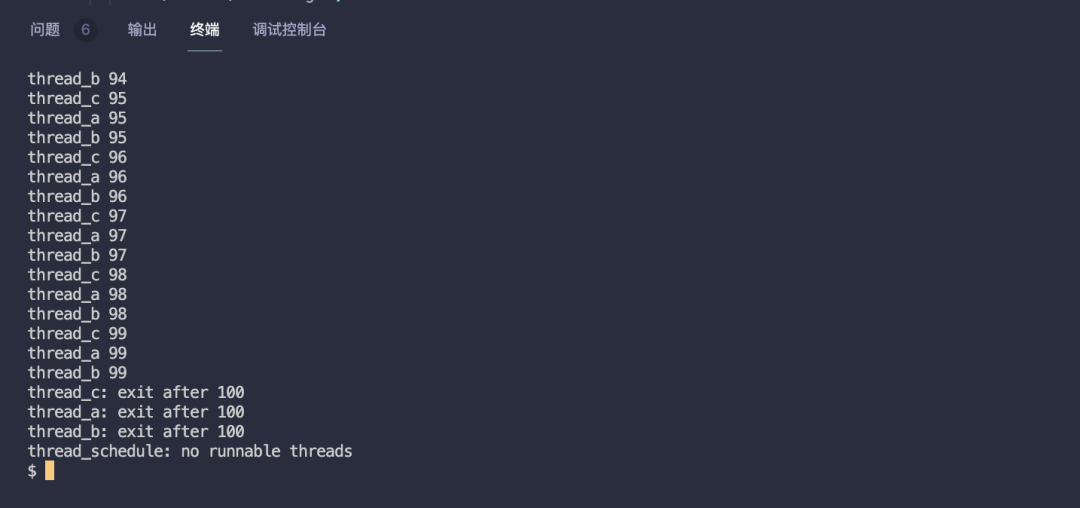
Test passed, complete code at: https://github.com/yibaoshan/xv6-labs-2020/commit/978d71fd02928313549058f5b354180fcab200d5
Using Threads (Moderate)
In this assignment, you will explore parallel programming with threads and locks using a hash table. You should do this assignment on a real Linux or MacOS computer (not xv6, not qemu) that has multiple cores. Most recent laptops have multicore processors.
Add locks to the hash table to ensure concurrent safety.
This is an easy task; open the ph.c file.
...
int keys[NKEYS];
int nthread = 1;

// Create a lock for each bucket
pthread_mutex_t locks[NBUCKET];
...

static
void put(int key, int value)
{
  ...
if(e){
    // update the existing key.
    e->value = value;
  } else {
    // the new is new.
    pthread_mutex_lock(&locks[i]); // Lock
    insert(key, value, &table[i], table[i]);
    pthread_mutex_unlock(&locks[i]); // Unlock
  }
}

int
main(int argc, char *argv[])
{
  ...
if (argc < 2) {
    fprintf(stderr, "Usage: %s nthreads\n", argv[0]);
    exit(-1);
  }
// Initialize all locks
for(int i = 0; i < NBUCKET; i++) {
      pthread_mutex_init(&locks[i], NULL);
  }
  nthread = atoi(argv[1]);
  ...
}
<span>make ph</span> to compile the single ph file, then execute <span>./ph 4</span> to see the results.
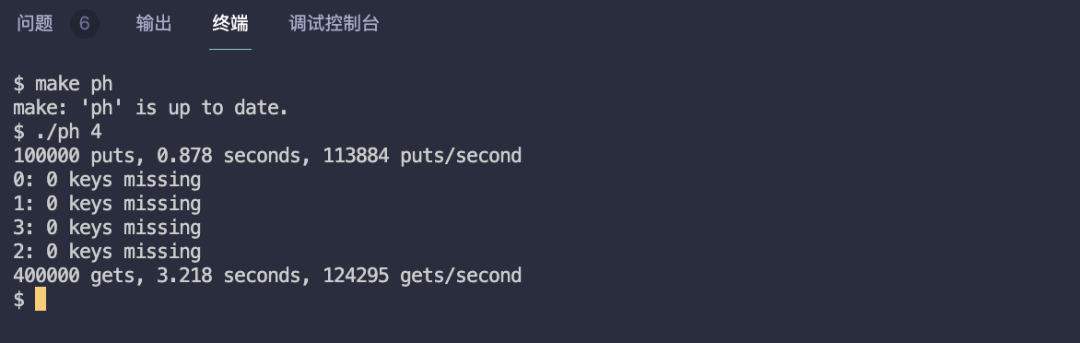
Test passed, complete code at: https://github.com/yibaoshan/xv6-labs-2020/commit/91ab33bdcd4379ae1f1931fdc577846aa870cc9a
Barrier (Moderate)
In this assignment, you’ll implement a barrier: a point in an application at which all participating threads must wait until all other participating threads reach that point too. You’ll use pthread condition variables, which are a sequence coordination technique similar to xv6’s sleep and wakeup.
Implement a “barrier”: all threads must wait at this synchronization point until all threads reach this point before they can continue executing.
This is another easy task; open the notxv6/barrier.c file.
notxv6/barrier.c
static void
barrier()
{
// YOUR CODE HERE
//
// Block until all threads have called barrier() and
// then increment bstate.round.
//
  pthread_mutex_lock(&bstate.barrier_mutex);

  bstate.nthread++;

if (bstate.nthread >= nthread) {
    bstate.round++;
    bstate.nthread = 0;
    // Wake up all waiting threads
    pthread_cond_broadcast(&bstate.barrier_cond);
  } else {
    // Wait for other threads
    pthread_cond_wait(&bstate.barrier_cond, &bstate.barrier_mutex);
  }

  pthread_mutex_unlock(&bstate.barrier_mutex);
}
<span>make barrier</span> to compile the single file, then execute <span>./barrier 4</span> to see the results.
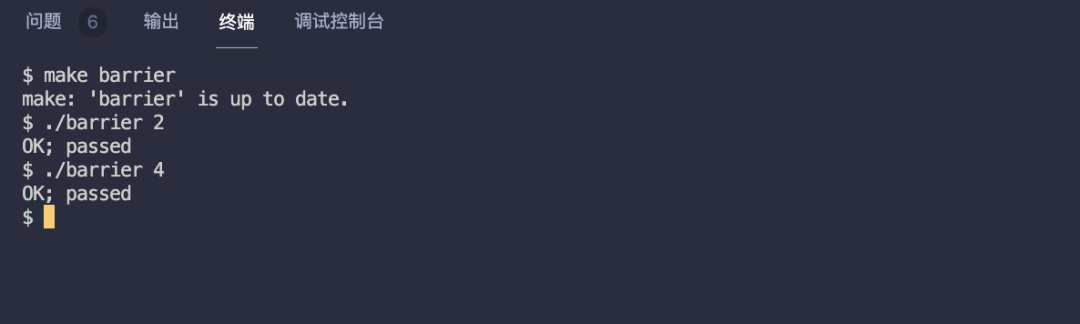
Test passed, complete code at: https://github.com/yibaoshan/xv6-labs-2020/commit/890a2ee8cba5c98dfbd73df32bd80cd11ed974c4
References
- CS Self-Learning Guide: https://csdiy.wiki/%E6%93%8D%E4%BD%9C%E7%B3%BB%E7%BB%9F/MIT6.S081/
- Wings: https://blog.wingszeng.top/series/learning-mit-6-s081/
- Miigon: https://blog.miigon.net/categories/mit6-s081/
- Zhihu Column “28 Days to Quickly Master MIT 6.S081 Operating Systems”: https://zhuanlan.zhihu.com/p/632281381