Author
1
Basic Product Setup
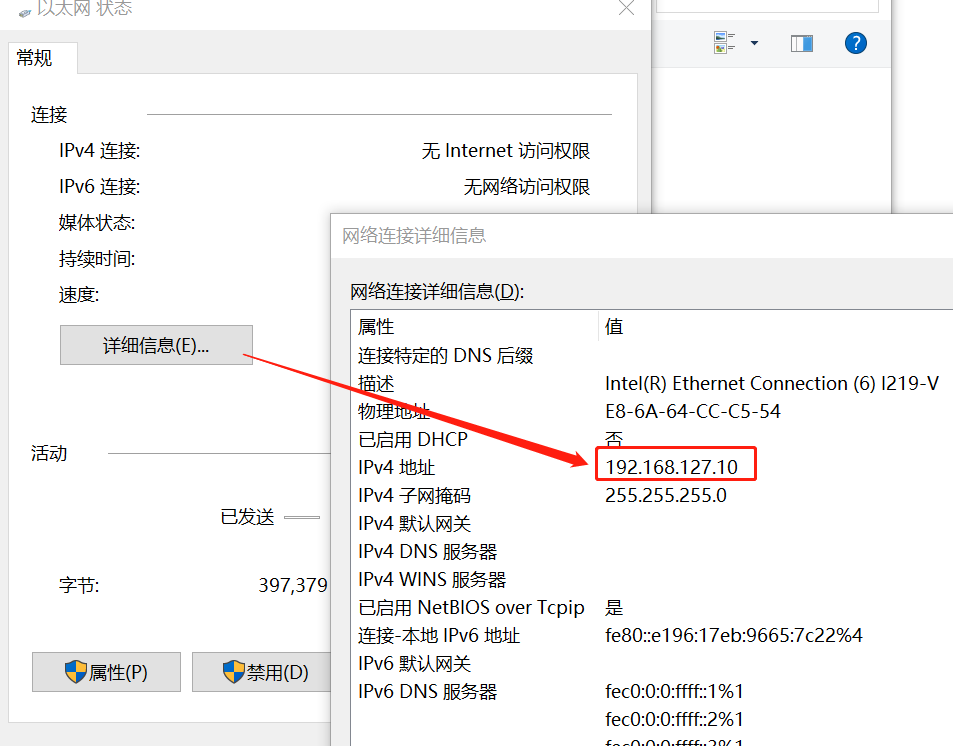
1. To log into the gateway’s configuration page, you need to change your computer’s local network card IP address to 192.168.127.X
The default factory IP address of the MGate 5121 is 192.168.127.254/24
The gateway’s default Ping service is disabled, so the factory-set IP address cannot be pinged, as shown in the image below. Set the computer’s IP address:
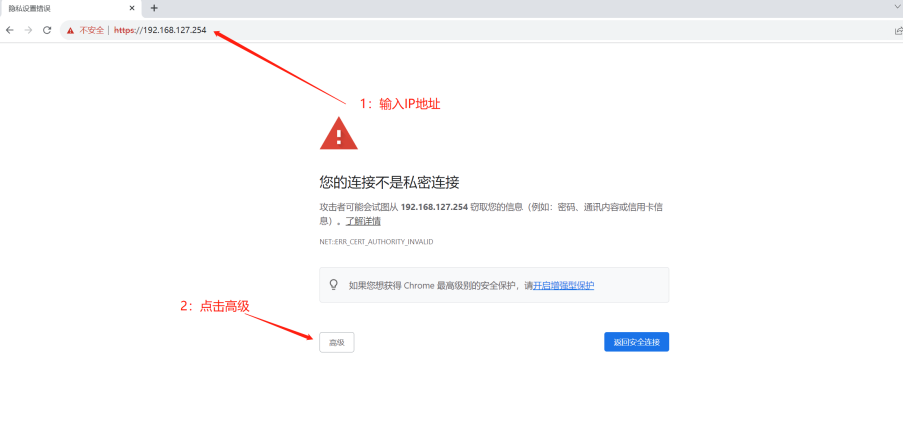
2. Enter the IP address of the MGate 5121 in the browser. The security settings of Google Chrome will display as follows
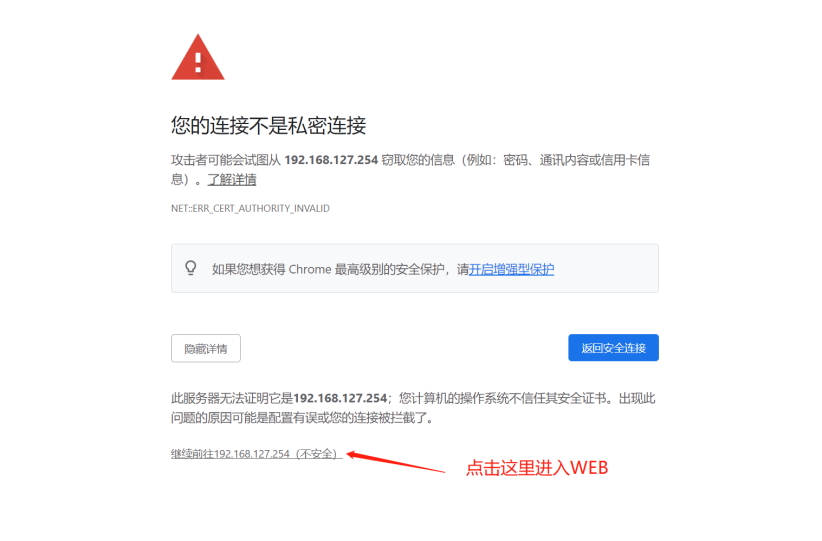
3. Click to continue to access
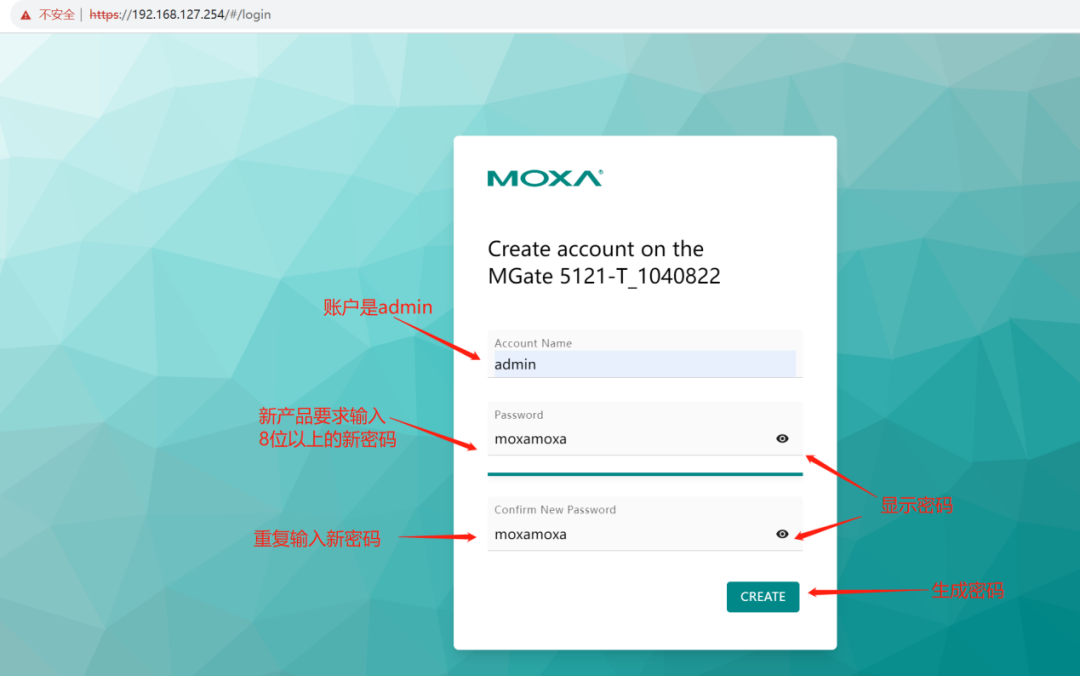
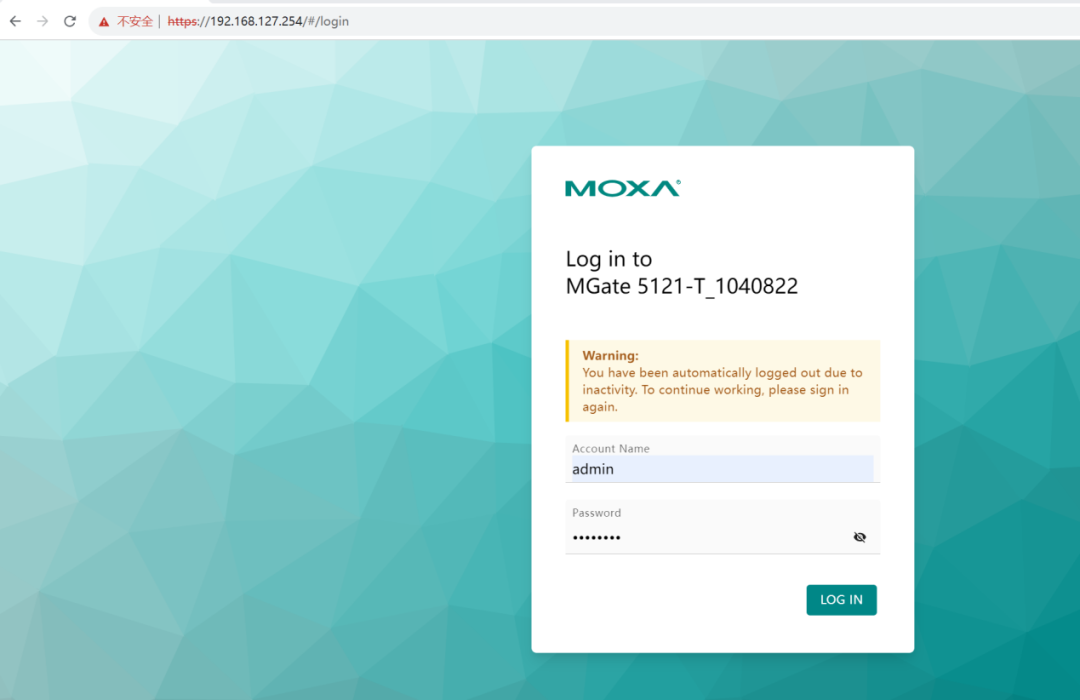
4. The default username for first-time login is admin, and you need to set a new password
5. After setting the new password, log in to the configuration page using the new password
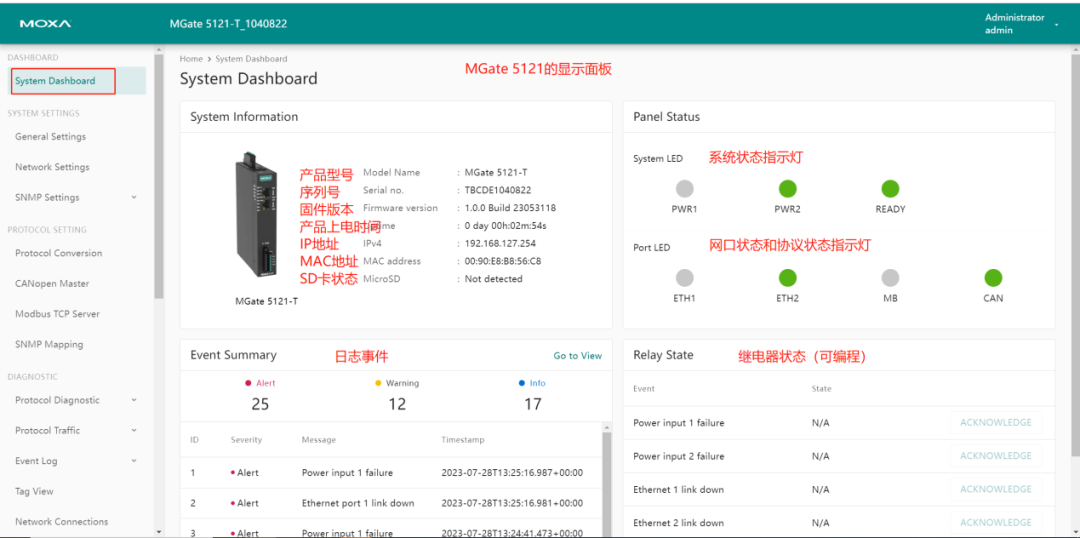
6. After logging in, you can see the device control panel as shown below:
7. If you need to enable the Ping function, you can set the gateway according to the following page
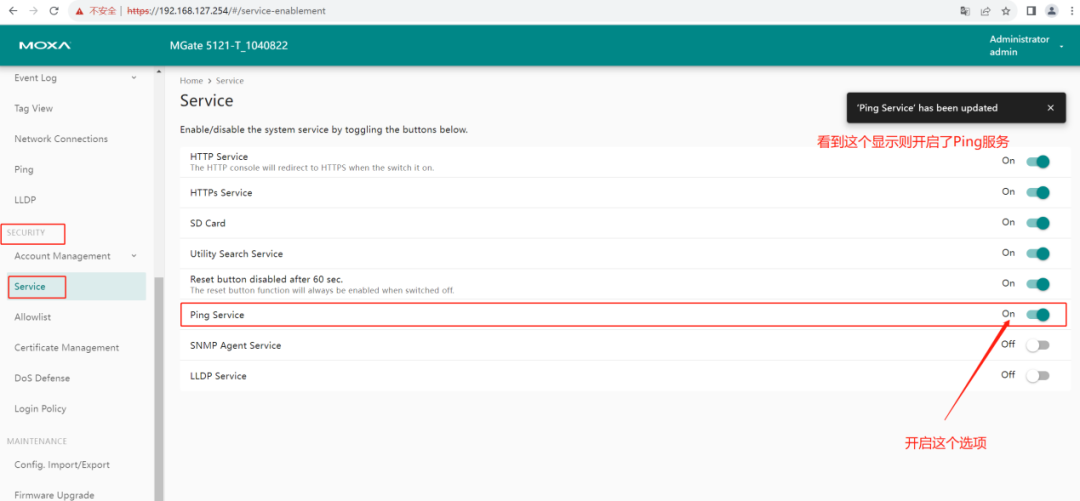
8. After setting, test the Ping of the gateway’s IP address

9. Set the IP address of the MGate 5121 (it is recommended to set the IP address after configuring the Modbus and CANopen parameters)
This IP address is for the Modbus TCP protocol device and is also the IP address for accessing the gateway’s web page.
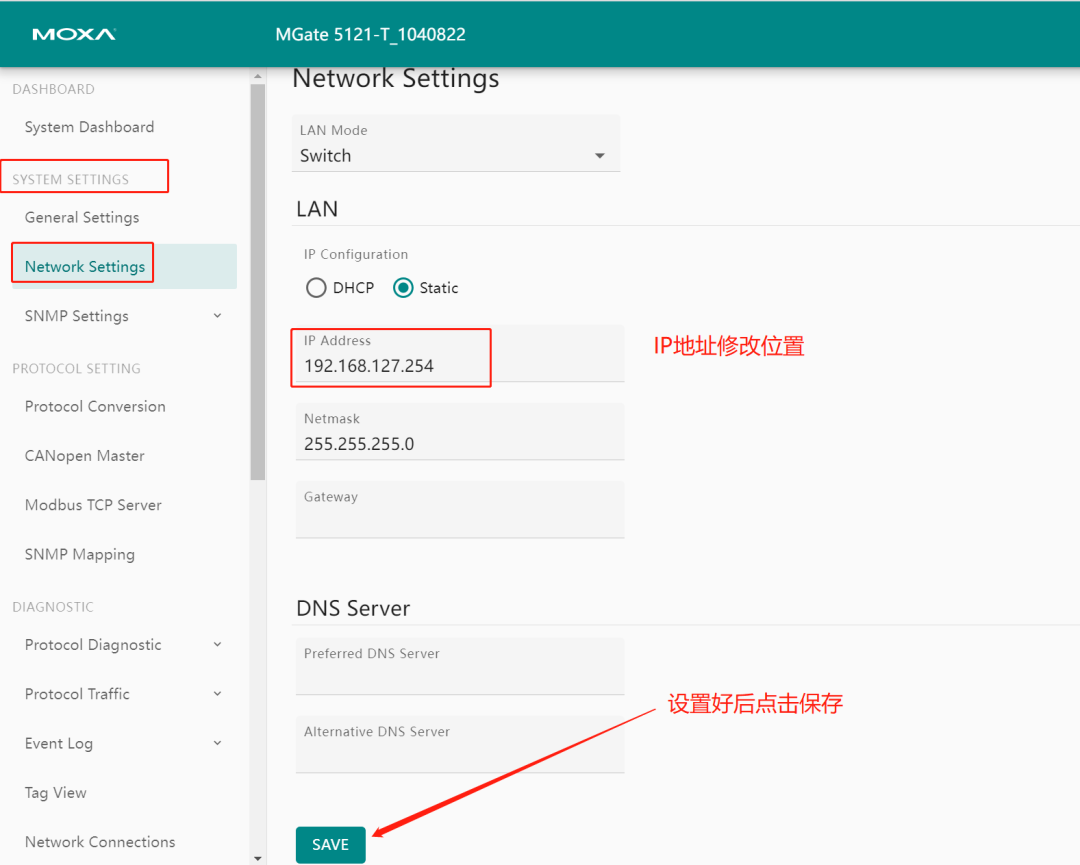
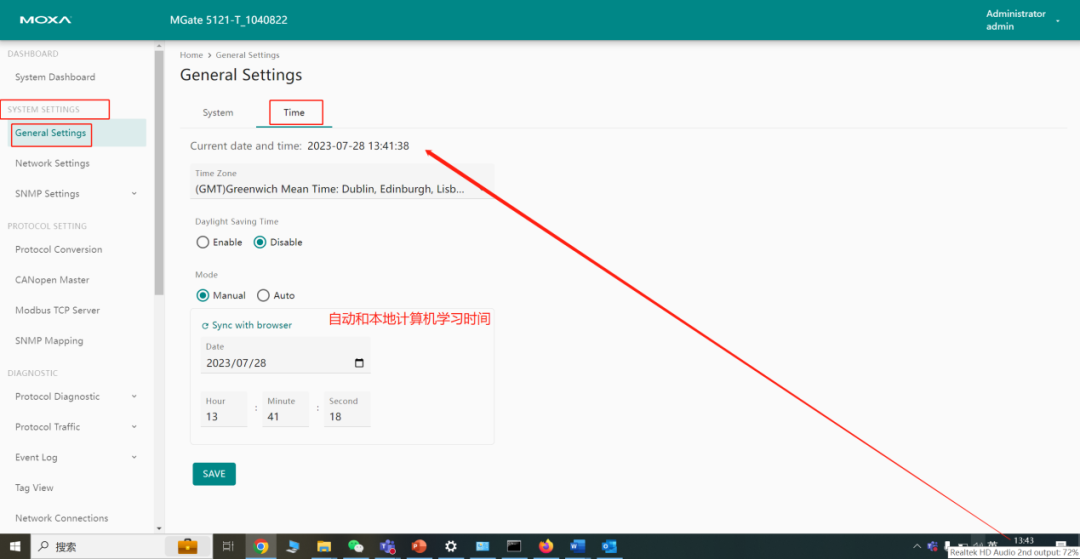
10. Set the system time of the MGate 5121 (to facilitate logs corresponding to specific events), and click SAVE to save
2
CANopen Protocol Settings
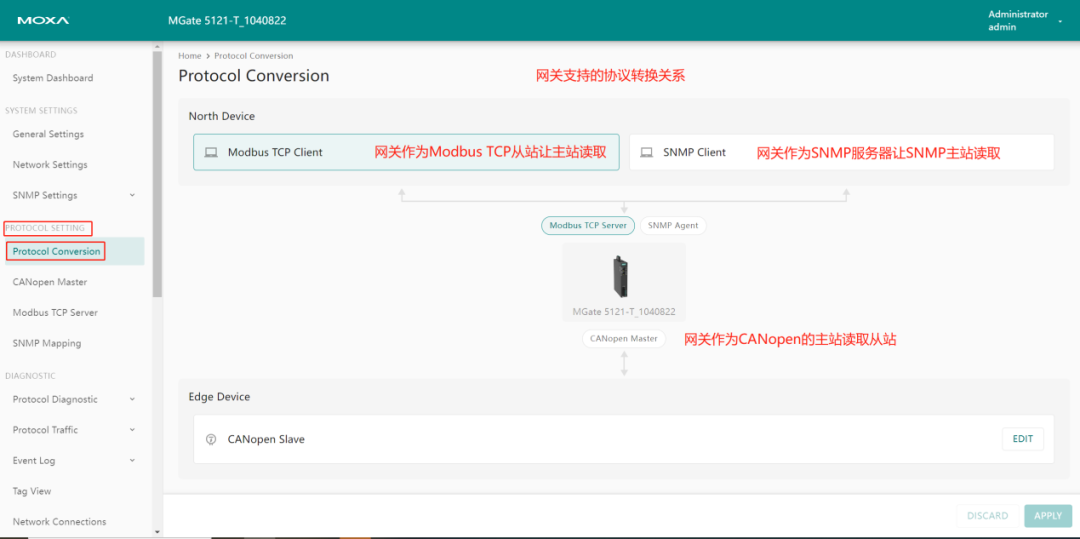
1. Click on Protocol Conversion to view the protocol conversion architecture, as shown in the image below. The MGate 5121 acts as a CANopen Master to read data from slaves and convert it to Modbus TCP slave data for the Modbus TCP master to read
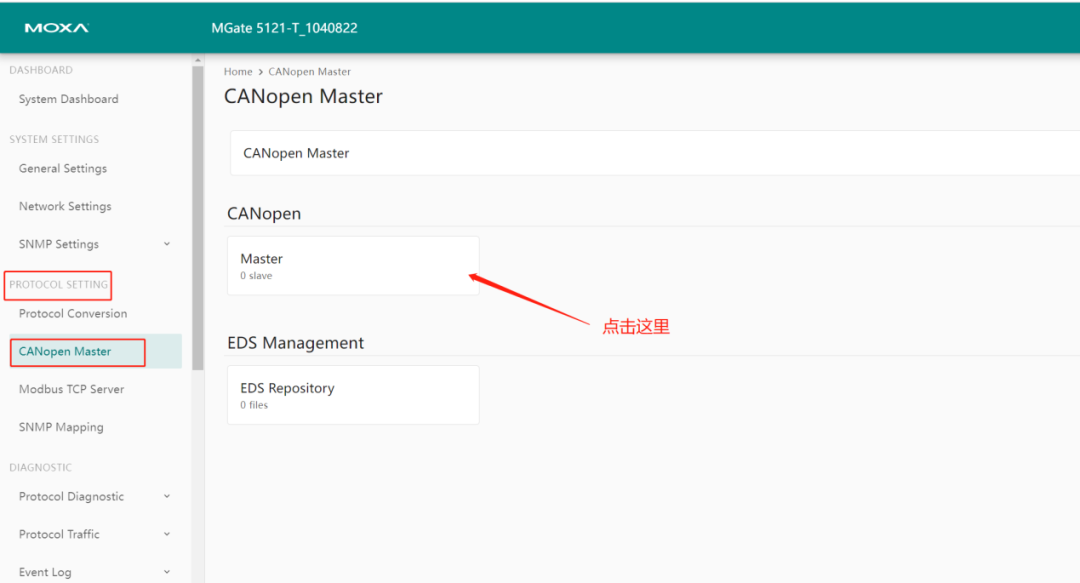
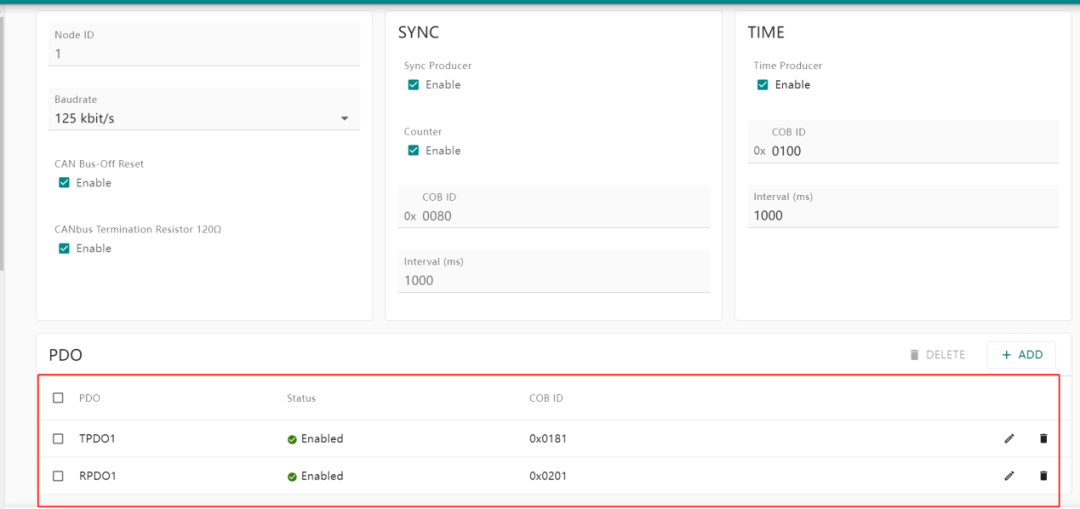
2. Set the CANopen Master parameters
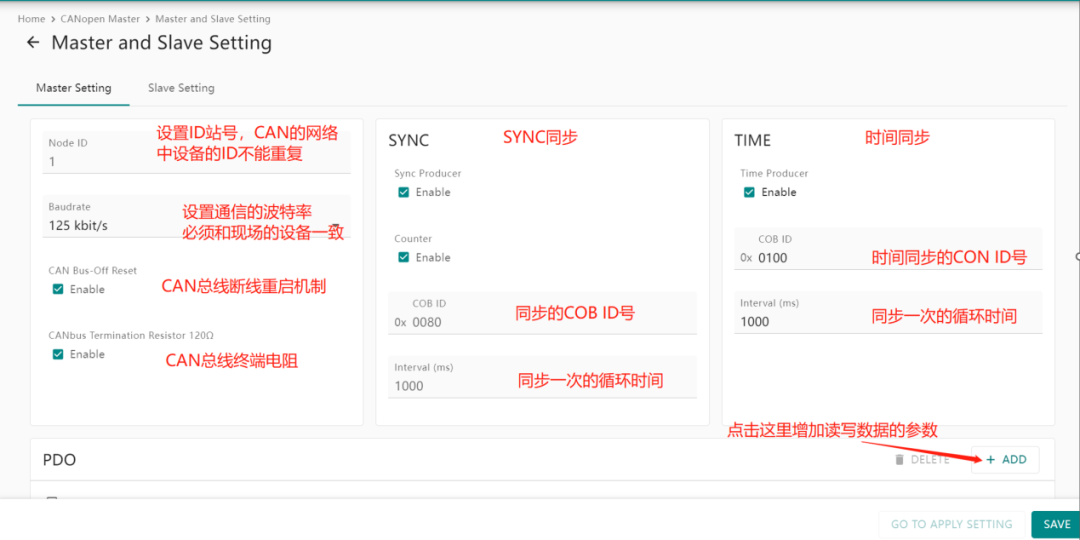
3. The basic parameters of the CANopen settings page are shown in the image below. Click ADD to add read/write data commands
4. The command setting parameters are shown in the image below
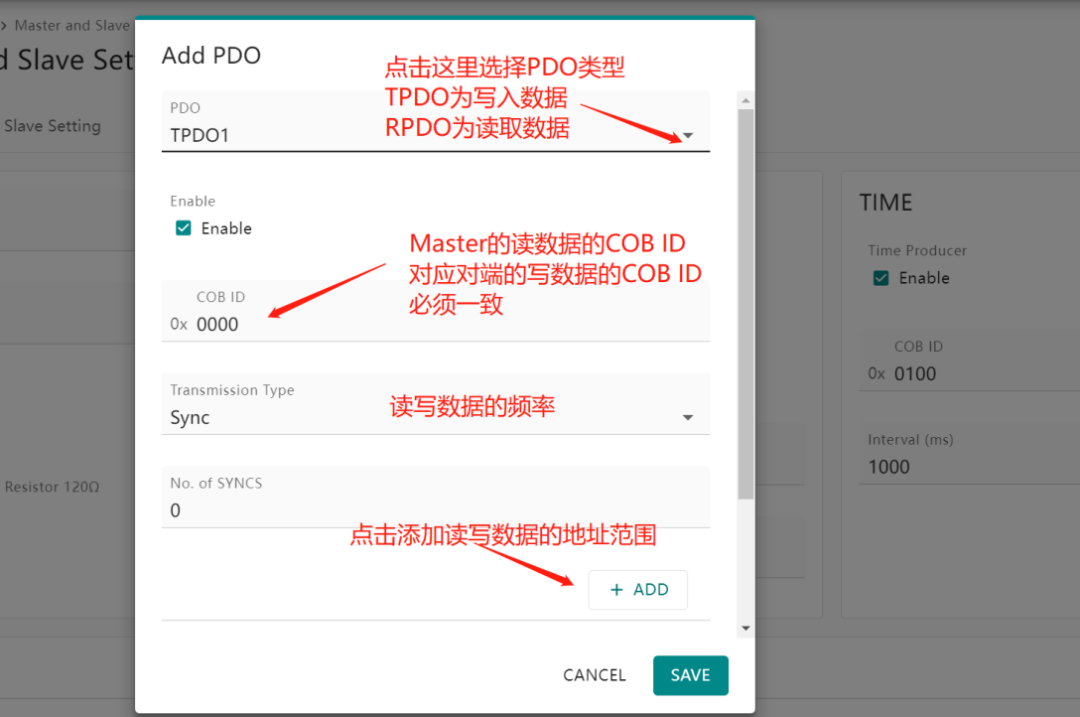
5. Set the following parameters as an example
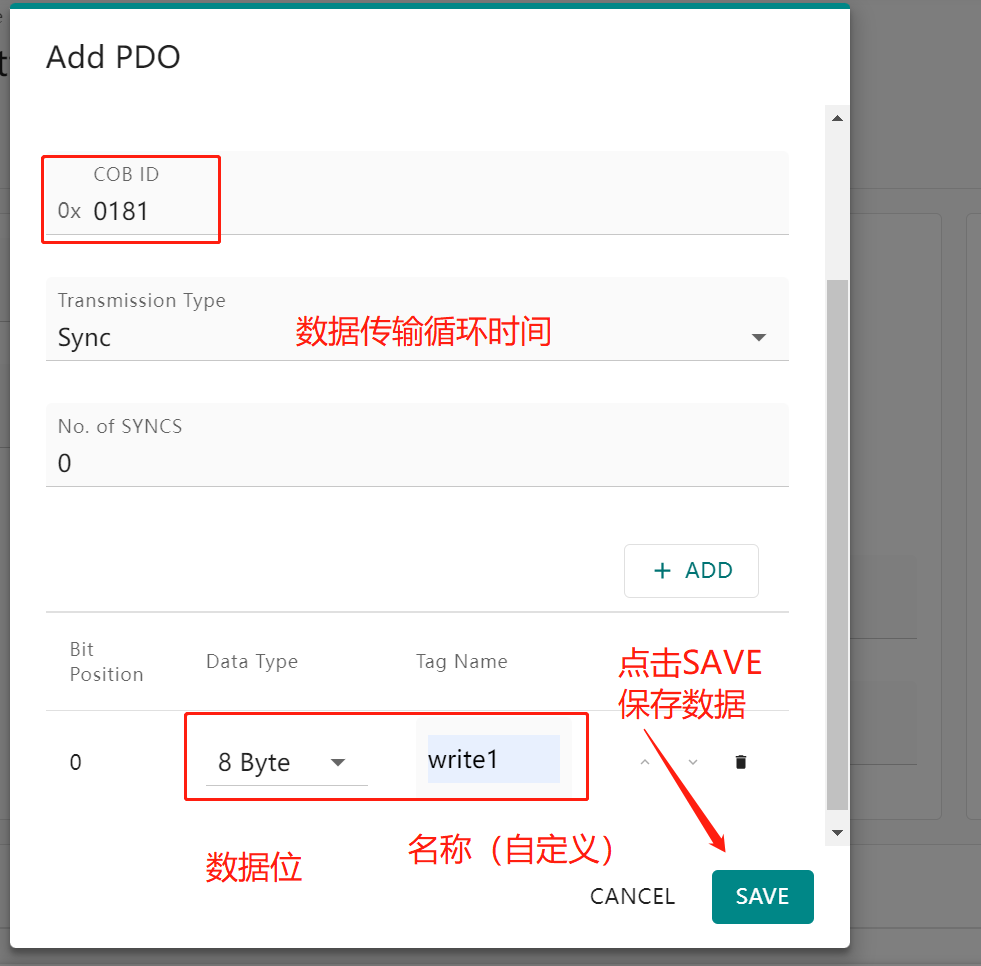
6. Establish a CANopen master station parameter for reading 8 Bytes and writing 8 Bytes, as shown below
7. Follow the three steps below to click and save the parameters


3
Setting Modbus TCP Slave Parameters
1. After setting the CANopen protocol, proceed to configure the Modbus protocol section of the MGate 5121
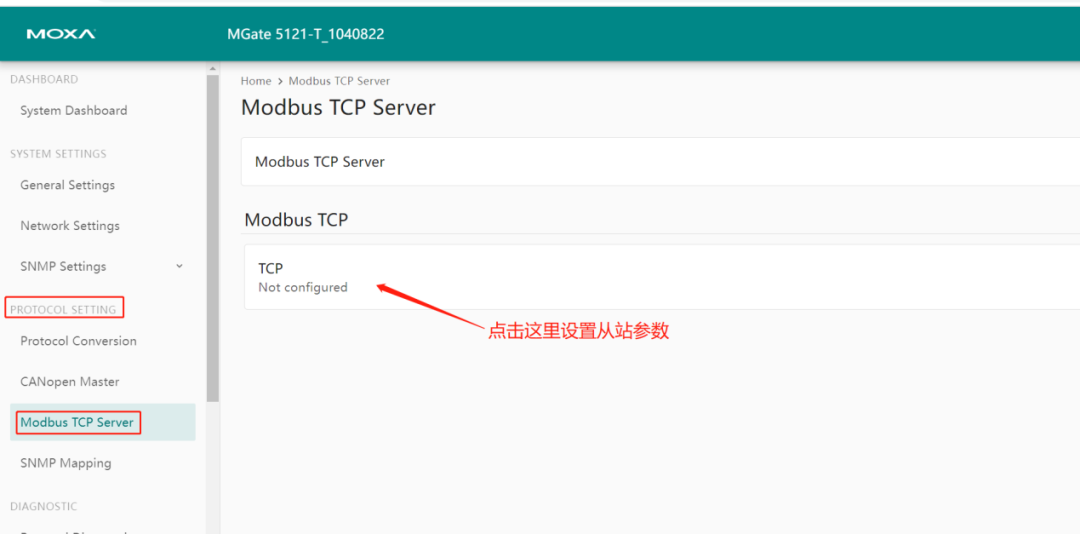
2. Click EDIT to edit the Modbus TCP slave ID and port number, then click ADD TAGS
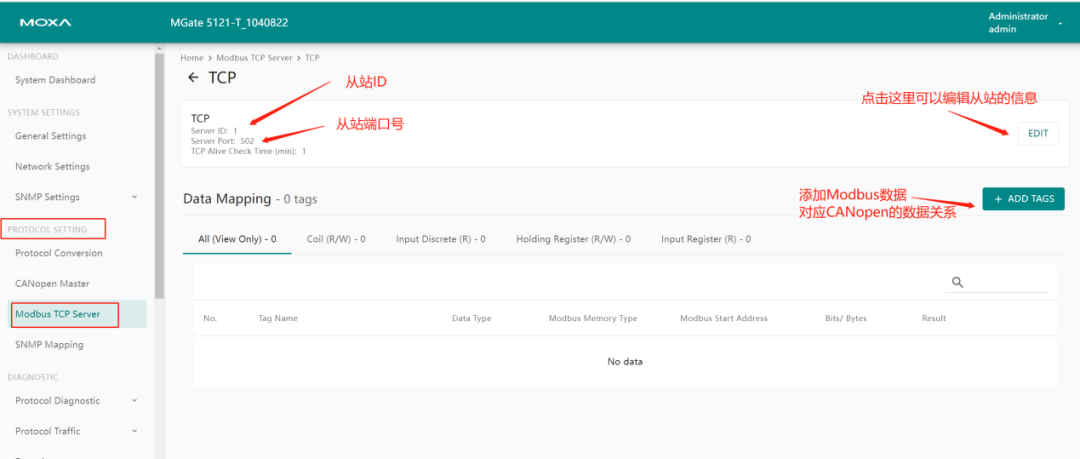
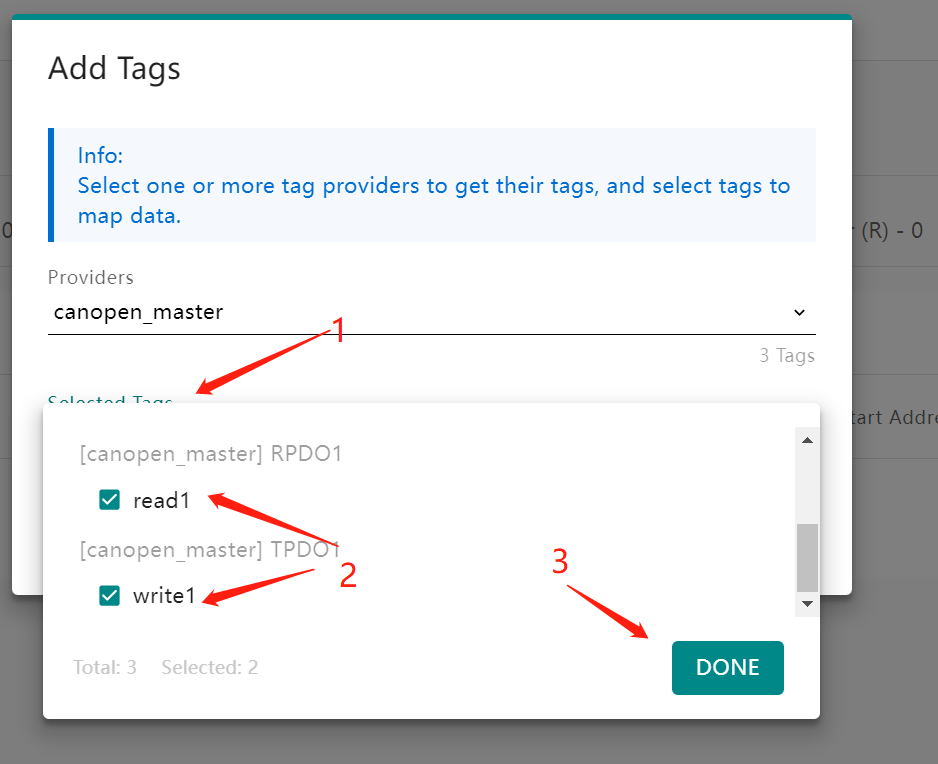
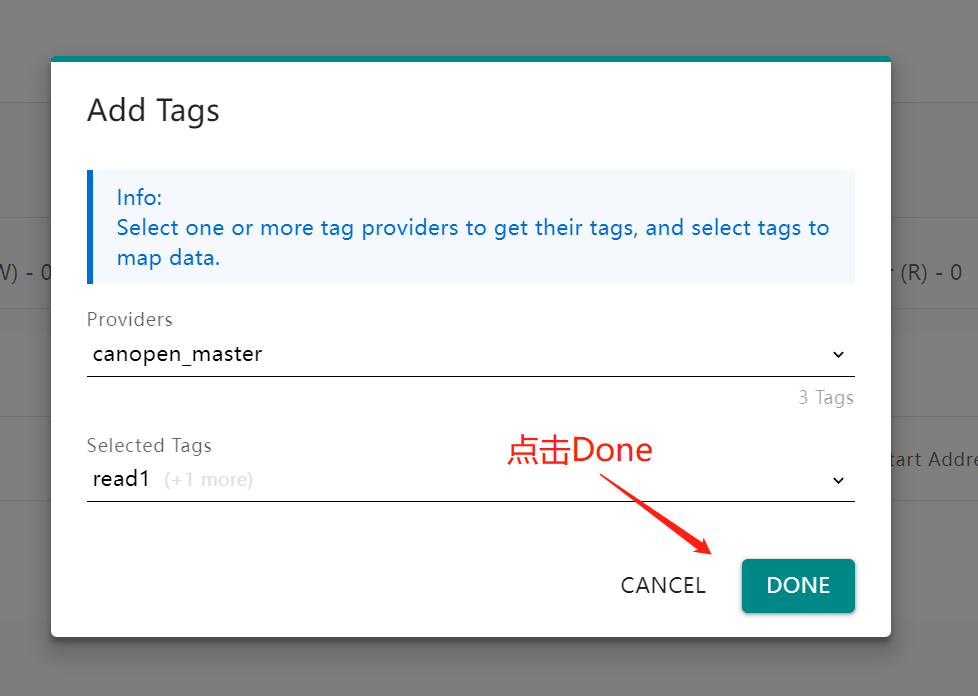
3. Follow the steps below to add
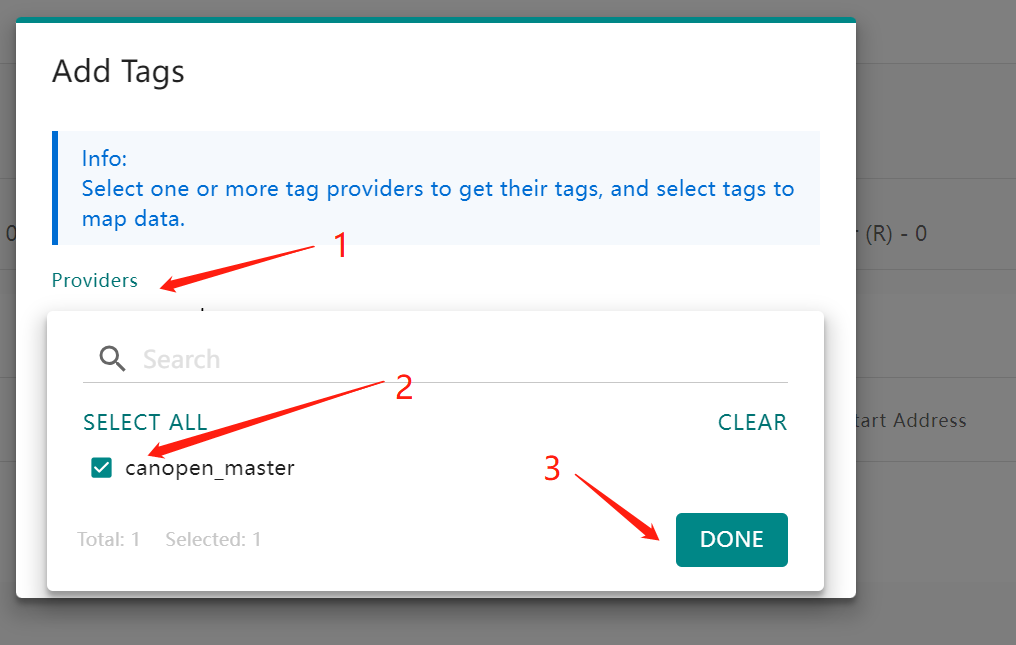
4. Select the corresponding command for the CANopen Master
5. Follow the steps below to save the configuration


6. The read/write address relationship between the corresponding CANopen and Modbus TCP slave is as follows

4
SNMP Service Settings
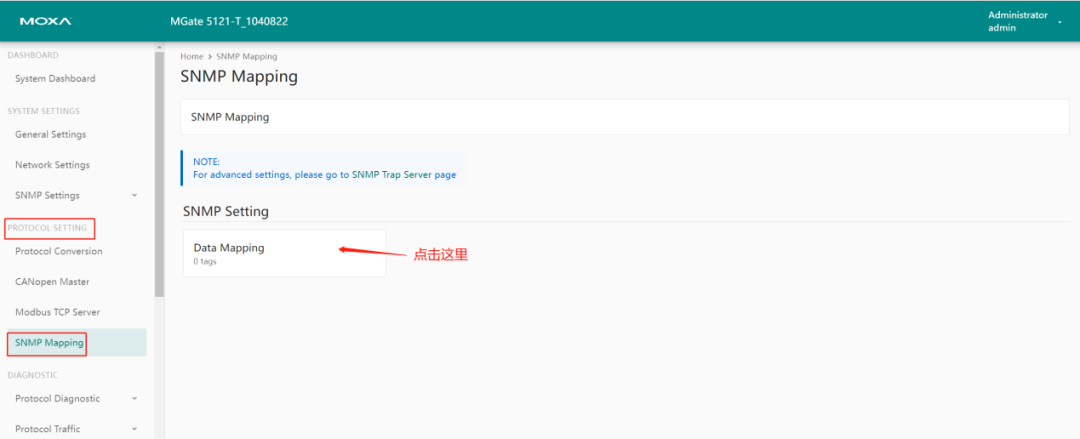
1. The CANopen data read by the gateway can also serve as an SNMP server, allowing the SNMP master to read it
In SNMP Mapping, click Data Mapping
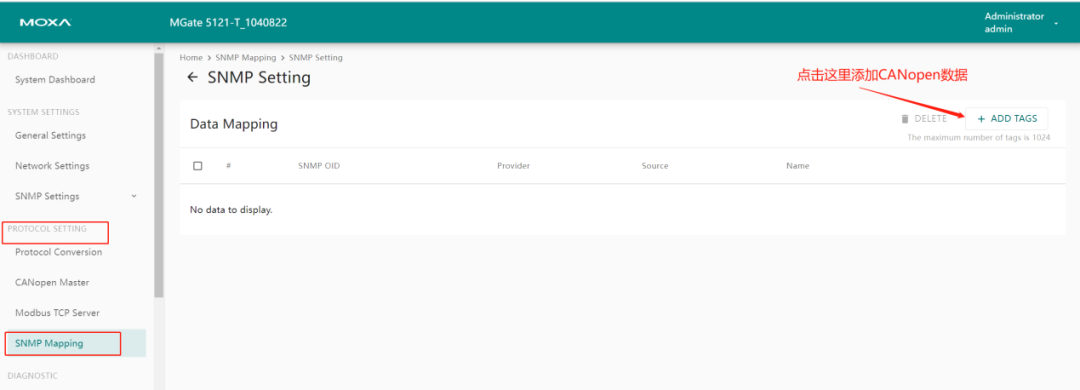
2. Set according to the steps below

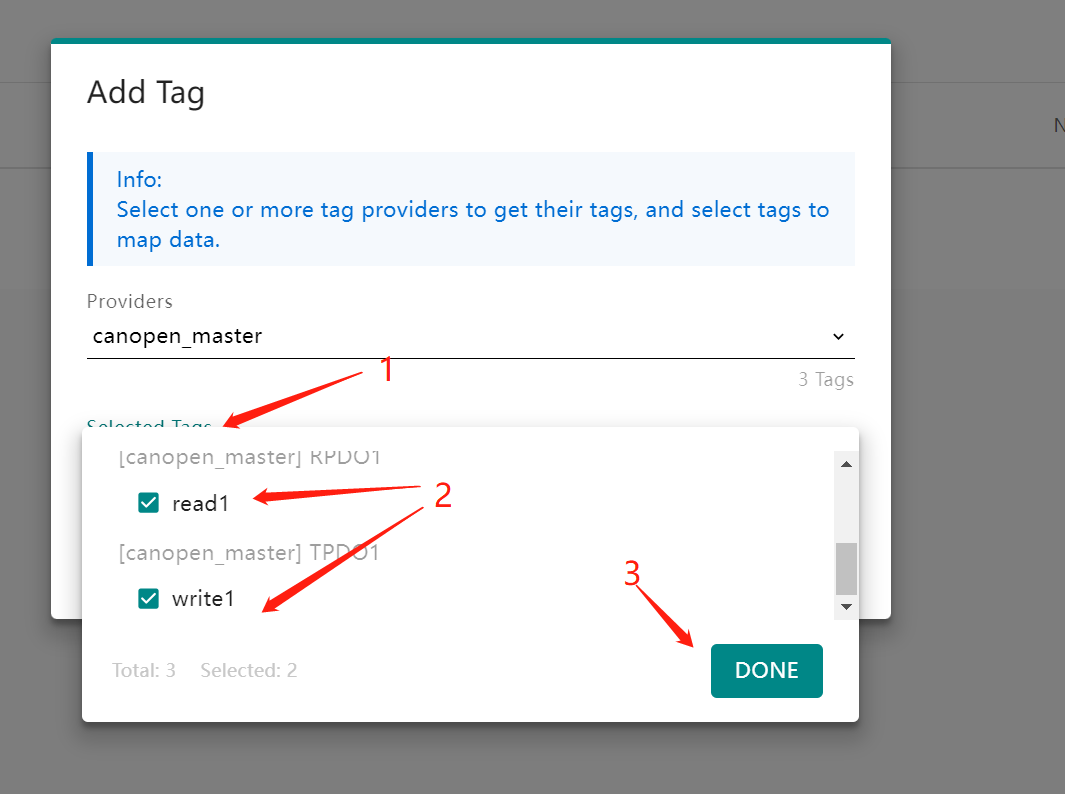
3. Select the corresponding command for the CANopen Master
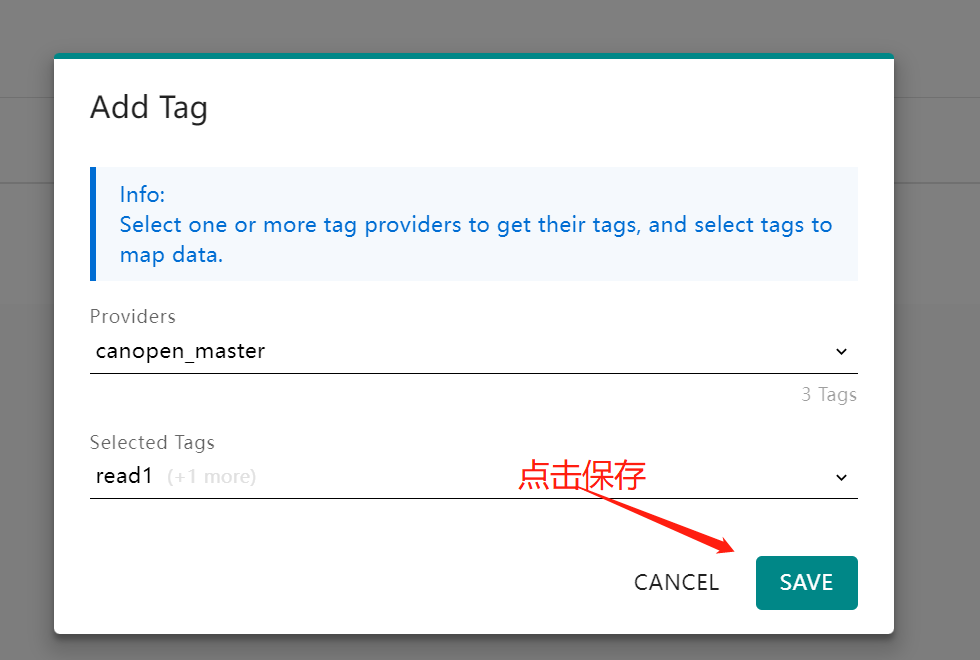
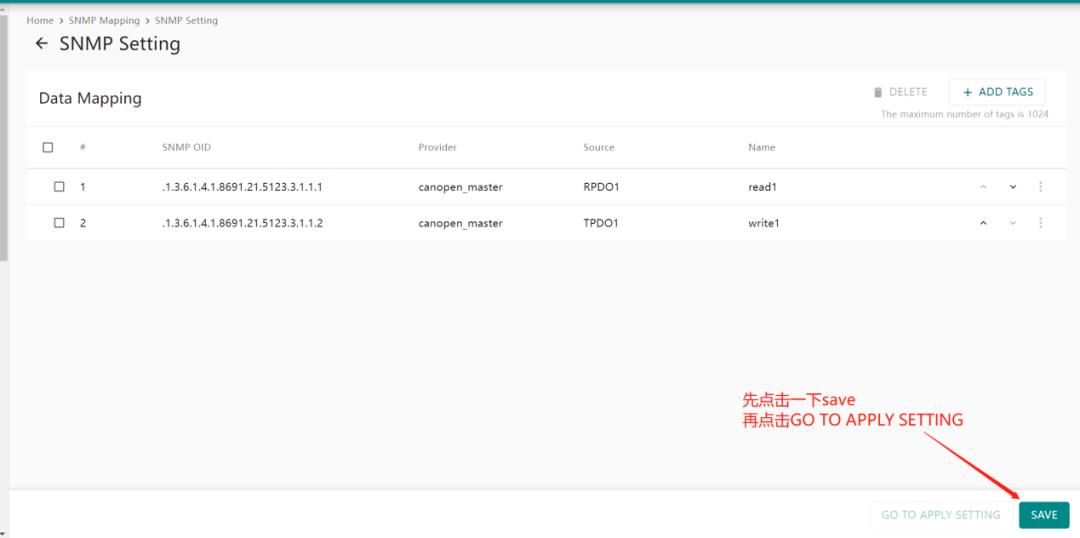
4. Click SAVE to save
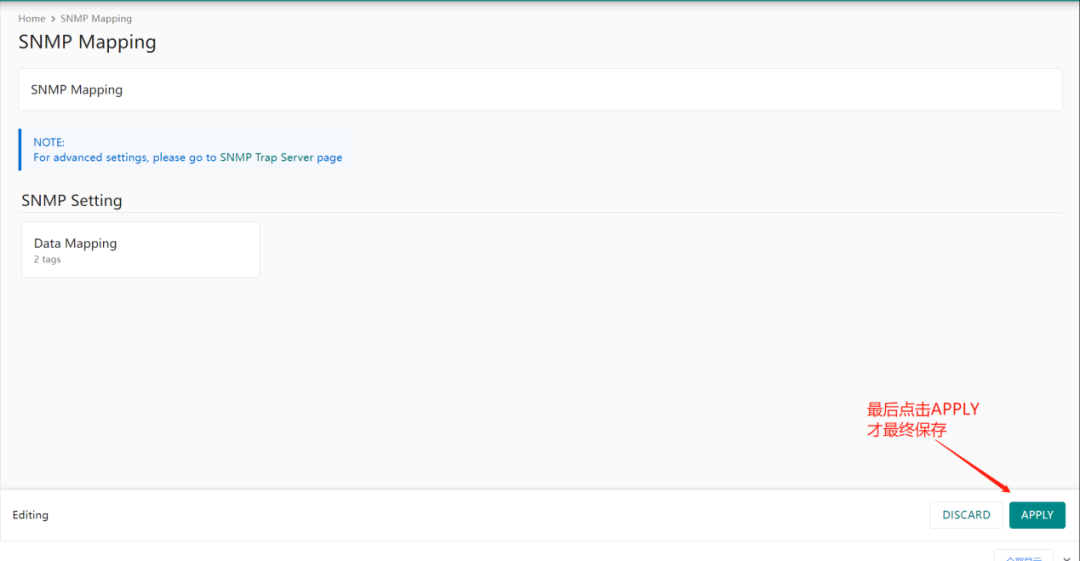
5. After setting, follow the three steps below to save the configuration
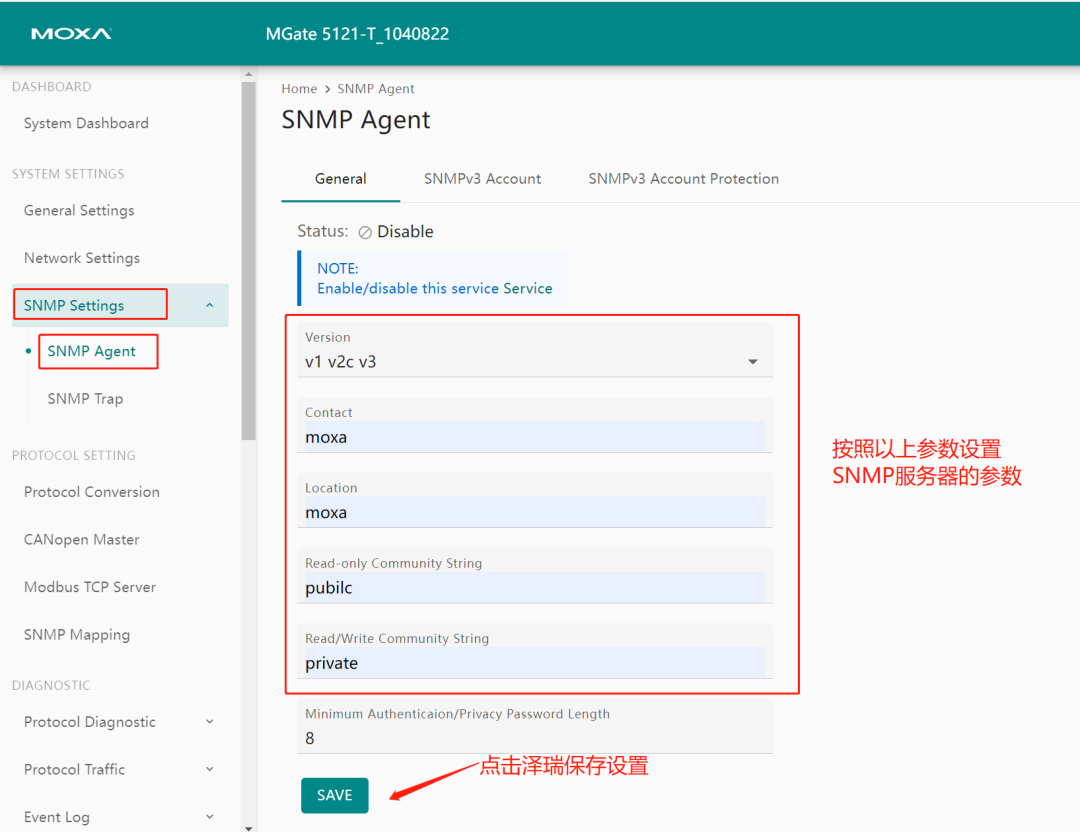
6. After completing the configuration, set the parameters for the gateway to act as an SNMP server
5
Protocol Diagnostic Tool Introduction
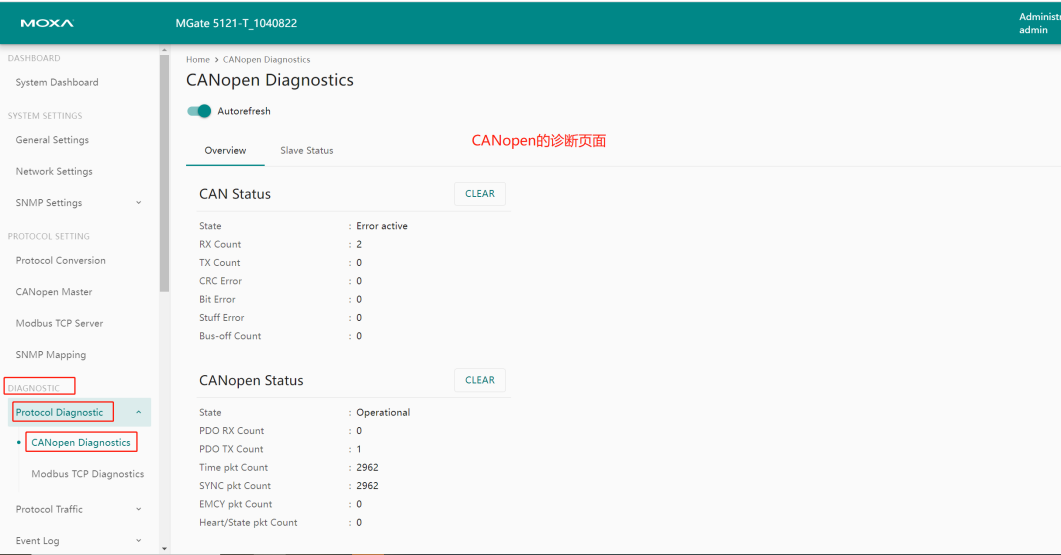
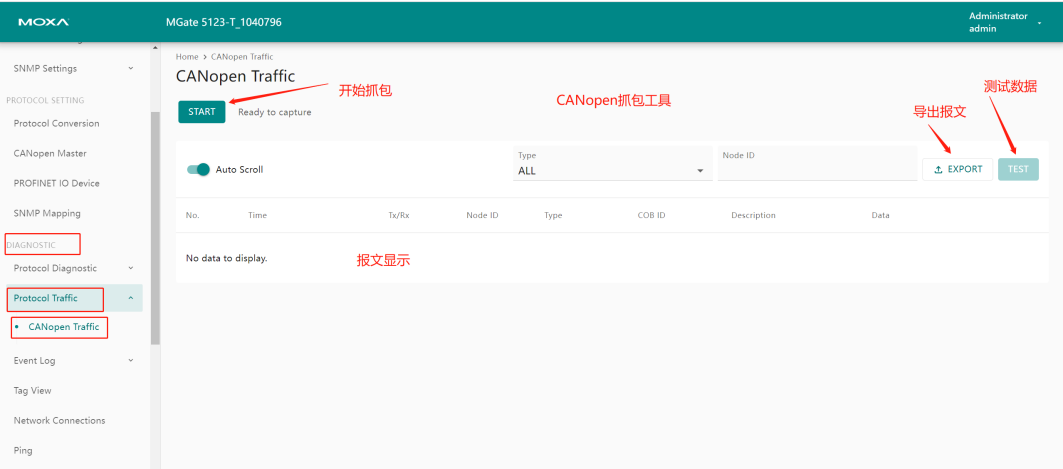
1. During actual communication, you can diagnose the communication situation using the following tools. Below is the diagnosis for the CANopen protocol
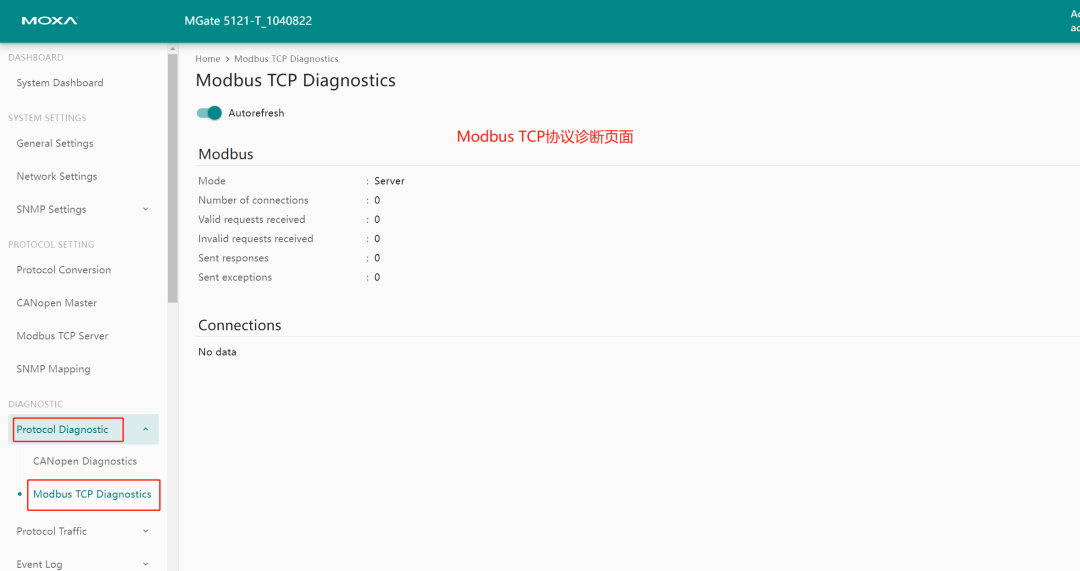
2. Modbus protocol diagnosis
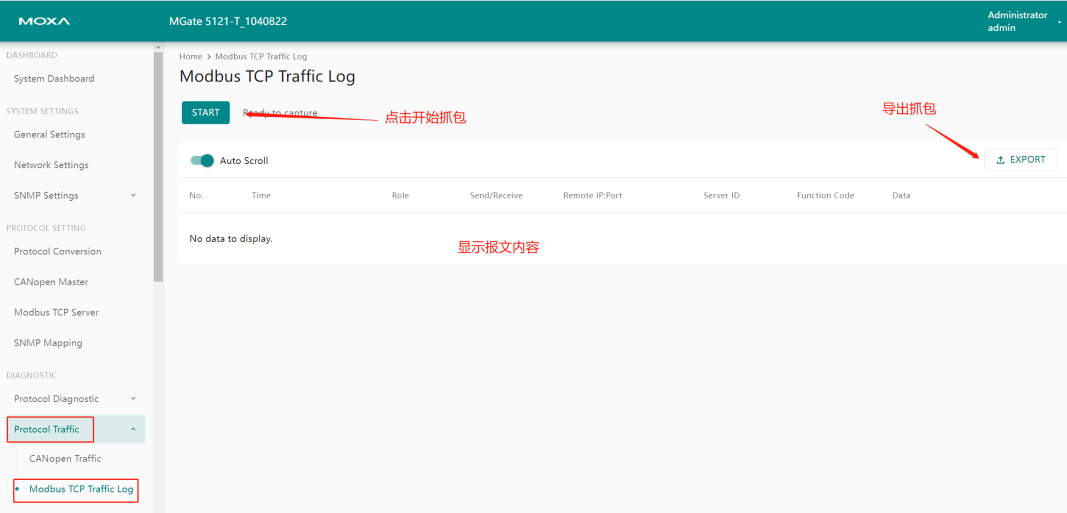
3. Modbus TCP message viewing
6
Import and Export Configuration
1. Click on Config.Import/Export on the left side
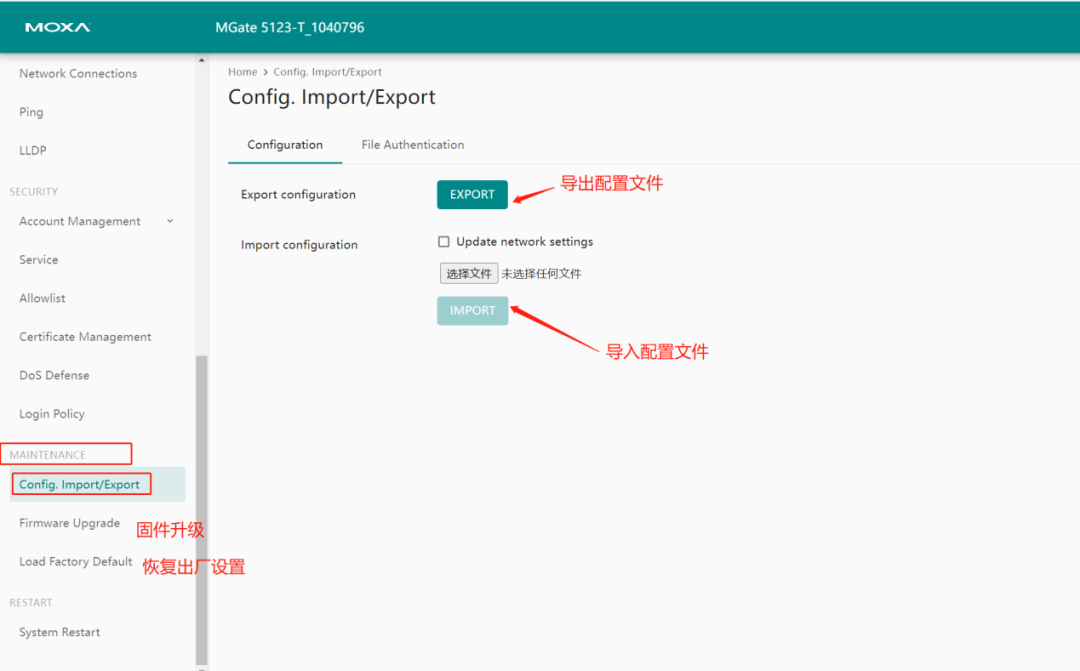
2. The format of the exported configuration file is as follows

Author: Lucien