LoRaWAN has been quite popular for a while, but it seems to be in a lukewarm state now, typically praised but not widely adopted!
Aside from the technology itself, there are many factors involved in making a product widely adopted. Cost is of course one aspect; it must be affordable, easy to use, and… there are so many requirements! Take LoRaWAN for example: to master LoRaWAN, there are many LoRa node products or modules available on the market at low prices. However, the most important component, the LoRa gateway, typically costs over 2000 RMB, which is a bit awkward!
As a result, various low-cost LoRa gateway solutions have emerged. C. Pham has built a low-cost single-channel LoRa gateway using RPI and various inexpensive LoRa modules (most based on SX1272/SX1276). Its performance is mediocre, yet eager buyers have already begun to cheer.
However, this solution has limitations; first, the single-channel restricts its application scope: it is okay for a demo, but it cannot convince customers! Secondly, it cannot fully support LoRaWAN and is not suitable for high-end applications.
The RAK831 PILOT GATEWAY is a LoRa gateway product launched by Shenzhen RAK Wireless Technology Co., Ltd., based on SX1301. Its performance is identical to foreign products based on SX1301, but it is much cheaper, making it a top choice for mastering LoRaWAN.
The PILOT GATEWAY kit evaluated this time includes the gateway, a matching power supply, an antenna, and a GPS module. Simple configuration is all that is needed to put it into practical use.

This is the LoRa gateway, which contains the RAK831 module, an adapter board, and an RPI3. The shell is made of aluminum alloy, making it very lightweight yet sturdy, with all the main interfaces exposed. The shell feels good!
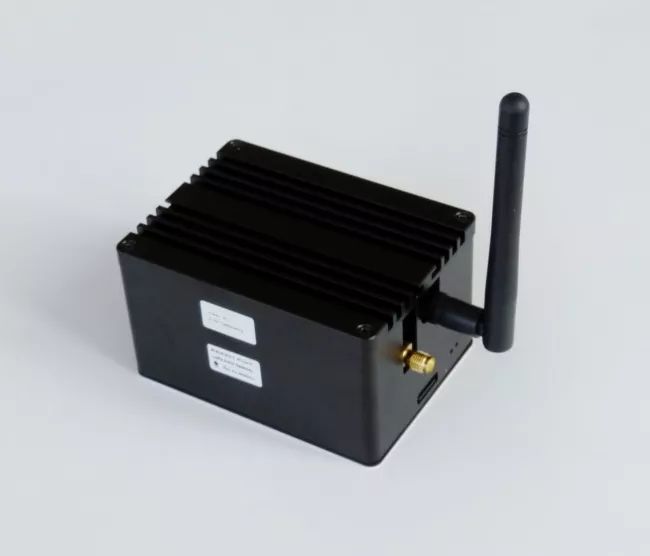
After connecting the antenna, the overall feel is elevated to a new level.
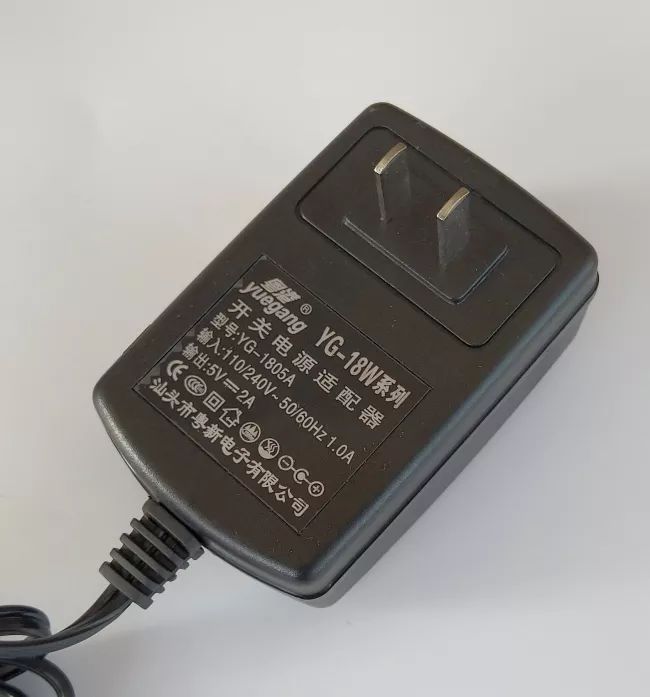
The included power supply meets the standard RPI3 power supply requirements. When the gateway is operational, the module’s peak current may reach up to 700mA, so a 5V/2A supply is essential.
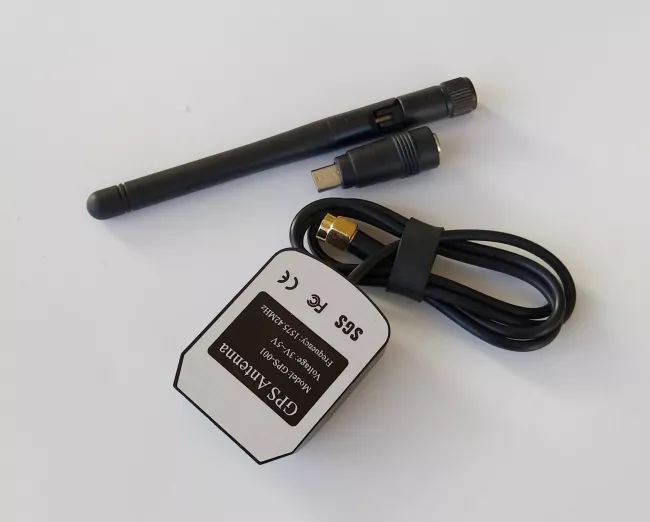
The kit includes one antenna and one GPS module, as well as a DC interface converter, because the output of the power supply is a round port, and this interface is needed to connect to the Micro USB power supply interface. Wouldn’t it be better if a standard RPI3 DC power supply were included?
Inside the product, besides the RPI3, there is also the RAK831 and the adapter board. Let’s take a look inside; seeing is believing!
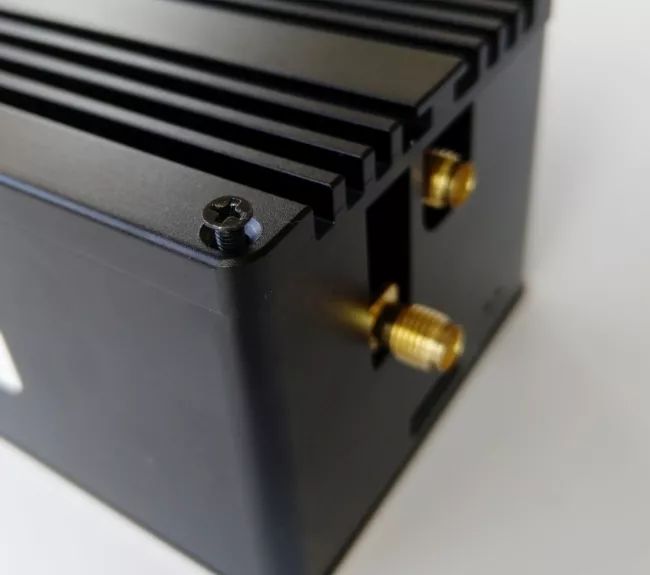
A close-up during the disassembly process, taking a closer look at the workmanship and texture of the outer casing, which is indeed well made.
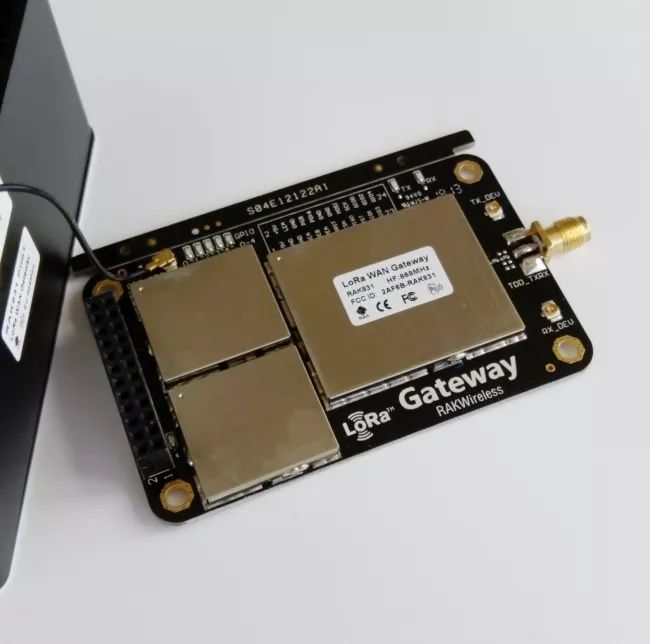
This is the RAK831 gateway module, where the main components are protected by a metal shield, which can also shield external signal interference.
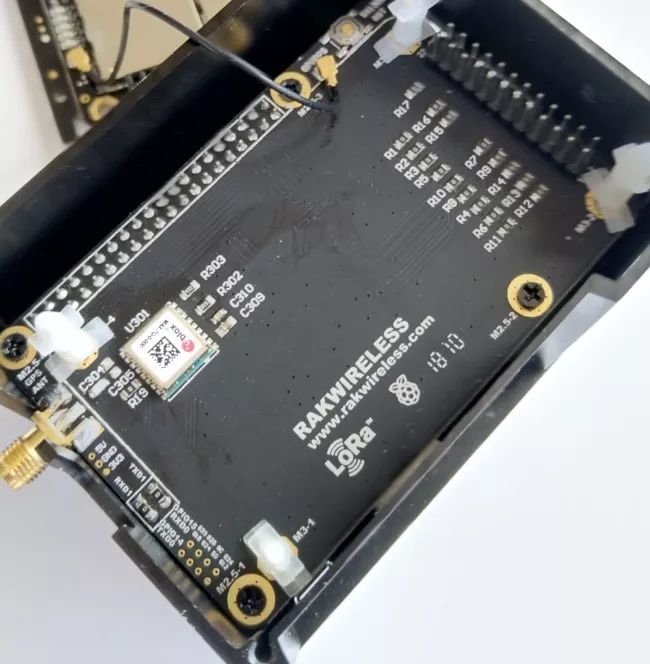
This is the adapter board, which connects the GPIO interface of the RPI3 to the RAK831.
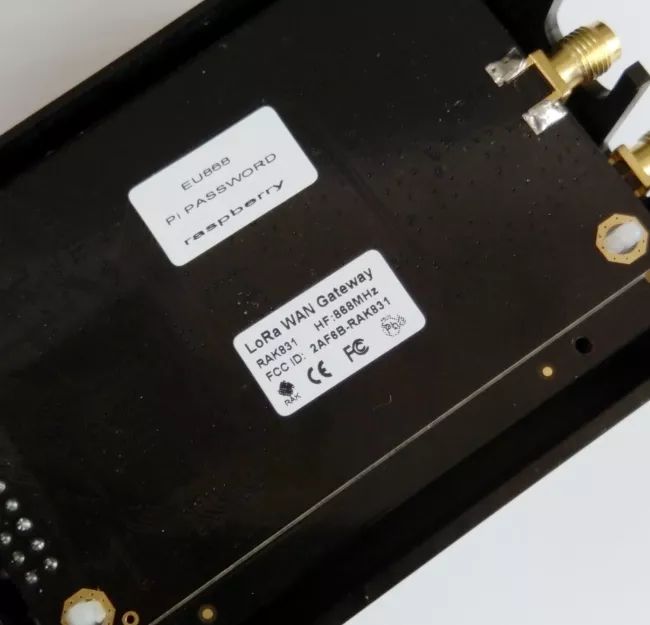
This kit operates at a frequency of 868 MHz, with options for other ISM bands like 433 and 915 MHz available. Later, we will use a LoRa mote operating on the same frequency band to communicate with the device and connect to TTN, achieving complete LoRaWAN communication.
During the unboxing and disassembly process, we can clearly see the product design and the developer’s attitude towards the product. The RAK831 module is neatly designed, with reasonable wiring and good soldering craftsmanship, free from burrs, making it look more like a piece of art once assembled.
The RAK831 uses the SX1301 chip from Semtech.
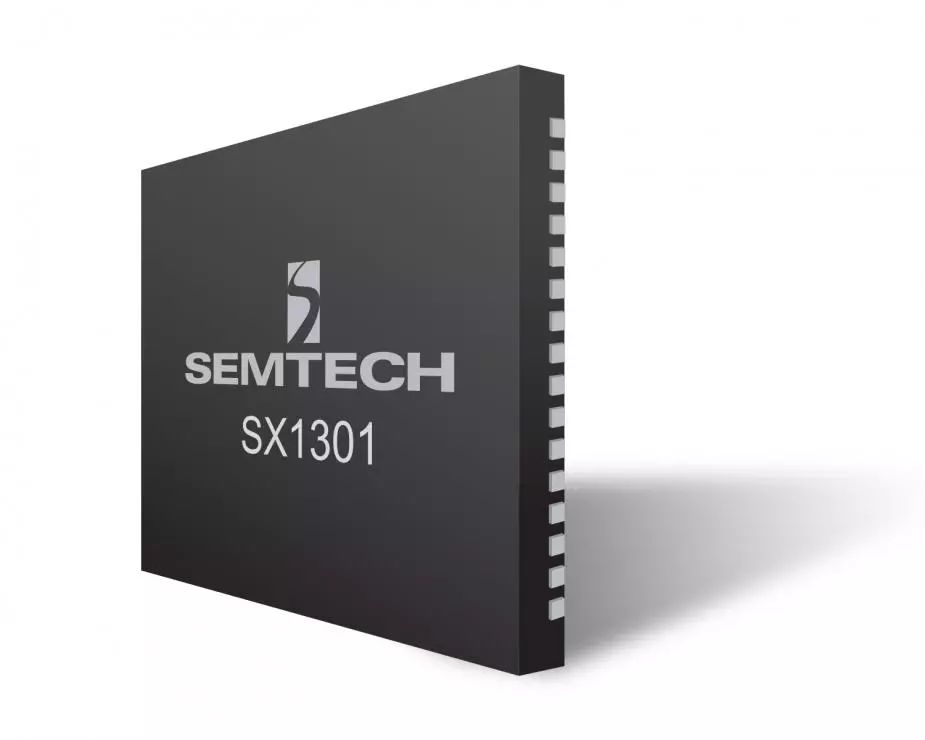
The SX1301 chip integrates a LoRa concentrator IP core, featuring a massive digital signal processing engine designed to provide breakthrough gateway capabilities for global ISM bands. Its main features include:
• Sensitivity of the X1257 Tx/Rx front end up to -142.5 dBm
• 70 dB CW interference suppression at 1 MHz offset
• Capable of operating with a negative SNR and CCR of up to 9 dB
• Simulates 49x LoRa demodulators and 1x(G)FSK demodulator
• Dual digital TX & RX radio front-end interfaces
• 10 programmable parallel demodulation paths
• Dynamic Data Rate (DDR) adaptation
• True antenna diversity or simultaneous dual-band operation
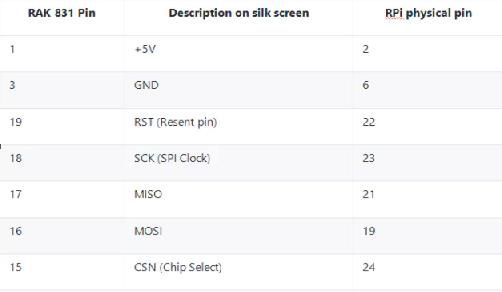
Most existing gateways are based on the SX1301 chip, which communicates with other devices via SPI. This kit uses RPI3, and the connection diagram between the module and RPI3 is as follows:
Next, we will configure the gateway, specifically enabling communication between the RAK831 and RPI3. But before powering on, remember to install the antenna first.
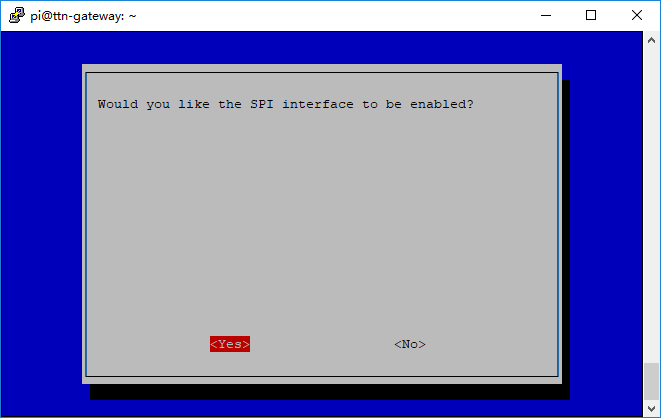
To communicate via SPI, you first need to enable the SPI interface on the RPI3. You can do this using the RPI configuration command raspi-config. After enabling the SPI interface, a reboot is required.
Currently, the main ISPs providing LoRa services are TTN and Thingspeak. Here we will take TTN as an example for configuration.
A typical LoRaWAN communication architecture is as follows:
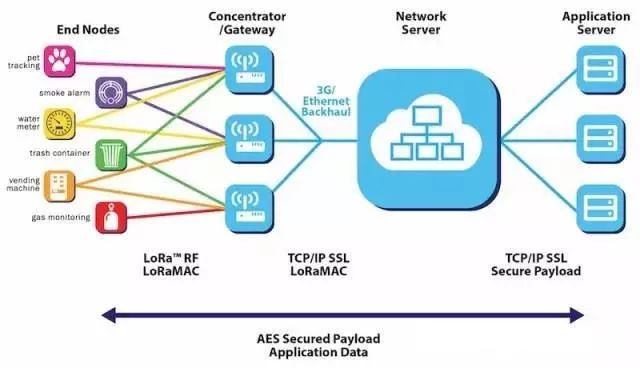
The LoRa network mainly consists of four parts: terminals (which may have built-in LoRa modules), gateways (or base stations), servers, and cloud. The LoRaWAN specification defines three types of devices. All LoRaWAN devices must implement Class A, while Class B and C are extensions of Class A device specifications. The RAK831 acts as a repeater here, forwarding information from nodes to ISPs such as TTN or Thingspeak.
In TTN, you first need to create the corresponding gateway, and since it is configured as a repeater, remember to make the following configurations:
The gateway configuration used in this test is as follows:

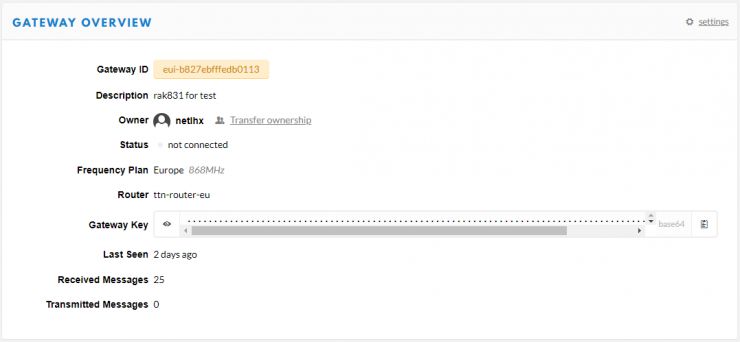
The key parameters mainly include two: one is the communication frequency band, which here is set to 868 MHz; the other is the server to connect to. Since the 868 band has been allocated to ISM in Europe, we will select ttn-router-eu for consistency.
Also, remember the value of eui, as this will be needed when configuring the RAK831. Execute the following command to download the code file to RPI3:
git clone -b spi https://github.com/ttn-zh/ic880a-gateway.git
Modify the configuration file start.sh as follows:
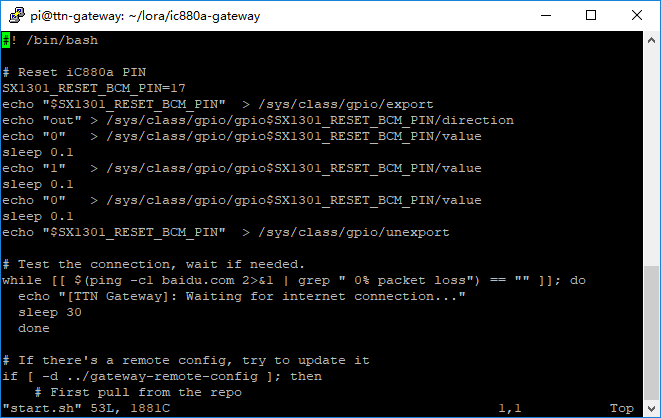
The first parameter is SX1301_RESET_BCM_PIN; from the pin mapping diagram above, we know that RPI3 uses pin 17, so this should be changed to 17. The other parameter is the command for checking network connectivity, which defaults to google.com; here we will change it to baidu.com.
After saving, execute the install.sh script in the directory to start the installation process. The installation process will ask for some specific setting parameters.
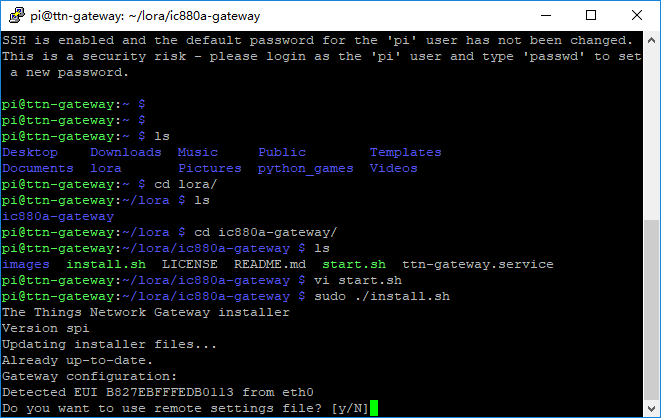
The gateway parameters can be set locally or using a configuration file on a remote network. Here it asks whether to use remote configuration; if remote configuration is used, these setting parameters will be placed on GITHUB for centralized management, but approval from the GITHUB owner is required. If local configuration is used, the parameters will be stored locally; here we choose to save them locally.
Reference settings are as follows:
{
“gateway_conf”: {
“gateway_ID”: “b827ebfffedb0113”,
“servers”: [
{
“server_address”: “router.eu.thethings.network”,
“serv_port_up”: 1700,
“serv_port_down”: 1700,
“serv_enabled”: true
}
],
“ref_latitude”: 50.0822850,
“ref_longitude”: 14.4502592,
“ref_altitude”: 40,
“contact_email”: “[email protected]”,
“description”: “TTN Prague VanCo.cz”
}
}
The two required parameter values are gateway_ID and servers, which must be set according to the actual values.
After the parameter configuration is complete, you can use the start.sh command to start the gateway program.
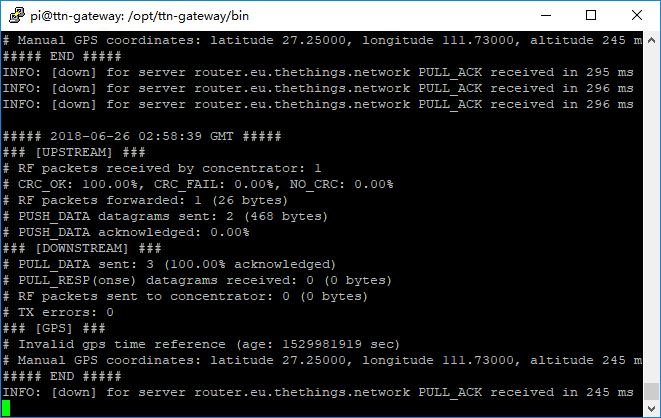
After starting the program, the Raspberry Pi console will display a series of log messages, and the TTN console will also show related connection information, as follows:
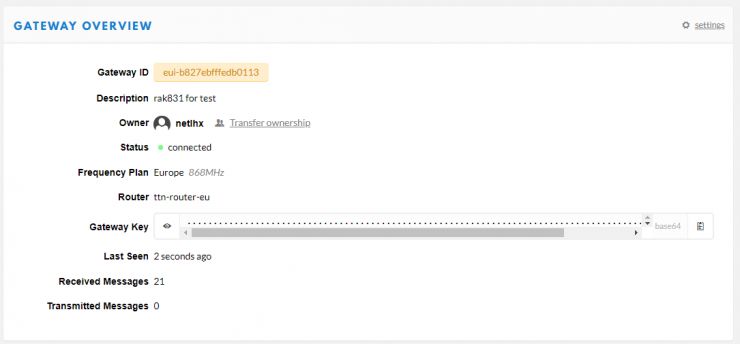
This is the information displayed on the TTN console indicating that the gateway is connected. If the TTN console shows that it is not connected, you need to check the parameter settings again to see if they are configured correctly. Additionally, check if the gateway’s network configuration is correct, such as the WiFi parameters.
Once the gateway configuration is correct, the next step is to use the LoRa mote to connect to the gateway and communicate with it. This test used two LoRa Arduino shield expansion boards, which were installed on the Arduino and communicated with the Arduino via the SPI interface.
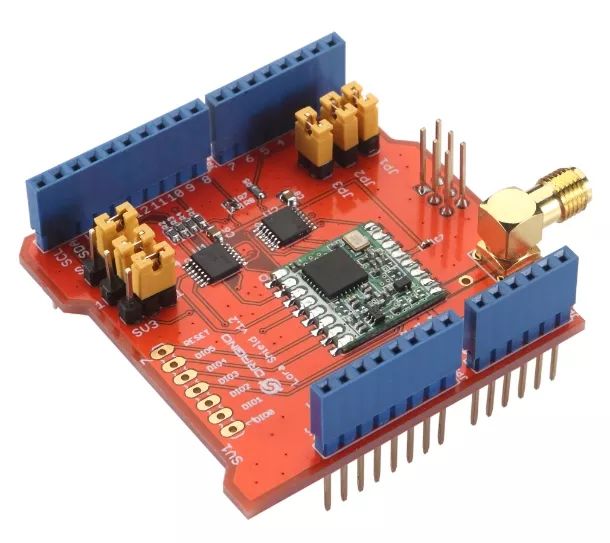
When selecting the LoRa mote module, be sure to choose the corresponding model for the frequency band, which is 868 MHz. The client software library used is lmic, which allows us to implement SX1272/SX1276 compatible communications through its API. Start the Arduino program and add lmic library support, then open the library’s ttg-abp.ino program, modify and configure the SPI-related parameters, compile, and upload to the Arduino development board. After a moment, you will see communication information on the TTN console.
This is the information displayed on the console, including time, frequency, CodeRate, SF, and BW, as well as two columns showing transmission time and payload length. Note that the dev addr is the device address; we will add another node later, which can be distinguished by the device address.

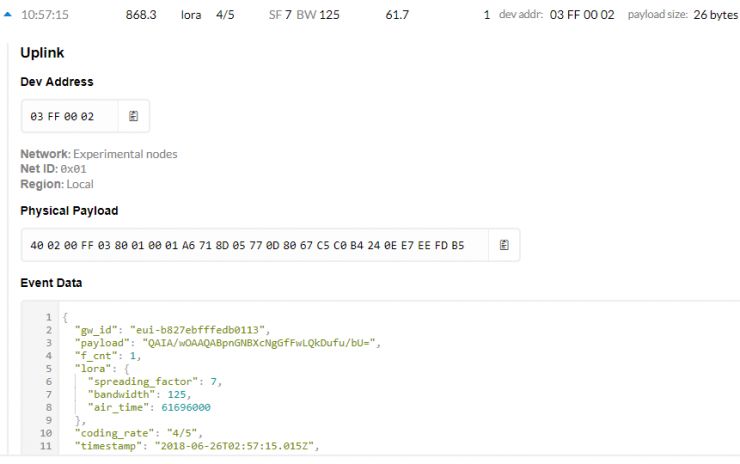
In the TTN console, you can also view the specific data packet content for each communication. The main information transmitted here is abp (activation-by-personal) information; you can also use otaa (over-the-air activation) to activate the device.
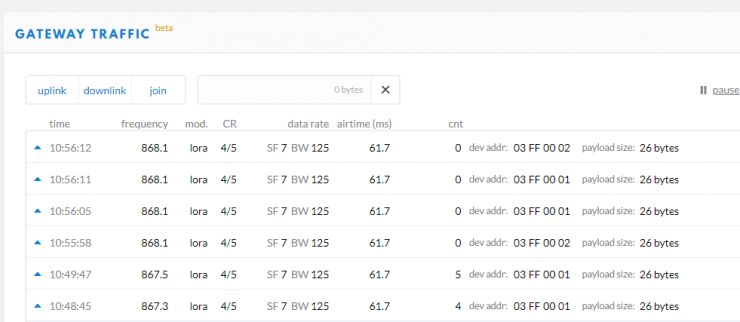
The PILOT GATEWAY can implement multi-channel communication; here we see two nodes sending messages through the gateway simultaneously. Note the device addresses: one is 0X03FF0002, and the other is 0X03FF0001.
Thus, a complete LoRaWAN communication network has been successfully built!
The entire testing process went very smoothly. First, due to the modular design of the RAK831, combined with the specially designed expansion board for RPI, hardware assembly was very easy. The gateway program setup process used an interactive script, allowing parameters to be set by answering just a few simple questions. Coupled with the powerful TTN console functionality, both diagnosis and final communication process viewing were very easy. As for the compatible LoRa mote, there are also ready-made modules available on the market for users to choose from. In summary, building a LoRa network from scratch is not as difficult as it seems.
Still struggling with LoRa? With the RAK831, it’s no longer a challenge! The price of the RAK831 is RMB 820, which is relatively acceptable.