Since programming TI’s DSP is slightly more complex than that of microcontrollers, many customers are not very familiar with the programming process. Therefore, we will provide a simple introduction to the programming methods. DSP generally adopts an online programming method, which means there is a connected JTGA interface on the circuit board. The programming tool used is TI’s emulator, which comes in both parallel and USB versions. You can choose based on your computer; the parallel version is cheaper, but most new products are generally USB, priced around 1000 RMB, available in various electronics markets and online. The software used with the emulator is TI’s CCS (Code Composer Studio), which the supplier will provide when purchasing the tool or can be downloaded online. Since the files provided by different emulator manufacturers may vary, the configuration of CCS should be done according to the methods provided by the emulator manufacturer. The CCS version currently in use is generally 3.3, while earlier versions like 3.1 and 2.2 also exist. If you are using version 3.3, there is no need to install the programming plugin; if you are using an earlier version, you need to install the programming plugin after installing CCS. Connect the emulator to the computer and the target board to be programmed, and power the target board (if the device is online, you can directly power the device; if you are powering a standalone board, you need to provide a power source yourself). At this point, you can open the CCS software.
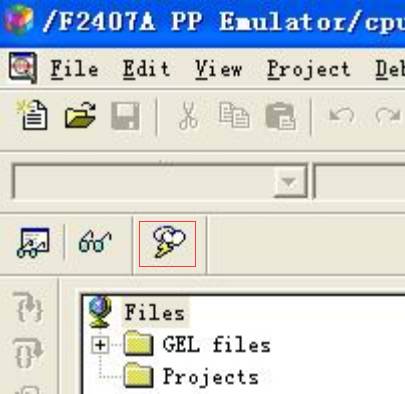 After opening the software, as shown in the above image, there is a cloud-shaped icon which is the programming plugin icon. After opening this programming icon, it will look like the image below:
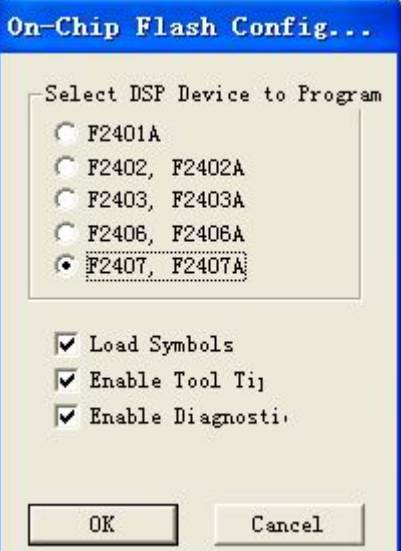 Select the model of the chip you want to program. In the image, we have selected F2407A. If you have a different model, select the corresponding one, and then click OK to confirm and proceed to the next step, as shown in the image below:
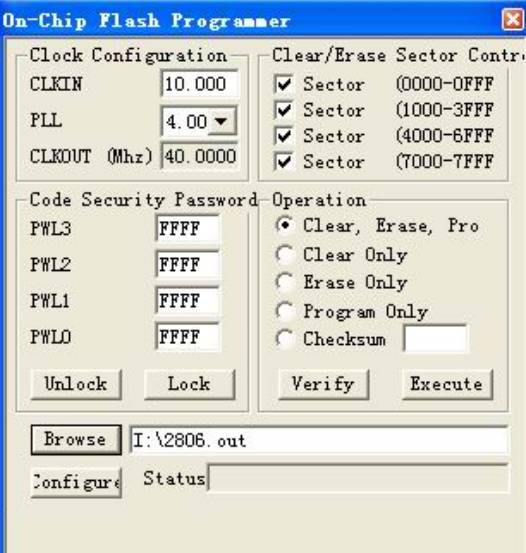 In the operation section, select clear, erase, program. Then click BROWSR to find the .OUT file you want to program on your computer, and confirm. Then click Execute to start programming. A progress bar will indicate the status, and upon completion, the programming will be successful.
If there is no JTGA interface on the circuit board, the best approach is to use a programmer for burning. However, since programmers are quite expensive, we do not recommend this. Each programmer has its own instructions for programming methods. Additionally, serial programming can also be used, but it is not a popular method. The TI website has programming plugins and methods, which will not be elaborated here.