Recently, my firmware hard drive broke, resulting in the loss of personal code and articles written over the past three to four years. Although I previously mentioned using an old computer to set up a NAS, I only stored some large files on the NAS and did not back up data like code and articles. Moreover, the old computer has long since perished. After some reflection, I invested heavily in purchasing a Raspberry Pi 5 to serve as a home server.
This article and the two subsequent articles document how I tinkered with the Raspberry Pi 5.
Installing the Image
Downloading Software
Download the Raspberry Pi imager from <span>https://www.raspberrypi.com/software/</span>.
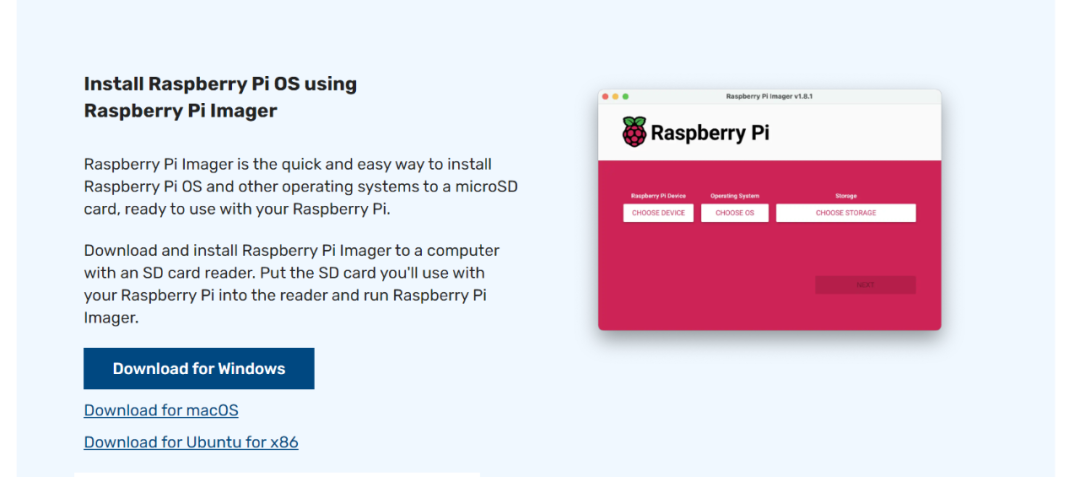
Flashing the Image
Install the downloaded image writer, then run it, selecting the version of Raspberry Pi, the image, and the SD card for storage.
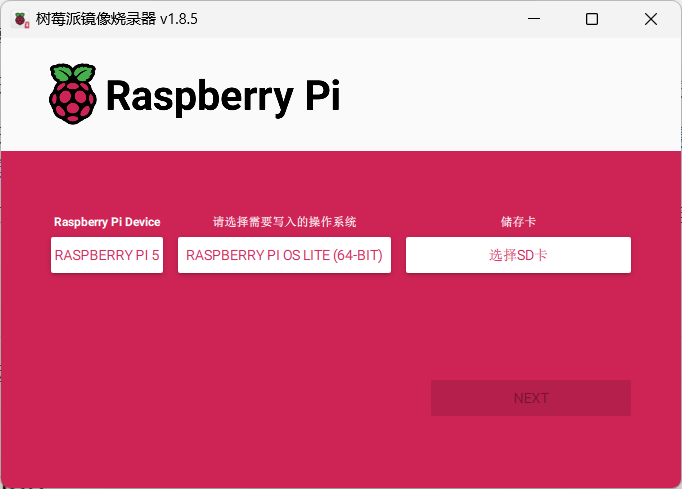
Since I do not need to use a screen, I chose <span>RASPBERRY PI OS LITE (64-BIT)</span>.
Custom Configuration
After configuring the image, you can proceed to custom configuration on the next step.
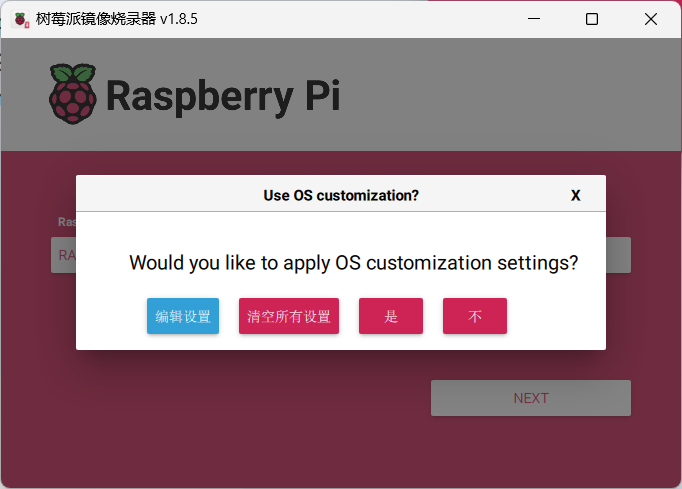
For example, configure username, password, SSH login, and other information.
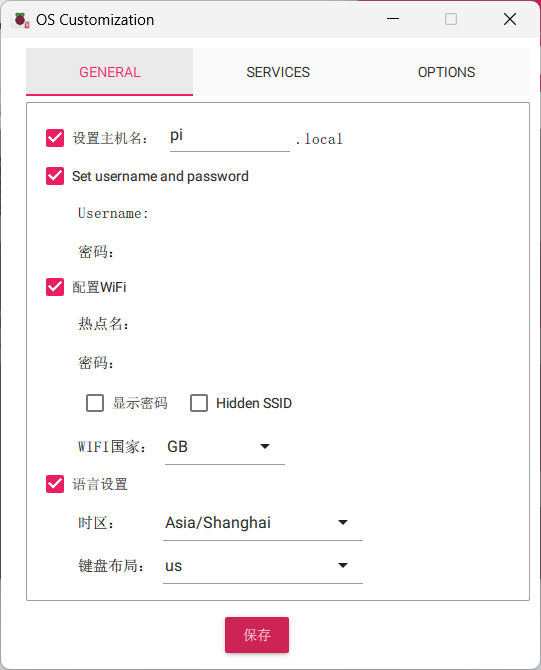
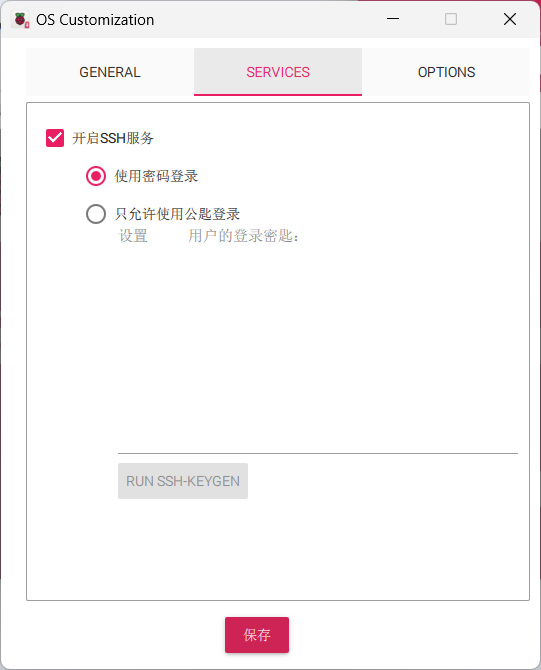
Finally, save the settings and write the image to the SD card.
Logging into Raspberry Pi
Since I do not have a screen and it is inconvenient to check the Raspberry Pi’s IP directly from the router’s backend, I will introduce two methods to SSH into the Raspberry Pi:
-
Scan using nmap to obtain the IP -
Log in directly using the hostname from the custom configuration
Using nmap to Scan
You need to install nmap first; personally, I do not recommend this method.
After installing nmap, use <span>nmap -sP -T4 <local network IP range></span> to scan and find the result containing <span>Raspberry Pi</span> to identify the IP used by the Raspberry Pi.
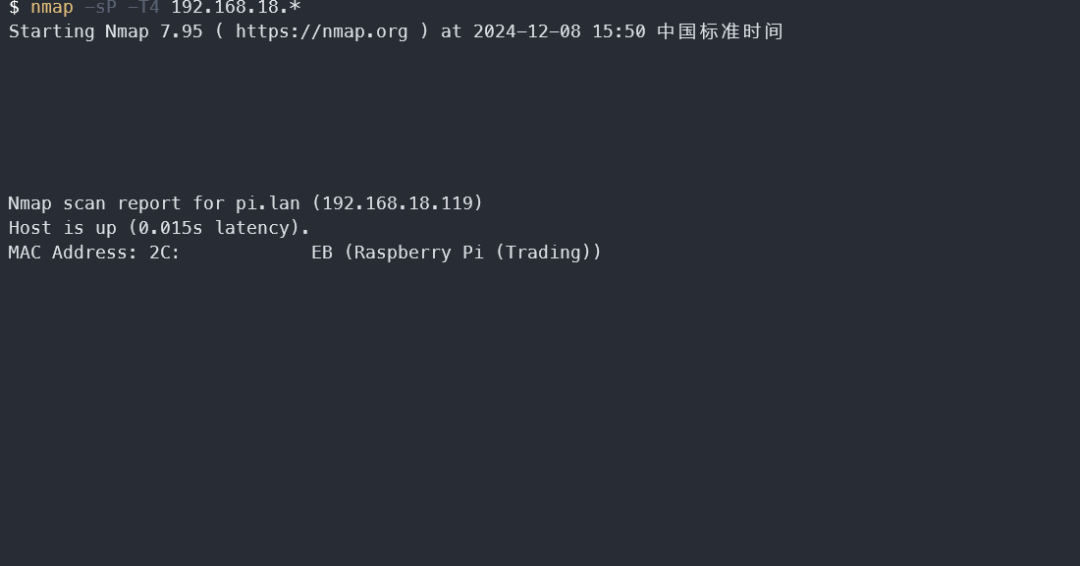
Once you find the IP, use <span>ssh <userName>@<ip></span>, for example, <span>ssh [email protected]</span>, to log in.
Logging in Using Hostname
Log in directly using <span>ssh <username>@<hostname></span>, for example, <span>ssh [email protected]</span>, and then enter the password.