Java development is a fundamental skill that Linux experts must master. This article will introduce how to install JDK on Linux and configure the Java environment. (This article uses jdk-8u201-linux-x64.tar.gz as an example)
1. Uninstall the pre-installed JDK (most Linux distributions come with Java, but it may not be usable)
1) Check the installed JDK:
$> rpm -qa|grep java

2) Remove the installed files #> rpm -e –nodeps [installed JDK package name] (all JDK files found in the previous command, i.e., all rpm packages ending with .x86_64)
After that, execute rpm -qa|grep java again to ensure there are no issues.

3) Visit
https://www.oracle.com/technetwork/java/javase/downloads/jdk8-downloads-2133151.html
Select the version for your system platform; here we take the .tar.gz format as an example.
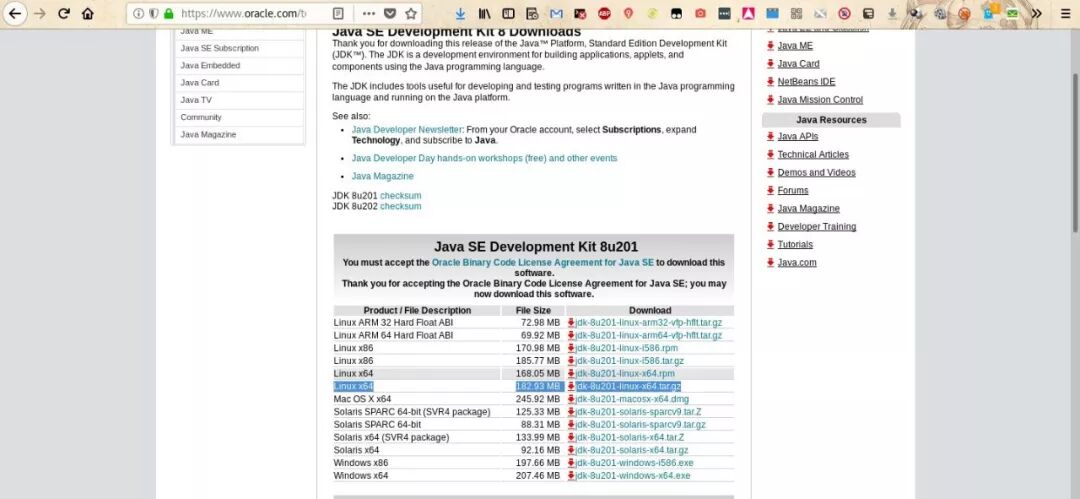
4) Download jdk1.8 to the /Download folder, extract it, and move it to the /usr/local directory.
$> tar zxvf jdk-8u201-linux-x64.tar.gz
#> mv /home/tom/Download/jdk1.8.0_201 /usr/local/
5) Configure the Java environment variables
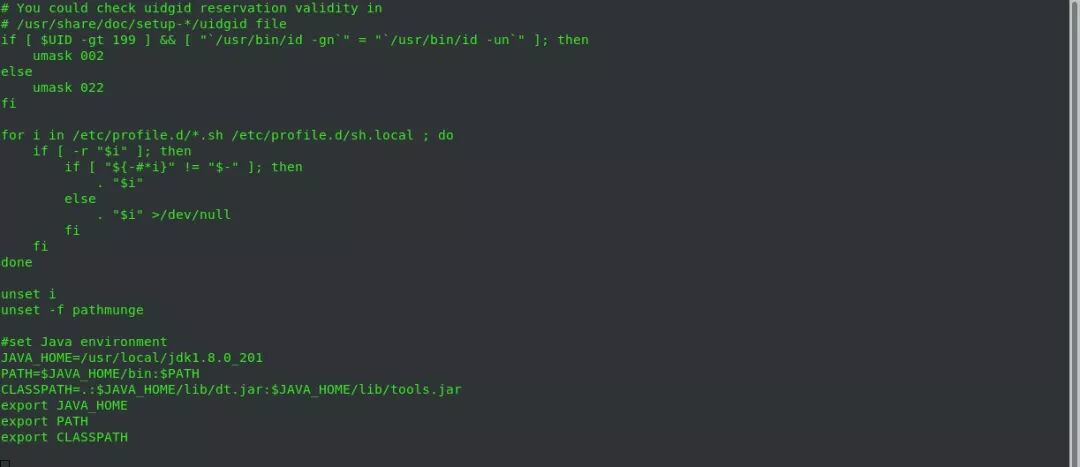
#> vi /etc/profile
Add the following at the end: #set Java environment JAVA_HOME=/usr/local/jdk1.8.0_201 PATH=$JAVA_HOME/bin:$PATH CLASSPATH=.:$JAVA_HOME/lib/dt.jar:$JAVA_HOME/lib/tools.jar export JAVA_HOME export PATH export CLASSPATH
3) After configuration, run source /etc/profile to apply changes
#> source /etc/profile
4) Verify
#> which java
If the output shows the directory where the JDK was just placed, the configuration is successful.

This article is a summary based on my own experiences during Linux operations. If you have any suggestions or comments, please leave a message at the end of the article. Thank you.