First: Introduction
This article is written in a Debian/Linux environment.
In daily work, git is indispensable, so this article is written to teach everyone how to use git, facilitating future work and study. At the same time, this article also accumulates many git techniques used by the author and other developers in their daily work. A table of commonly used git commands is organized at the end of this article.
There are many git commands, but only a dozen or so are commonly used.
Writing is not easy, if you like it, please follow, like, and share, thank you!
Second: Development Process
Git was originally developed by Linux developer Linus in just two weeks using pure C language. After its completion, it was immediately used to take over the Linux source code. However, before this, Linux was managed by BitMover’s BitKeeper distributed version control system, which was a commercial paid distributed version control tool. BitMover recognized the open-source spirit of Linux and authorized the Linux community to use it for free. In 2002, Linux began using the BitKeeper distributed version control system to manage its source code, but the good times did not last long. One day, Linux community member Andrew (the author of samba, a LAN file sharing program) attempted to crack BitKeeper’s shared usage, which was discovered by BitMover, leading to the revocation of the free usage rights. Subsequently, Linus developed git in two weeks (including testing), which is currently the best distributed version control system.
The famous GitHub uses the git system to manage its website. It is important to distinguish between GitHub and git; GitHub is a community, while git is a service system. GitHub only supports the git distributed system, hence the name GitHub.
Third: Differences Between Centralized and Distributed Systems
In addition to git, there are version control systems like svn and cvs. The difference lies in one being distributed and the other centralized.
Centralized refers to version control systems like svn and cvs, while distributed refers to git.
The difference is that in a centralized version control system, every time you write code, you need to pull a copy from the server. If the server is lost, then everything is lost; your local client only retains the current version information. In other words, centralized systems manage code on a single server, and all rollback operations require server support.
In a distributed system, every person’s computer acts as a server. When you pull a copy of the code from the main repository, your computer becomes a server. You do not need to worry about the main repository being deleted or lost; you can freely rollback and commit locally. When you want to submit your code to the main repository, you only need to merge and push it to the main repository. You can also create a new repository of your code to share with others.
In centralized systems, there is a main version number, and all version iterations are based on this version number. In distributed systems, since each client is a server, git does not have a fixed version number, but it has an id calculated by a hash algorithm for rollback purposes. There is also a master repository, which is the main repository for all branch repositories. We can push commits to the master and merge them into the main repository, which will iterate the version number of the master. The git version number on our client, regardless of how many iterations occur, is unrelated to the master; only during merging does the master iterate once.
Fourth: Installing Git on Debian/Linux
sudo apt install git
If not found, use the search command to check.
sudo apt search git
Configure the git environment: git config –global
Parameter explanation:
config: This parameter is used to configure the git environment.
–global: This long command indicates configuration for the entire git environment.
When using git for the first time, you need to set your username and email, which will serve as the identification for git on the current machine. If you use it to download remote repositories that require login permissions, you will be prompted to log in. Git defaults to using the configured email and username for login but will require you to manually enter your password.
Username configuration
user represents the user, .name represents the configuration of the user’s name.
git config –global user.name “Your Username”
Email configuration
user represents the user, .email represents the configuration of the user’s email.
git config –global user.email “Your Email”
It is also fine not to configure; when encountering remote repositories that require login permissions, you will be prompted to manually enter your username, email, and password.
Create a local empty repository: git init
init: Initializes the current directory as a repository, automatically setting the current repository as master.
To create a local repository, you need an empty directory, and then initialize your project in that empty directory.
For example, if I want to create an empty project named “test”
1. Create the directory
mkdir test
2. Enter the directory
cd test
3. Use git init to initialize the current repository
git init
After initialization, a directory for git’s configuration files will be generated, which cannot be seen with the ordinary “ls” command. We need to use ls -ah to view hidden directories.
Entering the directory will allow you to see its related configuration files.
New files can be added to the local repository: git add, git commit -m
add: Adds files to the staging area.
commit: Commits to the local repository.
Using the empty repository test created in the previous section as an example, we will create a new file named test.c using the touch command.
touch test.c
Use the git add command to add the file to the commit cache of the local repository.
git add test.c
At this point, it is still not added to the local repository; we still need to use the git commit command to add a description of the modifications.
Note that when using git commit, we only need to briefly describe what we did; do not write a long comment like writing a note, as it will be difficult to review when rolling back code or checking historical versions.
We need to use the -m command to succinctly describe our information. If -m is not used, the terminal’s comment editor will be called to enter the description, but it is not recommended to use it because the comment editor is quite difficult to use and uncomfortable.
git commit -m “add new file \”test.c\””
The git commit will generate a 40-character hash value as an id and submit the file that was just added to the commit cache to the local repository, allowing us to roll back. At this point, this file has been added to the local repository, and the local repository has also iterated a version.
Fifth: Rewrite Commit: git commit –amend
–amend: Rewrite the last commit message.
Just like in the previous example, if we submitted the repository but found that the comment was incorrect, we can use the –amend long command option to rewrite the commit.
git commit –amend
After entering the above command, you will enter the following editor interface:
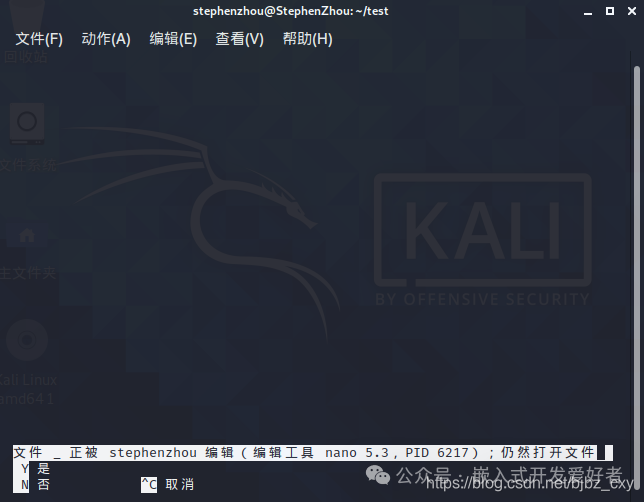
We input Y to select yes.
You can see the previous comment information.
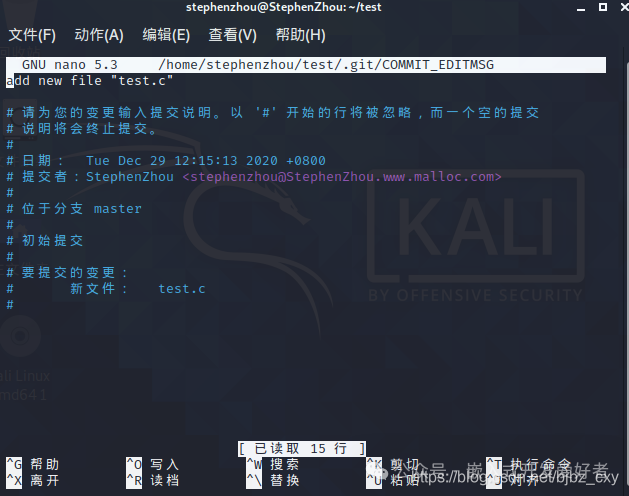
In the interface, press “i” to enter the editing interface.
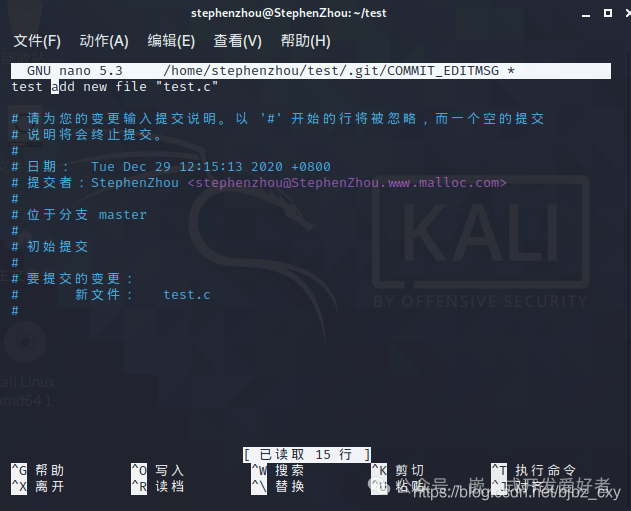 After modification, press ctrl+o.
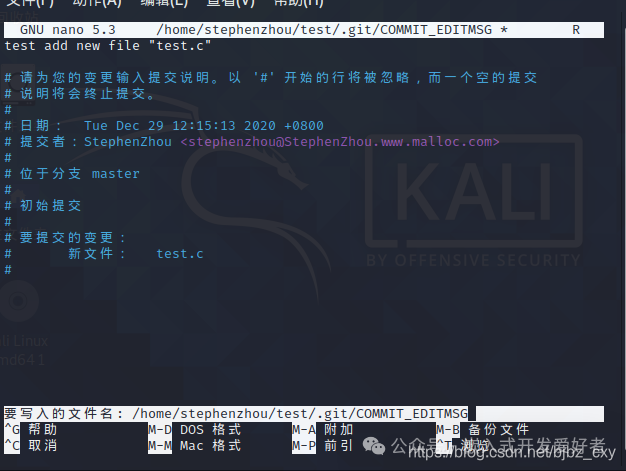 Then press enter, and it will prompt that it has been written. Lines starting with # are comments and will not be submitted; git will automatically filter them.
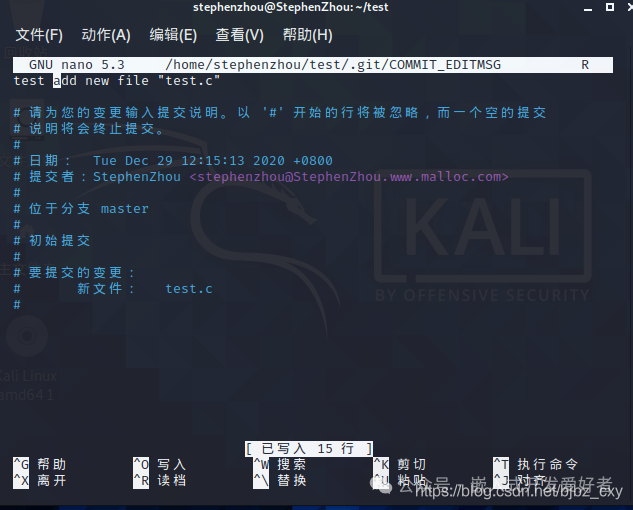
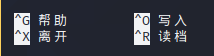
The symbols ^G and ^O correspond to the ctrl key in ASCII, so it is ctrl+x.
Press ctrl+x (case insensitive) to exit the editing interface.
View the commit history log: git log
log: View the log
As in the previous example of rewriting a commit, to confirm whether the rewrite was successful, we can use git log to check.
git log
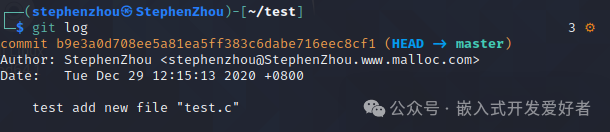
You can see that no new version number was generated; instead, the previously submitted comment was directly rewritten.
Here, let me explain what the commit information above means.
The first line of the commit is the id calculated by the hash algorithm. As mentioned earlier, distributed systems do not have a main version number; they all use ids as markers, with master as the main repository. Other branches can iterate without affecting the master. I will introduce how to use branches later.
Currently, our repository is master because we created it directly using git init without pulling branches.
commit b9e3a0d708ee5a81ea5ff383c6dabe716eec8cf1 (HEAD -> master)
The head at the end indicates the direction, showing where this commit goes. head->master means this commit goes to the master main repository; if it were head->branch repository, it would indicate a commit to the branch repository.
Author indicates who the committer is, displayed in the format: username <email>
Author: StephenZhou <[email protected]>
Date indicates the submission time, and the +0800 indicates Greenwich Mean Time, representing the current time as a reference. This is the world time, used as a base to calculate the time difference with the current location, including formulas for the Earth’s rotation.
Date: Tue Dec 29 12:15:13 2020 +0800
The last part is the comment.
test add new file “test.c”