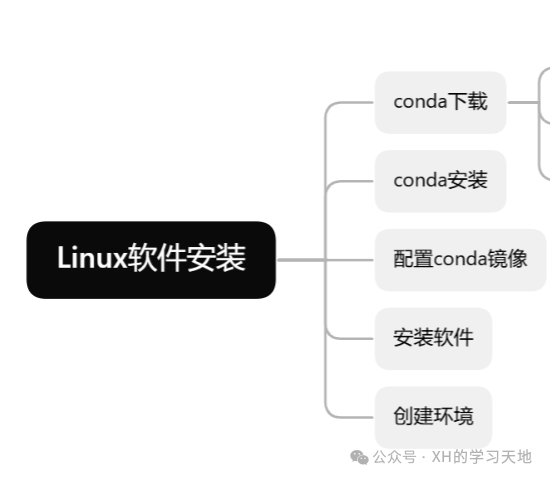
What is conda?
It is similar to an app store for mobile phones, where you can download the necessary software. There are three versions: conda, miniconda, and anaconda. Here, we will use miniconda as an example based on our needs.
unsetunset1. Downloading and Installing condaunsetunset
Link to download the conda mirror: https://mirrors.tuna.tsinghua.edu.cn/anaconda/miniconda/ After selecting the version to download, right-click to copy the download link and paste it into the Linux command line (In my case, the paste shortcut is Ctrl+Shift+V).
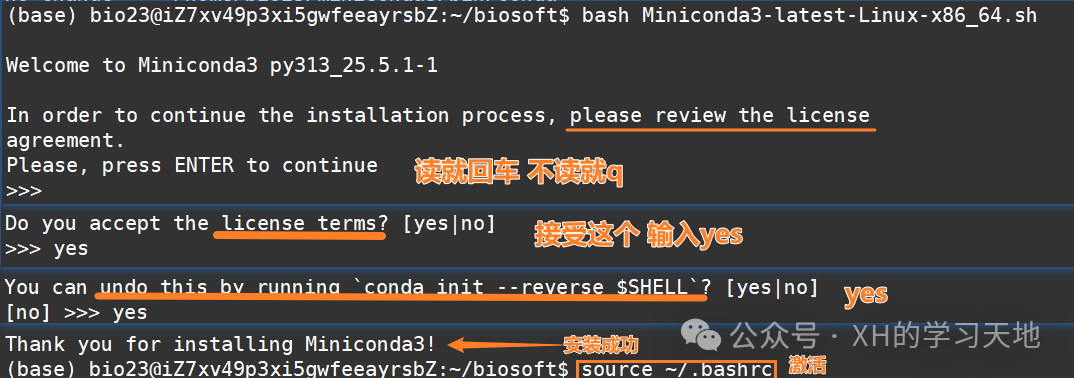
<span>cd biosoft</span>Enter the working directory<span>wget [download link]</span>Get the download script (the script ends with .sh), press Enter to start downloading. Once completed, it will display as shown in Figure 1.<span>bash Miniconda3-latest-Linux-x86_64.sh</span>Officially install miniconda; the command line will pop up some options, select as shown in Figure 2.<span>source ~/.bashrc</span>Finally, activate conda, and you’re good to go.

unsetunset2. Configuring conda Mirrorsunsetunset
A mirror can be understood as a domestic repository for software downloads from abroad, set up to allow faster downloads.
The syntax for setting the mirror is <span>conda config --add channels [mirror link]</span> (here, config means configuration).
Taking the BFSU mirror as an example, copy and paste the following commands and press Enter to run:
conda config --add channels https://mirrors.bfsu.edu.cn/anaconda/cloud/bioconda/
conda config --add channels https://mirrors.bfsu.edu.cn/anaconda/cloud/conda-forge/
conda config --add channels https://mirrors.bfsu.edu.cn/anaconda/pkgs/free/
conda config --add channels https://mirrors.bfsu.edu.cn/anaconda/pkgs/main/
conda config --set show_channel_urls yes
unsetunset3. Installing Software (using fastqc as an example)unsetunset
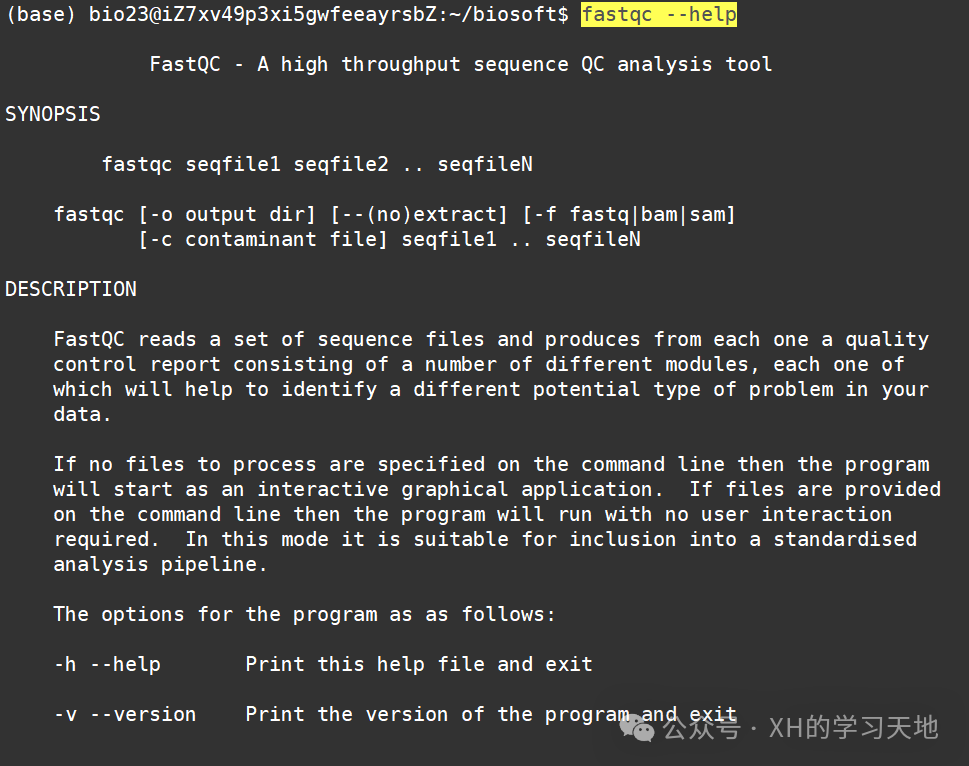
<span>conda list</span>Check the currently installed software<span>conda install fastqc -y</span>Here, -y means to select yes for all options during installation. If you need to download a specific version of the software, use<span>conda install fastqc=[version number] -y</span><span>fastqc --help</span>Finally, verify if the software is installed successfully, similar to using library() in R to check if a package is installed. If successful, the help documentation will be displayed on the screen.
However, I encountered an error here:
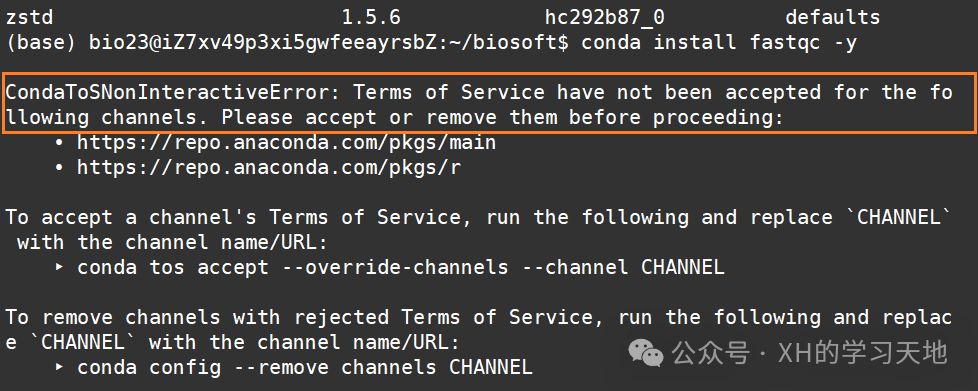 After asking Kimi, I was informed that the service terms of the two channels shown in the image above had not been accepted. You can choose to accept the terms or delete these two channels. I further inquired about the difference between these two options, and Kimi’s response is shown in the image.
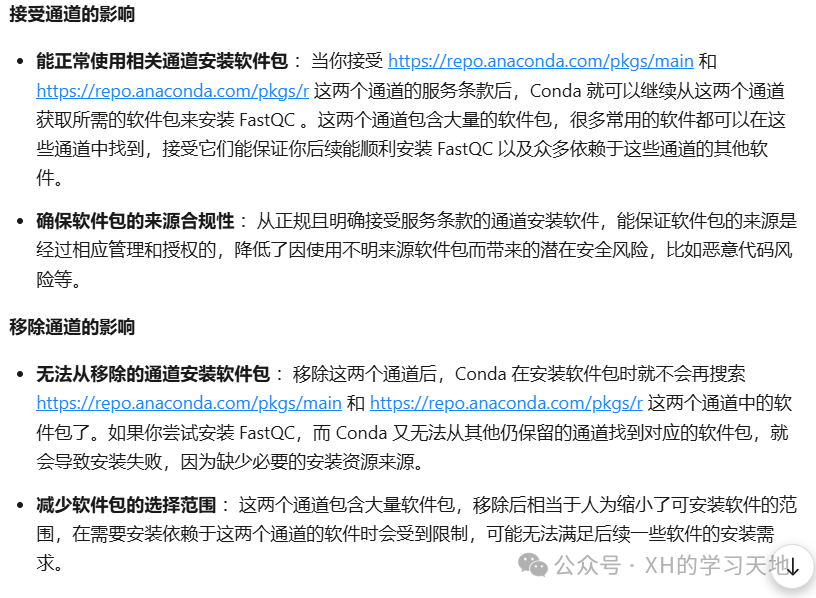
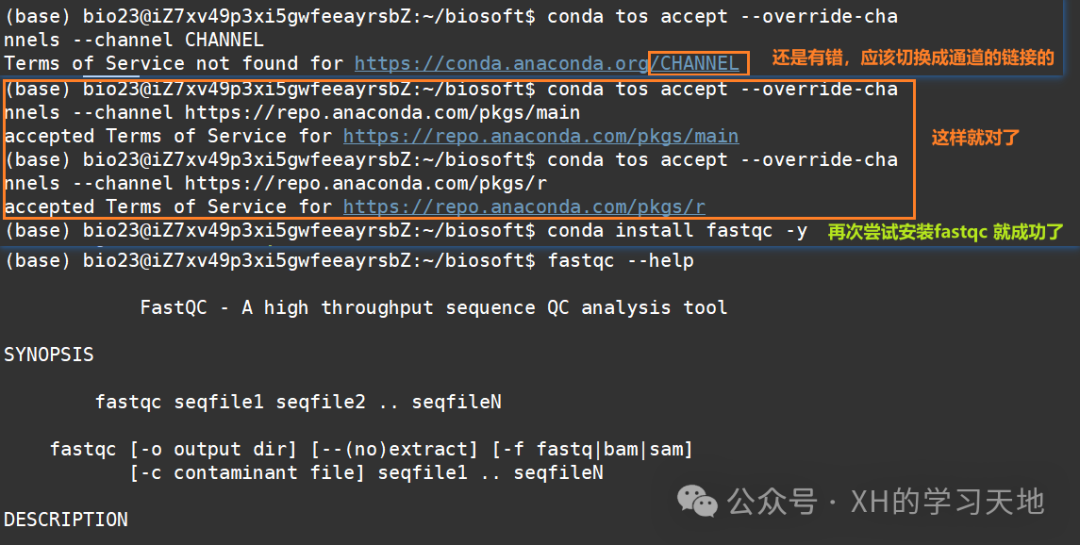
It seems that accepting the service terms is not a bad idea, so I chose to accept. During the acceptance process, I encountered a small issue, which I resolved as shown in the image, and finally, fastqc was successfully installed.
conda tos accept --override-channels --channel CHANNEL_URL
# Please replace CHANNEL_URL accordingly

conda tos accept --override-channels --channel https://repo.anaconda.com/pkgs/main
conda tos accept --override-channels --channel https://repo.anaconda.com/pkgs/r
unsetunset4. Creating an Environmentunsetunset
An environment is established to handle different projects that require different software without interference, creating a “small house” for each. The specific operations are as follows:
<span>conda info --envs</span>Check the current environment list; the one marked with<span>*</span>is the activated environment.
<span>conda create -n rna-seq python=3 fastqc trimmomatic -y</span>Create a new environment; this is the correct command.
However, I accidentally made an error, as shown below. 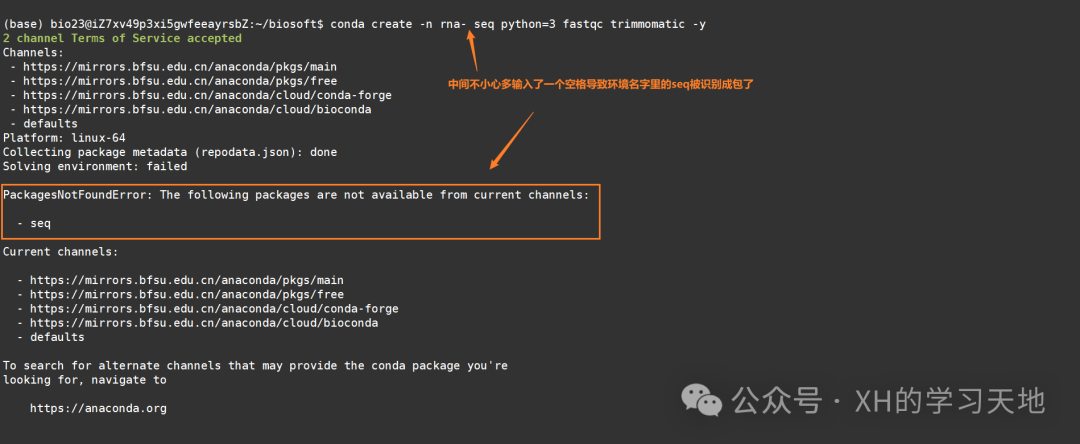
Initially, I did not notice the space issue, and only upon checking the environment again did I realize the naming was incorrect, so I decided to delete the environment and set it up again. 
I asked Kimi for the syntax to delete the environment, and the answer was <span>conda remove --name rna- --all</span>. After executing this, I successfully deleted it and then set up the environment again. 
<span>conda activate [environment name]</span>Activate the conda environment; once activated, the name of the activated environment will be displayed in parentheses.<span>conda deactivate</span>Exit the current environment
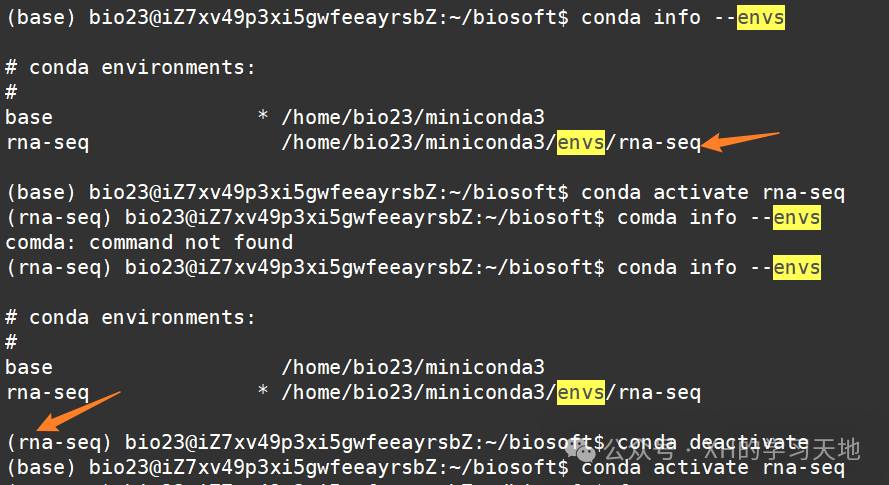
This concludes the content on software installation and environment setup in Linux. As notes, I have also recorded the issues I encountered; feel free to skip them if unnecessary. PS. AI has really been a great help (laughs)
This content is a learning note from the WeChat public account Bioinformatics Planet – Newbie Protection – Single Cell Introduction Group. Special thanks to Teacher Hua Hua for the teaching ღ( ´・ᴗ・` ) Sending love