This article will illustrate how Makefile works using two examples. The author’s aim is to summarize the common problems beginners encounter when writing Makefiles in a concise manner. After reading this article, you should be able to start writing your own Makefile.
-
Platform: Ubuntu 20 -
Tools: make, gcc
What is Makefile
The Makefile describes the dependencies of files and tells the compiler how to compile and link them. Mastering the writing of Makefiles allows you to break free from visual compilers and use compilation tools to generate the required target files.
Let’s Get Started
While reading this article, it is assumed that readers are already familiar with using GCC and make tools on Linux systems. If using a subsystem on Windows, it is recommended to create Makefile files using the vi tool from the subsystem, rather than files with a .mk suffix on Windows, as this may cause make to fail to recognize the Makefile.
In fact, a complete compilation process includes: preprocessing, compiling, assembling, and linking. We usually refer to preprocessing + compiling + assembling collectively as compiling.
-
Preprocessing: Expanding header files / macro substitution / removing comments / conditional compilation; -
Compiling: Checking syntax, generating assembly; -
Assembling: Converting assembly code to machine code; -
Linking: Linking together to generate an executable program.
Let’s first understand the common commands used by the compiler:
| Option | Meaning |
|---|---|
| -v | View the version of the gcc compiler and display detailed process of gcc execution |
| -o | Specify the output file name as file, which cannot have the same name as the source file |
| -E | Only preprocess, will not compile, assemble, or link |
| -S | Only compile, will not assemble or link |
| -c | Compile and assemble, will not link |
If we want to see the intermediate files generated by the compilation, we can write the following command:
gcc -S main.c
Compiling and Linking
Compiling and linking are the primary ways to obtain target files. In common programming tasks for the stm32f1xx/stm32f4xx series, we may use the keil/MDK tool. When clicking the build button, we can obtain bin (binary) or HEX (hexadecimal) files in the output folder. Afterwards, we can use the built-in burning tool of MDK to flash the target file into the chip’s Flash using JLink/STLink, or through ISP tools to flash it into the chip’s Flash.
During this process, the compiler has already executed the two steps of compiling and linking for us. Below, I will illustrate how this process is reflected in the compilation chain through a simple example.
Create a file named main.c and write the following code:
#include <stdio.h>

int main(int argv, char argc[])
{
    int num1=0;
    int num2=0;
    int revalue=0;

    printf("please input num 1\r\n");
    scanf("%d",&num1);

    printf("please input num 2\r\n");
    scanf("%d",&num2);

    revalue = num1 + num2;

    printf("result is :%d\r\n", revalue);
    return 0;
}
We compile the above code using GCC compiler on the Ubuntu platform: in the current folder, use the following command:
gcc main.c -o app
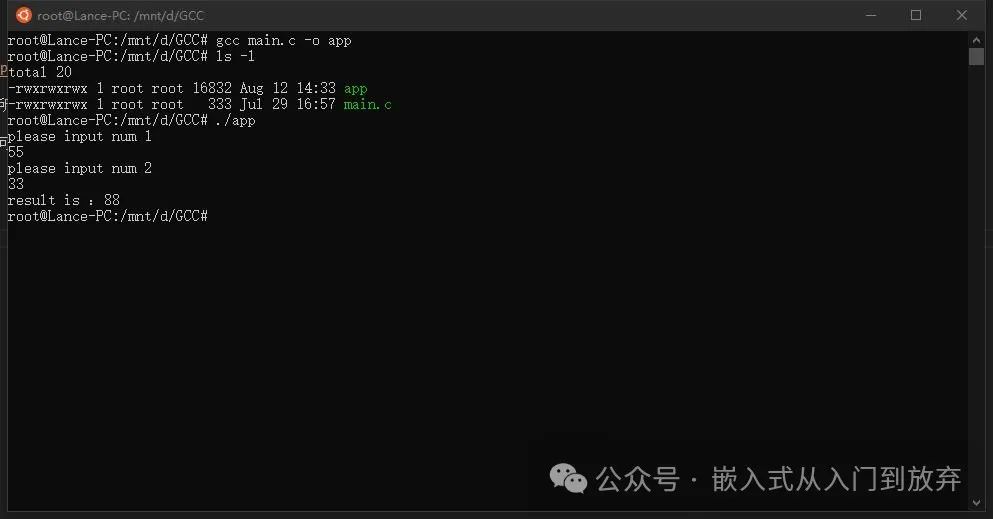
As shown in the image above, we obtain a target file named app.
Enter the following command to execute the target file:
./app
The above process is what we refer to as compiling and linking.
Creating a Single Directory Project
Create a folder named Test_A, or any other name. Then create the following files inside it:
main.c:
#include <stdio.h>
#include "addition.h"
#include "subtraction.h"
#include "division.h"
#include "multiplication.h"

int main(int argc, char* argv[])
{
 char symbol;
 float num_1, num_2;
 float result;

 printf("please input the symbol!\r\n");
 scanf("%c",&symbol);

 printf("please input number 1\r\n");
 scanf("%f",&num_1);

 printf("please input number 2\r\n");
 scanf("%f",&num_2);

 switch(symbol)
 {
  case '+':
   result = addition(num_1, num_2);
   break;
  case '-':
   result = subtraction(num_1, num_2);
   break;
  case '*':
   result = multiplication(num_1, num_2);
   break;
  case '/':
   result = division(num_1, num_2);
   break;
  default:
   break;
 }

 printf("the result is:%.2f\r\n",result);

 return 0;
}
addition.h
#ifndef ADDITION_H
#define ADDITION_H

float addition(float a, float b);
#endif/*ADDITION_H*/
addition.c
float addition(float a, float b)
{
    return (a+b);
}
division.h
#ifndef DIVISION_H
#define DIVISION_H

float division(float a, float b);
#endif/*DIVISION_H*/
division.c
float division(float a, float b)
{
    return (a/b);
}
multiplication.h
#ifndef MULTIPLICATION_H
#define MULTIPLICATION_H

float multiplication(float a, float b);
#endif/*MULTIPLICATION_H*/
multiplication.c
float multiplication(float a, float b)
{
    return (a*b);
}
subtraction.h
#ifndef SUBTRACTION_H
#define SUBTRACTION_H

float subtraction(float a, float b);
#endif/*SUBTRACTION_H*/
subtraction.c
float subtraction(float a, float b)
{
    return (a-b);
}
It can be seen that the project composed of these files is designed to perform binary addition, subtraction, multiplication, and division operations.
Writing the Makefile
File 1 is the main function, which has 4 sub-functions: the addition function addition(int a, int b), the subtraction function subtraction(int a, int b), the multiplication function, and the division function. Therefore, we know that to generate the target file app, we need not only the main.o file but also the dependencies of addition.o, subtraction.o, multiplication.o, and division.o. To generate the main.o file, we need to depend on the main.c file; to generate the subtraction.o file, we need to depend on the subtraction.c file; and to generate the addition.o file, we need to depend on the addition.c file. Following this logic, we can derive the writing method of the Makefile.
Create a Makefile file in the same folder. Note that this Makefile file has no suffix.
Makefile
app: main.o addition.o subtraction.o multiplication.o division.o
 gcc -o app main.o addition.o subtraction.o multiplication.o division.o

main.o: main.c
 gcc -c main.c

addition.o: addition.c
 gcc -c addition.c

subtraction.o:subtraction.c
 gcc -c subtraction.c

multiplication.o: multiplication.c
    gcc -c multiplication.c

division.o: division.c
    gcc -c division.c

.PHONY : clean
clean :
 -rm main.o addition.o subtraction.o multiplication.o division.o app
Rules for Writing Makefile
target... : prerequisites ...

    command
-
target is a target file, which can be an intermediate file, an executable file, or a label. -
prerequisites are the files needed to generate that target, which are the dependency files we mentioned. -
command is the command that make needs to execute (any shell command). It should be noted that commands must start with a Tab character.
By comparing this rule with the above Makefile, you will understand the basic concept. The part before the colon (:) is the target, and the part after it is the files that the target depends on. Here, we declare the relationship between them. The next line is the command line to generate the target file, which is the same as the GCC command line you enter in the console. It is worth noting that the command line must start with a [tab].
Simplifying Makefile
At this point, I believe everyone has a basic understanding. In fact, Makefile is just a script file. We notice that main.o addition.o subtraction.o multiplication.o division.o have appeared 3 times in the Makefile file. Is there a way to reduce the amount of content written to make it simpler and more readable? The answer is yes.
Using Variables in Makefile
In fact, we can use a symbol to replace a string content like in C.
OBJ = main.o addition.o subtraction.o multiplication.o division.o

app: $(OBJ)
 gcc -o app $(OBJ)

main.o: main.c
 gcc -c main.c

addition.o: addition.c
 gcc -c addition.c

subtraction.o:subtraction.c
 gcc -c subtraction.c

multiplication.o: multiplication.c
    gcc -c multiplication.c

division.o: division.c
    gcc -c division.c

.PHONY : clean
clean :
 -rm $(OBJ) app
In the above example, we used OBJ to replace the long list of main.o addition.o subtraction.o multiplication.o division.o. Note that when referencing a variable, it must be enclosed in $().
Static Pattern Rules in Makefile
We don’t need to get caught up in what static pattern rules are, as the name can be misleading. Now, we just need to think about how to further simplify this Makefile so that when we continue to add files to this project in the future, the modifications required are minimized. We can even write a project template so that we do not need to modify the Makefile when adding files to the folder later.
By observing the above Makefile, we can find a pattern.
In fact, it can be further simplified as follows:
OBJ = main.o addition.o subtraction.o multiplication.o division.o

app: $(OBJ)
 gcc -o app $(OBJ)

%.o:%.c
 gcc -c $< -o $@

.PHONY : clean
clean :
 -rm $(OBJ) app
We notice that the .c files have disappeared, and in the future, we only need to modify the first line when adding or deleting files, which greatly reduces the time spent writing Makefile. How did we achieve this? Because we used static pattern rules. Some friends may ask how to understand this? Okay, let me explain it to you in detail.
The main.o file depends on the main.c file and the header files addition.h subtraction.h multiplication.h division.h included in it; the addition.o file depends on the addition.c file. Following this logic, we find that the compilation method for each file in $(OBJ) follows a pattern, which is: *.o:*.c
So we can use: %.o:%.c to replace the dependency declarations of the 5 .o files.
As for the gcc -c $<, what does it mean? Some friends may ask. This is a long story, so please listen carefully.
Wildcards in Makefile
-
$@ represents the target file
-
$^ represents all the dependency files in the content
-
$< represents the first dependency file in the content
-
$? constructs a list of files that have been updated
-
= is the most basic assignment
-
:= overwrites the previous value
-
?= assigns the value after the equal sign if it has not been assigned a value yet
-
+= appends the value after the equal sign
Dear readers, @ represents the target file, which refers to the main.o file before the colon.
From the whole command, it says: Compile the first dependency file to generate the target file.
Some friends may ask why not write gcc -c @. This is a great question. Indeed, the part after the colon is just one main.c file, and it can run through in this example. However, $^ represents all the dependency files in the content, and sometimes when there are multiple files after the colon, it will include all files, which can cause errors. However, in most cases, one .o file depends on one .c file, and the corresponding header files will be included in the .c file, so we do not need to write a non-general Makefile for special cases.
At this point, many friends should be amazed, and of course, I mean the designers of the rules. Some friends may ask, is it possible to eliminate OBJ = main.o addition.o subtraction.o multiplication.o division.o so that make can find the dependency files in the folder by itself? This way, we wouldn’t need to modify anything when adding files to the folder later. Hearing this, I would give a thumbs up. Of course, this is possible!
Functions in Makefile
We can write it like this:
SRC = $(wildcard *.c)
OBJ = $(SRC:%.c=%.o)

app: $(OBJ)
 gcc -o app $(OBJ)

%.o:%.c
 gcc -c $^ -o $@

.PHONY : clean
clean :
 -rm $(OBJ) app
Are you satisfied? No .o or .c files need to be added manually. At this point, everyone is eager to know how this is achieved.
-
$(subst from, to, text) replaces the from string in text with to. -
$(patsubst pattern, replacement, text) checks if the words in text (separated by spaces, tabs, or line breaks) match the pattern. If they do, it replaces them with replacement. The pattern can include the wildcard “%”, representing a string of any length. If replacement also contains “%”, then the “%” in replacement will represent the string that “%” in pattern corresponds to. (You can escape it with “” to represent the real meaning of “%”.) -
$(notdir names) extracts the non-directory part from the sequence of filenames names. The non-directory part refers to the part after the last backslash (“/”). -
$(wildcard PATTERN) retrieves all objects that match PATTERN.
Here, we use the wildcard function. The general format for functions is: $(function [param]), which is quite similar to our variable usage.
-
In the first line, all .c files are placed into the variable SRC -
Then, the .c files in SRC are converted to .o and placed into the variable OBJ
The rest is unnecessary to explain. Some friends may ask, in the second step, you converted .c to .o, do I need to write %.o:%.c? Yes, it can be omitted here.
SRC = $(wildcard *.c)
OBJ = $(SRC:%.c=%.o)

app: $(OBJ)
 gcc -o app $(OBJ)

.PHONY : clean
clean :
 -rm $(OBJ) app
We can also write it as:
OBJ := $(patsubst %.c,%.o,$(wildcard *.c))

app: $(OBJ)
 gcc -o app $(OBJ)

.PHONY : clean
clean :
 -rm $(OBJ) app
Or:
OBJ := $(patsubst %.c,%.o,$(wildcard *.c))

app: $(OBJ)
 gcc -o $@ $^
It is worth noting that in the command line above, we used:
gcc -o $@ $^
Instead of:
gcc -o $@ $<
Although conventionally understood, $< represents the first dependency file, and in this case, it can run. However, $^ represents all dependency files, and sometimes when there are multiple files, it will include all files, leading to errors. But in most cases, one .o file depends on one .c file.
At this point, many friends will be amazed at the brilliance of the design. Some friends may ask, can we eliminate OBJ = main.o addition.o subtraction.o multiplication.o division.o? Let make automatically find the dependency files in the folder, so we don’t need to modify anything when adding files later? Yes, this is possible!
Cleaning Up Compilation Files
We notice that every time we compile, a large number of intermediate files are generated, which can be messy. Every Makefile should include a rule for cleaning up target files (.o and executable files), which not only facilitates recompilation but also helps maintain file cleanliness.
.PHONY : clean
clean :
 -rm $(OBJ) app
.PHONY indicates that clean is a “phony target”. The small minus sign before the rm command means that even if some files encounter issues, it will continue with the subsequent tasks. The clean rule should not be placed at the beginning of the file; otherwise, it will become the default target for make. Generally, we place it at the end of the file.
Input the command line: make clean to clear the corresponding files.
Up to this point, we have basically completed the Makefile for a single directory. Some friends may ask, my project is very large, and it cannot fit in one folder. How should I write it for multiple directories?
Don’t worry, my dear friends.
Makefile for Multiple Directories
If there is a project structure like the following, how should we write the Makefile?
TEST_B
 |__generalOperation
 | |__addition.h
 | |__addition.c
 | |__subtraction.h
 | |__subtraction.c
 |
 |__shiftOperation
 | |__division.h
 | |__division.c
 | |__multiplication.h
 | |__multiplication.c
 |
 |__User
 | |__main.c
 | |__main.h
 |
 |__Makefile
It’s simple; we include the file paths in variables.
SRC += ./User/*.c
SRC += ./User/*.c
SRC += ./generalOperation/*.c
This part appends the .c files from the three folders into the variable SRC. However, it is worth noting that the appended variable cannot be used directly, as SRC holds the raw string ./User/*.c ./User/*.c ./generalOperation/*.c.
We need to convert it using RAW_SRC := $(wildcard $(SRC)) to save the paths of the .c files from each folder.
As for header files, we need to use the -I symbol to specify the paths where the header files are located.
DIR_INC += -I./User
DIR_INC += -I./shiftOperation
DIR_INC += -I./generalOperation
In summary, we can derive the Makefile as follows:
SRC += ./User/*.c
SRC += ./shiftOperation/*.c
SRC += ./generalOperation/*.c

DIR_INC += -I./User
DIR_INC += -I./shiftOperation
DIR_INC += -I./generalOperation

RAW_SRC := $(wildcard $(SRC))

OBJ := $(RAW_SRC:%.c=%.o)

app: $(OBJ)
 @echo $(OBJ)
 gcc -o $@ $(OBJ)

%.o:%.c
 gcc -c $(DIR_INC) $< -o $@

.PHONY : clean
clean :
 -rm ./output/*.o\
     ./output/app
At this point, some friends might not be satisfied. They notice that the .o files are mixed with .c files, and the target files are placed together with the Makefile. The reason for using multiple folders is to classify different files.
So let’s create an output folder.
SRC += ./User/*.c
SRC += ./shiftOperation/*.c
SRC += ./generalOperation/*.c

DIR_INC += -I./User
DIR_INC += -I./shiftOperation
DIR_INC += -I./generalOperation

RAW_SRC := $(wildcard $(SRC))

OBJ := $(RAW_SRC:%.c=%.o)

./output/app: $(OBJ)
 @echo $(OBJ)
 gcc -o $@ $(OBJ)
 -mv ./User/*.o ./output
 -mv ./shiftOperation/*.o ./output
 -mv ./generalOperation/*.o ./output

%.o:%.c
 gcc -c $(DIR_INC) $< -o $@
 -mv $@ ./output

.PHONY : clean
clean :
 -rm ./output/*.o\
     ./output/app
Of course, the usage of Makefile can be more clever. There is also the vpath keyword to assist in finding file paths. However, the purpose of this article is to teach everyone how to write Makefile in the simplest and most effective way, while more advanced topics can be learned gradually through practice later.
Source: https://github.com/laneston/note/blob/main/09-stm32/Hey_Makefile.md
This article is sourced from the internet, and the copyright belongs to the original author. If there are any copyright issues, please contact me for deletion.
Disclaimer:
This account’s original articles, reposted articles, images, etc., are copyrighted by the original authors. If there is any infringement, please contact for removal.
Click here👇to follow me, and remember to star it~