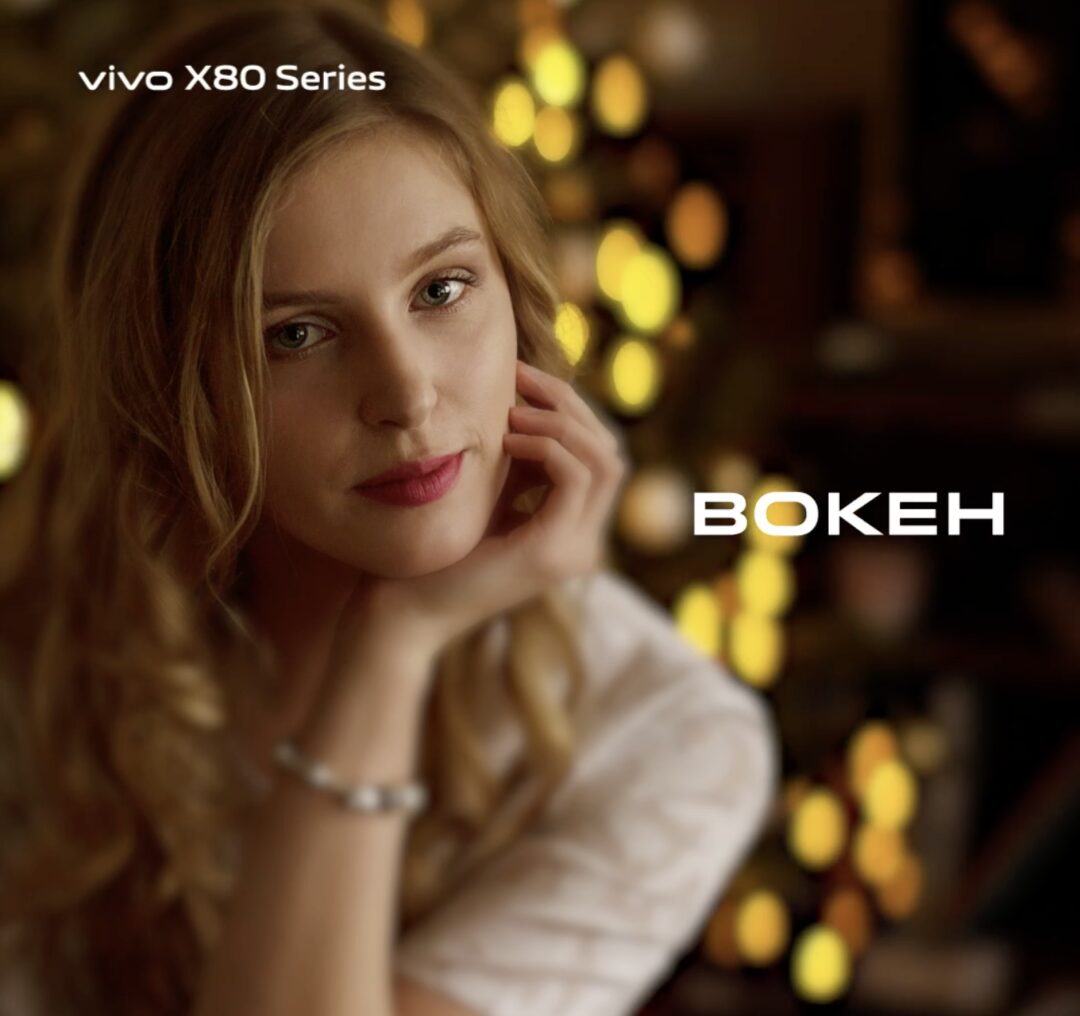
The portrait mode on mobile phones, also known as “background blur” or “dual-camera blur” mode, also referred to as Bokeh mode, can keep specific people or objects in focus while blurring the rest of the background. This highlights the main subject of the image, resulting in a stronger aesthetic appeal.
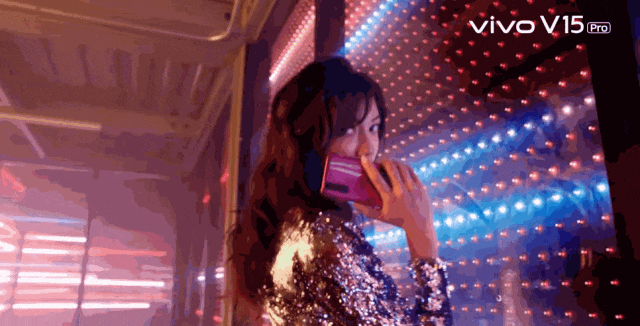
Portrait mode effect on VIVO phones
The general principle of implementing portrait mode is to use a dual-camera system to obtain depth information and accurately separate the subject from the background using depth sensors and image segmentation techniques, followed by applying portrait enhancement processing and background blur algorithms, such as beautification, skin tone optimization, and depth-based blurring, ultimately providing clear and prominent portrait photos.
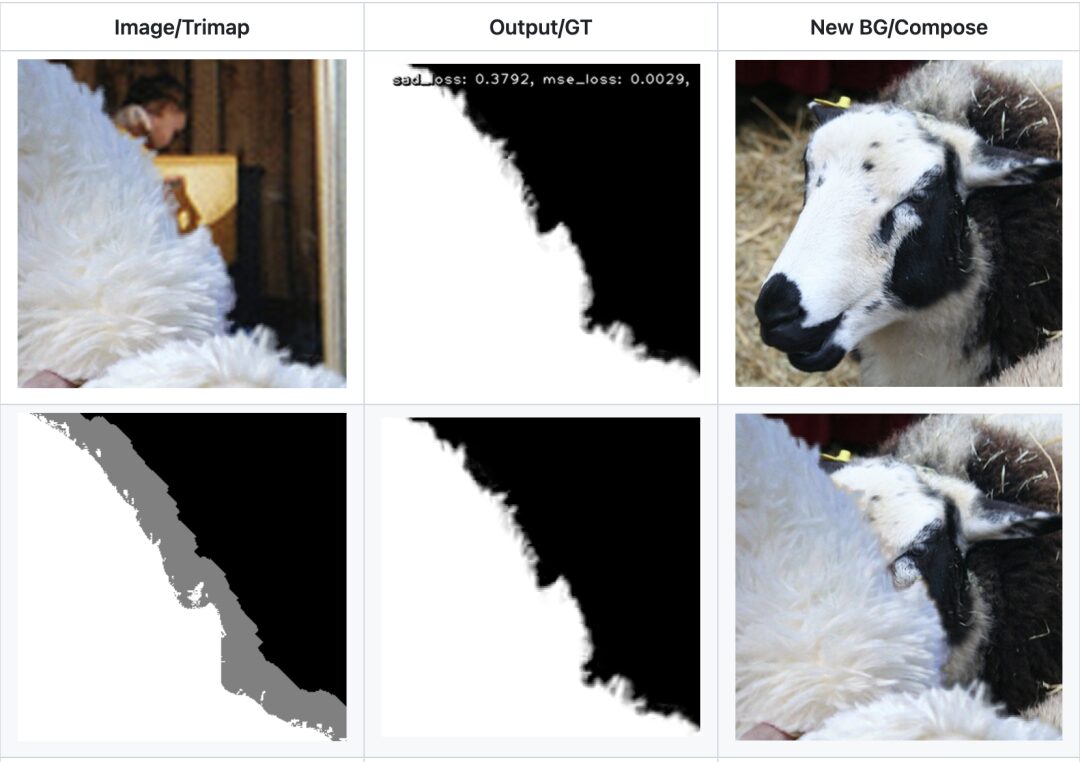
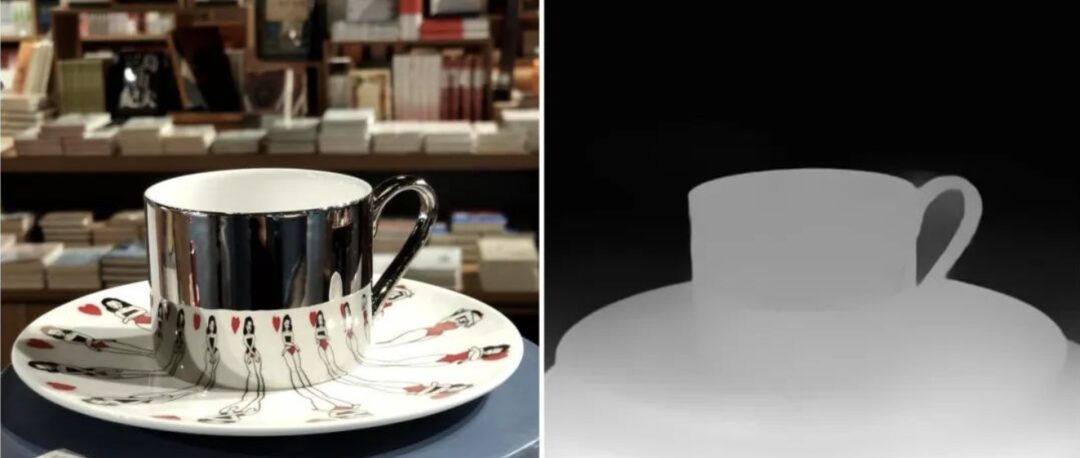
Therefore, the implementation of portrait mode on the software side relies heavily on having an image segmentation algorithm that can accurately output images with depth (depth of field) information.
With the development of deep learning, it is now possible to infer depth maps of scenes using a single camera. I recommend the open-source model Deep-Image-Matting: https://github.com/foamliu/Deep-Image-Matting
If you want to simply implement portrait matting, you can refer to the open-source project ncnn_Android_RobustVideoMatting by Feige Chuan Shu, which uses Tencent’s ncnn neural network computing framework. ncnn is a high-performance neural network forward computation framework optimized for mobile devices.
VideoMatting Demo: https://github.com/githubhaohao/AndroidVideoMatting
Next, this article will teach you how to use portrait segmentation and OpenGL filters to implement the portrait background blur effect.
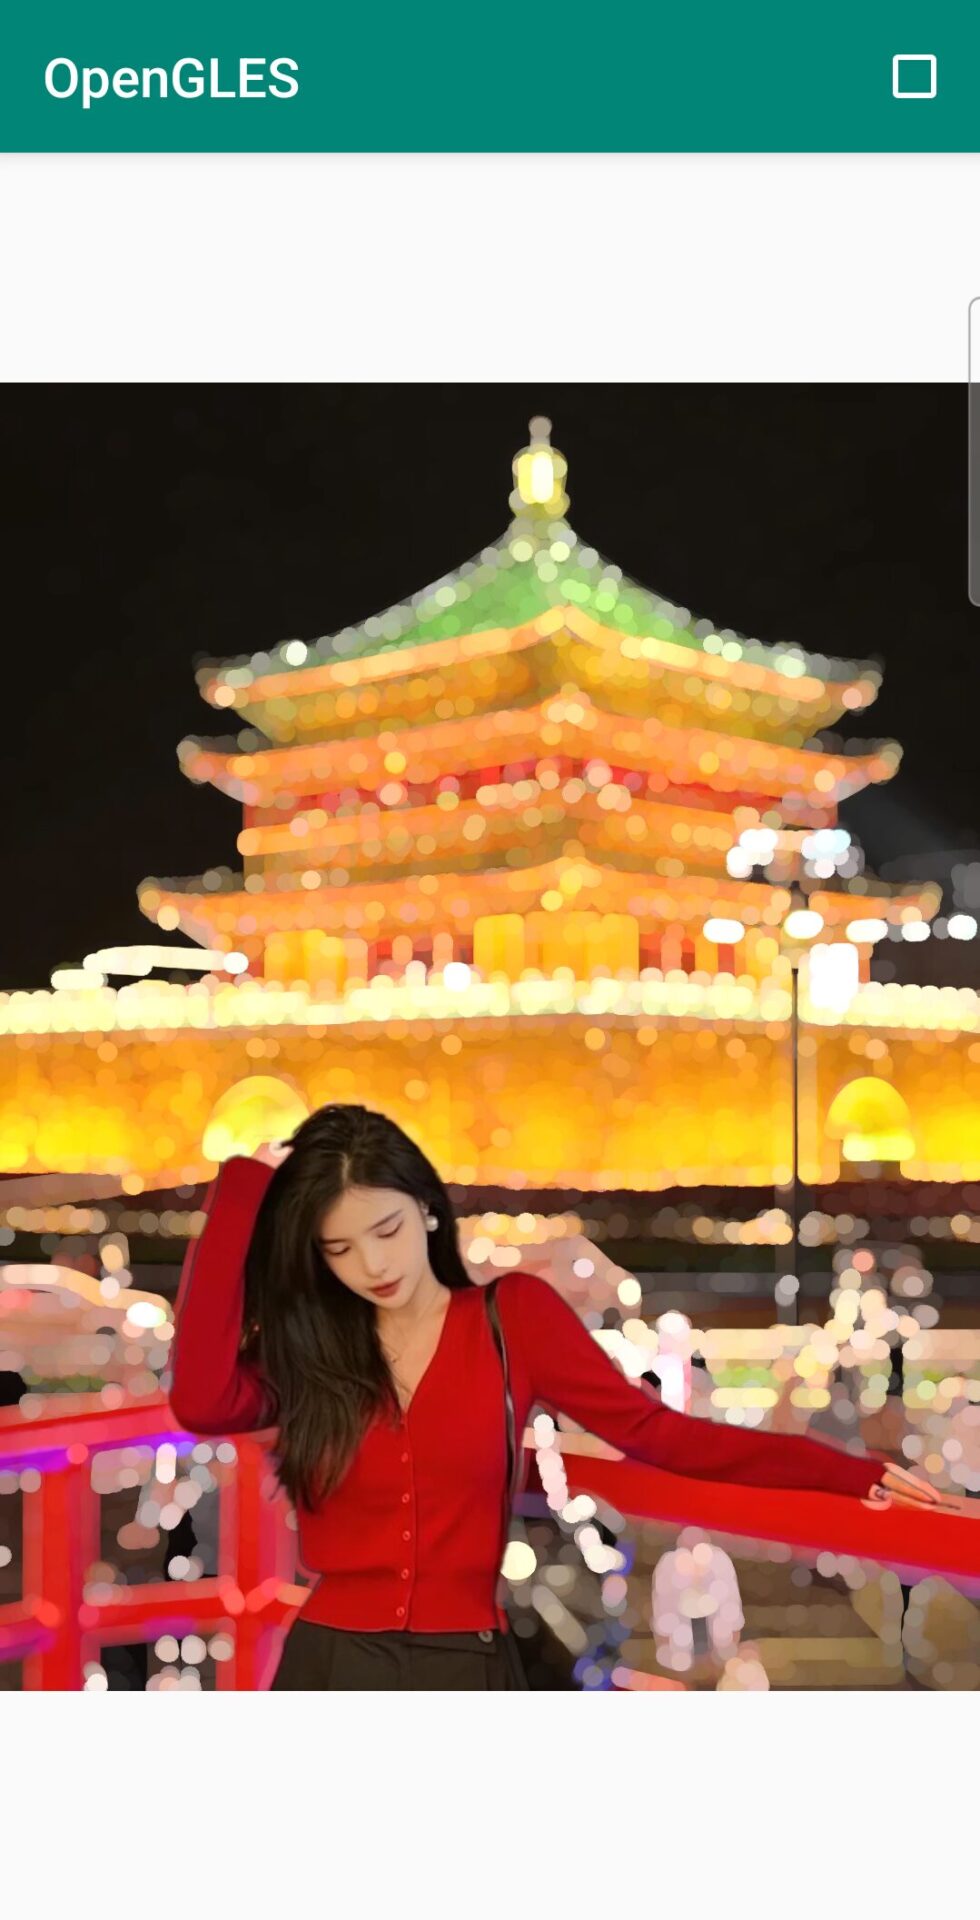
As usual, here is the effect image, the “portrait background blur” effect implemented with OpenGL

Implementation Principle
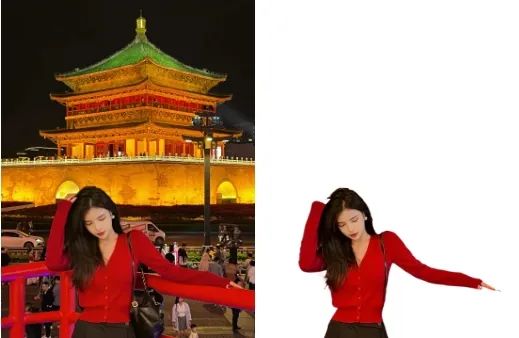
To achieve the “portrait background blur” effect, we first obtain the mask image of the portrait, then based on this mask image, we protect the portrait, apply some blur (blurring) to the background and create some highlight “bokeh” effects, as real optical systems form particularly textured bokeh at certain highlight pixels during large aperture imaging.
Depth Information
If the mask image we obtain contains depth information, we can perform more detailed processing, such as varying the size of the bokeh based on proximity and distance, which will make the blur effect more layered and closer to the output effect of mobile portrait mode.
The implementation of the “bokeh” effect refers to my previous article: How is the popular Bokeh effect of Douyin and Video Numbers achieved? https://mp.weixin.qq.com/s/O4DFpruMdQecJBPga6Q5zA where we select a circular bokeh.
Shader for implementing circular bokeh:
#version 300 es
precision highp float;
in vec2 v_texCoord;
uniform sampler2D sTexture;
uniform sampler2D sPortraitTexture;
uniform highp vec2 inputSize;
layout(location = 0) out vec4 outColor;

float sdCircle(in vec2 p, in float r) {
    return length(p)-r;
}

void main() {
    float effectValue = 0.4;
    vec2 uv = v_texCoord;
    vec2 d = 1.0 / inputSize;
    float scale = (inputSize.x + inputSize.y)/1080.0;
    float kernel = floor(20.0 * scale * effectValue);
    vec4 maxCol = vec4(0.0);
    vec4 mask = texture(sPortraitTexture, uv);
    for(float x = -kernel;x<kernel;x++) {
        for(float y = -kernel;y<kernel;y++) {
            vec2 xy = vec2(x,y)/kernel;
            if(sdCircle(xy, 0.5 + effectValue * 0.2) < 0.0) {
                vec4 col = texture(sTexture, uv + d * vec2(x,y));
                maxCol = max(maxCol, col * mask.a);
            }
        }
    }
    outColor = maxCol;
}
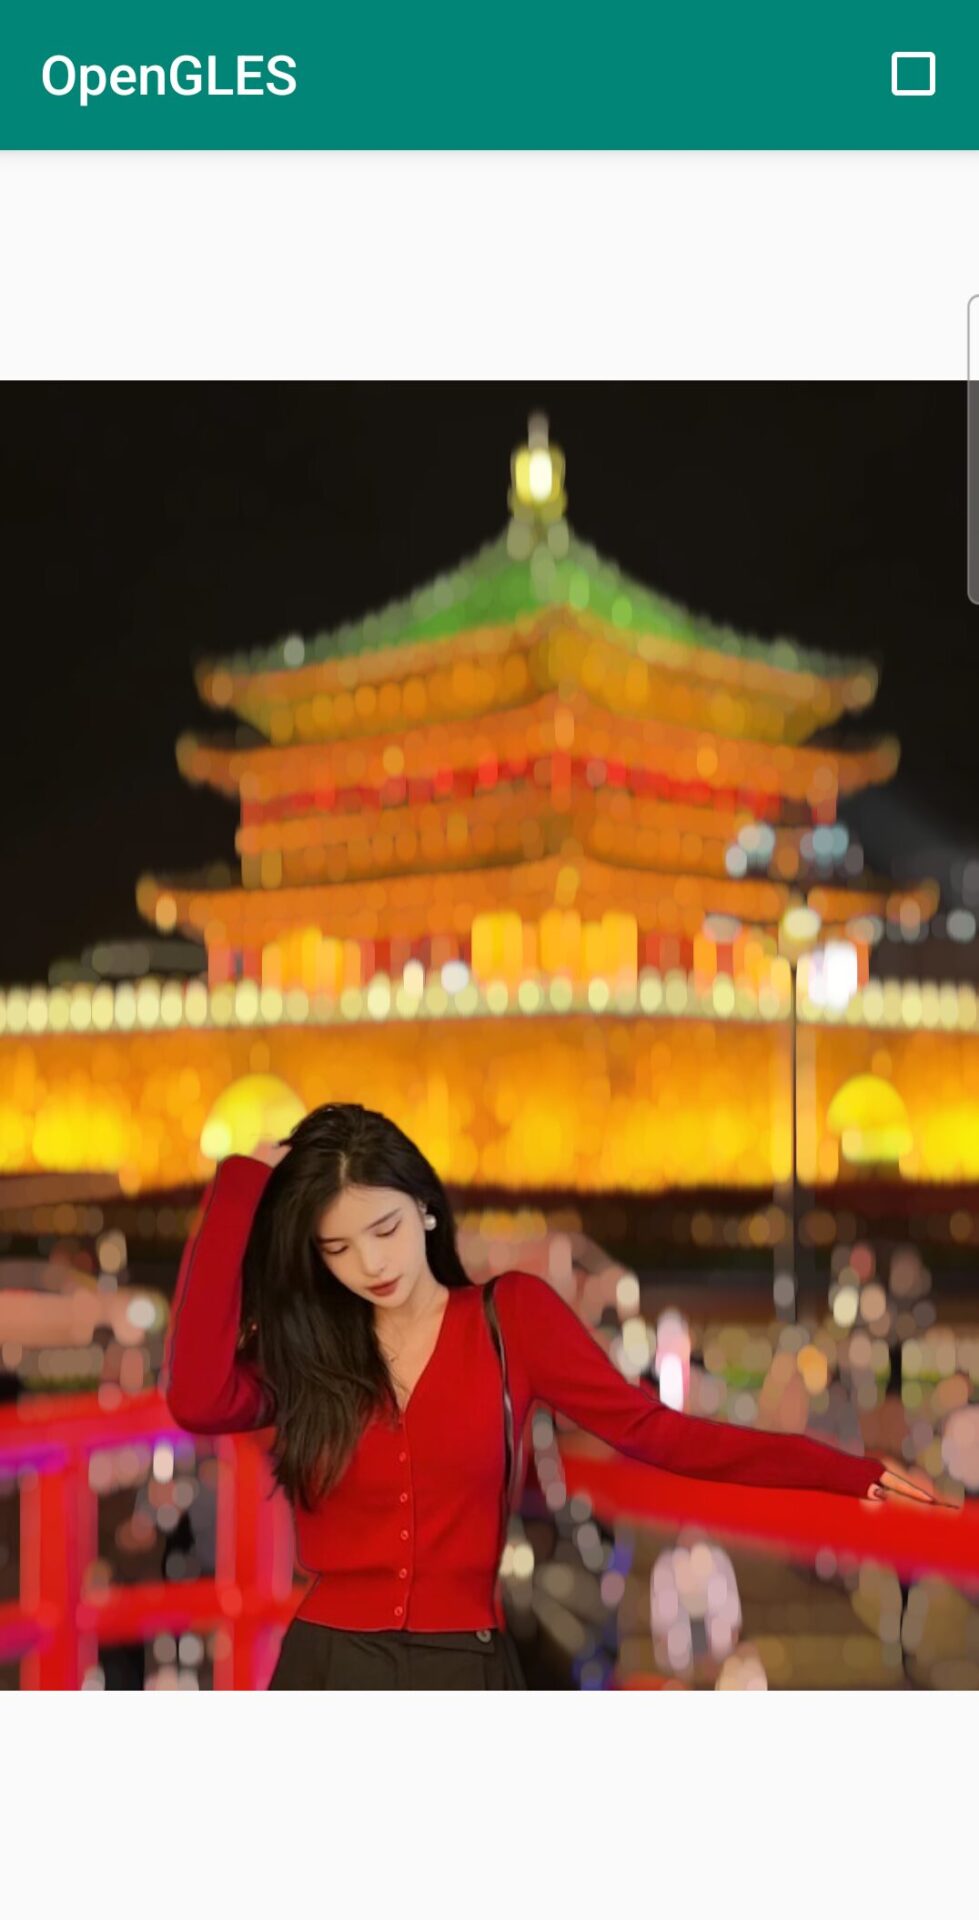
With the bokeh effect and the extracted portrait, we can use the Blend filter to verify:
//Blend
#version 300 es
precision highp float;
in vec2 v_texCoord;
uniform sampler2D sTexture;//Image after bokeh effect
uniform sampler2D sPortraitTexture;//Extracted portrait mask
layout(location = 0) out vec4 outColor;

void main() {
    vec4 portraitCol = texture(sPortraitTexture, v_texCoord);
    vec4 srcCol = texture(sTexture, v_texCoord);
    outColor = mix(srcCol, portraitCol, portraitCol.a);
}
The effect is as follows:
The “bokeh” looks very unnatural and lacks the blur feeling. Next, let’s apply blur to the image first and then the bokeh effect to see how they blend together.
The blur effect can be implemented using a Gaussian blur algorithm. For reference: https://mp.weixin.qq.com/s/D53C1KtY2slLBX28Ggmx2g. Here, to reduce the computational load, I choose to use a lightweight, fast Gaussian blur filter. The source code will not be posted here due to space constraints, but the method to obtain it is at the end.
After adding blur, the effect looks much more natural:
Upon careful observation, a new problem arises: there is a black edge around the portrait, which looks very unattractive.
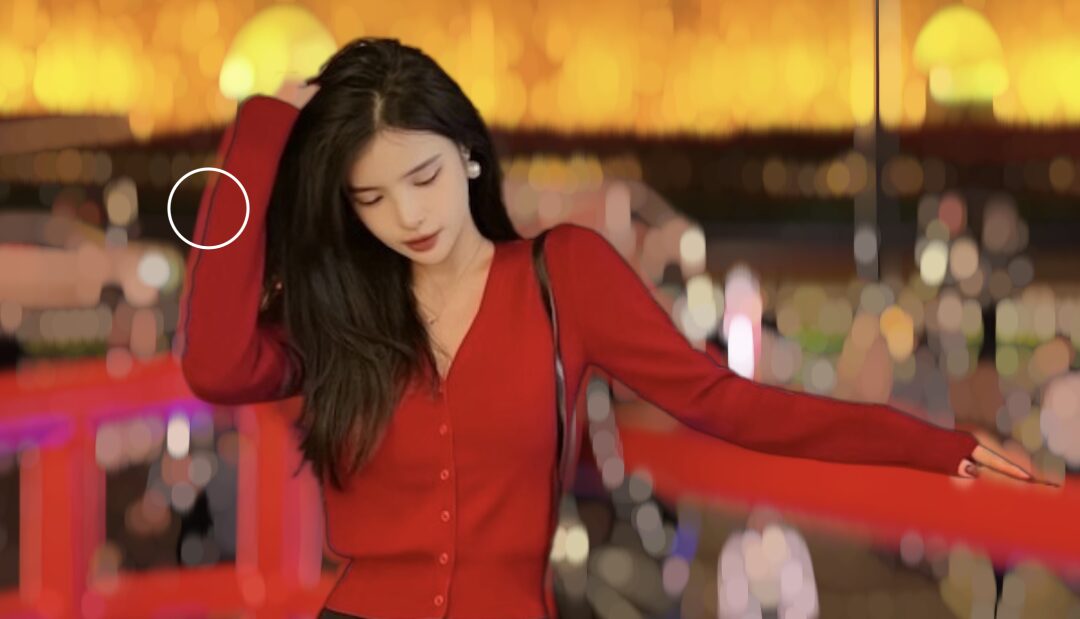
This issue is caused by two reasons: one is the insufficient precision of the segmentation algorithm, which does not cleanly extract the portrait; the other is the lack of alpha premultiplication during blending, leading to black edges in the semi-transparent areas. To address these two issues, let’s optimize our blend shader:
#version 300 es
precision highp float;
in vec2 v_texCoord;
uniform sampler2D sTexture;//Image after bokeh and blur effects
uniform sampler2D sPortraitTexture;//Extracted portrait mask
layout(location = 0) out vec4 outColor;

void main() {
    vec4 portraitCol = texture(sPortraitTexture, v_texCoord);
    vec4 srcCol = texture(sTexture, v_texCoord);
    srcCol *= srcCol.a;// Alpha premultiplication
    portraitCol *= portraitCol.a;// Alpha premultiplication
    outColor = mix(srcCol, portraitCol, portraitCol.a);
    outColor.rgb /= max(0.000001, outColor.a);
}
Let’s take a look at the final effect:
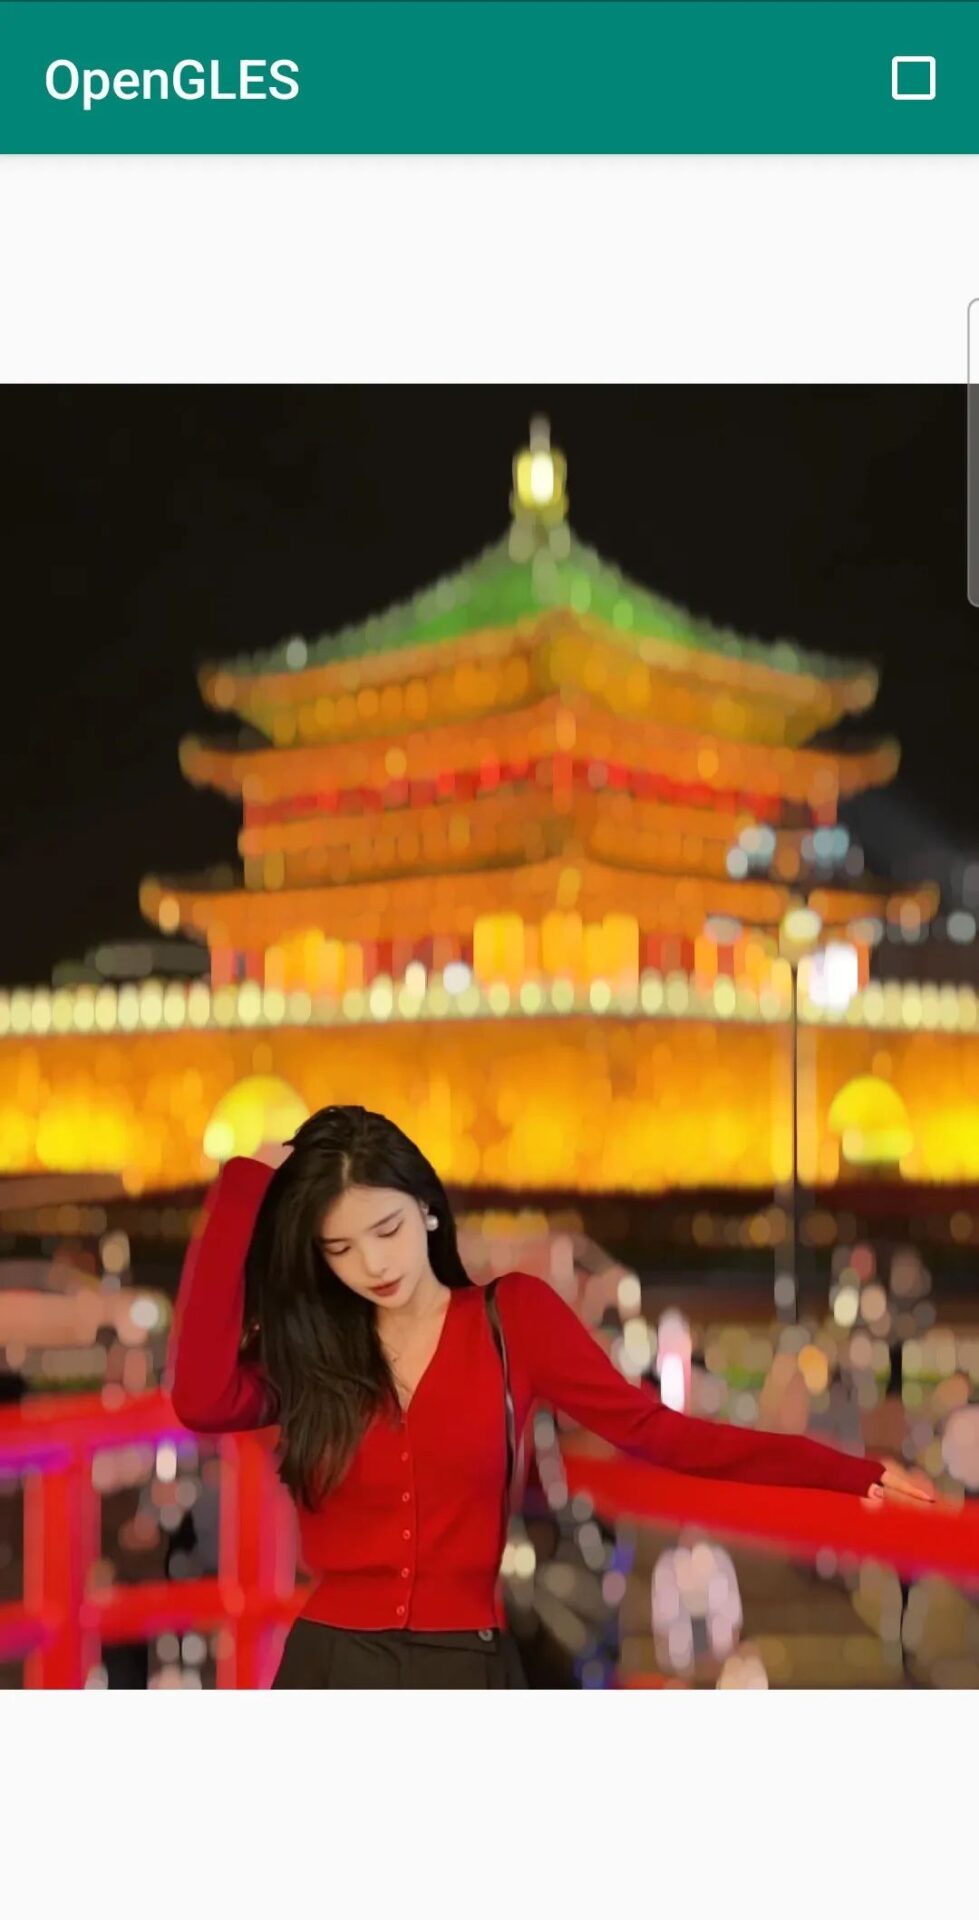
Future optimization directions include using depth (depth) maps to control the size of bokeh and the intensity of blur in different areas. Students who need the complete code can scan the QR code below to add my WeChat: Byte-Flow to obtain it.
— END —
Join the technical exchange group, scan to add my WeChat: Byte-Flow

Get relevant materials and source code
Paid community for learning audio and video, OpenGL ES, Vulkan, Metal, image filters, video effects, and related rendering technologies, interview guidance, 1v1 resume services, career planning.

My paid community
Recommendations:
Implementing Filtered WeChat Mini Video Recording Function with Android FFmpeg
The most comprehensive Android audio, video, and OpenGL ES resources are all here
Master the basics of YUV image processing in one article
How is the conveyor belt effect in Douyin achieved?
All the image transition effects you want are here
Interviewer: How to use Shader to achieve RGBA to NV21 image format conversion?
I used OpenGL ES to create several Douyin filters for a girl