This article will detail how to write a .NET IoT device driver from scratch using the NV3030B LCD device driver as an example. We will use the Raspberry Pi as the hardware platform and refer to the official .NET IoT Ili934x TFT LCD driver library.
1. Background
In the previous article “Getting Started with .NET IoT Development”, we mentioned methods for developing drivers in .NET IoT. By leveraging cross-disciplinary learning, you can first operate according to these example codes and then rewrite them in .NET. Here, we will take the NV3030B LCD device driver as an example to detail how to start writing a .NET IoT device driver from scratch.
2. Preparation
Before we start writing the driver, we need to ensure the following:
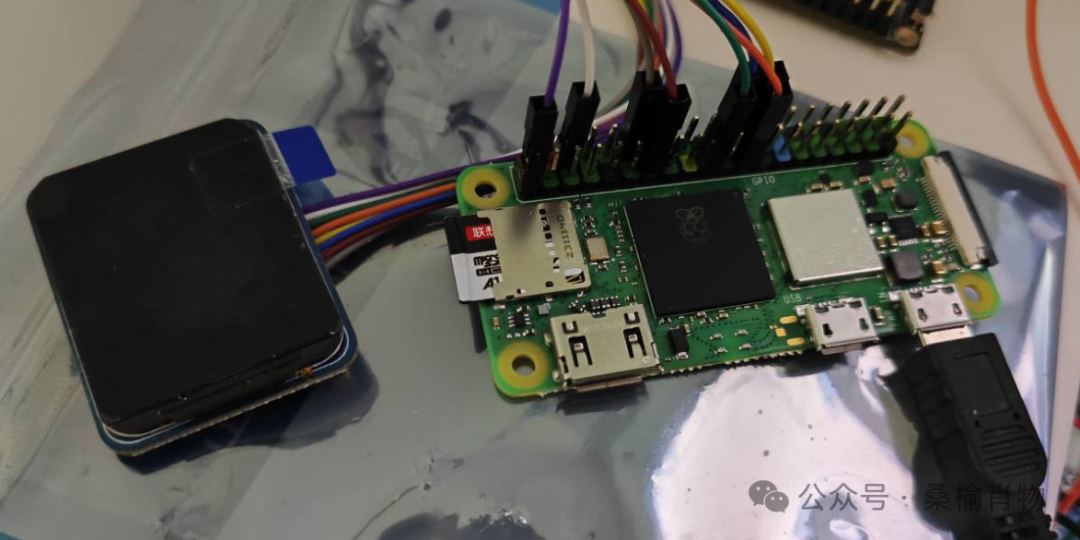
•Raspberry Pi (this article uses Raspberry Pi Zero 2 W as an example)•Waveshare 1.5-inch LCD screen, NV3030B driver chip•SPI wiring•.NET 8.0 or higher•Waveshare’s official Python driver example code
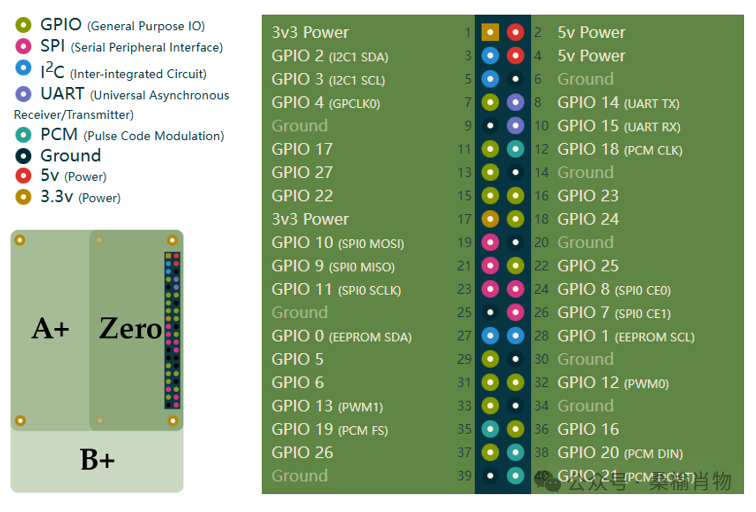
The 40 Pin wiring of the Raspberry Pi is generally consistent, and you can refer to the Raspberry Pi GPIO pinout diagram[1].
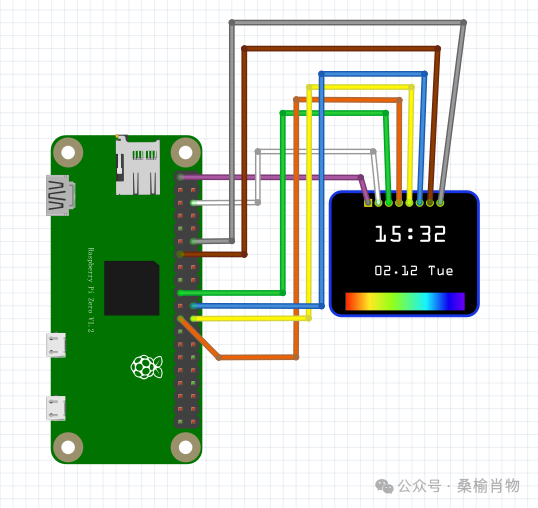
The wiring between the display and the Raspberry Pi is as follows:
3. Verify SPI Wiring and Device
Before writing the .NET driver, we first need to verify that the SPI wiring and device are functioning correctly. We can use the example Python code provided by Waveshare to perform the test, which includes the Python version of the driver code.
It is important to note: If you have not previously installed the numpy and pillow libraries, you need to install them first:
sudo apt install python3-numpy python3-pillowThen run the example code and observe whether the display works correctly. If the screen lights up and displays content, it indicates that the wiring and device are functioning properly, and we can proceed to the next step.
4. Writing the .NET Driver
In previous articles, we mentioned that before connecting a device, we should check the support status of the official driver library. If a supported device is available, purchase it; if not, refer to the official driver library or other open-source projects. If all else fails, we can find a similar official driver and modify it. Here, I found the official Ili934x TFT LCD driver library[2], which we can use as a reference for designing the NV3030B LCD driver.
Most of the code in this library can be used directly; we only need to modify some initialization and detail codes. We will use this library as a basis to write the NV3030B LCD driver.
4.1 Quickly Set Up the Project Using GitHub Copilot
Of course, in the era of large models, who still writes code by hand? Writing is impossible; these tedious tasks are left to AI. We just need to tell AI what we want to do, and it will help us generate the code. Now, we directly invoke the GitHub Copilot to help us complete the NV3030B driver by referencing the implementation of the <span>Ili934x</span> library:
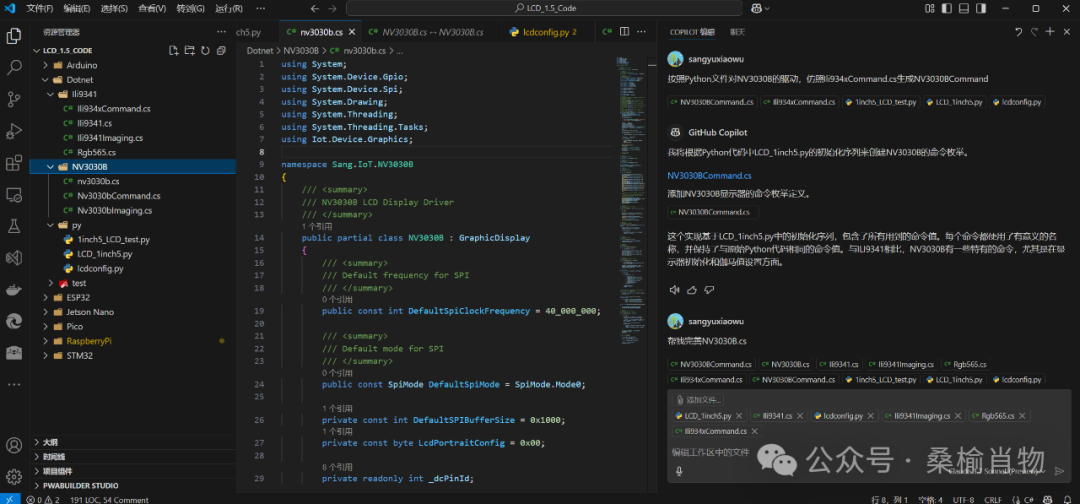
Of course, the code generated by AI is not 100% accurate; we still need to review it one by one to ensure the correctness of the code. We will not list them all here. Then, based on the AI’s generation, we can either modify it ourselves or guide AI to generate the correct code.
For GitHub Copilot, I feel that the best IDE to use is still VS Code, at least it provides a better experience than the integrated GitHub Copilot in Visual Studio. Both IDEs have their pros and cons, and I generally use them in conjunction.
Again, it is crucial to conduct thorough reviews; this is a key point that will be tested later.
For this driver, since we are referencing the Ili934x driver library, this library inherits from the <span>GraphicDisplay</span> class, so we will also inherit this class and need to install the following library:
dotnet add package Iot.Device.Bindings.SkiaSharpAdapter4.2 Areas That Need Modification
<span>Ili934x</span> driver library, the modifications we need to make are actually few, mainly in the constructor class main file and the <span>Command</span> file.
For the <span>Command</span> file, we need to modify some initialization commands and special commands based on the NV3030B’s datasheet. Here, we can directly modify according to the initialization commands of the Python driver. Although AI helped a lot here, in the end, due to debugging failures, I had to verify this command and the implementation code for initialization several times o(╥﹏╥)o.
Besides the initialization code and basic configuration information, such as frequency and screen size, there are also some detail codes that need modification:
In the <span>SetWindow</span> method, according to the Python driver, there is an offset for <span>y0</span> and <span>y1</span>, so we also need to apply the same offset:
/// <summary>/// Set display window for drawing/// </summary>private void SetWindow(int x0, int y0, int x1, int y1){ y0 += 20; y1 += 20; /* ... */}Other than that, there is not much that needs to be modified. Here, we optimized the brightness control; the original only had high and low levels, but we added PWM dimming, which allows for better brightness control:
public NV3030B(SpiDevice spiDevice, int dataCommandPin, int resetPin, int backlightPin = -1, int backlight_frequency = 1000, int spiBufferSize = DefaultSPIBufferSize, GpioController? gpioController = null, bool shouldDispose = true){ /* ... */ if (_backlightPin != -1) { _gpioDevice.OpenPin(_backlightPin, PinMode.Output); _backlightChannel = new SoftwarePwmChannel(backlightPin, backlight_frequency,controller: _gpioDevice); _backlightChannel.Start(); SetBacklight(100); } /* ... */}/// <summary>/// Set backlight brightness (0-100)/// </summary>public void SetBacklight(int brightness){ if (_backlightChannel is null) throw new InvalidOperationException(“Backlight pin not configured”); if (brightness < 0 || brightness > 100) throw new ArgumentOutOfRangeException(nameof(brightness), “Brightness must be between 0 and 100”); double dutyCycle = brightness / 100.0; _backlightChannel.DutyCycle = dutyCycle;}
At this point, we should have made most of the necessary modifications, and we should consider the NV3030B driver writing complete. However, this is not the end; we need to test it.
5. Testing the Driver
Before testing, we need to write a simple test program to initialize the display and show some content, which should include basic graphics drawing and image display tests. The image can directly use the test image from the Python driver <span>LCD_1inch5.jpg</span>.
// Test basic graphicsdisplay.ClearScreen(System.Drawing.Color.Red, true);Task.Delay(10000).Wait();Console.WriteLine("Testing fill rectangle...");display.FillRect(System.Drawing.Color.Blue, 0, 0, 100, 100);display.FillRect(System.Drawing.Color.Green, 100, 0, 100, 100);display.SendFrame(false);Task.Delay(10000).Wait();using var image = BitmapImage.CreateFromFile("LCD_1inch5.jpg");display.DrawBitmap(image);Deploy the program to the Raspberry Pi, run the test program, and observe whether the display shows content correctly. If everything is normal, congratulations, you have successfully written the NV3030B driver. However, we encountered an unexpected issue:
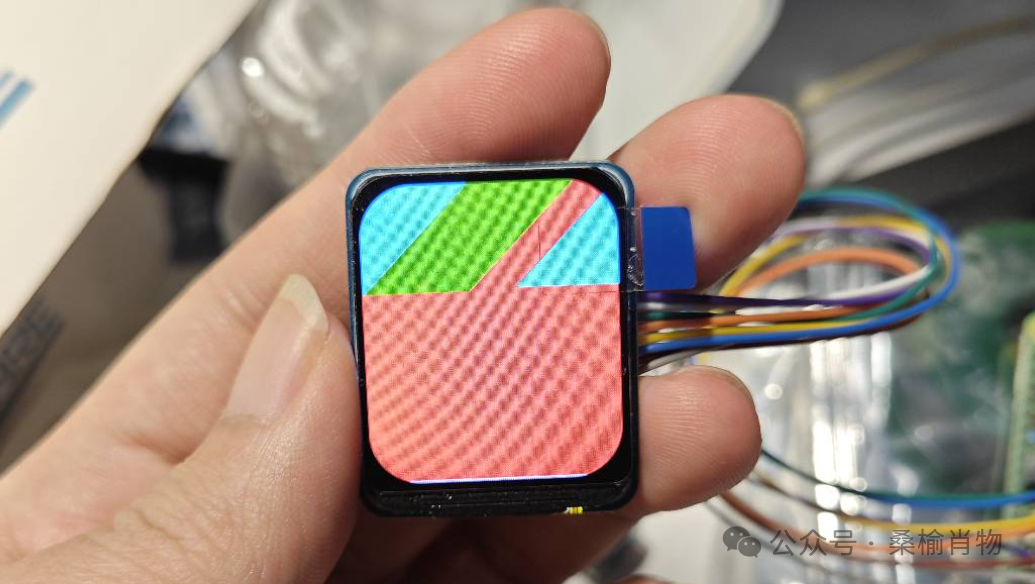
The entire image display is skewed and fragmented; is this still our square? (▼へ▼メ)
Then, I began a debugging process that lasted four to five days, during which I consulted various large models and tried all the suggestions given, but none resolved the issue. After several tests, I found that by adding data processing after the original <span>LCD_1inch5.py</span> ShowImage method and using .NET to read the binary data directly to send to the screen, it displayed correctly. Based on this breakthrough, I eventually discovered that the issue was still with the <span>SetWindow</span> method. In Python, in addition to the <span>+20</span> adjustment, there is also a <span>-1</span> adjustment, and the original library <span>Ili9341</span> directly sends the <span>byte</span> using the <span>SendBitmapPixelData</span> method, which has a <span>-1</span> operation, so it works correctly.
Finally, the mystery was solved, but this problem had troubled me for several days, and I had several rounds of contention with the large models; sometimes they are really stubborn, admitting but not changing.
All the code you saved by using large models will turn into tears when you encounter pitfalls.
However, it is a good thing; originally, the large model was familiar with this code, and now I am also quite familiar with it. When I have time later, I will extract a base class to optimize the common parts and facilitate the quick integration of new displays.
6. Conclusion
After completing the driver writing, we can publish it on NuGet for other developers to use. We will not elaborate on this here; the project is open-source, and those interested can refer to NV3030B[3].
This article detailed how to write a .NET IoT device driver for the NV3030B from scratch. By verifying the SPI wiring and the normal operation of the device, we gradually migrated the Python code to .NET, ultimately achieving the writing and testing of the driver. I hope this article helps you better understand and master .NET IoT development. If you have any questions or suggestions, feel free to leave a comment.
References
<span>[1]</span> Raspberry Pi GPIO Pinout Diagram: https://pinout.xyz/<span>[2]</span> Ili934x TFT LCD Driver Library: https://github.com/dotnet/iot/tree/main/src/devices/Ili934x?wt.mc_id=DT-MVP-5005195<span>[3]</span> NV3030B: https://github.com/sangyuxiaowu/NV3030B?wt.mc_id=DT-MVP-5005195