The latest version of the development environment can be downloaded from the official website:http://www.arduino.cc/en/Main/Software,
Note: The latest version 2.0.0 (see the image above) only supports 64-bit systems above Windows 10. If your computer’s system is below Windows 10 or the operating system is 32-bit, please download version 1.8.X (see the image below).
Next, we will introduce the differences between each installation package one by one:
1. Download the Windows system exe (executable file) version of the installation package.
This installation package only supports Windows 10 and above, and the system must be 64-bit. It is recommended to download this version for the first installation, which can automatically install commonly used hardware drivers.
2. Download the MSI (Microsoft Installer) installation package for Windows systems.
3. Download the zip compressed package for Windows systems.
This is a portable version that does not require installation; just unzip and open arduino.exe to use.
4. Download the installation package for Linux systems.
5. Download the zip compressed package for Linux systems.
6. Download the installation package for macOS.
7. For Windows 8.1 and Windows 10 systems, download from the app store. Just open the built-in app store and search.
1. After downloading, you will get the installation file arduino-ide_2.0.0_Windows_64bit.exe. Double-click the exe installation file to install.
2. Click “I Agree” to agree to the installation.
3. Check all the components to install. Click “NEXT” (the options from top to bottom are: install Arduino software; install USB driver; create a shortcut in the start menu; create a desktop shortcut; associate INO files).
4. Choose the installation path. It is recommended to use the default. Click “INSTALL”.
5. The software begins installation.
6. During the installation process, several dialog boxes may pop up (this varies by computer). Make sure to check the boxes and click install.
7. After the blue progress bar is full, a “Completed” message will appear. Click the “Close” button to close the dialog, and the installation is complete.
8. Double-click the icon of Arduino IDE on the desktop to open the software.
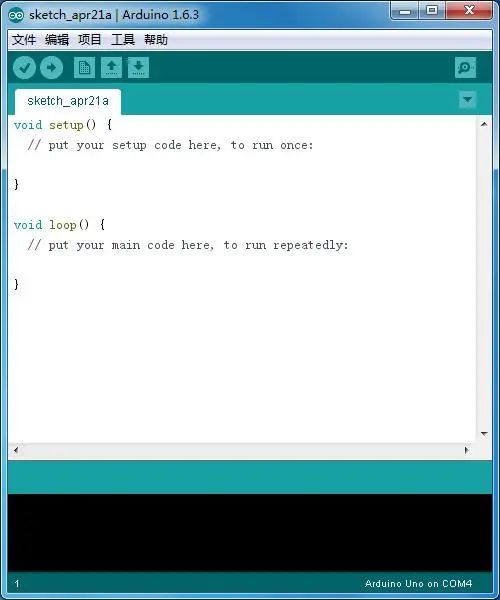
1. The interface of Arduino IDE after the first opening.
2. If the interface is in English, you can change the interface language with the following steps.
1. Click File -> Preferences to enter the first item settings,

2. In the Editor language section, select Simplified Chinese and click OK.
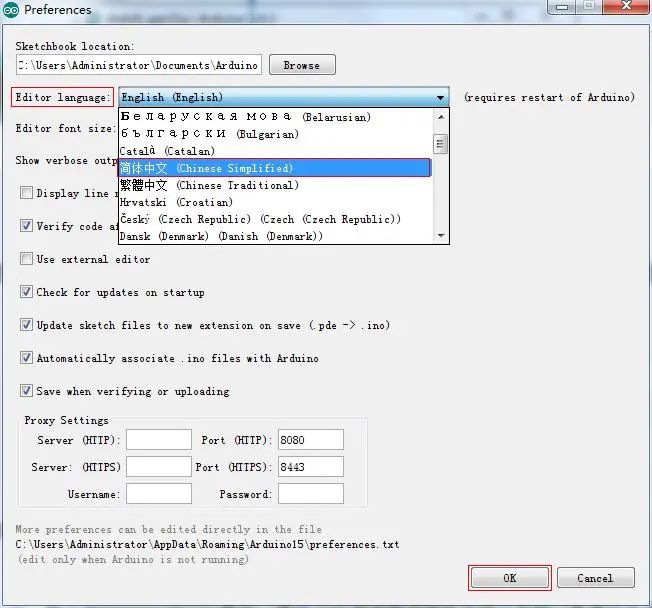
3. Restarting the software will change the language to Simplified Chinese.
4. Download Program
By downloading the program to the development board, you can test whether the program and driver are running normally.
1. Set the BOOT mode of the UNO PLUS development board to On, and set the VCC voltage to 5V.
2. Connect the development board to the computer via USB cable. If the power indicator of the module lights up, it indicates that it is working normally.
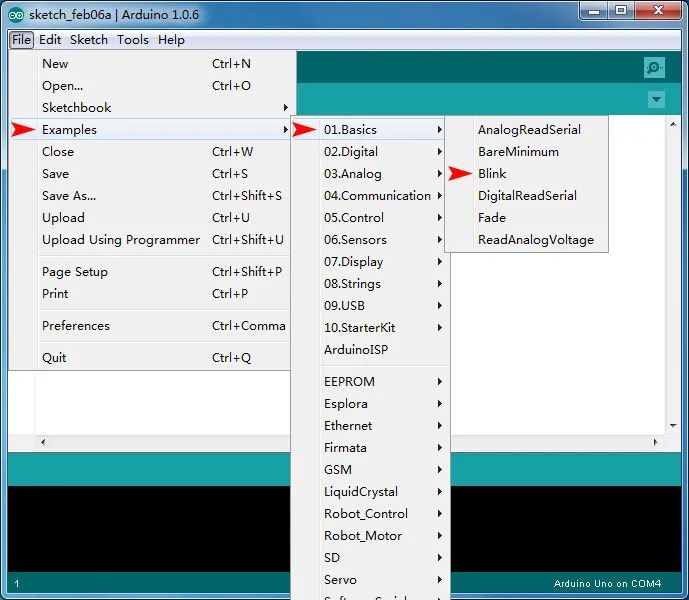
3. Click File -> Example -> 01.Basics -> Blink to open the example program.
(The Example contains various example programs that you can refer to when writing your own programs)
4. Click Tools -> Board -> Arduino Uno to select the Arduino board model. This only needs to be configured once; subsequent operations will default to using this model.
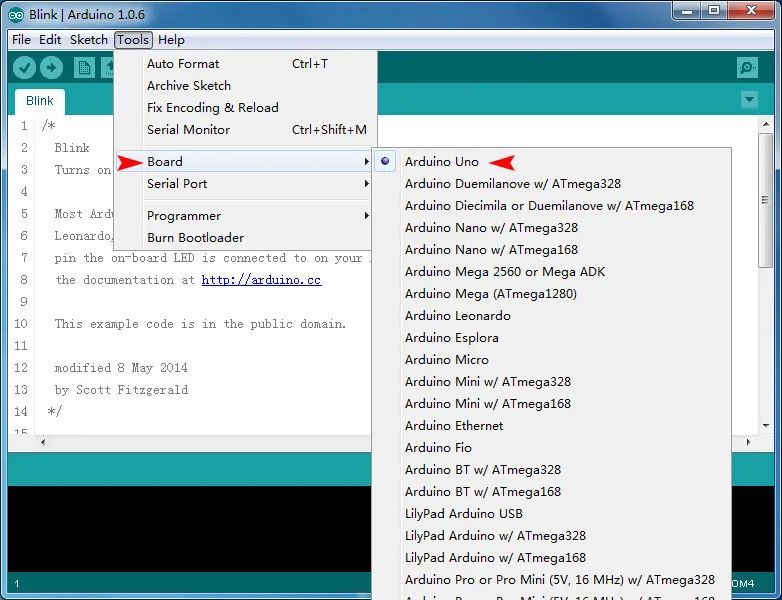
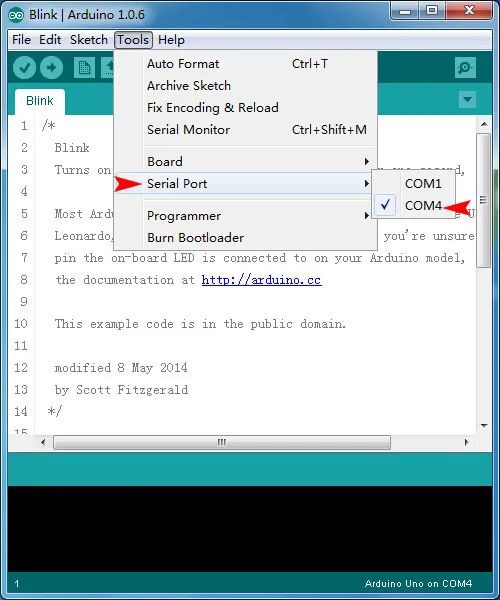
5. Click Tools -> Serial Port -> COM4 to configure the download port for the Arduino board. Note: The COM4 here may vary by computer, and you need to check the specific COM port number through the Device Manager.
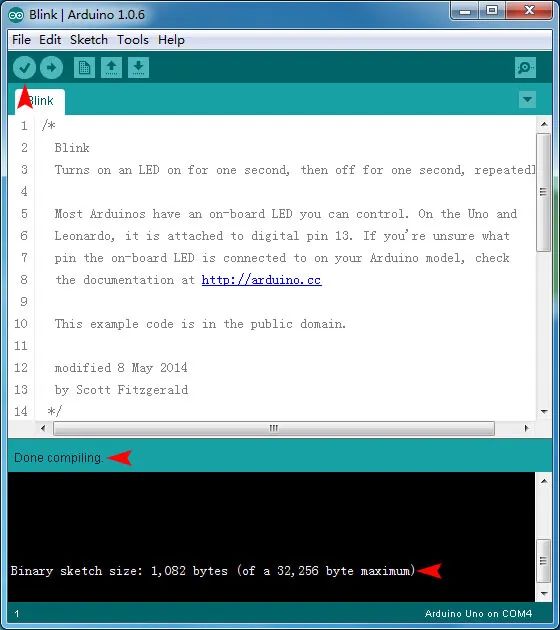
6. Click the compile button , and start compiling the program. If there are no errors, you will see a message saying “Done compiling” and the size of the generated file.
Click the download button , and start downloading the program. After it ends, you will see the LED on the UNO PLUS board start blinking with a 1-second cycle, indicating that the program has been successfully downloaded and is running normally.


