The goal of geeks is to bring drones into everyday life, making personal drones possible.
Multirotor aircraft are flying machines with more than two rotors. The motors at the end of each axis rotate the rotors to generate lift. By changing the relative speed between different rotors, the torque of the thrust can be altered, thus controlling the flight path of the aircraft.
Multirotor aircraft are relatively smaller than airplanes, usually with a diameter of less than two meters, and the smallest can be as small as 5cm. The most common type is the quadcopter, with a square layout that feels very high-tech; in fact, besides quadcopters, there are also dual-rotor, tri-rotor, hexacopters, octocopters, dodecacopters, and hexadecacopters (see e-volo manned multirotors). Different numbers of rotors and sizes exist, but they all share the same advantages: compared to traditional helicopters, multirotor aircraft are more compact and agile, and fly more stably; compared to fixed-wing aircraft, multirotors can take off and land vertically (VTOL) and can hover stably at a point to perform tasks.
In fact, in 1907, the Breguet brothers, Louis and Jacques, built the first rotorcraft under the guidance of Professor Richet, which, by today’s standards, is a dual-rotor quadcopter. However, due to the difficulty of control, it had little practical use. In recent years, with the development of new materials and MEMS technology, automatic attitude detection and precise motor speed control have become much easier. With the control issues resolved, multirotor aircraft have re-emerged on the historical stage; just a few years ago, we had never heard of such a strange aircraft with four propellers; but now, they can be seen on battlefields, in studios, and even in pizza shops.
Thanks to advancements in microelectronics and new materials, DIY-ing a multirotor aircraft is not very difficult. Because multirotor aircraft have a simple mechanical structure, uncomplicated circuits, and low material requirements, anyone with basic circuit knowledge can get started on building their own aircraft; if one has a more exploratory spirit, we can even equip this aircraft with GPS navigation, obstacle avoidance, image communication, and a series of other functions.
I started researching multirotor aircraft in my senior year of high school, from ready-made kits to self-designing, and I have made no less than twenty multirotors. I wouldn’t call myself a geek, but I am a dedicated multirotor enthusiast. Next, I will share some basic multirotor knowledge and production experiences.
How Do Multirotor Aircraft Work?
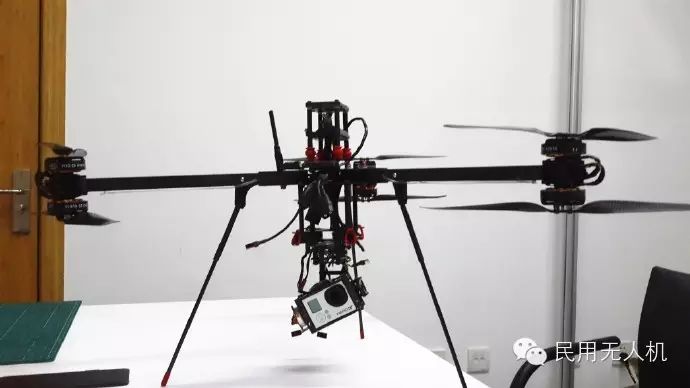
Multirotor aircraft come in various shapes, but they generally look like this: the flight controller is in the middle, with multiple arms extending outward. The flight controller controls the motors at the end of the arms through several electronic speed controllers. When you make a move with the remote control, the flight controller receives information from the receiver, assigning different speeds to each motor to execute the action. At the same time, the flight controller also obtains information from the gyroscope and accelerometer, using it to distribute motor speeds and ensure the entire aircraft remains stable.
The remote controllers commonly used operate at a frequency of 2.4G, the same as that of wireless networks; but don’t worry about interference, as most remote controllers can avoid interference through frequency hopping.
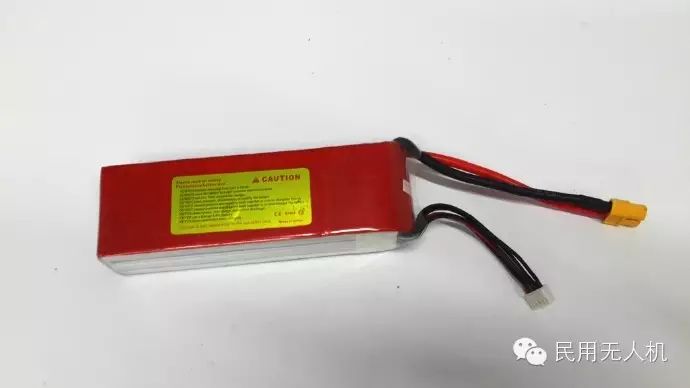
Multirotor aircraft fly using batteries. The batteries used are lithium batteries, the same as those in mobile phones and laptops. However, unlike those, multirotors use high-discharge lithium batteries, which have a very high discharge current, even reaching 200A.
Multirotor aircraft typically use brushless motors designed for model aircraft, which require special electronic speed controllers to drive, but it’s worth it: they are lightweight yet powerful—one motor the size of an egg can have a power output exceeding one kilowatt.
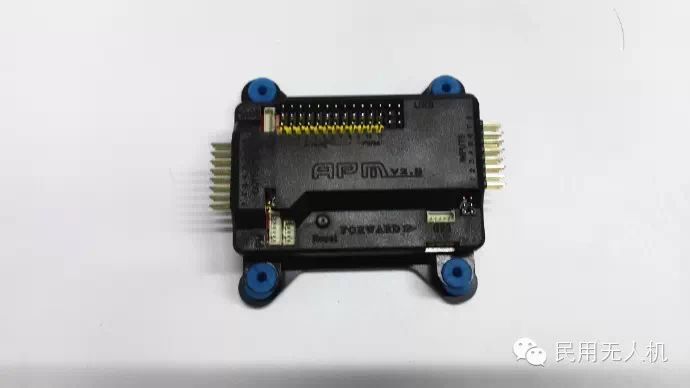
The flight control board may look very advanced, but it is not. Many people are familiar with the Arduino programming language, which was developed by Italian engineers in 2005. Most current flight controllers use Arduino programming. For example, the famous APM flight controller uses the mega2560 as its main control chip, connecting external sensors like magnetometers, barometers, and a series of other sensors to form a drone flight control system.
How to Determine Payload?
Some people may have seen the video of Domino’s drone delivering pizza, but as far as multirotor payload capacity is concerned, delivering pizza is a trivial matter.
The maximum payload currently achievable was created by a German team. E-volo achieved a manned multirotor aircraft. Its flying height is not very high, but it did take off.
Blindly pursuing high payloads is unwise; no one would want to spend millions to build a 100kg multirotor just to carry a camera. Determine the necessary payload first, and then determine the aircraft configuration.
Aerial Photography
This is the reason many people get involved with aircraft. Imagine using an aircraft to rise to 100 meters high to record the surrounding world; the scene is simply dreamy. Of course, there are some flying regulations that must be followed, such as not flying near airports and not exceeding a height of 120 meters, etc.
How to Choose a Model?
The most common multirotor aircraft appearance is the quadcopter with four motors. There are cross-shaped quadcopters, X-shaped rotors, and the less common Y-shaped quadcopters (with two motors installed on the front arms and one motor on the back arms).
Do different layouts have advantages and disadvantages? Cross and X layouts are more common (in fact, most are X-shaped), but the choice of frame is generally based on preference and needs; for example, the cross layout is more direct for control, while the Y layout is easier to carry when folded, etc.
Hexacopters have a basic design with one motor at the front and back, with two motors on each side. The H-shaped hexacopter has three motors evenly distributed on both arms. The Y-shaped hexacopter, or Y6, has one motor on each arm, both top and bottom.
When the number of rotors expands to eight or more, there will be more frame layouts.
Using a quadcopter is a good entry point. Because quadcopters are easier to control, have simpler and more direct setups, and are relatively low in cost.
While more rotors mean increased lift, they also imply higher costs. To maintain flight time, higher battery capacity must be used. However, this is worth it: hexacopters and octocopters have an advantage in redundancy. An octocopter can still maintain flight even if one motor’s power is lost. In hexacopters, depending on the layout, losing one motor’s power may allow the aircraft to land safely. However, in quadcopters and tri-copters, losing one motor’s power will cause it to crash; of course, TED has also demonstrated a different stabilization method for quadcopters, but maintaining stability through continuous spinning is obviously not something the average person can accept.
Multirotor aircraft come in various sizes, but the most popular wheelbases are 550mm, 450mm, and 330mm. In fact, any wheelbase is possible, as long as larger motors and batteries are used to match the larger wheelbase. Therefore, choosing a model is also a balance: the interrelation between size, weight, lift, and endurance.
How to Obtain Materials?
Before getting started, it is very important to determine what materials are needed, including motors, electronic speed controllers, flight controllers, and frame selection. Usually, these can be purchased on e-commerce websites. If you want to DIY further, trying to customize components or outsourcing processing is also a good option.
Build Your Own Aircraft!
As a geek, how can you not have your own aircraft? Next, I will show you how to make a quadcopter.
Continuous Research
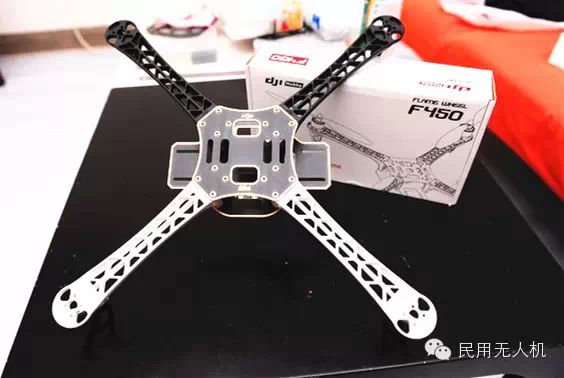
The 450-600mm wheelbase X quadcopter is clearly the simplest choice—it has high expandability, can carry cameras like GoPro, and can be equipped with other sensors. If you are purchasing a ready-made frame, I recommend DJI’s F450 Flame Wheel frame; although a bit heavy, it is very strong, with built-in soldering points and great expandability.
The flight control board is small but very powerful. It has a series of sensors including gyroscopes, barometers, and magnetometers, making it the soul of the entire aircraft. For geeks, I recommend the APM flight controller, which is an open-source flight controller based on Arduino, powerful and highly modifiable, but may require some basic English skills. For those who want to get started quickly, DJI’s NAZA flight controller is a reliable and easy-to-use commercial flight controller.
Selecting Motors
The most challenging component to select is the motor. Due to the inherent relationship between thrust, weight, and battery capacity, it is almost impossible to create the best combination at the lowest cost. I recommend the Longyu V2216kv800 motor. The 22 refers to the inner diameter of the motor stator, and 16 refers to the length of the motor stator. The longer or larger the motor, the more power it provides.
Once you have chosen the motor, you can select the electronic speed controller, which connects the flight control board to the motor and controls its speed. The amperage of the ESC should be sufficiently large to stabilize the motor’s power. The Spider 20A/30A from Zhongtewei offers great value, and the Feiteng 30A from Haoying is also quite good. However, be cautious with ESCs marked as ‘opto’; they do not supply power to the flight controller, which means you will need another independent 5V step-down module (UBEC) to power the flight controller.
Batteries and Propellers
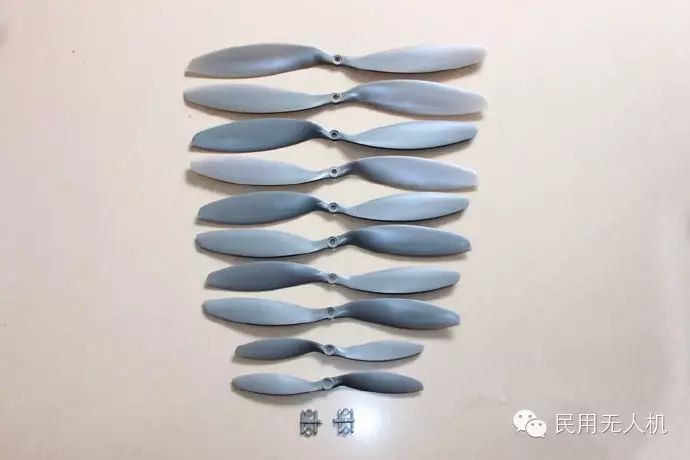
The final major components are the battery and the propeller. Theoretically, as long as the propellers do not hit each other, it is fine; however, you should also consider the motor’s power and speed when choosing the appropriate propeller. The higher the battery voltage, the faster the speed, which will also affect the choice of propeller. For the V2216, a 14.8V 4200mAh battery paired with 1045 propellers can achieve a flight time of twenty minutes. It is worth mentioning that lithium batteries have certain dangers, so safety precautions should be taken, such as storing at a voltage of 3.85V, avoiding high current charging, etc.
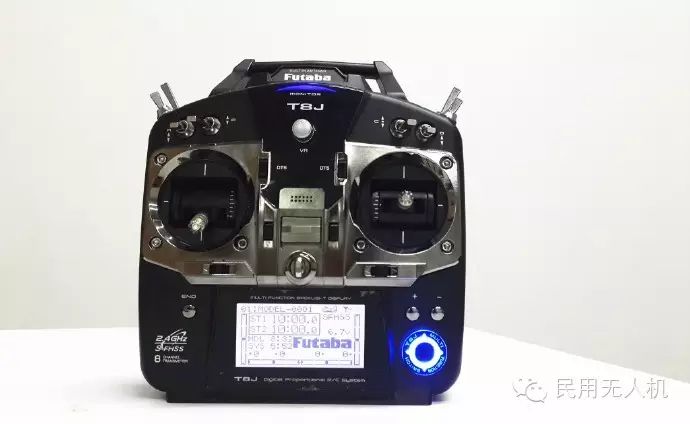
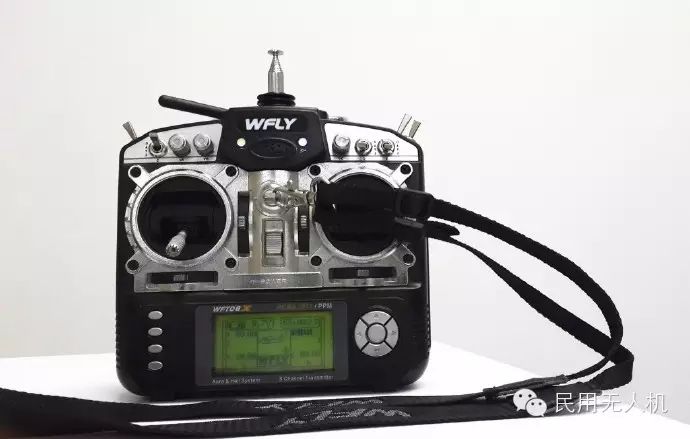
Remote Controller
The remote controller is the most critical part, directly determining the reliability of the aircraft. Some cheap remote controllers use refurbished components and can easily lead to loss of control. Students familiar with English can choose brands like Futaba and JR, while those who enjoy tinkering can opt for open-source systems like FS ER9X and Taranis X9D; for those who prefer Chinese remote controls, there is also Tiandi Fei to choose from.
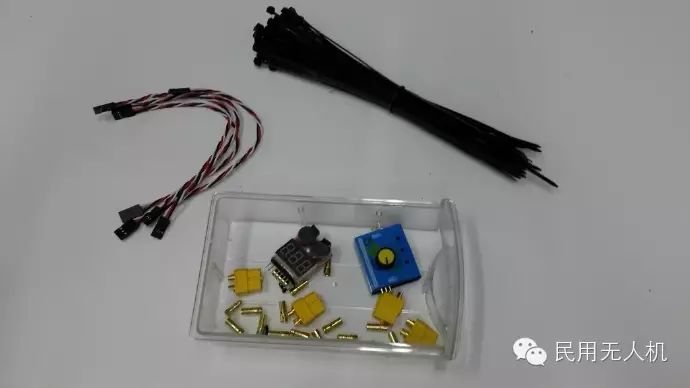
Some Small Components
During assembly, we will need some small components: such as XT60 power connectors, 3.5mm banana plugs, 3P DuPont connectors, etc. Additionally, some nylon ties and nylon buckles are very useful for installing equipment. These can all be purchased online.
Once all the components are gathered and assembled, we need to check all the connections: from the power to the electronic speed controller to the motor, from the electronic speed controller to the flight controller, and from the flight controller to the receiver. It is also important to ensure that the propellers are not installed on the aircraft during the first debugging to avoid injury.
Flying?
After all this effort, getting this pile of hard work to fly is quite a nerve-wracking experience. Now, it’s time to test the results.
The aircraft is like a flying blade—its propellers are so sharp that they can easily cut an arm. Imagine a 500-watt electric fan flying around—while a ceiling fan only requires 60 watts. Therefore, before takeoff, ensure that debugging is done properly and that the propellers are securely installed during the actual flight. Generally, it’s best to choose a place with very few people and plenty of space for flying.
The first step is to check the propeller installation, the blinking of the flight controller indicator lights, whether it passes self-check, and whether it is in normal attitude mode flight. Then, unlocking is necessary. Keeping the remote control at a certain position for a few seconds can unlock it and put it in standby mode. At this point, pushing the throttle will cause the propellers to start spinning, gradually accelerating; when pushed to about 50%, it can take off. After takeoff, the aircraft may drift in one direction, and you will need to control the aircraft to fly in the opposite direction to stay in place—this is the most basic point-holding practice. Once point-holding is easy, you can try fast flying, turning, and other skills. During practice, crashes are inevitable, so it’s advisable to buy several spare propellers.
Safety is crucial while flying. Moreover, it’s not just about your own safety, but also the safety of those around you, especially in very dangerous flying environments. Here are some basic safety tips:
• Never fly in places with small children or large crowds.
• Never fly near power lines.
• Before approaching your aircraft, ensure it is locked.
• Disconnect the aircraft’s power before turning off the remote controller.
• Develop the habit of cutting throttle in case of loss of control.
• Never fly the aircraft too high, too far, or too fast, as it may lead to loss of control.
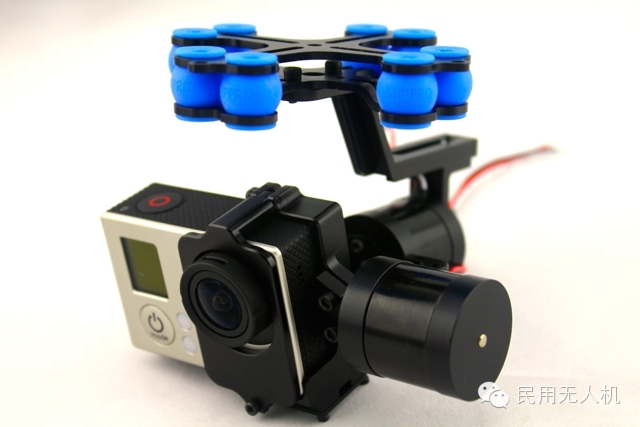
Mounting a Camera, Expanding Functions
Any model can carry a camera. Generally, action cameras (like GoPro) are more suitable for aerial photography; if you want to take photos, a regular camera (like Sony’s QX100) is also a good choice. However, ensure that the total weight after mounting the camera is within the motor’s carrying capacity. To ensure stable photography, a gimbal is essential. Typically, a brushless gimbal is used, which uses electronic circuits to counteract spatial displacement, ensuring that the footage remains steady.
Some powerful flight controllers can provide more functions. For example, the APM flight controller, when paired with some modules, can even allow it to take off automatically, fly along a pre-designed route on a map, perform tasks at a specific point, and then return home. The entire process requires no human intervention.
Soon, geeks will want to add many things to their aircraft. However, if the load is too heavy and exceeds the motor’s capacity, the motor will burn out. Nevertheless, there are ways to determine how much weight the aircraft can actually carry.
Being able to take off only indicates that the lift of the aircraft exceeds its weight. Most motors will specify how much lift they can provide under a certain size of propeller. The larger the propeller, the greater the lift (within a certain range), and the required power will also increase. Based on the propeller size, multiplying the lift of each motor by four gives the maximum lift the aircraft can provide. Use an electronic scale to measure the takeoff weight of your aircraft. The difference between total lift and takeoff weight is the additional weight your aircraft can carry. Alternatively, this can also be expressed as:
Additional Load = Total Lift - Takeoff WeightExcessive load will cause the motors to always operate at peak levels. The higher the motor power, the faster the battery consumption. This means that under normal circumstances, a 15-minute flight time may be reduced to 3 minutes. Even with a high motor load, it is essential to ensure that the aircraft does not exceed the maximum load, or that during maneuvers, it does not exceed the corresponding motor’s maximum load. This is also one of the joys of designing and building your own aircraft. The more fun, the more it depends on how each geek plays with it.
Author: Qian Chenhui (Student of Automation/Industrial Design at Zhejiang University)
We update drone news and useful information every day!
Long press the QR code to follow us!