1. Introduction

DeepSeek is a leading natural language processing model, which has evolved from its initial basic model into several different versions to meet various computational needs and application scenarios.DeepSeek-r1 is one of the newly launched efficient local deployment versions, designed to enhance user performance and flexibility when using DeepSeek in local environments. Many of you may often encounter the busy state of Teacher D’s server, and the local deployment version can solve this problem.

1. Comparison of DeepSeek-r1 and the Web Version of DeepSeek
The web version of DeepSeek (usually hosted on cloud servers) provides powerful computing resources and real-time updates, allowing users to easily access it via the internet. This method is suitable for users who need quick deployment and are not concerned about computational resource limitations. However, relying on network connections and cloud services may pose risks of latency and privacy leaks, especially when dealing with sensitive data.
DeepSeek-r1, on the other hand, is an optimized version for local deployment, allowing users to deploy the model directly on their own servers for efficient computation. This deployment method is not affected by network fluctuations, better protects data privacy, and can also be optimized for performance based on hardware resources. Additionally, local deployment allows for more customizable configurations, making it better suited to specific business needs.
2. Comparison of DeepSeek-r1 and Other DeepSeek Models
Compared to other versions of DeepSeek (such as the basic version or other large-scale versions), DeepSeek-r1 has been optimized in its model architecture to provide higher computational efficiency and resource utilization for local deployment. DeepSeek-r1 has further streamlined memory and computational requirements and increased support for multiple hardware architectures, allowing different configurations of computers/servers to run it easily. Furthermore, DeepSeek-r1 offers different model sizes, allowing users to choose based on their hardware conditions and application needs.
2. Deploying DeepSeek on Linux
First, you need to prepare a server with a GPU: RTX5090, 4080S, or 5070 graphics card
If you find the following tutorial confusing, you can first learn Linux tutorials:Learn Linux in Ten HoursBioinformatics Linux and Server Usage TipsYou can also look for organizations: Bioinformatics Linux GroupIf your computer is not sufficient to support the computational process below, you can choose suitable computing resources as needed:Shared (Economical): Shared server with root access, mention my name for a discount of 200¥Dedicated (Energy-saving and Worry-free): Bioinformatics Analysis without Worries
Visit the link:https://biomamba.xiyoucloud.net/
For more content, you can consult customer service WeChat [Biomamba_yunying]
1. Download and Install Ollama
When deploying DeepSeek-r1 on Linux, the first step is to install Ollama.
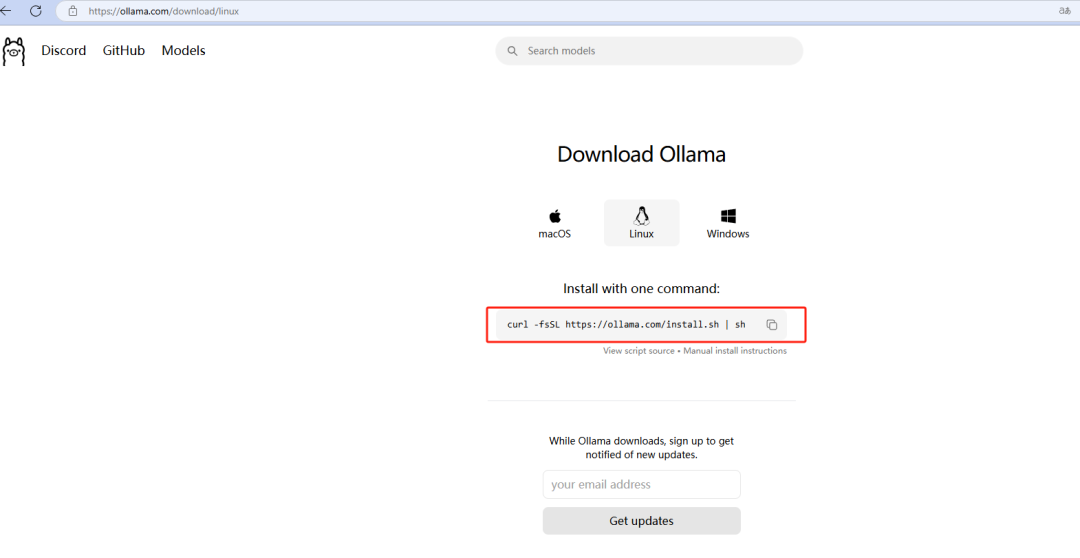
The installation of Ollama on Linux may also be affected by the network. If the download fails, you can try several times.
curl -fsSL https://ollama.com/install.sh | sh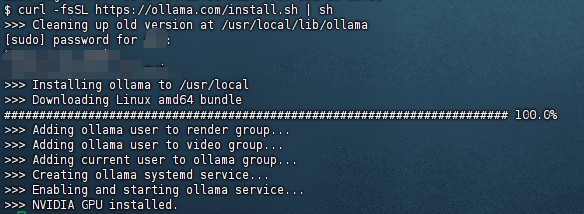
2. Install DeepSeek-r1
(1) Start Ollama
First, we need to check if Ollama can run properly. If executing the Ollama command displays the Ollama parameter information, it indicates that Ollama is running normally on Linux.
ollama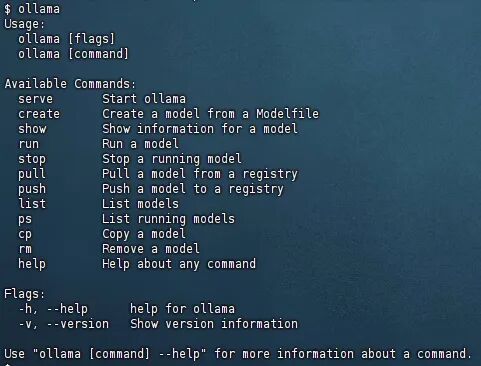
(2) Install DeepSeek-r1
The different versions of DeepSeek-r1 have varying sizes. The larger the model, the more storage space it requires, and the longer the download time will be. The 32b version is approximately 19G, so this step will take some time to download.
ollama run deepseek-r1:32b
(3) Check the Model Download Version
ollama list
(4) Start a Conversation
Now we can start chatting with DeepSeek in the Linux system~~ Execute the command below to start the conversation.
ollama run deepseek-r1:32b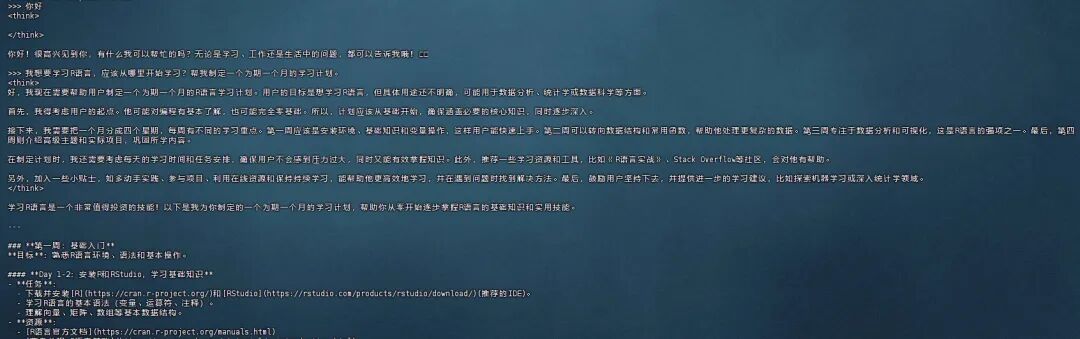
3. Setting up chatBox
chatBox Access Port
# Modify the configuration file
sudo vi /etc/systemd/system/ollama.service

# Add the following two lines to the configuration file
[Service]
Environment="OLLAMA_HOST=target_ip:target_port"
Environment="OLLAMA_ORIGINS=*"

# Reload the Ollama service
sudo systemctl daemon-reload
sudo systemctl restart ollama
Next, open chatBox and go to the settings page, fill in your API domain and port, and select the model you downloaded.
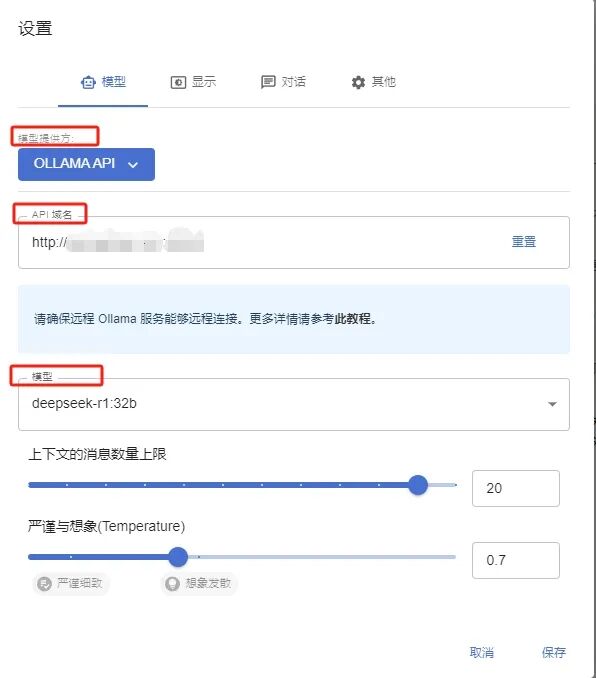
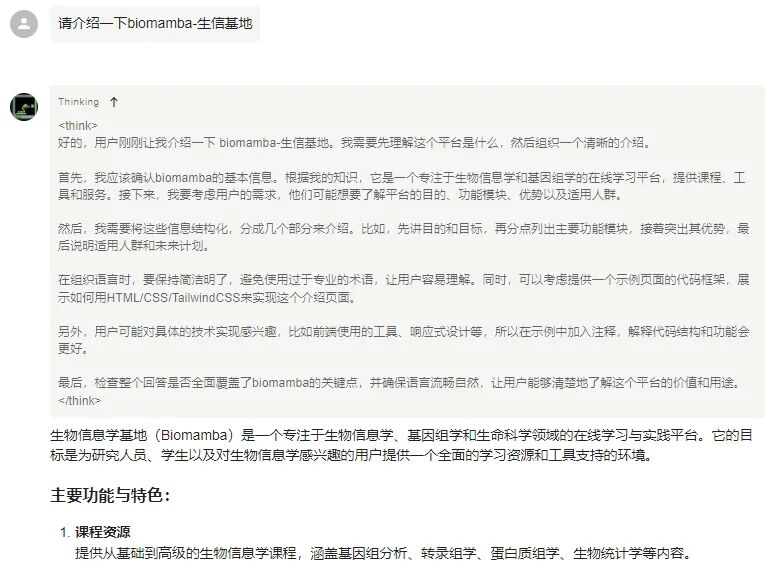
After completing the setup, click save, and then you can enter your questions in the chat box to start the conversation~~
3. Security Issues
Note that Ollama may leave backdoors, posing security risks to the server. When using it, you can disconnect the local server from the internet. If it is a cloud server, remember to change the password regularly and monitor resource usage. You can also refer to the following tutorial for regular virus scanning:
Techniques for Intercepting 1 Billion+ Network Virus Attacks

How to Contact Us

 Leave a message to receive materials,plug-and-play single-cell analysis image fromWeChat ID[Biomamba_yunying], making it convenient for everyone to communicate at any time. We have also built a group matrix, and everyone is welcome to join the discussion.After reading these articles, you can addtips for beginners in bioinformaticsNo search, no voice
Students who already have contact information for the bioinformatics basedo not need to add again

 Your likes and views are taken seriously as appreciation