Welcome to the world of environmental sensing! Nowadays, with the ongoing issues of climate change and pollution, understanding and monitoring our surrounding environment has become very important. This is why we are discussing the BME680 sensor! The BME680 sensor can measure temperature, humidity, pressure, and even VOCs (volatile organic compounds). It provides us with valuable data to improve our quality of life. However, knowing how to use it effectively can be very helpful. In this article, we will fully introduce how to use the BME680 sensor based on the Arduino development board.
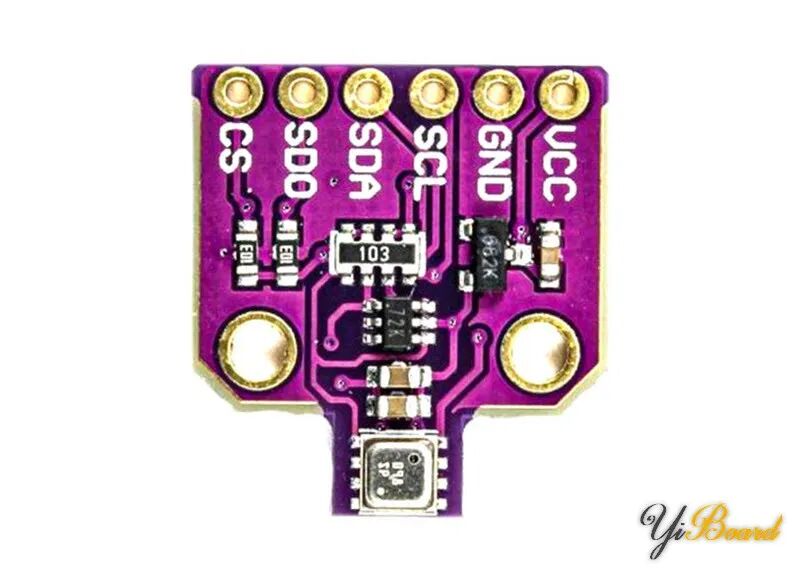
Required Components
● Arduino MEGA 2560 Development Board
● BME680 Sensor Module
● Jumper Wires
BME680 Sensor Module Pin Distribution
The sensor module has six pins, as follows:
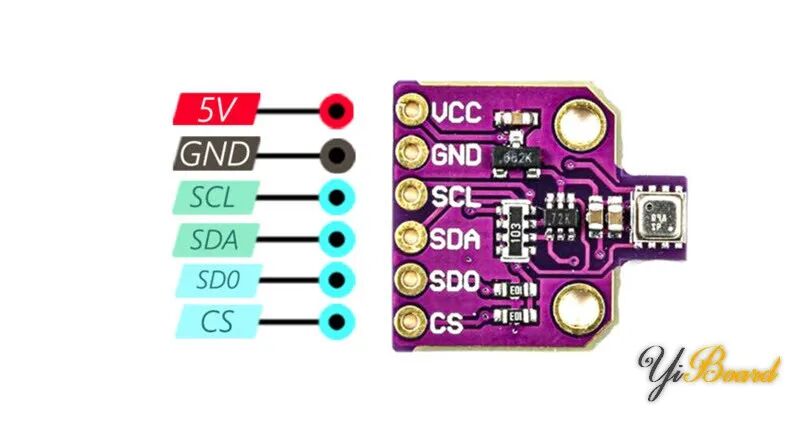
● VCC: Module Power Supply (5V)
● GND: Ground
● SCL: Clock Pin (I2C Protocol)
● SDA: Data Pin (I2C Protocol)
● SDO: Select I2C Address
● CS: Chip Select
You can connect the SDO pin to either GND or Vcc, allowing the BME680 module’s I2C address to be 0x76 or 0x77.
Hardware Connection of BME680 Sensor Module with Arduino
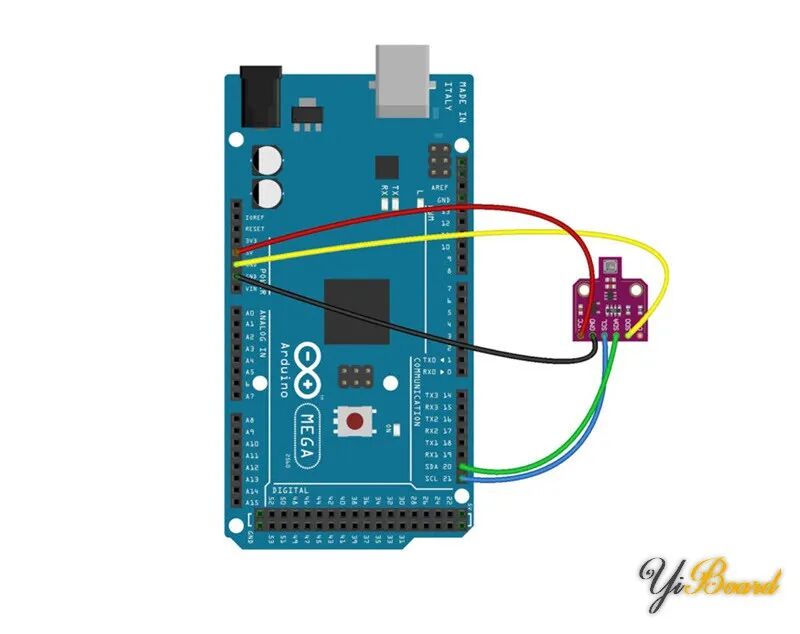
The sensor module can communicate in I2C and SPI modes. To select I2C or SPI mode, you need to connect the CS pin to VCC or GND, respectively. The default communication protocol is I2C, which will be used in this article. Connect the components as shown below:
Code
First, install the Adafruit BME680 library in the Arduino software, then upload the following code to your Arduino development board.
#include <Wire.h>#include <SPI.h>#include <Adafruit_Sensor.h>#include "Adafruit_BME680.h"
#define BME_SCK 13#define BME_MISO 12#define BME_MOSI 11#define BME_CS 10
#define SEALEVELPRESSURE_HPA (1013.25)
Adafruit_BME680 bme; // I2C//Adafruit_BME680 bme(BME_CS); // hardware SPI//Adafruit_BME680 bme(BME_CS, BME_MOSI, BME_MISO, BME_SCK);
void setup() { Serial.begin(9600); while (!Serial); Serial.println(F("BME680 test"));
 if (!bme.begin()) { Serial.println("Could not find a valid BME680 sensor, check wiring!"); while (1); }
 // Set up oversampling and filter initialization bme.setTemperatureOversampling(BME680_OS_8X); bme.setHumidityOversampling(BME680_OS_2X); bme.setPressureOversampling(BME680_OS_4X); bme.setIIRFilterSize(BME680_FILTER_SIZE_3); bme.setGasHeater(320, 150); // 320*C for 150 ms}
void loop() { if (! bme.performReading()) { Serial.println("Failed to perform reading :("); return; } Serial.print("Temperature = "); Serial.print(bme.temperature); Serial.println(" *C");
 Serial.print("Pressure = "); Serial.print(bme.pressure / 100.0); Serial.println(" hPa");
 Serial.print("Humidity = "); Serial.print(bme.humidity); Serial.println(" %");
 Serial.print("Gas = "); Serial.print(bme.gas_resistance / 1000.0); Serial.println(" KOhms");
 Serial.print("Approx. Altitude = "); Serial.print(bme.readAltitude(SEALEVELPRESSURE_HPA)); Serial.println(" m");
 Serial.println(); delay(2000);}
Code Explanation
As usual, we start by including the necessary libraries.
#include <Wire.h>#include <SPI.h>#include <Adafruit_Sensor.h>#include "Adafruit_BME680.h"Next, we define the sea level pressure to use in altitude calculations.
#define SEALEVELPRESSURE_HPA (1013.25)Now, we create an instance of the BME680 sensor.
Adafruit_BME680 bme; // I2CNext is the setup() function. Here, we establish a serial connection with the computer and an I2C connection with the BME680 sensor. If the sensor connection fails, we display the following message in the serial monitor: Could not find a valid BME680 sensor, check wiring!
The following code is used to adjust the gas sensor heater. You can adjust the heater temperature and the time it should be maintained using the first and second parameters, respectively.
bme.setGasHeater(320, 150); // 320*C for 150 msAt the beginning of the loop() function, we start sampling all sensor output data.
bme.performReading()This allows us to measure temperature, humidity, pressure, and gas concentration.
You can access each measurement data as follows:
– Temperature (°C): bme.temperature
– Humidity (%): bme.humidity
– Gas Resistance (Ω): bme.gas_resistance
– Altitude (Pascal): bme.readAltitude(SEALEVELPRESSURE_HPA)
In the loop() function, we measure the parameters every 2 seconds and display them in the serial monitor.
Code Test Results
After programming the Arduino development board and opening the serial monitor, you will see the displayed data as follows:
BME680 test
Temperature = 29.37 *C
Pressure = 866.53 hPa
Humidity = 28.59 %
Gas = 80.58 KOhms
Approx. Altitude = 1300.03 m
Temperature = 29.83 *C
Pressure = 866.55 hPa
Humidity = 27.85 %
Gas = 87.49 KOhms
Approx. Altitude = 1299.65 m
This concludes how to use the BME680 sensor based on the Arduino development board.
For more content, please click“Read Original” 》》