If you don’t want to miss my updates, remember to check the public account in the upper right corner and set it as a star, take down the star and give it to me.

Initially, when Sister Ni added Island Master_Landor‘s WeChat, he thought it was a robot talking to him (Sister Ni and Sister Mo only have one WeChat, you are adding us personally). During the live broadcast of the 14th Intelligent Car Competition, Island Master_Landor focused on Darwin, he is a senior fan of ours, currently preparing for the electric competition, wishing him good results.

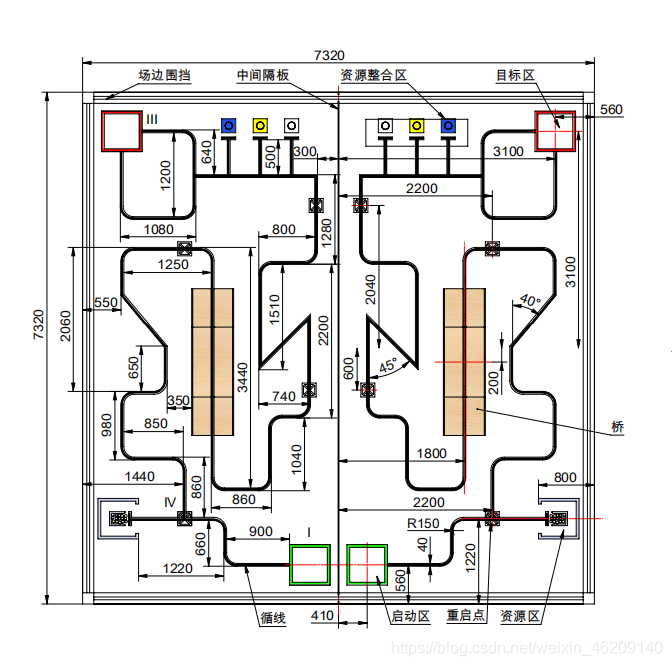
# Venue Map and Brief Description of Competition Tasks #
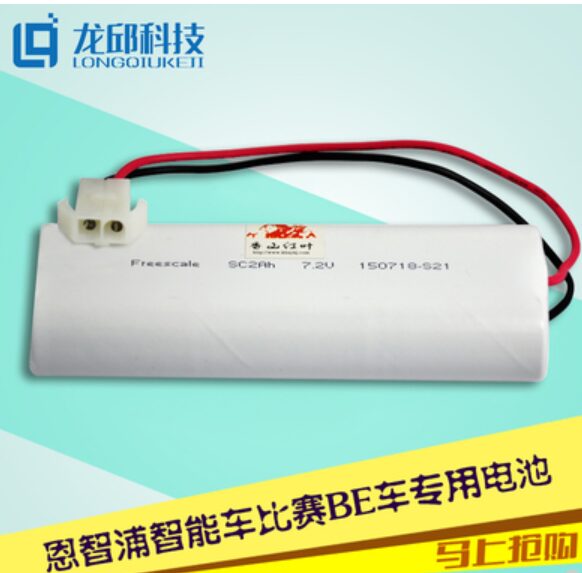
# Hardware Selection #
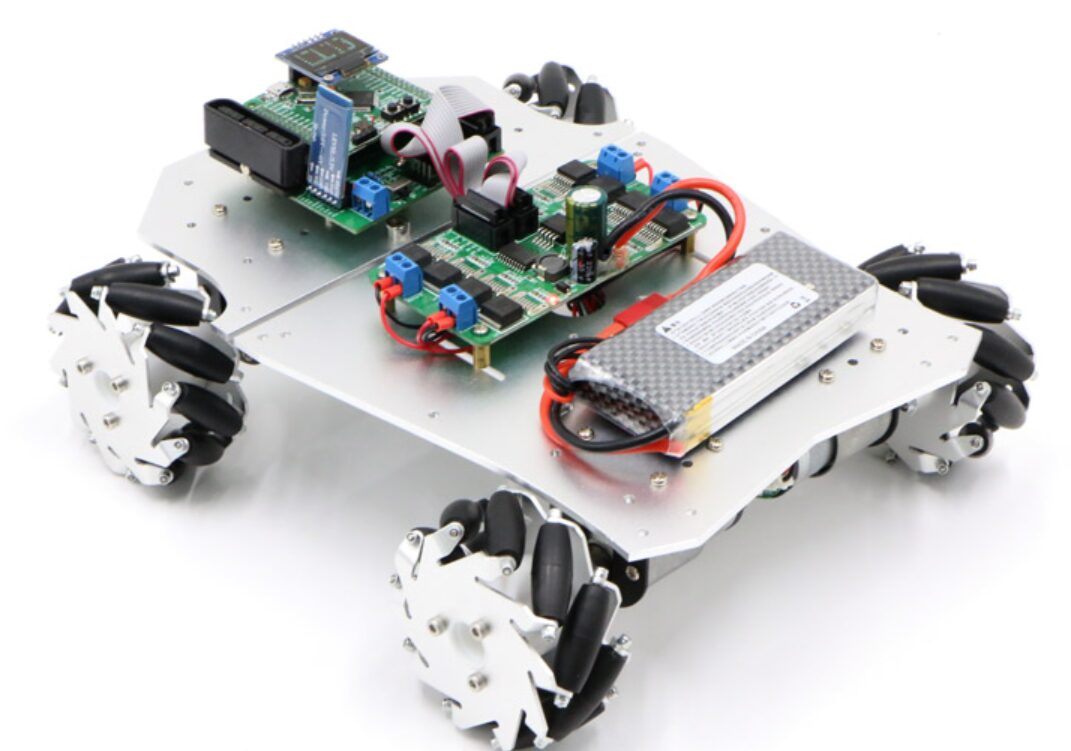
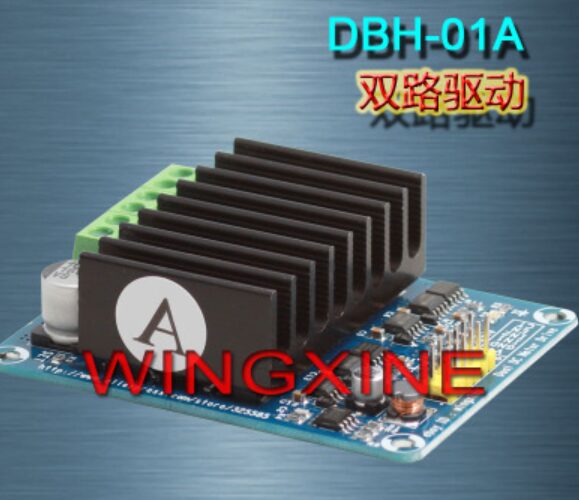

# Hardware Design #
# Design Thinking #
# Part of the Code #
#include "bsp_Find_Num.h"
void Find_Nun_Init(){ GPIO_InitTypeDef GPIO_InitStruct; // Define a GPIO_InitTypeDef type structure RCC_APB2PeriphClockCmd(LED_1_GPIO_CLK|LED_2_GPIO_CLK|LED_3_GPIO_CLK|LED_4_GPIO_CLK|LED_5_GPIO_CLK, ENABLE);// Open the clock for the corresponding GPIO of LED GPIO_InitStruct.GPIO_Pin = LED_1_GPIO_PIN|LED_2_GPIO_PIN|LED_3_GPIO_PIN|LED_4_GPIO_PIN|LED_5_GPIO_PIN;// Set the GPIO pins to be controlled GPIO_InitStruct.GPIO_Mode = GPIO_Mode_IPD; // Set to pull-down resistor input GPIO_InitStruct.GPIO_Speed = GPIO_Speed_50MHz; // Set GPIO speed GPIO_StructInit(&GPIO_InitStruct);}#ifndef _BSP_FIND_NUM_H
#define _BSP_FIND_NUM_H
#include "stm32f10x.h"
//******************** Infrared tracking module IO configuration (digital) *****************//// led 1 #define LED_1_GPIO_PORT GPIOB
#define LED_1_GPIO_CLK RCC_APB2Periph_GPIOB
#define LED_1_GPIO_PIN GPIO_Pin_2
// led 2
#define LED_2_GPIO_PORT GPIOB
#define LED_2_GPIO_CLK RCC_APB2Periph_GPIOB
#define LED_2_GPIO_PIN GPIO_Pin_7
// led 3 #define LED_3_GPIO_PORT GPIOB
#define LED_3_GPIO_CLK RCC_APB2Periph_GPIOB
#define LED_3_GPIO_PIN GPIO_Pin_4
// led 4 #define LED_4_GPIO_PORT GPIOB
#define LED_4_GPIO_CLK RCC_APB2Periph_GPIOB
#define LED_4_GPIO_PIN GPIO_Pin_5
// led 5 #define LED_5_GPIO_PORT GPIOB
#define LED_5_GPIO_CLK RCC_APB2Periph_GPIOB
#define LED_5_GPIO_PIN GPIO_Pin_6
// Detect each input separately
#define LED_1_out GPIO_ReadInputDataBit( LED_1_GPIO_PORT, LED_1_GPIO_PIN);
#define LED_2_out GPIO_ReadInputDataBit( LED_2_GPIO_PORT, LED_2_GPIO_PIN);
#define LED_3_out GPIO_ReadInputDataBit( LED_3_GPIO_PORT, LED_3_GPIO_PIN);
#define LED_4_out GPIO_ReadInputDataBit( LED_4_GPIO_PORT, LED_4_GPIO_PIN);
#define LED_5_out GPIO_ReadInputDataBit( LED_5_GPIO_PORT, LED_5_GPIO_PIN);
void Find_Nun_Init(void); // Initialize infrared tracking module
#endif#include "bsp_Car_Oper.h"
#include "bsp_em_gpio.h"
#include "bsp_Find_Num.h"
#include "bsp_usart.h"
#include "bsp_SysTick.h"
int LED_1=1,LED_2=1,LED_3=1,LED_4=1,LED_5=1,i=0,status=0;static int Resources=1;
void Follow_line()// Line following{// The red light on the car is 1, off is 0;// Not stepping on the black line red (1), stepping on the black line off (0); LED_1=LED_1_out;//A LED_2=LED_2_out;//A LED_3=LED_3_out;//B LED_4=LED_4_out;//A LED_5=LED_5_out;//B
if((LED_1==1)&(LED_5==1))// 2, 3, 4 all pressed the line { Car_Fore(Car_Speed_Str);// Go straight status=1; }
if((LED_1==1)&(LED_3==0)&(LED_5==0))// 2 lost the line, turn left a bit { Car_CLOCKWISE(Car_Speed_Turn+20);// Turn left status=2; }
if((LED_1==0)&(LED_3==0)&(LED_5==1))// 4 lost the line, turn right a bit { Car_ANTICLOCKWISE(Car_Speed_Turn);// Turn right status=3; } //printf("LED_1=%d LED_2=%d LED_3=%d LED_4=%d LED_5=%d\n",LED_1,LED_2,LED_3,LED_4,LED_5);}
void Identify()// Mode recognition{// if((LED_1==0)&(LED_2==0)&(LED_3==0)&(LED_4==0)&(LED_5==0)&(Resources==6))// Uphill// {// status=6;// Car_Fore(80);// Go straight through// SysTick_Delay_Ms(4000);// Resources=7;// } if((LED_1==0)&(LED_2==0)&(LED_3==0)&(LED_4==0)&(LED_5==0)&(Resources==5))// Third respawn point { status=6; Car_Fore(30);// Go straight through SysTick_Delay_Ms(1500); Resources=6; } if((LED_1==0)&(LED_2==0)&(LED_3==0)&(LED_4==0)&(LED_5==0)&(Resources==4))// Z_2 { status=6; Car_Fore(30); SysTick_Delay_Ms(300); Car_ANTICLOCKWISE(Car_Speed_Turn);// Turn right SysTick_Delay_Ms(650); Resources=5; } if((LED_1==0)&(LED_2==0)&(LED_3==0)&(LED_4==0)&(LED_5==0)&(Resources==3))// Z_1 { status=6; Car_CLOCKWISE(Car_Speed_Turn);// Turn left SysTick_Delay_Ms(1700); Resources=4; } if((LED_1==0)&(LED_2==0)&(LED_3==0)&(LED_4==0)&(LED_5==0)&(Resources==2))// Second respawn point { status=6; Car_Fore(30);// Go straight through SysTick_Delay_Ms(1500); Resources=3; } if((LED_1==0)&(LED_2==0)&(LED_3==0)&(LED_4==0)&(LED_5==0)&(Resources==1))// First respawn point { status=5; Car_Fore(30);// Go straight through SysTick_Delay_Ms(1700); Resources=2; } if((LED_1==0)&(LED_2==0)&(LED_3==0)&(LED_4==0)&(LED_5==0)&(Resources==0))// T-junction { status=4; Car_Fore(30);// Go straight for a while SysTick_Delay_Ms(400); Car_ANTICLOCKWISE(50);// Turn left for a while SysTick_Delay_Ms(900); Car_Fore(30);// Go straight for a while SysTick_Delay_Ms(1000); Resources=1; } printf("status=%d Resources=%d\n",status,Resources);}# Problems and Improvements #

Graduation Series:
Temperature/Heart Rate/Step Count Design Based on STM32
Intelligent Automatic Light Seeking Line Following Fire Extinguishing Car
51 Microcontroller + HX711 to Realize Simple Electronic Scale
Low-Cost STM32 IoT Portable Power Meter
STM32 + OV7670 Design License Plate Recognition System
Homemade Mobile App and Arduino to Achieve Intelligent Monitoring and Control System
STM32F103 + NB Module + MQTT to Achieve IoT Collection System
7 Days to Complete Gesture Control ESP32 WIFI Electronic Photo Album
Homemade STM32 Multimeter, Beats 500 Yuan Regular Brand
Homemade Simple Blood Oxygen Heart Rate Monitor STM32 + MAX30100
STM32 + Zigbee Network Ordering System
STM32 Intelligent Trash Can Automatically Recognizing Various Types of Trash
Based on MCU Development Board + Camera to Achieve “Artificial” Parking Assistant
STM32 and MPU6050 Achieved Body Sensing Gimbal Design
More Intelligent “Xiao Ai”?
STM32F4 + H7 Achieved Bionic Robot Dog
Low-Cost 360° Monitoring System
STM32 Version RFID Medical Advice Special Wristband
STM32 Microcontroller Controlled Intelligent Home System Design
STM32F4 Electronic Reader Production Tutorial
Graduation Project | Intelligent Infusion Monitoring System
Raspberry Pi 3B+ and OpenCV3 + PyQt5 to Achieve Face Recognition Access Control
Based on STM32 Gesture Control Dot Matrix Display Design
Learn and Use Immediately, Share the Whole Process of Building a Fingerprint Recognition System
Homemade Six-Legged Robot, Difficult, Enter with Caution
True Human-Machine Interaction, Cloud-Based Intelligent Butler (My Graduation Project, My Efforts)
STM32 Bluetooth Smart Car (Share Code and Android APK)
STM32 + TI BQ76940 Design 48V BMS Scheme (Data Sharing)
STM32 Slope Driving Line Following Car Production Tutorial
Simple Fatigue Driving Detection Under 100 Yuan
STM32 + OneNET to Achieve NB-IOT Power Collection System
Design Parking Management System Using ARM Platform (Including Tutorials & Data)
Intelligent WIFI LED Light Design
LCD Digital BOOST Circuit Design
STM32 Intelligent Baby Crib Monitoring (Basic Version)
STM32 + UART HMI, Play Minesweeper Game
Two-Wheel Self-Balancing Car, Including Source Code, Schematic/PCB Source Files
Project Sharing | Electric Competition Series | Artificial Intelligence | Postgraduate Entrance Examination
Essential Knowledge Points | Graduation Project | Switch Power Supply | Job Hunting
We are Ni Mo, the founders of Darwin, only talking about technology and not flirting. Darwin’s online education platform aims to serve professionals in the electronics industry, providing skill training videos covering popular topics in various subfields, such as embedded systems, FPGA, artificial intelligence, etc. Tailored learning content for different groups, such as commonly used knowledge points, disassembly assessments, electric competitions/intelligent cars/postgraduate entrance examinations, etc., welcome to follow.