Click the blue text to follow us
“
Four Questions About Arduino
1. What is Arduino?
When I started college, I heard the name “Arduino” more than once, but I didn’t really know what it was for a long time. I only knew it was a board (a circuit board) along with some software. What is this board used for? Later, I learned that it is a type of microcontroller, in other words, it is like the brain of a robot. We use the Arduino IDE software to write programs and upload them to the board, which then gains the ability to execute programs and control external actuators/sensors to achieve the functions we set. This is the general process of our robot control design.
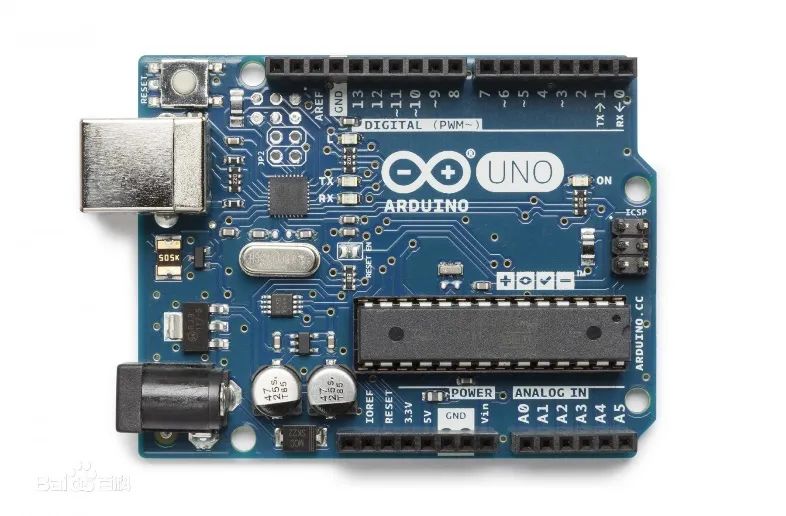
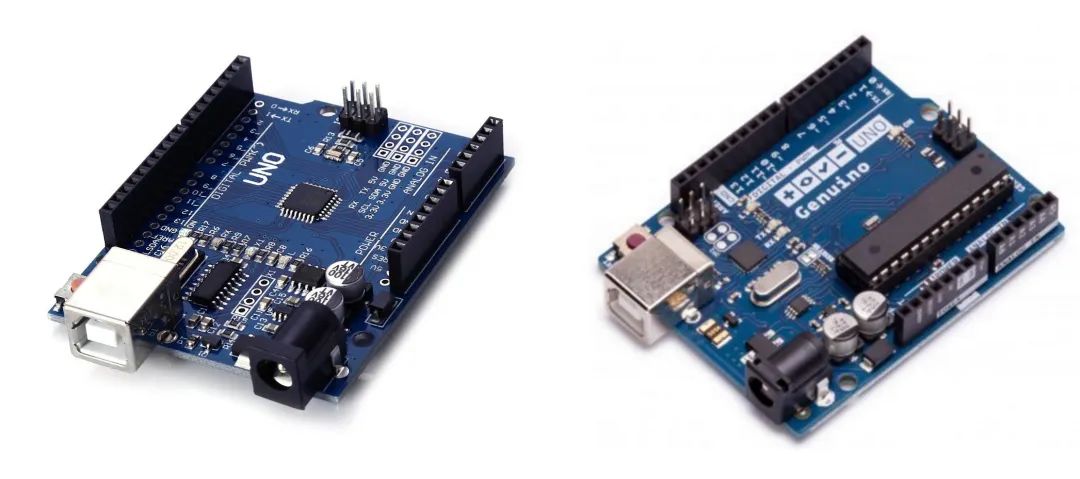
Arduino UNO Development Board
2. Why Learn Arduino?
Why learn Arduino, or why do I suggest everyone start learning robotics from Arduino? In fact, there are many microcontrollers that can serve as the brain of a robot. Besides Arduino, the 51 microcontroller, STM32, Raspberry Pi, etc., are commonly used as microcontrollers for robots. However, compared to these, Arduino is simple! Its biggest advantage is its ease of use, speed, and convenience.
You can quickly get started with Arduino without any prior knowledge of electronics or programming. At the same time, Arduino is sufficient to accomplish various sensor, actuator, and robot functionalities that we need. While its capabilities may not be the most powerful, they are definitely adequate. In the process of learning Arduino, you will also learn programming languages, analog circuits, digital circuits, and other foundational knowledge, which will lay a foundation for future systematic learning of these courses. Furthermore, Arduino is also the basis for learning other microcontrollers. My recommendation for learning microcontrollers is Arduino → 51 Microcontroller → STM32 → Other types of microcontrollers.
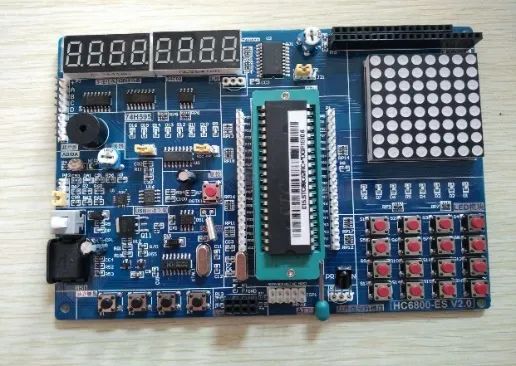
51 Microcontroller Development Board
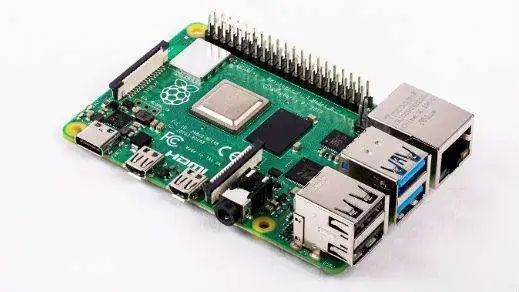
Raspberry Pi 4B Development Board
3. How to Learn Arduino?
First, we will teach you the basics of Arduino through this series—Basic Robotics Tutorial Control Section, to help you create simple projects. However, our tutorials are definitely not enough; our main role is to guide you on how to learn robotics and open the door to the world of robotics. We will provide some materials and directional guidance during your learning process. In-depth learning of knowledge still relies on you.
Here are a few recommended learning pathways for Arduino:
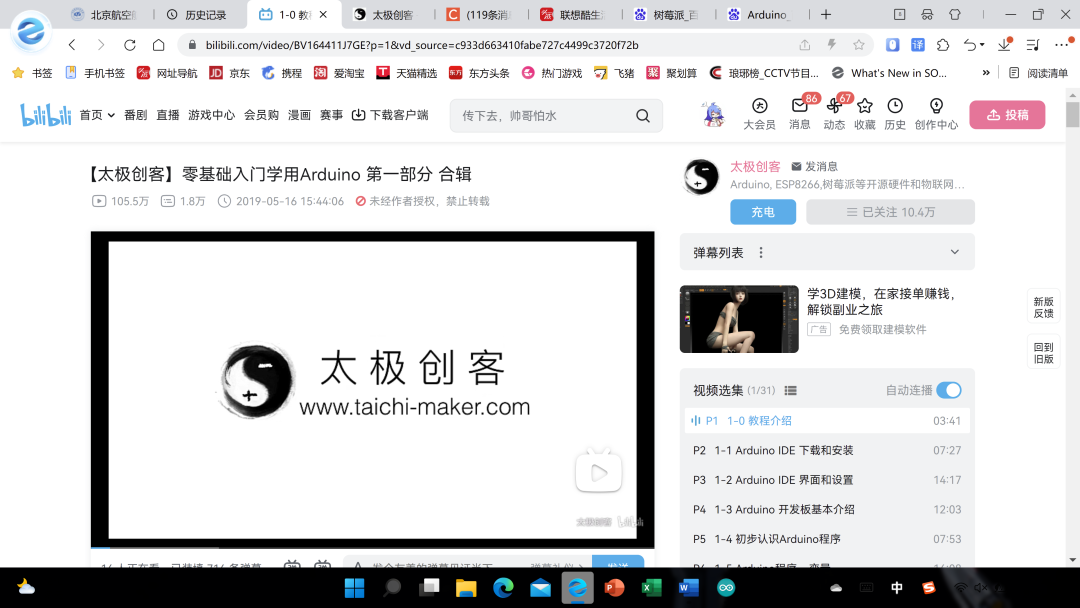
(1) Bilibili “Taiji Maker—Zero Basics Introduction to Arduino”
https://www.bilibili.com/video/BV164411J7GE
This tutorial is divided into four parts, and it is recommended that you watch them in order. The explanations are very comprehensive and detailed, completely aimed at zero-basis beginners, covering everything from basic knowledge of Arduino to the construction and functionality expansion of robotic arms, as well as the use of various sensors. It is an important pathway for learning Arduino.
(2) Taiji Maker Website
The Taiji Maker website is a treasure trove for learning Arduino, summarizing various programming knowledge related to Arduino. Watching Bilibili videos plus checking website materials is a very effective learning approach.
Website link: http://www.taichi-maker.com/
(3) CSDN
https://www.csdn.net/
(CSDN has an app that can be installed directly on your phone)
CSDN is an extremely useful programming resource website, not just for Arduino but also for various programming languages like C and C++, as well as front-end and back-end development, software development, microcontrollers, MATLAB engineering analysis, etc. It contains programming resources that will be used during university and even in future jobs, including machine learning, artificial intelligence, and other more advanced content. If you encounter bugs or issues in various programming courses, microcontrollers, or other software, just search it up directly, and the Arduino resources there are also very comprehensive, containing information and code for controlling various sensors.
(4) Classic Learning Book: “Basics of Arduino Programming” (Beihang University Press)
Access link: Beihang Cloud Disk
https://bhpan.buaa.edu.cn:443/link/D130D0972E7B0A66CE3308F09179789D
4. What to Buy for Learning Arduino
To learn robot development, you will definitely need to purchase some components. Microcontrollers and various actuators and sensors are must-haves. Although the club activity room will provide many components, the variety is limited, and you should also learn to select and purchase materials yourself.
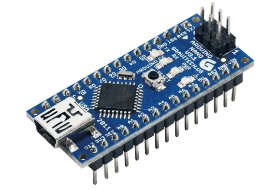
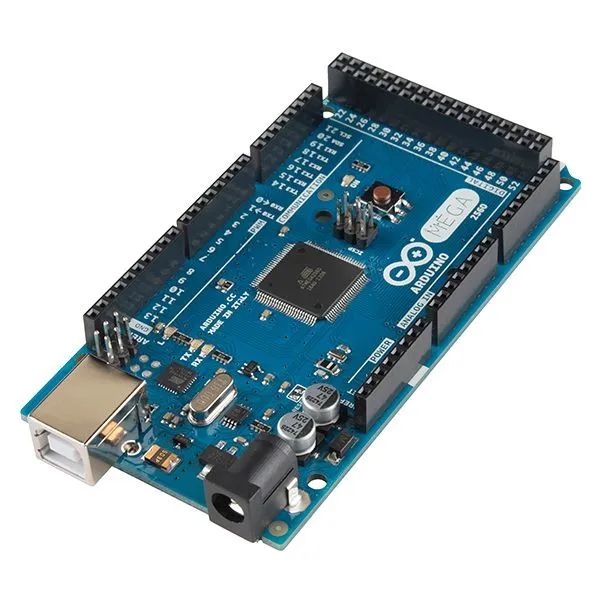
Let me tell you about the classification of Arduino development boards. The common ones are Arduino Uno, Arduino Nano, and Arduino Mega. All three can control robots, but their performance configurations and number of interfaces differ. The Uno and Nano boards use the same microcontroller model, Atmega328p, but due to different circuit board layouts, the former is larger while the latter is more compact. Both are comprehensive and adequate for entry-level learning and general robot control. The biggest advantage of the Nano is its compactness, making it suitable for small robots, but it requires a breadboard or expansion board; the Uno is slightly larger but usually does not require a breadboard or expansion board. The Mega is the big brother of the Arduino family, using the Atmega2560 microcontroller, and has the most interfaces among 8-bit development boards (of course, it is also the most expensive), suitable for creating more complex robots.

Swipe left and right to view
Arduino UNO, Arduino Nano, Arduino Mega Development Boards
However, if you search for Arduino Uno boards on Taobao, you will find one type priced at one or two hundred yuan for the original Italian version, and another type for twenty-some yuan for the domestic version. Many people will be conflicted, thinking the original is too expensive and worrying that the domestic version might not work well. Here, I can assure you that since all Arduino materials are open-source (meaning the chips, circuits, etc., are all public), there is no issue of piracy in open-source materials. Therefore, the performance of both boards is exactly the same, and there is no problem with the quality of the domestic board. The only difference is that the original version may be more aesthetically pleasing, so choosing the domestic version is completely fine. (Of course, if you have the budget, feel free to choose the original.)
Additionally, you will notice that there are two appearances of the Uno board: one is like the original version with a long chip, and the other is the domestic version with a flat chip. There is actually no difference between these two chips; the original one is called a through-hole chip, which can be removed. If it gets damaged due to excessive voltage, you can directly replace it (but don’t remove it unnecessarily, as the pins can easily break). The domestic one is called a surface-mounted chip, which is directly soldered onto the circuit board and cannot be removed, but both have the same internal structure. Usually, the Uno board with a surface-mounted chip is just fine. The Nano board only has the surface-mounted chip appearance.
Surface-mounted (left) and through-hole (right) development boards
In addition to the UNO board, you will also need wires to connect the development board and various components, usually using jumper wires (like the colorful ones arranged in a row below). The connectors come in male and female types, and they connect to each other. The types of jumper wires are categorized based on the type of connectors on both ends, so it’s best to buy a set of each type: male-to-male, male-to-female, and female-to-female. Additionally, buy a breadboard (which is a support board for easy wiring) and optionally a breadboard power module (which provides more stable power compared to directly powering from the development board).
In our tutorials, we will teach you how to use commonly used components like servos, sensors, and smart cars. If you find it troublesome, you can directly buy a complete car kit, but I recommend buying what you need as you go since all components are available for purchase.
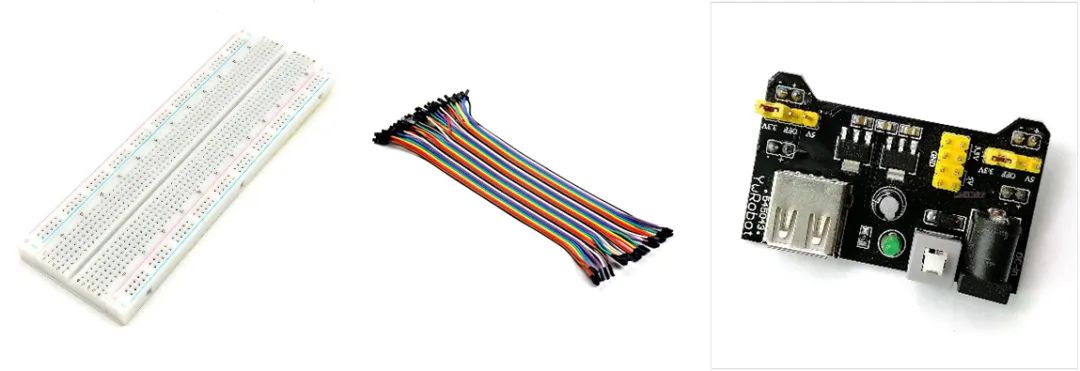
Breadboard, jumper wires, and breadboard power module
To complete the experimental task of this tutorial—blinking LED, the recommended components are:
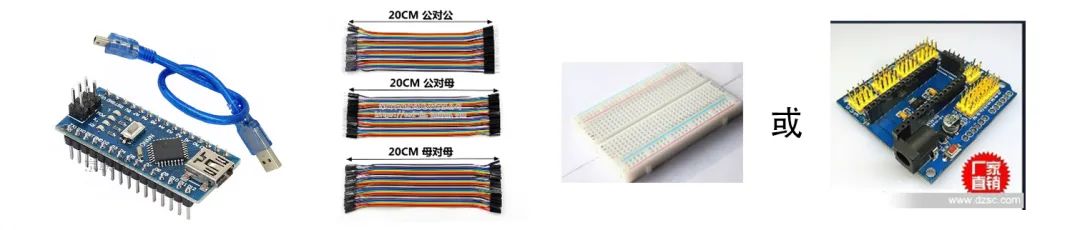
One Arduino Nano development board, several jumper wires, and a breadboard or Arduino Nano expansion board.
The total cost should not exceed ¥30.
If any of you have won a Nano development board in previous knowledge competitions, you can use it directly for development learning!
“
Let’s get to the main topic!
Through the four questions about Arduino, you should now have some understanding of it. Now let’s get to the main topic, where I will lead you through two small experiments.
(1) Installing Arduino IDE
You can download the Arduino IDE for free from the official Arduino website at www.Arduino.cc, and it can also be downloaded from the Taiji Maker website. Alternatively, you can directly download the installation package from this Beihang cloud disk link:
https://bhpan.buaa.edu.cn:443/link/AC38209564FA3D55EA5535D31A8FCA45
The specific installation tutorial will not be repeated here; you can directly refer to the second section of the Taiji Maker Bilibili tutorial:
https://www.bilibili.com/video/BV164411J7GE
(2) Structure of Arduino Programs
After opening the IDE, the interface looks like this:
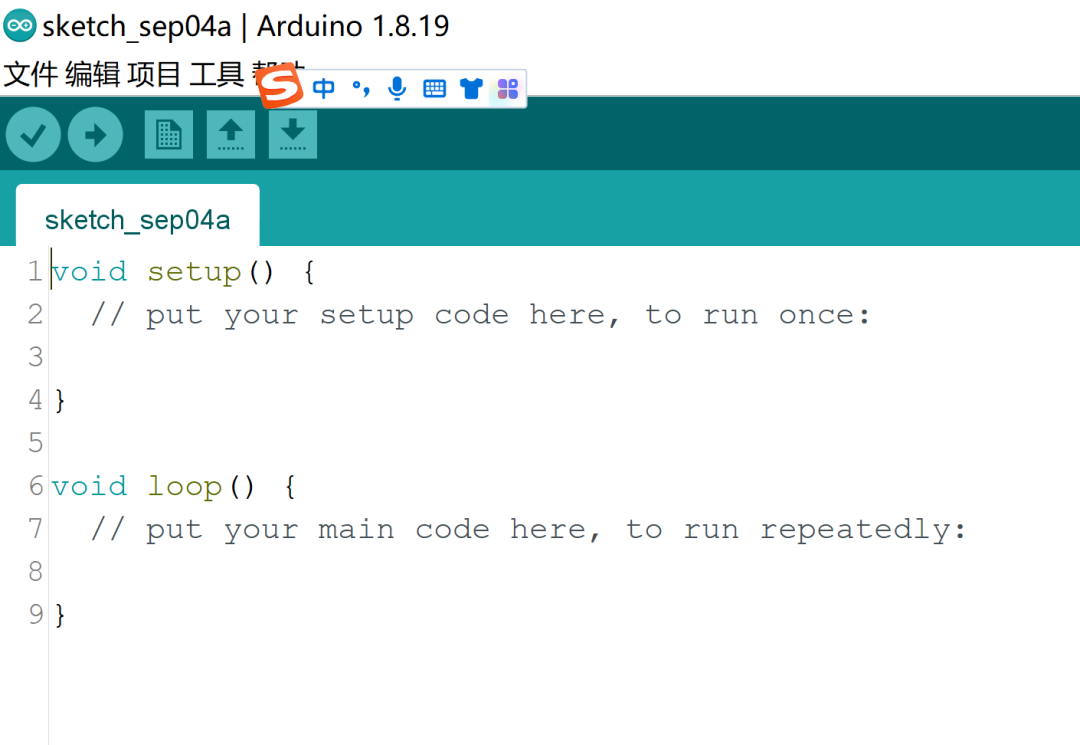
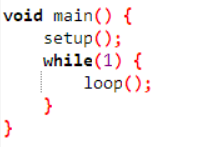
You can see that it is divided into two parts: the upper part, setup, is used for initialization, commonly used to define variables, configure pins, etc., while the lower part, loop, is the main part that executes in a loop. The main process of executing the program is to first enter the setup part for initialization, and then repeatedly loop through the program in the loop.
This is similar to the structure in a standard C language program:
(3) Arduino’s Structure, Statements, and Functions
The structure, statements, and functions of Arduino programs are implemented based on C++ language. However, if you have no foundation, that’s completely fine. You can refer to the materials from Taiji Maker, which are very clear and easy to understand. You can find references for Arduino programming statements in the Arduino development section of the website. It categorizes all structures, values, and function types into three parts: structure, numerical functions, and functions. My suggestion is to master all parts of the structure except pointers and boolean operators, understand constants and data types in the numerical part, and grasp communication, digital I/O, and analog I/O in the functions part. This is sufficient for general programming.
(4) Lighting Up an LED
As a classic introduction, lighting up an LED is the first step in learning with all development boards. Once you can light up one LED, you can light up two, three, or four. Oh, I mean you can master basic programming knowledge and the process of writing programs, and thus master the use of various sensors and actuators, making your way into the world of robotics unstoppable. Without further ado, let’s get started. By the way, if you only need one LED, you don’t need to buy it separately; the board comes with one LED, so just having the board is enough.
First, we create a new project file in the Arduino IDE (the special file for Arduino has a .ino extension), and then write the following program code: (Note that all symbols should be in English input, and the double slashes are program comments meant to help you understand each line’s meaning, making it easier to analyze code and debug later)
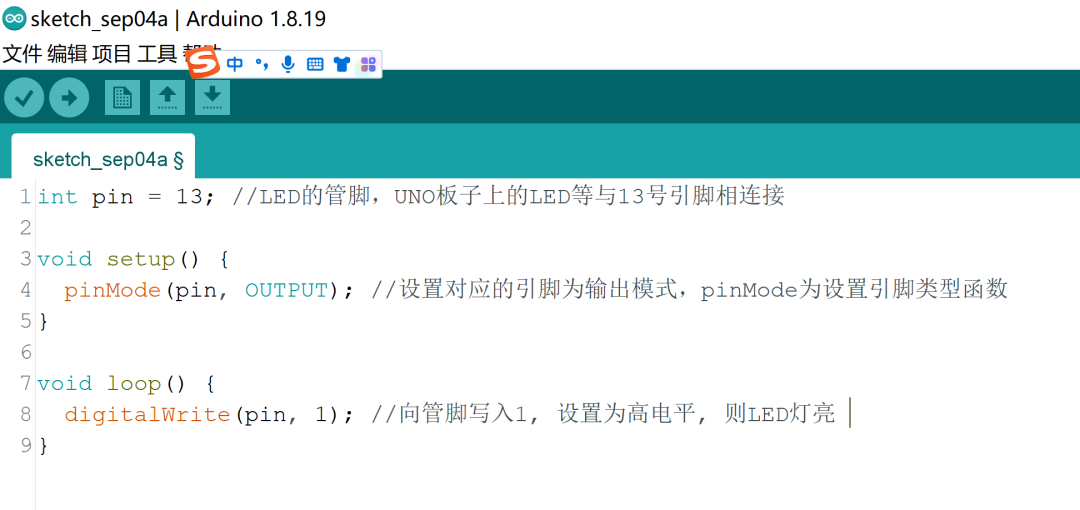
Let me briefly explain the content of this program (I recommend you check out the third point above first and learn about Arduino’s related functions, data, and structures on the Taiji Maker website): The first line defines an integer variable pin; int is the keyword for integer type, and these keywords turn blue when entered. The names of built-in library functions turn red. If they don’t change colors, it means you made a mistake. After defining pin as 13, all instances of pin in this program will refer to pin 13.
The second line uses the pinMode function, where pin means pin, and pinMode is the function that sets the pin type. This line sets the pin to OUTPUT type, which means it will output (In Arduino, functions and variable types are mostly abbreviations or combinations of English words, so don’t forget your high school English!). In simple terms, this line allows the pin to output based on our control. OUTPUT is actually a constant defined as “1”, and in the program, it can be replaced directly with 1 without changing the effect.
The third line uses the digitalWrite function, which means writing a digital value. In Arduino, all functions that include Write mean “write”, which means inputting a value to the pin through the program, while functions that include “Read” mean reading a value from the pin, such as when a temperature sensor is connected to the pin to read temperature measurement values. This function writes a high level to pin 13. Here, let me briefly introduce digital and analog values; digital values simply have two states: high (which corresponds to “1” in digital circuits) or low (which corresponds to “0”). A high state means a high voltage output (about 3-5V), while a low state means a low voltage output (which can be considered as 0V). Analog values can vary continuously (any voltage between 0V and 5V). In short, to make the LED have only two states (on and off), we use digital output (digitalWrite). To make it gradually change from bright to dim, we use analog output (analogWrite). These two types can be converted under certain conditions, but we will discuss that later. So this line makes the LED connected to pin 13 light up.
You might be wondering why the first line seems redundant. I could just use digitalWrite(13,1) to save time. However, this is a program maintenance issue. It seems that skipping this step makes the program simpler, but if I have a very complex program that uses pin 13 multiple times to control an LED, but due to some reason, pin 13 gets damaged and needs to be switched to pin 12 (since the LED on the board is connected to pin 13, using another pin would require an external LED). If I wrote the code like this, I would have to find and replace every instance of 13 with 12. By writing it this way, I can simply change pin to 12 at the beginning, and that’s it. In fact, we rarely use numbers directly to refer to pins in later programs; we usually name each pin, which makes it easier for future changes and maintenance, and also helps identify what device is connected to that pin.
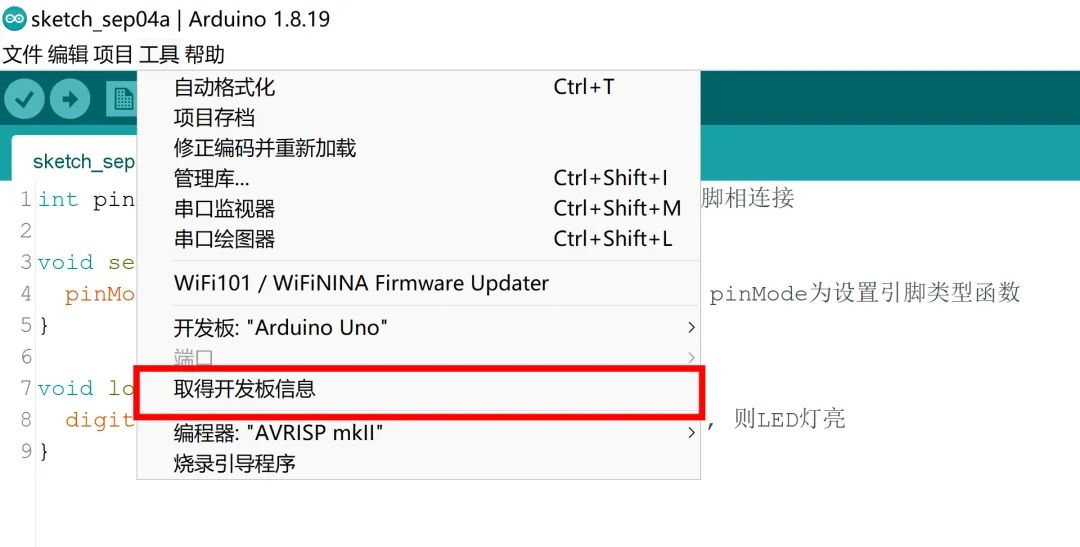
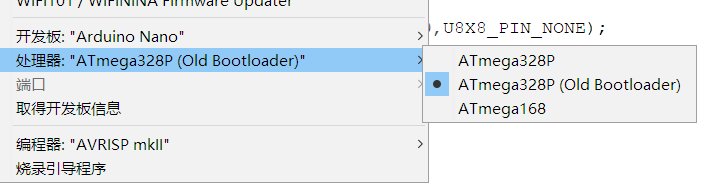
Next, you need to select the model you are using from the “Board” option in the menu bar, either “Arduino UNO” or “Arduino Nano”. If you are using a Nano board provided by the association, there is also a “Processor” option to select Old Bootloader. There is also a “Port” option to select the USB port connected to the development board (COM XX) (this port is temporarily greyed out as I don’t have a board with me). Your computer may have many devices connected via USB, so it’s important to select the correct USB port. You can find out how to do this through Device Manager or just try them all out.
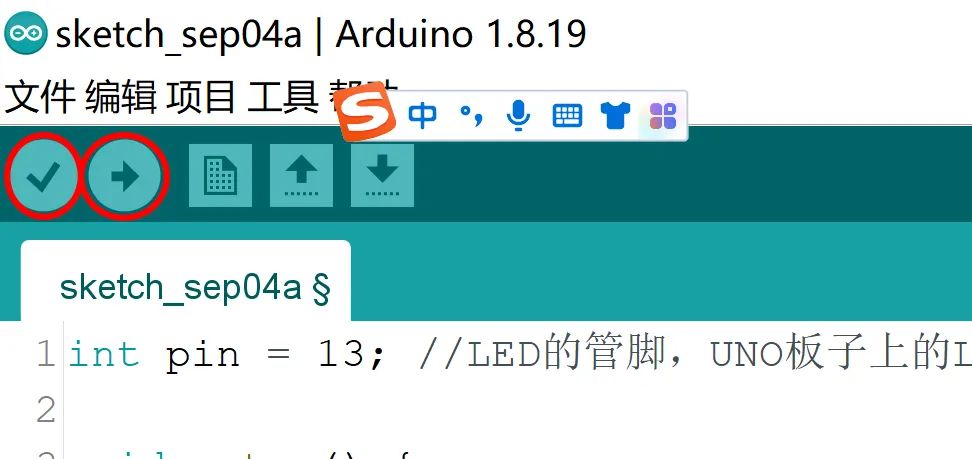
Then click the “checkmark” button below; this is the compile button, which checks for errors in the program. In other words, it helps us find bugs. The program can only be uploaded if there are no issues. Common issues may include missing semicolons at the end of lines, so make sure to use English input (half-width characters). If the compilation is successful, you will see “Compilation finished” at the bottom left. After that, connect the development board to your computer and click the “right arrow” icon to upload the program. Once the upload is successful, you will see “Upload successful” at the bottom left, and the LED light on the board will light up.
Next, let’s create an upgraded version—controlling the LED to blink

With the knowledge we just covered, this program should also be easy to understand. There are only two new points:
One is HIGH and LOW, which use macro-defined constants, essentially another way to represent high and low levels, similar to 1 and 0.
The other is a new function, delay, which, as the name suggests, means delay. However, note that the parameter for this function is in milliseconds, so to delay for one second, you should use delay(1000).
By compiling and uploading the program as we just did, you will see the LED light on the board blinking in a pattern of one second on and one second off.
END
This is the main content of our tutorial. By lighting up the LED, your journey into learning Arduino officially begins. Through learning the program and practicing coding, you turn lines of virtual code into actual operations on hardware, which is the most rewarding and fulfilling part of learning robotics! Our tutorials will continue, and I hope you can use the websites and videos mentioned earlier to continue practicing and deepening your understanding of Arduino. We also look forward to discussions and comments in the comment section and group chat!

Illustration: Wang Tingyu
Revised by: Nie Zijian
Typesetting: Zhu Yizhong
Reviewed by: Gao Zeyang