When you want to achieve remote desktop monitoring at a low cost, traditional solutions either rely on expensive Raspberry Pi or are limited by the rudimentary interfaces of microcontrollers.Now, ArduinoVNC — it transforms low-cost development boards like ESP8266/ESP32 into VNC clients, allowing small screens to display remote computer desktops for just a few dozen yuan in hardware, completely breaking the barrier between embedded devices and complex UIs.
This article concludes with some bugs encountered by the author while deploying this open-source project.
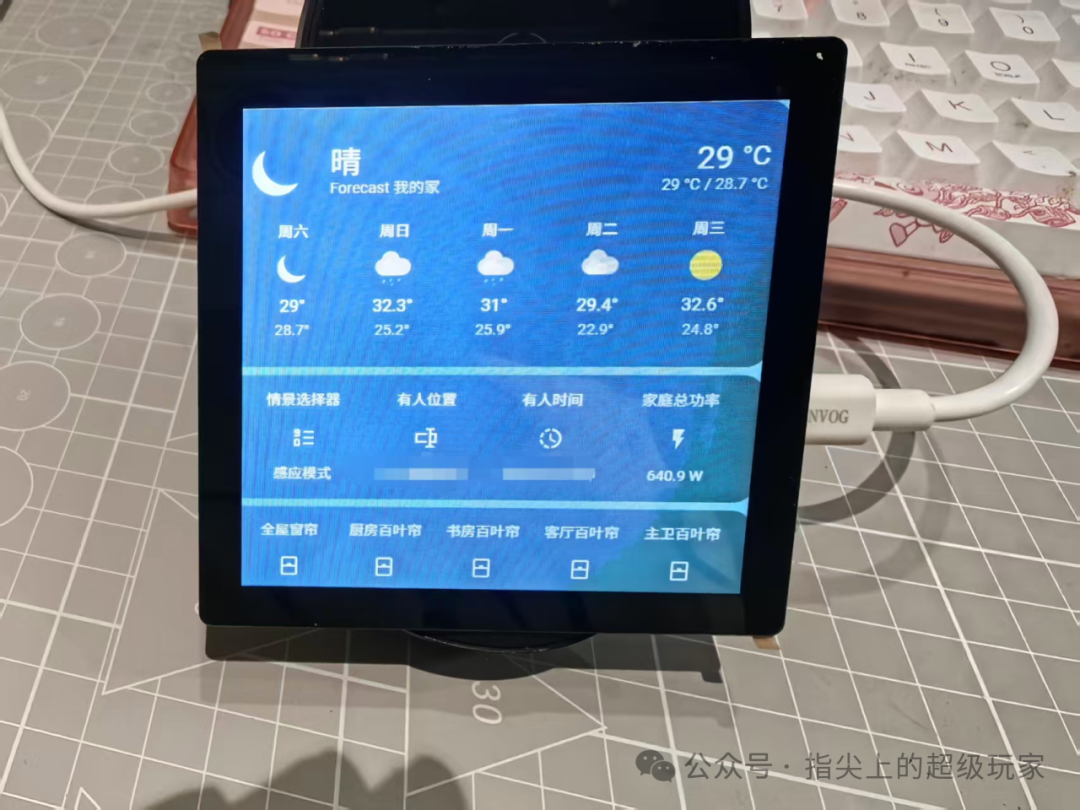
Core Value of the Project: Giving Embedded Devices a “Long-Distance Eye”
The revolutionary aspect of ArduinoVNC lies in its lightweight porting of the VNC protocol to resource-constrained microcontroller platforms. It is developed based on the RFB (Remote Framebuffer) protocol and supports VNC servers of mainstream systems like Windows/macOS/Linux, allowing Arduino devices to directly receive and display remote desktop images, achieving a breakthrough of “small screen controlling large screen”.
-
• Hardware Compatibility: Perfectly supports ESP8266/ESP32 series development boards, compatible with mainstream TFT displays like ILI9341, ST7789, ST7796
-
• Display Optimization: Accelerates image transmission through hardware SPI interface, reducing data volume with area update algorithms, achieving smooth display at 5-8 FPS at a resolution of 320×240
-
• Open Source Ecosystem: Open-sourced under the GPL-2.0 license, with code hosted on GitHub
Technical Principles: Running Remote Desktop on Microcontrollers
1. Lightweight Protocol Stack Design
The core of the project lies in the deep optimization of the RFB protocol. In response to the limited RAM/Flash resources of microcontrollers, the development team made three key improvements:
-
• Protocol Trimming: Removed non-essential features like audio transmission and file sharing, retaining only core framebuffer updates and input event handling
-
• Image Compression: By default, the ZRLE compression algorithm is used, optimizing the decompression process according to the microcontroller’s hardware characteristics, improving transmission efficiency by 40%
-
• Memory Management: Utilizes dynamic block caching technology, allowing rendering of 320×240 resolution images within the 320KB SRAM of the ESP32
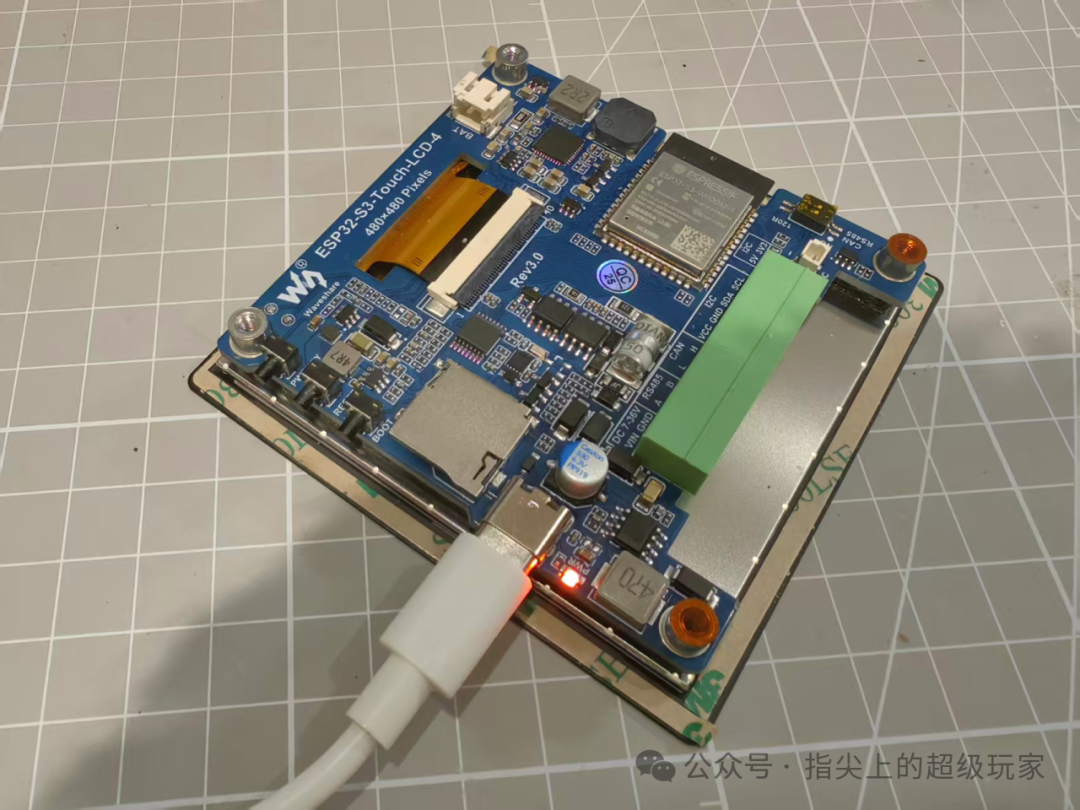
2. Hardware Architecture Components
The minimum system requires three major components:
-
• Main Control Unit: ESP32-WROOM-32 module (recommended), providing WiFi connectivity and sufficient computing power
-
• Display Unit: 2.4-3.5 inch TFT touchscreen (SPI interface), recommended resolution 320×240
-
• Power Unit: 5V/2A DC power supply, ensuring stable operation under high WiFi load
Smart Home Control Center
-
• Connects to the VNC service of the living room server, displaying the home energy monitoring panel
-
• Directly operates the Home Assistant interface via the touchscreen, without the need to purchase a dedicated controller
-
• Typical configuration: ESP32 + 2.8 inch ILI9341 touchscreen + lithium battery power supply, total cost about 80 yuan
Core Code Quick Start
1. Required Libraries
 https://github.com/moononournation/Arduino_GFX.git

    https://github.com/moononournation/arduinoVNC.git
2. Configuring the Display
// Create display object
Arduino_RGB_Display  *gfx = new Arduino_RGB_Display (
480 /* width */, 480 /* height */, rgb_panel, 2 /* rotation */, true /* auto_flush */,
bus, GFX_NOT_DEFINED /* RST */, st7701_type1_init_operations, sizeof(st7701_type1_init_operations));
// Create VNC_GFX object
VNC_GFX *vnc_gfx = new VNC_GFX(gfx);
arduinoVNC vnc = arduinoVNC(vnc_gfx);
Advantages and Disadvantages of the Tool
| Advantages | Disadvantages |
| Extremely low hardware cost (<100 yuan) | Resolution limitations |
| Compatible with mainstream TFT display libraries | No audio transmission support |
| Supports touch input for bidirectional control | Depends on stable WiFi connection |
| Open source and can be further developed | High CPU usage at high resolutions |
Limitations of Applicable Scenarios: Not recommended for high-frequency update scenarios like video playback, more suitable for static interfaces or low-frequency monitoring systems.
Summary and Access Method
This ArduinoVNC project proves that even resource-constrained microcontrollers can accomplish seemingly impossible remote desktop tasks through clever protocol optimization and hardware adaptation.
Project Address:
https://github.com/moononournation/arduinoVNC
Bugs Encountered and Suggestions
-
The computer-side service software can use tightvnc
- Comment out the following lines in vnc_config.h:
// #define VNC_CORRE// #define VNC_HEXTILE // RFC6143// #define VNC_ZRLE // RFC6143/// VNC Pseudo-encodes// #define SET_DESKTOP_SIZE // Set resolution according to display resolution▼▼▼
That’s all for today’s tutorial. If you found it useful, please give it a thumbs up.
For more information on Home Assistant low-cost modifications, hardware DIY and software tutorials, feel free to follow this public account.