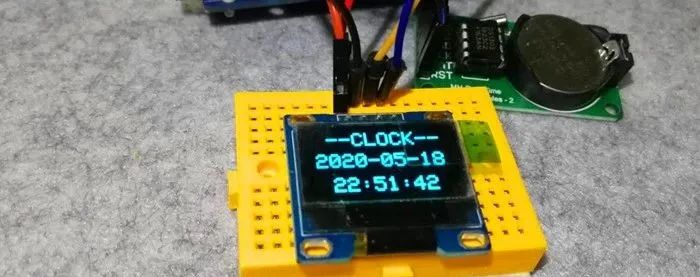
In the previous article, we used library functions to drive the DS1302 to obtain time data and output it via the serial port. The serial port is just for debugging; to create an electronic clock, we need to use a display module. This article will demonstrate the time data using an OLED.
-
Uno R3 Development Board -
USB Data Cable -
Male to Female Dupont Wires -
Breadboard and Connecting Wires -
OLED Display -
DS1302 Module
1. Build the circuit according to the schematic diagram.
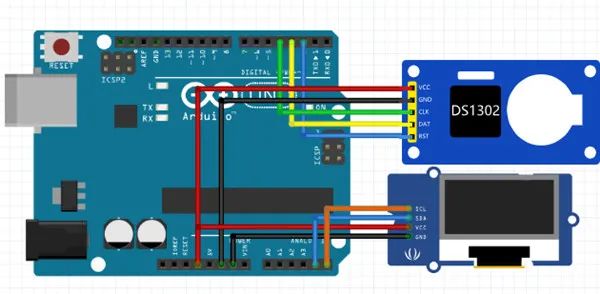
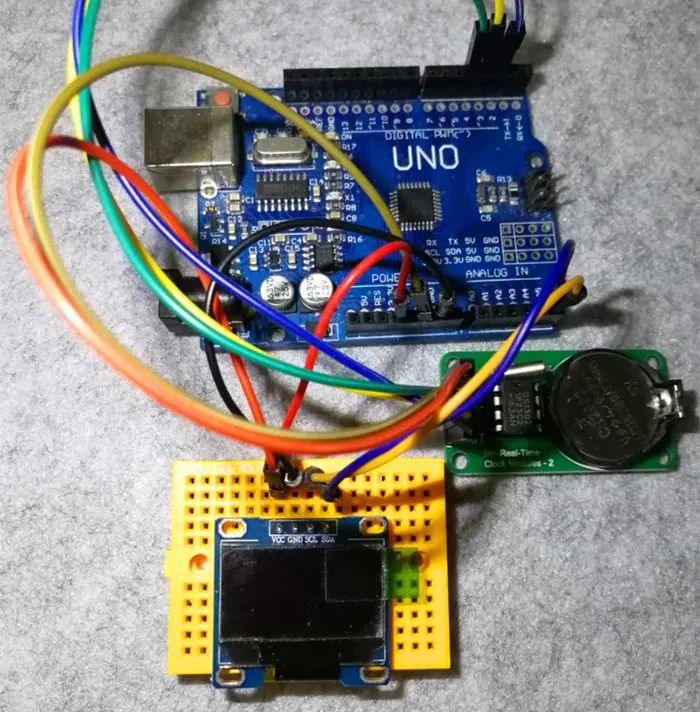
Added the OLED module connection based on the previous article. Connect the VCC and GND of the DS1302 module to the 3.3V and GND of the Uno development board. The CLK, DAT, and RST of the DS1302 module correspond to pins 4, 3, and 2 of the Uno development board. The VCC and GND of the OLED are connected to the 3.3V and GND of the development board, and the SDA and SCL of the OLED are connected to the A4 and A5 pins of the board.
The experimental schematic is shown below:
The physical connection diagram is shown below:
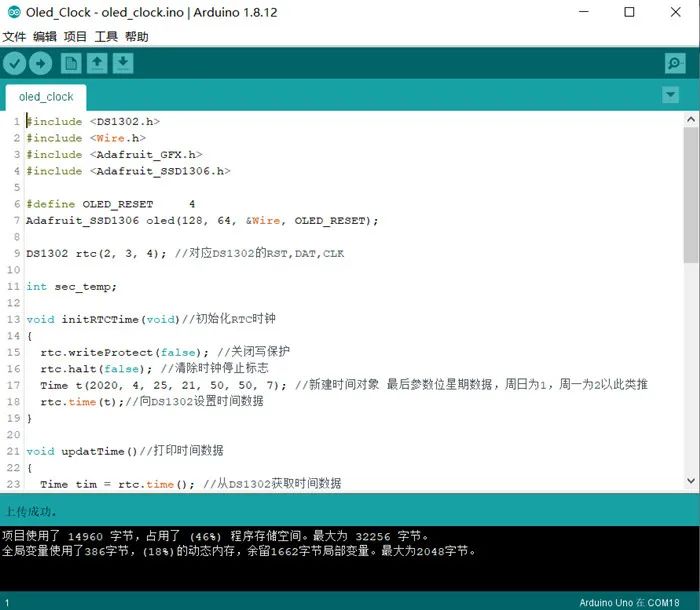
2. Create a new sketch, copy the code below to replace the auto-generated code and save it.
#include <DS1302.h>
#include <Wire.h>
#include <Adafruit_GFX.h>
#include <Adafruit_SSD1306.h>

#define OLED_RESET     4
Adafruit_SSD1306 oled(128, 64, &Wire, OLED_RESET);

DS1302 rtc(2, 3, 4); // Corresponds to DS1302's RST, DAT, CLK

int sec_temp;

void initRTCTime(void)// Initialize RTC clock
{
  rtc.writeProtect(false); // Disable write protection
  rtc.halt(false); // Clear clock stop flag
  Time t(2020, 4, 25, 21, 50, 50, 7); // Create time object, last parameter is week data, Sunday is 1, Monday is 2, and so on
  rtc.time(t);// Set time data to DS1302
}

void updatTime()// Print time data
{
  Time tim = rtc.time(); // Get time data from DS1302
  char date[20];
  char timer[20];
  snprintf(date, sizeof(date), "%04d-%02d-%02d",
           tim.yr, tim.mon, tim.date);
  snprintf(timer, sizeof(timer), "%02d:%02d:%02d",
           tim.hr, tim.min, tim.sec);

  if (tim.sec != sec_temp) { // Refresh once per second
    oled.clearDisplay();// Clear screen
    oled.setCursor(15, 2);// Set display position
    oled.println("--CLOCK--");
    oled.setCursor(4, 25);// Set display position
    oled.println(date);
    oled.setCursor(18, 50);// Set display position
    oled.println(timer);
    oled.display(); // Turn on display
  }
  sec_temp = tim.sec;
}

void setup() {
  oled.begin(SSD1306_SWITCHCAPVCC, 0x3C);
  oled.setTextColor(WHITE);// Turn on pixel illumination
  oled.clearDisplay();// Clear screen
  oled.setTextSize(2); // Set font size

  // For the new module, you need to set the current time once,
  // After downloading, disable this function to download again, otherwise it will initialize time data every time powered on
  //  initRTCTime();

}

void loop() {
  updatTime();
}
3. Connect the development board, set the corresponding port number and board type, and download the program.
The OLED display effect is as follows:
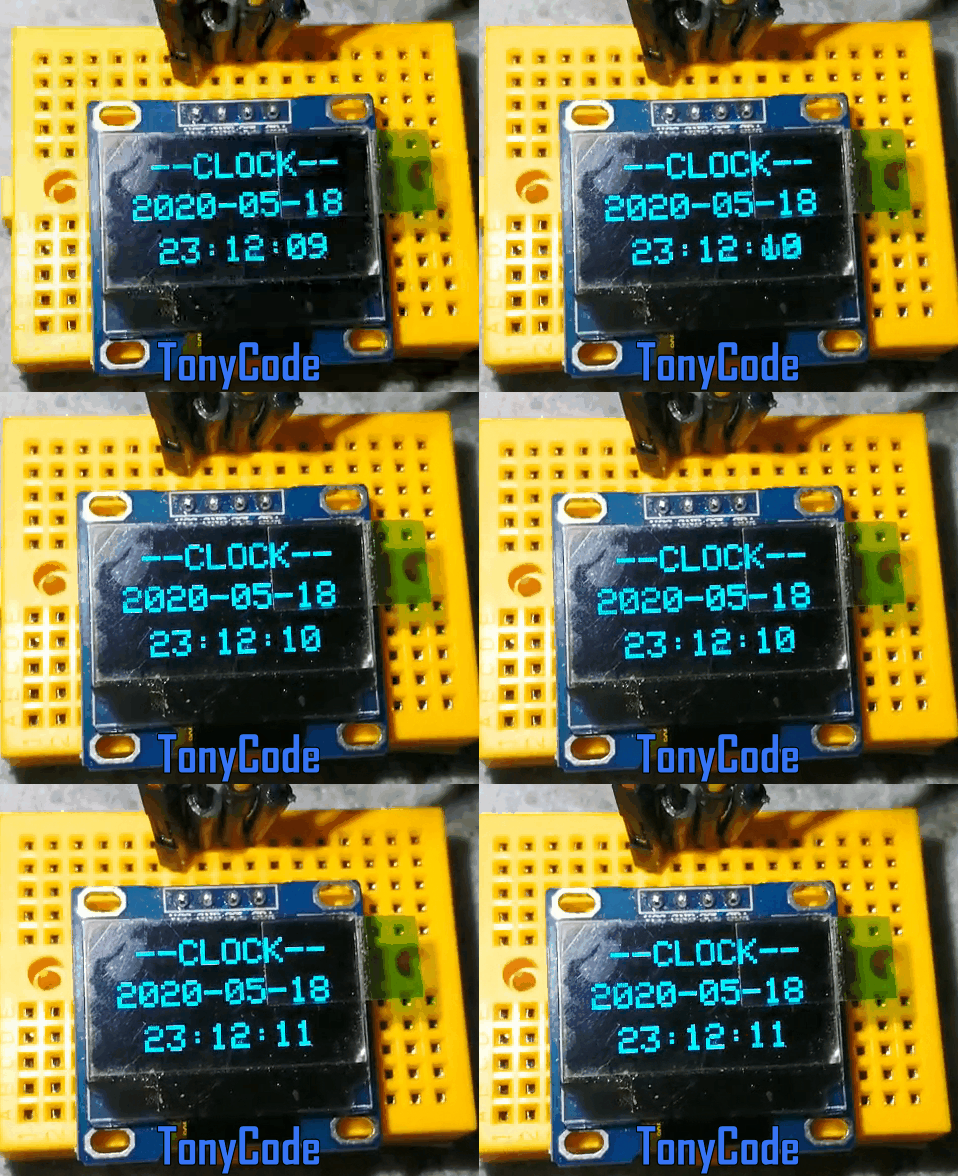
In the production of various electronic clocks with the DS1302, we often encounter the problem of inaccurate timekeeping. Apart from issues with the DS1302 chip itself, most are caused by the precision of the crystal oscillator and matching capacitors. For applications with low requirements, we can roughly measure the daily error range, which is likely to be fast, and then add an automatic calibration operation in the program every day.
Additionally, you may find that the seconds change unevenly, sometimes fast and sometimes slow, which is related to the screen refresh frequency. We can use a timer to fetch DS1302 data once per second for refresh. In this program, we refresh once the seconds value changes by comparing the two time data obtained before and after.
Summary of Arduino Basics
Arduino Nano Driving OLED Scrolling Display
Enhancing Arduino: Real-Time Clock DS1302
Follow the public account “TonyCode”, reply in the background“Enhance” to get the code resources in this article.

Reply “1024” in the background to get 1000G of learning materials
