MAKER:ReinKTH / Translated by: Fun Unlimited
The last issue’s “Raspberry Pi Machine Cat Petoi Nybble” was praised by Fun friends @Yuzu as “the series where you want to make it at first glance but give up after seeing the content”, so this time I decided to create something that makes you want to make it at first glance and even more after reading the content…
This is a charming crimson fox that begs for affection. It uses an adorable posture that you can hardly ignore to remind you to comfort it.
At its request, you temporarily set aside your tedious work and interact with it for a brief rest, adding a bit of fun and comfort to your originally mechanical working state… (Creative friends can, of course, take it a step further and directly make a female version, nothing wrong with that.)
Ahem… Let’s get to the point. This cute little fox breathes like an animal. When you start working, gently pet it to indicate you are starting. After working for a while, the little fox will become restless, and its breathing seems to become heavy.
First, watch a video!
When this happens, you need to pet it again to calm it down. You will also immediately realize that you need to take a break, drink some tea, eat something, or even get up and do some yoga.
After a short break, you can gently pet the fox again to tell it you will continue working. When you ignore it again, it will come back to seek your affection, very obedient!
Materials list

-
Arduino pro micro ×1
-
micro USB to USB cable ×1
-
Stepper motor ×1
-
Motor driver ×1
-
Small breadboard ×2
-
Color LED strip ×2
-
Wires × several
-
10M resistor ×1
-
100M resistor ×2
-
9V battery ×1
-
9V electrode clip ×1
-
Artificial leather ×1
-
Plywood ×1
-
Cardboard ×1
-
Aluminum foil ×1
-
Glue ×1
-
Needles and thread × several
Operation warning: Ensure that the artificial leather used does not contain any PVC components. The artificial leather will be cut using a laser cutter, and if it contains PVC, toxic gases will be released during cutting. If you are unsure whether the leather contains PVC, you can cut the lines with scissors.
Cutting raw materials


Use a laser cutter to cut all materials according to the template. As shown in the picture, all red lines need to be cut, and all black lines need to be engraved. Set the laser cutter according to your requirements.
I recommend testing with a piece of artificial leather first to determine if the engraving depth is sufficient.
If you don’t have a laser cutter, you can print the template on paper and manually cut all templates, but it will take longer.
The cutting files can be downloaded from the project file library.
http://maker.quwj.com/project/81
Glue the leather to the cardboard


The cardboard serves as a supporting material for the leather, making it easier to bend. Every surface of the leather has a matching cardboard piece except for the hexagonal one.
Glue them to the leather according to the shape of the leather. There should be about 3mm of space left between the cardboards at the edges to fold outward, while there is almost no space between the cardboards that fold inward.
At the same time, slightly cut the leather at the inward folding places with a utility knife to make it easier to fold. Ensure you do not cut all the way through!
Glue aluminum foil to the inner side

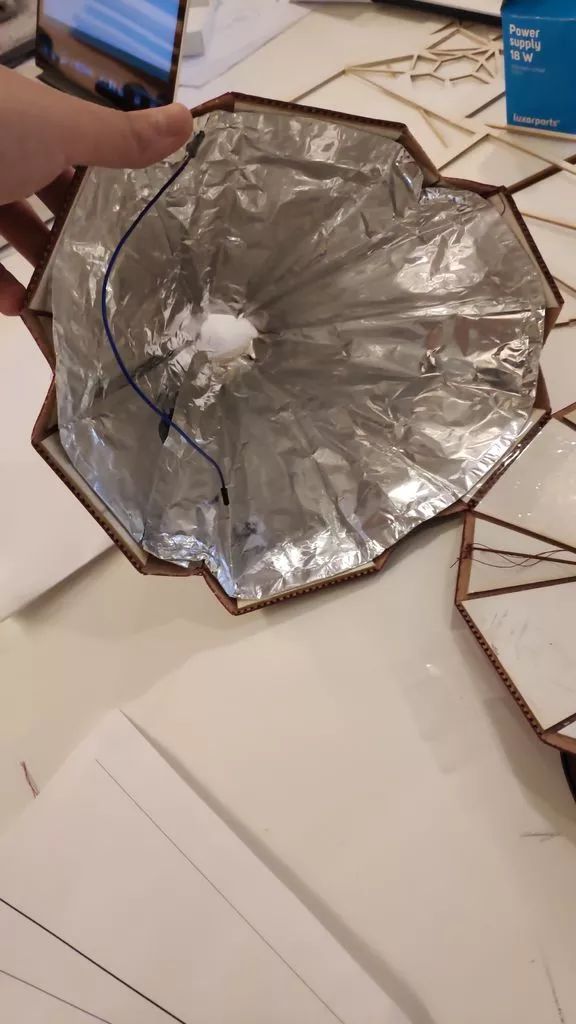
Create a touch sensor to detect if someone is touching or petting the fox. Stick 4 layers of aluminum foil inside to make a capacitive sensor.
For Arduino capacitive touch switch principles, you can refer to here.
http://arduino.nxez.com/2017/07/20/arduino-rc-delay-circuit-application.html
Sew the long edges together and then stick the aluminum foil onto the cardboard. Ensure that there is some space left in the internal folded part so that the aluminum foil does not tear. Leave a place to connect to the Arduino wiring.
Build the circuit and upload the code

The code can be downloaded from the project file library. http://maker.quwj.com/project/81
Glue the bottom and connect the wires


1. Glue the gear to the bottom of the stepper motor and the plywood, and glue the stepper motor on top.
2. Using needle and thread, fold in each corner to form the shape of the fox.
3. Wrap the wire around the stepper motor twice and then pull tight. Also, ensure it can rotate counterclockwise.
Assemble all parts


The layout of the components is as follows:
1. The bottom leaves space for the 9V battery.
2. The middle is for the stepper motor.
3. The top is for the Arduino pro micro and motor driver.
4. Sew the open edges of the leather together.

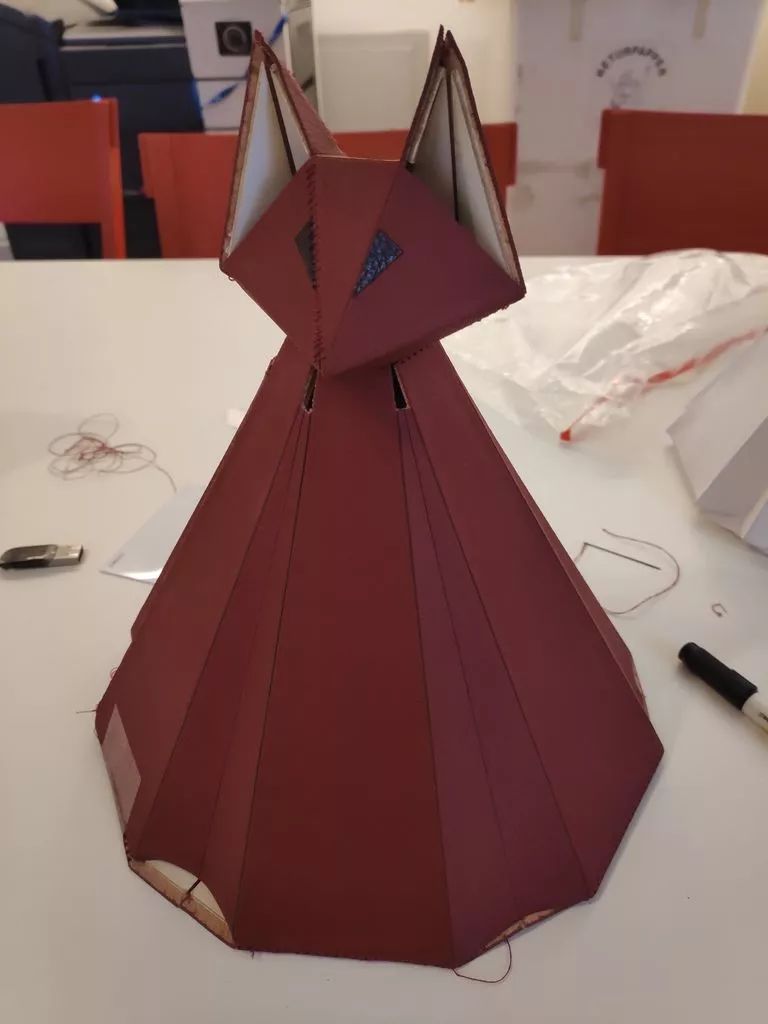
Finally, sew up all remaining open sides, and the project is complete. You can also connect the USB data cable to reprogram the little fox for personalized adjustments!
via instructables.com/id/Crimson-Fox-Raising-Awareness-to-Take-a-Break-Whil/
Links in the text can be clicked to read the original text at the end

More Exciting Content
Raspberry Pi Drawing Robot
UltraV: Portable UV Index Meter
Create a Decent NAS with Raspberry Pi
Raspberry Pi Toilet Condition Monitor
Create an Automatic Watering System with Raspberry Pi
DIY a Hot Equipment: Flame Throwing Gloves
Make a Fantastical “Infinite Extension” Mirror