
I have been busy with final exams for a while, and I apologize for the delay. In this chapter, we will continue from the last section that we didn’t finish. After getting the PCB soldered, we need to program this chip.

Main Content
First, let’s take a look at the actual photo after soldering.
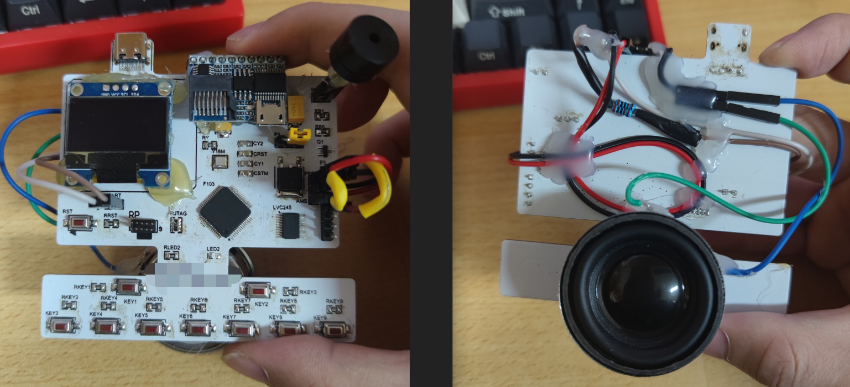
Let’s review the functionality we mentioned in the previous issue. We first output a PWM wave to the buzzer and adjust it to produce different tones by varying the frequency. We also added a serial communication voice broadcast module.
Now, let’s look at the relevant configuration for generating PWM waves in CubeMX.
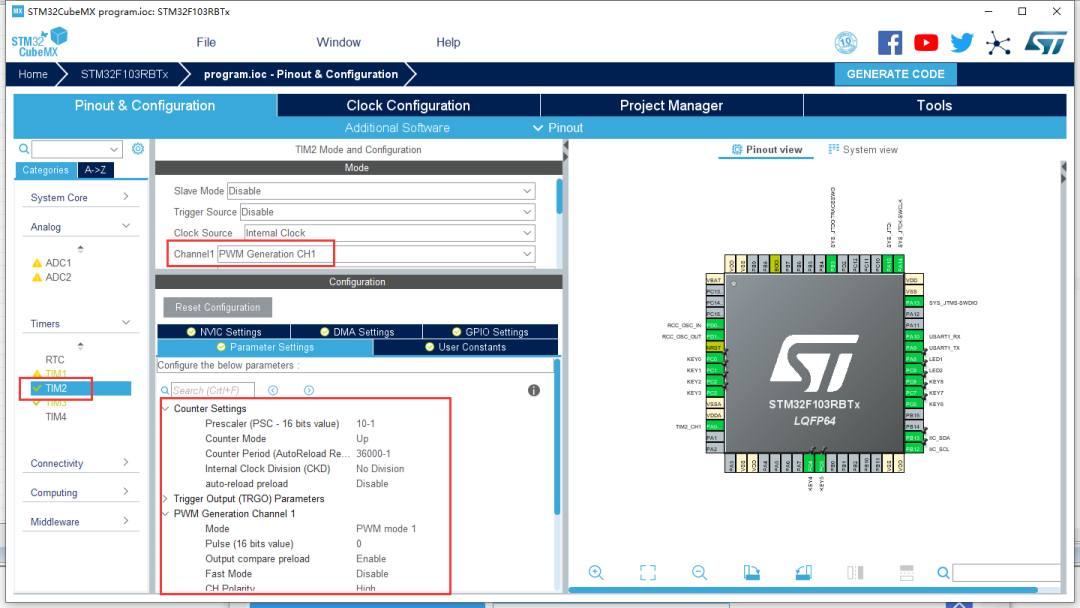
After configuration, we need to write a function in the code to generate the PWM wave.
The code is as follows:
void pwm2_output(uint8_t pwm_CH,float duty){ uint16_t CCR,ARR; if(!(pwm_CH!=1 || pwm_CH!=2 || pwm_CH!=3 || pwm_CH!=4)) return; if(duty<0||duty>100) return; ARR=htim2.Instance->ARR; CCR=(uint16_t)(ARR*(duty/100.0f)+0.5f); if(pwm_CH==1) { htim2.Instance->CCR1=CCR; } else if(pwm_CH==2) { htim2.Instance->CCR2=CCR; } else if(pwm_CH==3) { htim2.Instance->CCR3=CCR; } else if(pwm_CH==4) { htim2.Instance->CCR4=CCR; }}Of course, the above function only supports adjusting the duty cycle of the PWM wave. For this project, we need to adjust the frequency while keeping the duty cycle at fifty percent.
If we need to adjust the frequency of the PWM wave, we just need to adjust the ARR register under this timer.
The code is as follows:
htim2.Instance->ARR = frequency;
By taking different values for frequency, we can achieve different pitches.
After implementing DO, RE, MI, FA, SO, LA, XI, we also need to add a voice module.
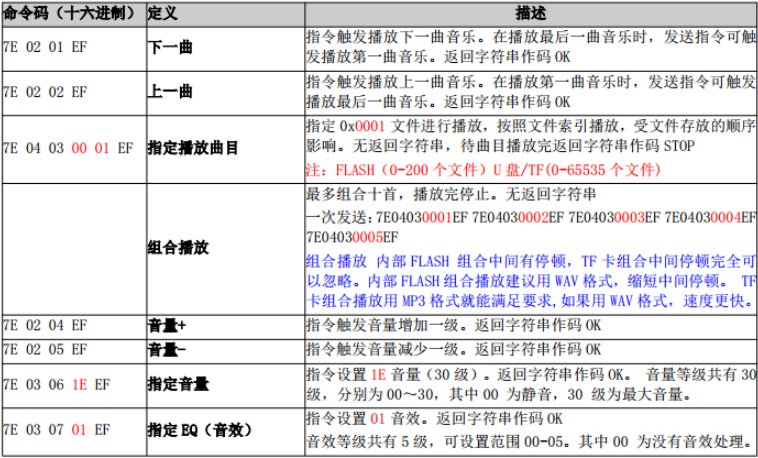
According to the voice module’s manual, we just need to send the corresponding data packet to complete the operation.
Therefore, we need to understand how to implement serial communication, starting with the CubeMX configuration.
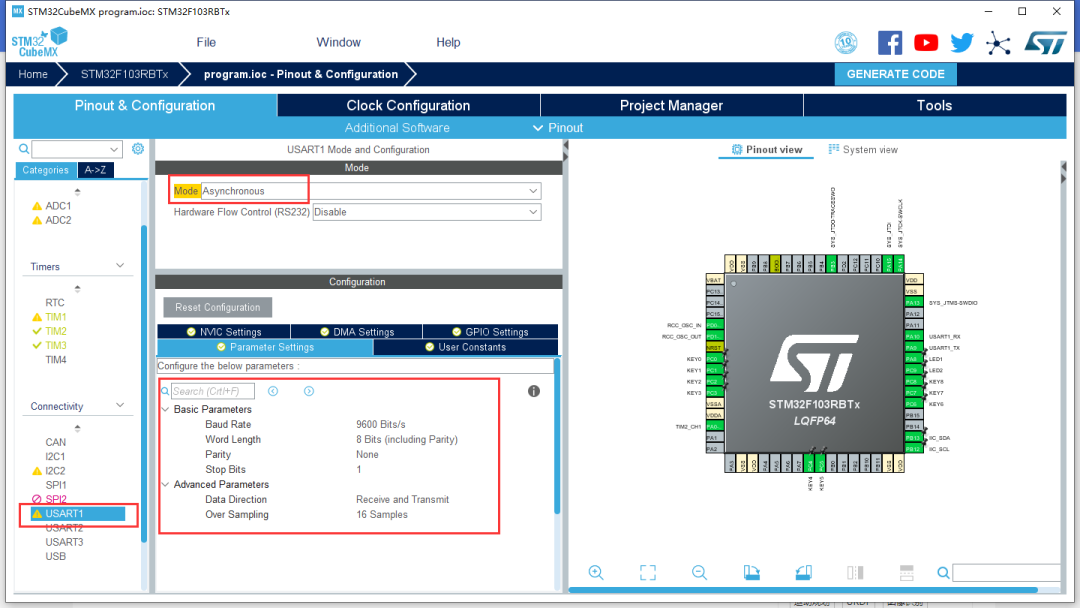
As shown in the figure above, we configure the USART1 serial port to use asynchronous communication mode and set the baud rate to 9600.
After generating the project, we need to write a data packet to complete the operation. First, we set the volume of the voice module to maximum, and the code is as follows:
HAL_UART_Receive_IT(&huart1,(uint8_t *)&RX_BUFF,1); tx_data_package0[0] = 0x7E; tx_data_package0[1] = 0x03; tx_data_package0[2] = 0x06; tx_data_package0[3] = 0x1E; tx_data_package0[4] = 0xEF; HAL_UART_Transmit(&huart1,tx_data_package0,sizeof(tx_data_package0),0xffff);Place this part of the code in the initialization function before the main loop to execute it once. After that, we just need to set the corresponding key event to trigger the playback of the track. Due to the lack of an SD card, the onboard flash of the voice module only supports very small files, so below I will demonstrate the experimental effect of the finished product.
