Today, we will share how to use Python+QT to implement single-axis homing motion control development for the domestic EtherCAT motion control edge controller ZMC432H.
01
Function Overview
The domestic EtherCAT motion control edge controller ZMC432H is a fully domestically produced and controllable hardware and software solution from Zhengyundong. It is compatible with EtherCAT bus and pulse-type independent motion controllers, supporting up to 32 axes of motion control. It also supports remote HMI functionality, providing network configuration display and real-time monitoring and adjustment of parameter settings.
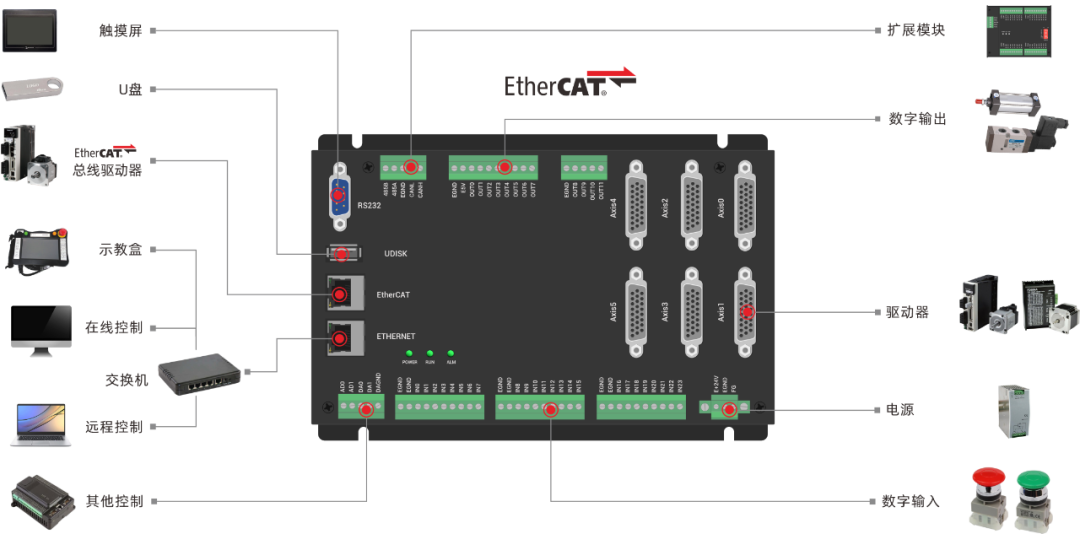
The ZMC432H features a rich set of hardware interfaces and control function modules, enabling efficient and stable motion control and real-time data acquisition to meet the application needs of industrial control and the industrial internet.The ZMC432H is equipped with a built-in Linux system, allowing connection via the local LOCAL interface for faster command interaction, with a single command and multiple commands interacting in about 40us.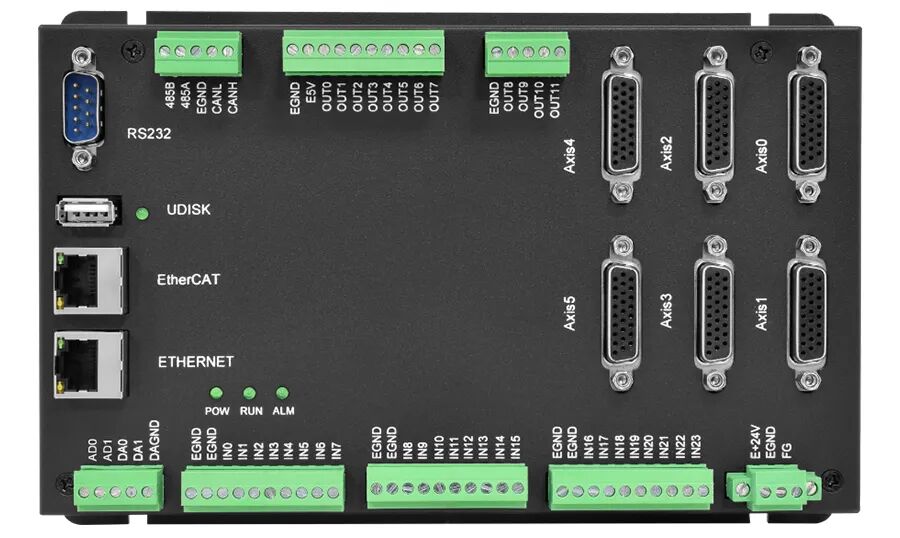 ZMC432H Video Introduction: The following video is sourced from Zhengyundong Assistant
02
Motion Control Development with Python+QT
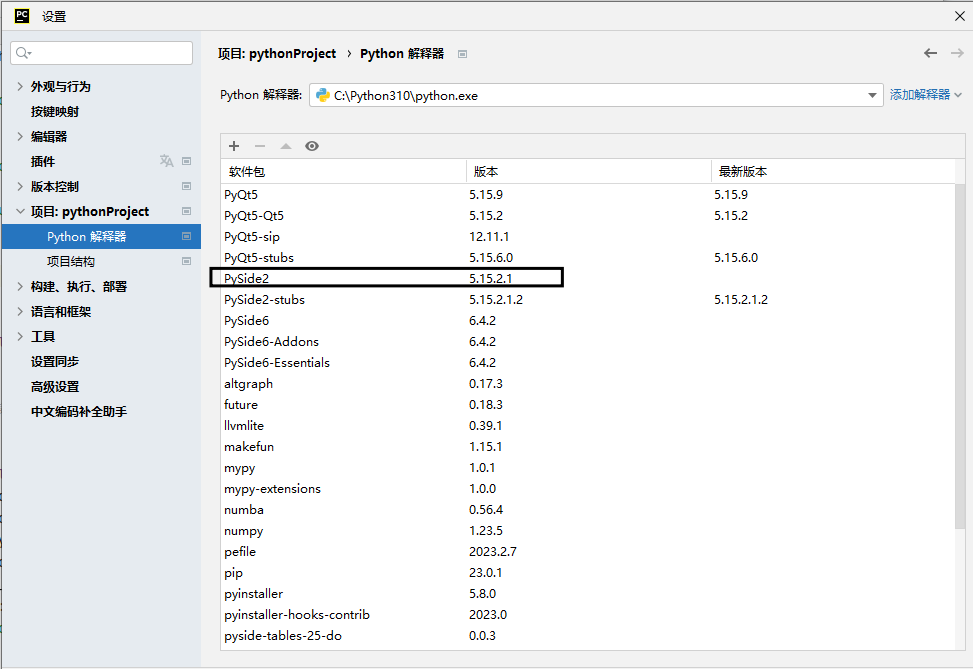
1. Set up the Python+Qt development environment and install the required tools1. Download the Python interpreter.2. Install pyside2 or pyside6 based on the version of the Python interpreter; use pyside6 for higher versions.There are two ways to install pyside2:Method 1:Open the run interface using win+r, then enter cmd (make sure to configure the environment variables according to the installation wizard when installing the Python interpreter, otherwise the following commands will not execute successfully), pip install pyside2 -i https://pypi.douban.com/simple/;Method 2:Install it in PyCharm.3. After installing PyCharm Community Edition, click the + sign in the interface to install the required tools, such as pyside2.
4. Configure custom tools in PyCharm (for Qt interface editing).(1) Open the Tool editing box as shown in the figure.
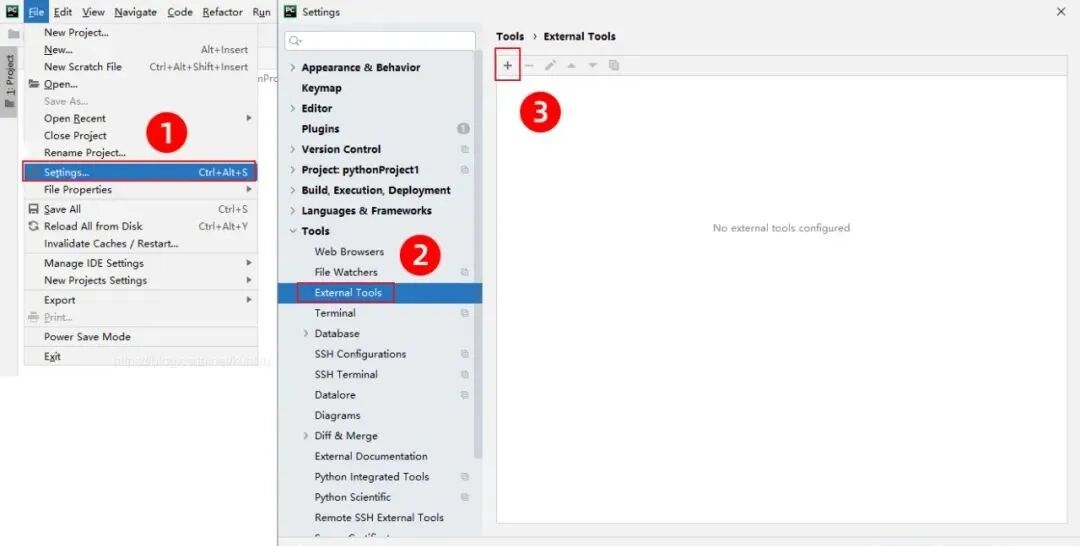
(2) Custom Pyside2-uic:a. Program fill in:Python installation directory \Scripts\pyside2-uic.exe;b. Arguments fill in:$FileName$ -o $FileNameWithoutExtension$.py;c. Working directory fill in:$FileDir$.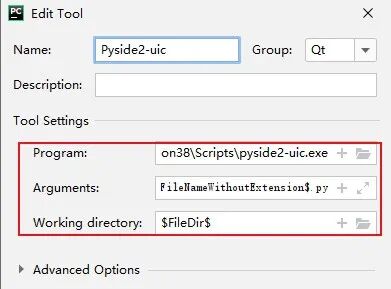 (3) Custom QtDesigner:a. Program fill in:Python installation directory \Scripts\pyside2-designer.exe;b. Working directory fill in:$ProjectFileDir$.
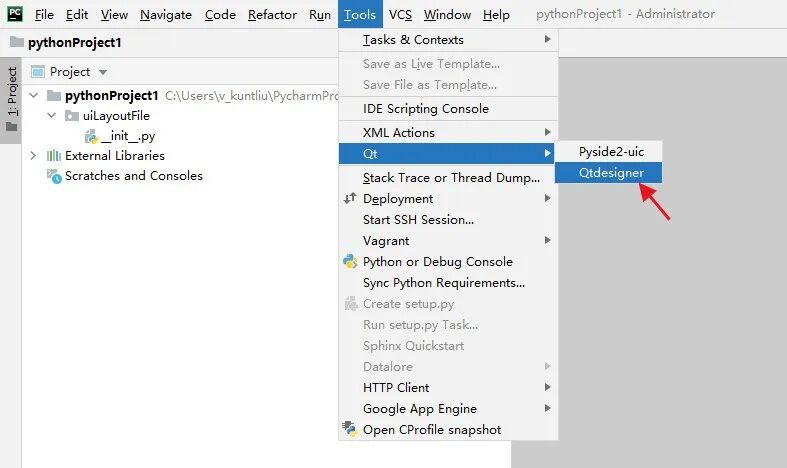
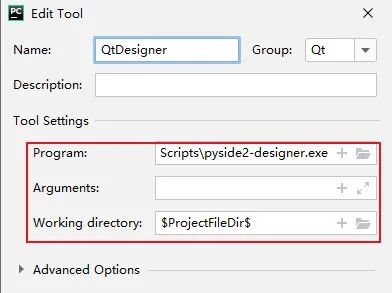 Once the custom tools are configured, they can be directly used in the PyCharm menu.1. Click Tools → Qt → Qtdesigner to enter the UI design interface.
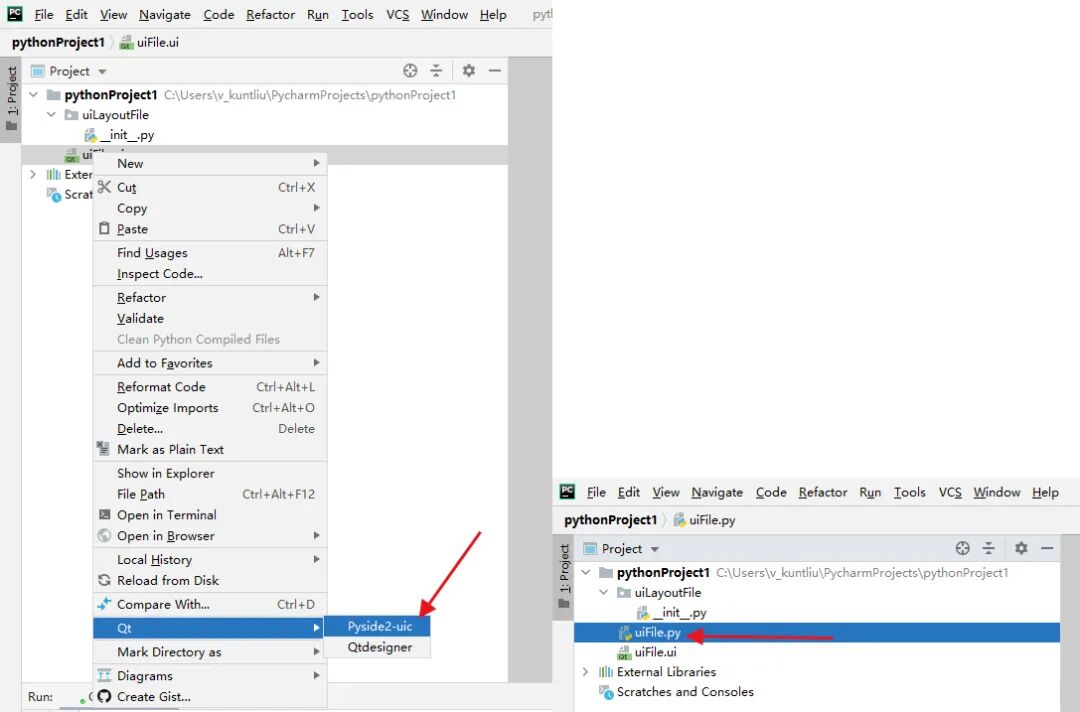
 2. Right-click the ui file, click Qt → Pyside2-uic to generate the py file for the ui file.
2. Create a New Python Project and Add Function Libraries
1. Open a newly created folder using PyCharm Community Edition 2022 or create a new directory after entering PyCharm Community Edition 2022, and add a Python file in the directory.
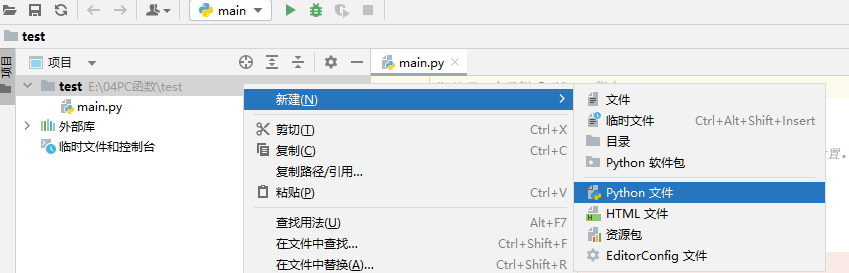
2. Find the manufacturer’s provided CD materials, the path is as follows.A. Enter the “04.PC Functions” folder in the vendor-provided CD materials and click to enter.
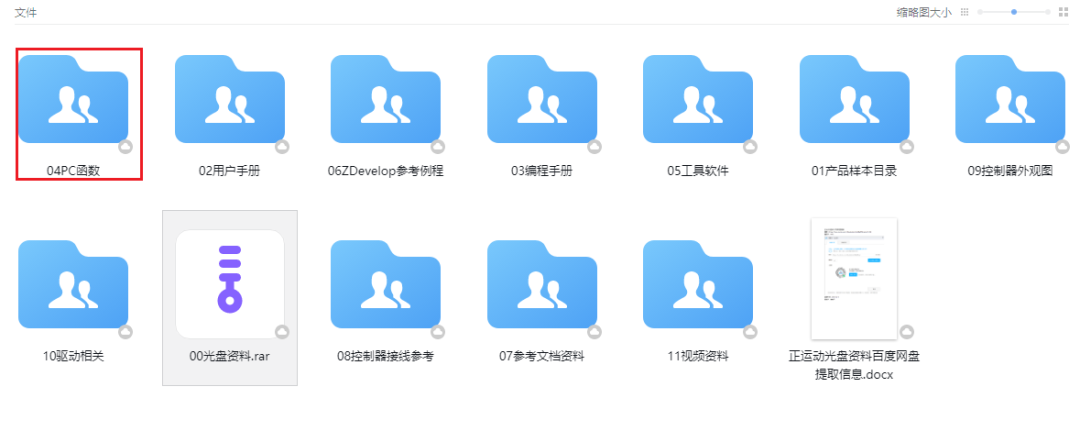
B. Select the “PC Function Library V2.1.1” folder.
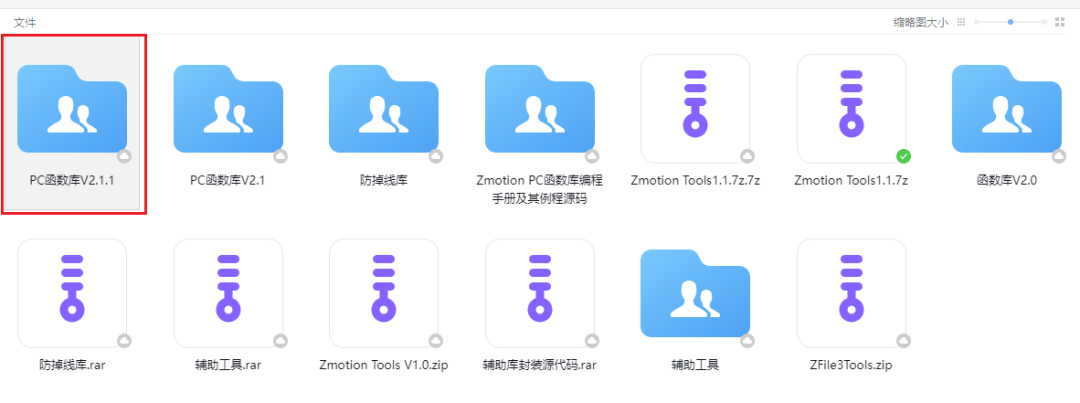
C. Select the “Windows Platform” folder.
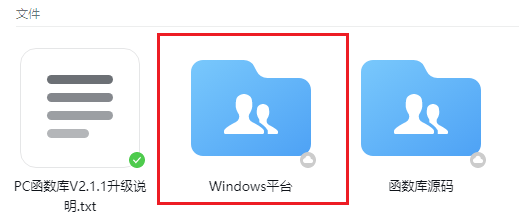
D. Select the “Library Files and Examples” folder.
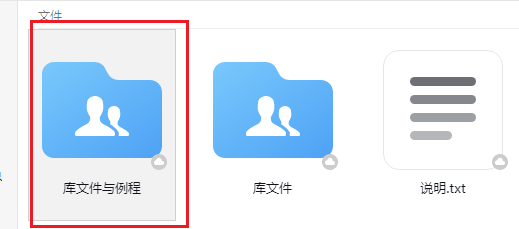
E. Select the “PYTHON Examples” folder.
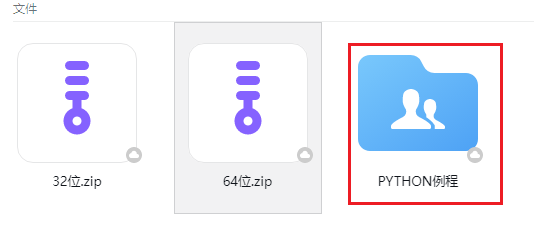
F. Unzip the corresponding bit version of the compressed package.
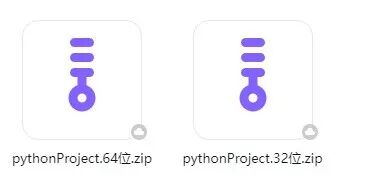
G. After unzipping, it is shown in the following figure.
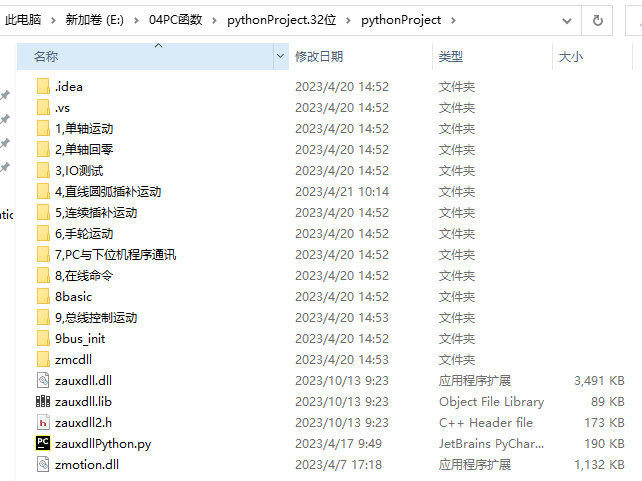
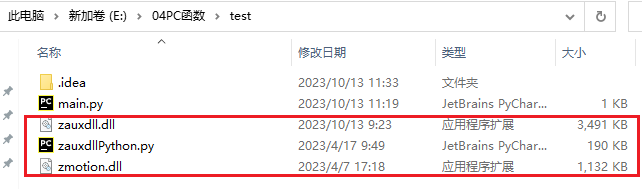
3. For Windows systems, add zauxdll.dll, zmotion.dll, and zauxdllPython.Py files to the created folder.
3. View the PC Function Manual and Familiarize Yourself with Related Function Interfaces.
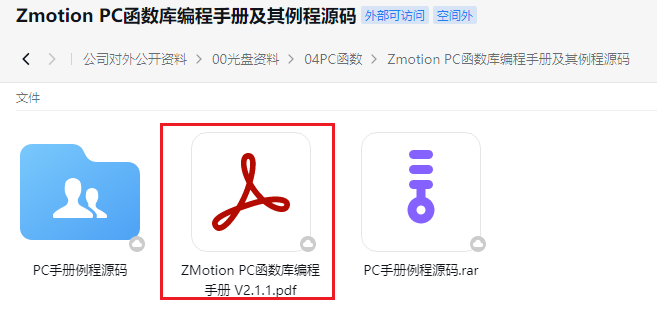
1. The PC function manual is also in the CD materials, the specific path is: “CD materials\04.PC Functions\ZMotion PC Function Library Programming Manual and Example Source Code\ZMotion PC Function Library Programming Manual V2.1.1.pdf”.
2. Connect to the controller and obtain the connection handle.
(1) ZAux_OpenEth() interface description:
|
Command 7 |
ZAux_OpenEth |
|
Command prototype |
int32 __stdcall ZAux_OpenEth(char *ipaddr, ZMC_HANDLE * phandle) |
|
Command description |
Ethernet link to the controller. |
|
Input parameters |
1 input parameter, see detailed description below. |
|
ipaddr |
IP address of the link. |
|
Output parameters |
1 output parameter, see detailed description below. |
|
Phandle |
Returned link handle. |
|
Return value |
See error code description for details. |
(2) Configuration of IO signal point corresponding function interface description:
|
Command |
Description |
|
ZAux_Direct_SetDatumIn |
Set axis origin signal |
|
ZAux_Direct_SetFwdIn |
Set axis forward limit signal |
|
ZAux_Direct_SetRevIn |
Set axis reverse limit signal |
|
ZAux_Direct_SetAlmIn |
Set axis servo alarm signal |
|
ZAux_Direct_SetInvertIn |
Set input signal inversion status |
|
ZAux_Direct_GetDatumIn |
Read origin signal |
|
ZAux_Direct_GetFwdIn |
Read axis forward limit signal |
|
ZAux_Direct_GetRevIn |
Read reverse limit signal |
|
ZAux_Direct_GetAlmIn |
Read servo alarm signal |
For detailed interface descriptions, please refer to the PC function manual.(3) The following is the homing motion calling interface, along with detailed descriptions of the homing mode:Adding 10 indicates that after hitting the limit, it will reverse search, and will not stop at the limit, for example, 13 = mode 3 + limit reverse search 10, used when the origin is in the middle.
|
Command 78 |
ZAux_Direct_Single_Datum |
|
Command prototype |
int32 __stdcall ZAux_Direct_Single_Datum(ZMC_HANDLE handle, int iaxis, int imode) |
|
Command description |
Single-axis homing motion. |
|
Input parameters |
There are 3 input parameters, see the description below. |
|
handle |
Link identifier. |
|
iaxis |
Axis number. |
|
imode |
Mode 0 Clear all axis error states. 1 The axis runs forward at CREEP speed until the Z signal’s DPOS value resets to 0 while correcting MPOS. 2 The axis runs backward at CREEP speed until the Z signal appears. DPOS value resets to 0 while correcting MPOS. 3 The axis runs forward at SPEED speed until it hits the origin switch. Then the axis moves backward at CREEP speed until it leaves the origin switch. DPOS value resets to 0 while correcting MPOS. 4 The axis runs backward at SPEED speed until it hits the origin switch. Then the axis moves forward at CREEP speed until it leaves the origin switch. DPOS value resets to 0 while correcting MPOS. 5 The axis runs forward at SPEED speed until it hits the origin switch. Then the axis moves backward at CREEP speed until it leaves the origin switch, and then continues to reverse at CREEP speed until it hits the Z signal. DPOS value resets to 0 while correcting MPOS. 6 The axis runs backward at SPEED speed until it hits the origin switch. Then the axis moves forward at CREEP speed until it leaves the origin switch, and then continues to reverse at CREEP speed until it hits the Z signal. DPOS value resets to 0 while correcting MPOS. |
4. Python+Qt Development Controller Single Axis Homing Example.
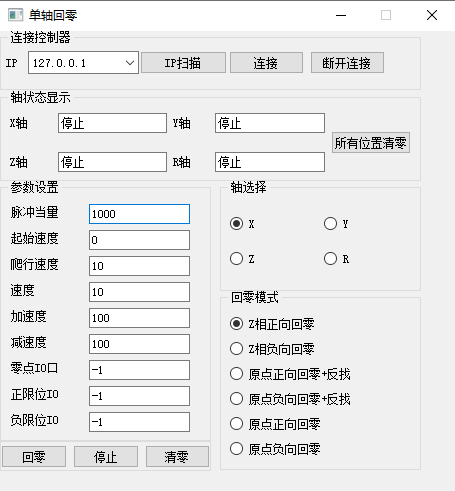
1. The example interface is as follows.
2. The program example is as follows.
(1) Load the qt UI file in Python;
from PySide2.QtWidgets import QMessageBox
from PySide2.QtCore import QFile, QTimer
from PySide2.QtUiTools import QUiLoader
q_state_file = QFile("mainweiget.ui")
q_state_file.open(QFile.ReadOnly)
self.ui = QUiLoader().load(q_state_file)
q_state_file.close()
Note: At this point,self.ui represents the UI in qt.
(2) In the event handler function for the link button, call the link controller interface function ZAux_OpenEth(), link to the controller, and after a successful link, start timer 1 to monitor the controller status.
def on_btn_open_clicked(self):
    strtemp = self.ui.comboBox.currentText()
    print("Current IP is:", strtemp)
    if self.Zmc.handle.value is not None:
        self.Zmc.close()
        self.time1.stop()
        self.ui.setWindowTitle("Single Axis Homing")
    iresult = self.Zmc.open_eth(strtemp)
    if 0 != iresult:
        QMessageBox.warning(self.ui, "Tip", "Connection failed")
    else:
        QMessageBox.warning(self.ui, "Tip", "Connection successful")
        str_title = self.ui.windowTitle() + strtemp
        self.ui.setWindowTitle(str_title)
        self.Up_State()
        self.time1.start(100)
(3) Monitor the controller status through the timer.
def Up_State(self):
    idlelist = [ctypes.c_int(-1) for i in range(0, 4)]
    fdposlist = [ctypes.c_float(0) for i in range(0, 4)]
    for i in range(0, 4):
        self.Zmc.get_target_pos(i, fdposlist[i])  # Get current axis position
        self.Zmc.get_idle(i, idlelist[i])  # Determine current axis status
    str1 = " {}  {} ".format("Stopping" if idlelist[0].value else "Running", round(fdposlist[0].value, 2))
    self.ui.lineEdit_X.setText(str1)
    str1 = " {}  {} ".format("Stopping" if idlelist[1].value else "Running", round(fdposlist[1].value, 2))
    self.ui.lineEdit_Y.setText(str1)
    str1 = " {}  {} ".format("Stopping" if idlelist[2].value else "Running", round(fdposlist[2].value, 2))
    self.ui.lineEdit_Z.setText(str1)
    str1 = " {}  {} ".format("Stopping" if idlelist[3].value else "Running", round(fdposlist[3].value, 2))
    self.ui.lineEdit_R.setText(str1)
(4) Use the event handler function for the homing button to initialize the parameters before the homing motion and call the corresponding homing mode operation for the homing motion.
def on_btn_run_clicked(self):
    if self.Zmc.handle.value is None:
        QMessageBox.warning(self.ui, "Warning", "Controller not connected")
        return
    ifidle = ctypes.c_int(0)
    self.Zmc.get_idle(self.axis_Num,ifidle)
    if 0 == ifidle:
        QMessageBox.warning(self.ui, "Tip", "Motion not stopped")
        return
    # Set axis type 7 - pulse axis type + encoder Z signal, can also be set to 1 without EZ homing
    self.Zmc.set_axis_type(self.axis_Num,7 if self.mode < 3 else 1)
    # Set pulse mode and logical direction (pulse + direction)
    self.Zmc.set_invert_step(self.axis_Num,0)
    # Set equivalent
    str_tmp = self.ui.edit_Units.text()
    float_tmp = float(str_tmp)
    self.Zmc.set_units(self.axis_Num,float_tmp)
    # Set creep speed
    str_tmp = self.ui.edit_CLSpeed.text()
    float_tmp = float(str_tmp)
    self.Zmc.set_creep(self.axis_Num,float_tmp)
    # Set speed
    str_tmp = self.ui.edit_Speed.text()
    float_tmp = float(str_tmp)
    self.Zmc.set_speed(self.axis_Num,float_tmp)
    # Set acceleration
    str_tmp = self.ui.edit_Accel.text()
    float_tmp = float(str_tmp)
    self.Zmc.set_acceleration(self.axis_Num,float_tmp)
    # Set deceleration
    str_tmp = self.ui.edit_Decel.text()
    float_tmp = float(str_tmp)
    self.Zmc.set_deceleration(self.axis_Num,float_tmp)
    # Set origin switch
    str_tmp = self.ui.edit_zeroIO.text()
    float_tmp = int(str_tmp)
    self.Zmc.set_datum_in(self.axis_Num,float_tmp)
    # Invert ZMC series considers OFF when hitting the origin signal (normally closed), if it is a normally open sensor, the input needs to be inverted, ECI series does not need inversion
    if float_tmp != -1:
        self.Zmc.set_invert_in(float_tmp,1)
    # Set forward limit input signal switch
    str_tmp = self.ui.edit_FWDIO.text()
    float_tmp = int(str_tmp)
    self.Zmc.set_fwd_in(self.axis_Num,float_tmp)
    if float_tmp != -1:
        self.Zmc.set_invert_in(float_tmp,1)
    # Set reverse limit input signal switch
    str_tmp = self.ui.edit_REVIO.text()
    float_tmp = int(str_tmp)
    self.Zmc.set_rev_in(self.axis_Num, float_tmp)
    if float_tmp != -1:
        self.Zmc.set_invert_in(float_tmp, 1)
    # Single-axis homing
    self.Zmc.single_datum(self.axis_Num,self.mode)
(5) Use the event handler function for the stop motion button to stop the current motion.
def on_btn_stop_clicked(self):
    if self.Zmc.handle.value is None:
        QMessageBox.warning(self.ui,"Warning","Controller not connected")
        return
    # If already stopped, no need to operate
    isidle = ctypes.c_int(-1)
    self.Zmc.get_idle(self.axis_Num,isidle)
    if isidle:
        return
    self.Zmc.single_cancel(self.axis_Num,2)
(6) Use the event handler function for the coordinate clear button to clear the coordinates of the current axis.
def on_btn_clear_clicked(self):
    if self.Zmc.handle.value is None:
        QMessageBox.warning(self.ui,"Warning","Controller not connected")
        return
    isidle = ctypes.c_int(-1)
    self.Zmc.get_idle(self.axis_Num,isidle)
    if not isidle:
        QMessageBox.warning(self.ui,"Warning","Motion not paused, cannot clear")
        return
    self.Zmc.set_target_pos(self.axis_Num,0)
03
Debugging and Monitoring
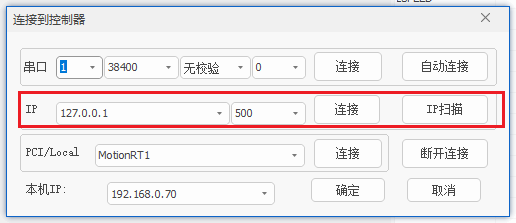
Compile and run the example while monitoring the controller status through the RtSys software.
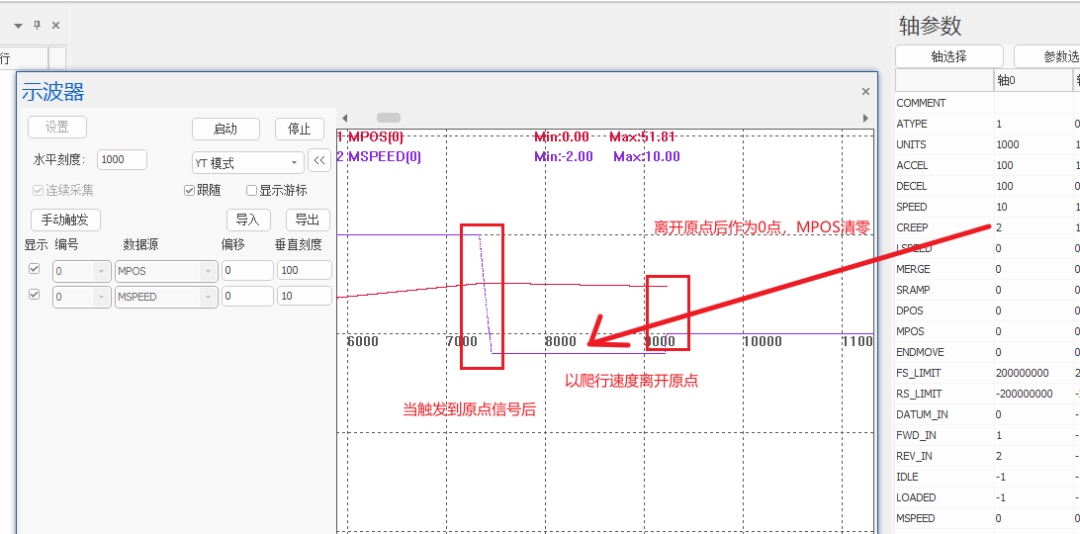
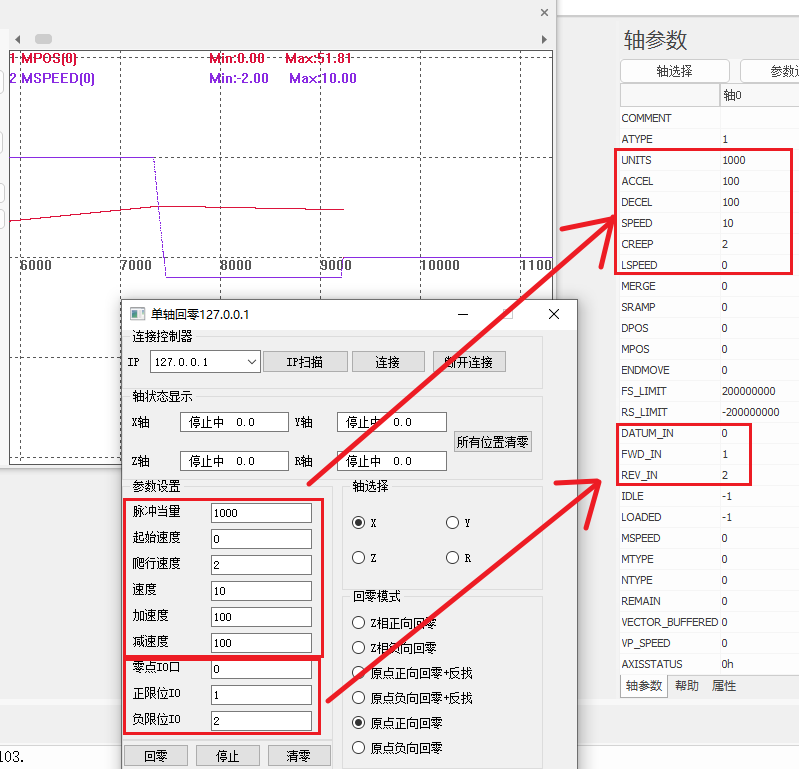
Python+QT single-axis homing motion example explanation.
The following video is sourced from Zhengyundong Assistant
Complete Code Access Address
▼

This concludes the sharing of the domestic EtherCAT motion control edge controller (Part 5): IO configuration and homing motion development with Python+QT.
For more exciting content, please follow the “Zhengyundong Assistant” public account. For related development environments and example codes, please consult Zhengyundong Technology sales engineers: 400-089-8936.
This article is original by Zhengyundong Technology, and everyone is welcome to reprint it for mutual learning and improvement of China’s intelligent manufacturing level. The copyright of the article belongs to Zhengyundong Technology. Please indicate the source when reprinting.
About Zhengyundong Technology
Zhengyundong Technology Co., Ltd. was established in 2013, focusing on the research of purely domestic motion control technology and the development of general motion control software and hardware platforms and products. It is a national high-tech and specialized “little giant” enterprise.
Zhengyundong Technology gathers outstanding talents from companies such as Huawei and ZTE. Striving for innovation, the company currently holds more than fifty intellectual property rights, including patents and copyrights. While adhering to independent innovation, it actively collaborates with major universities and research institutes to jointly research the basic technology of motion control, making it one of the fastest-growing companies in the domestic industrial control field and one of the few companies that fully master the core technology of motion control and real-time industrial control software platform technology.
In addition to the main R&D center, Zhengyundong Technology has three R&D branches in Zhongshan, Wuhan, and Shanghai. To better serve customers, there are two regional service centers outside the headquarters, and sales and technical service institutions in Foshan, Xiamen, Qingdao, Xi’an, Wuhan, Chengdu, Tianjin, and Zhengzhou.
After years of development and application by numerous partners, Zhengyundong Technology’s products are widely used in fields such as 3C electronics, semiconductors, new energy, robotics, packaging and printing, textile and clothing, laser processing, medical and pharmaceutical, CNC machine tools, and traditional processing.