 This is about building a simple smart home system. I have created a small box for this smart home system, aimed at providing a convenient way to control regular household appliances, allowing control of lights, water heaters, fans, doors, air conditioners, etc., when connected to the internet via a mobile phone.
The hardware components of the entire system are: main controller STM32F103C8T6, wifi module ESP8266, temperature and humidity sensor SHT20, light intensity sensor, infrared transmitter, memory AT24C02, buzzer, as well as some perforated boards, DuPont wires, and a plastic box.
For the software part, the server uses CentOS, a paid server costing one yuan a day; there’s no choice, money talks! On the server host, I wrote a simple program in C language designed to support 100 accounts logged in simultaneously, without using a database, just storing usernames and accounts in files, and no other data; basically, the role of this server is to perform data transparent transmission tasks. Then I designed an Android client app, but I’m not very good at Android programming, so it turned out quite rough, and the interface isn’t fancy, but it works.
 .
.
After the system was completed, it can control the control box from the mobile end, including controlling relays and reading data from terminal sensors. Overall, it is quite convenient to use, but sometimes there is a bit of delay, as it goes through a remote server, which seems to be located in Shenzhen, and the network may get congested.
Enough talking, let’s look at the pictures. Actually, I filmed a video of this, but unfortunately, my phone was stolen on the bus last week, and the video is gone, which is really frustrating. I haven’t bought a new phone, so I haven’t filmed another video, so

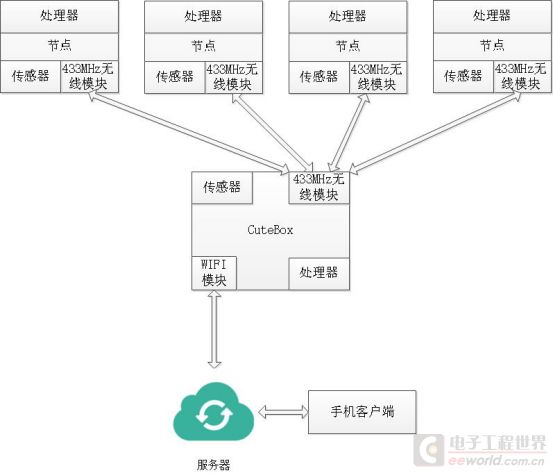
Figure 1 Design Concept
My design concept is quite good, with one main control node connecting multiple slave nodes; this scheme is similar to Zigbee, although I have never worked with Zigbee, I guess it operates on a similar principle. All slave nodes send data to the main node via 433MHz wireless modules, and only the main node can connect to the internet, allowing for information collection from various corners using a distributed node approach. Moreover, the transmission distance of the SI4432 wireless module is quite good; the seller said it can penetrate 2000 meters, using a stick antenna.
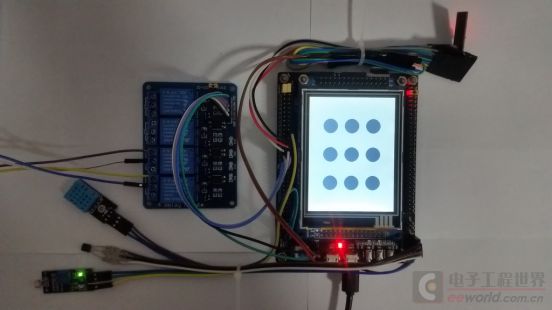
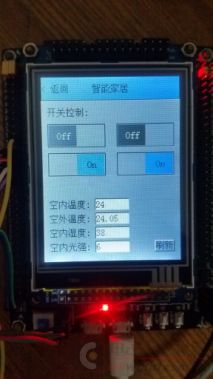
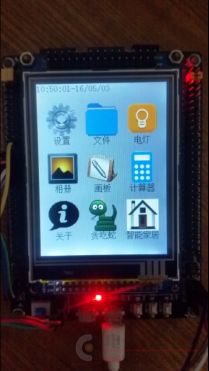
Figure 2 Design Prototype
At first, I used my development board with a screen to experiment and connect a few sensors; once the timing was right, I moved to the physical product. Since I don’t know industrial design, I just bought a case to put it in, and it turned out quite cute. On top of the case, I added a relay module to control household appliances; I connected my fan and desk lamp, and it works. I sealed it with hot melt glue, and once electricity flows, it becomes permanent.
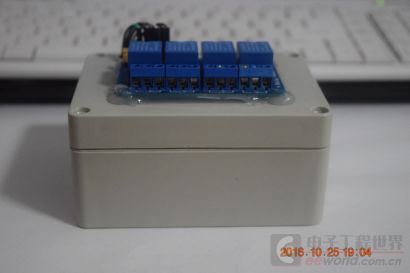
Figure 3 Front View of the Physical Product
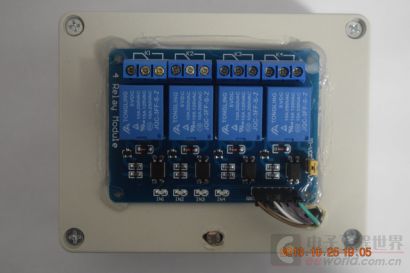
Figure 4 Top View of the Physical Product

Figure 5 Open View
After opening, everyone will see that there isn’t much inside, just two boards and some wires; the workmanship is quite rough. It’s DIY, so it doesn’t matter; as long as it works, it’s fine. It would be best if it could be developed into an industrial product someday. .
.

Figure 6 Server Running Screenshot
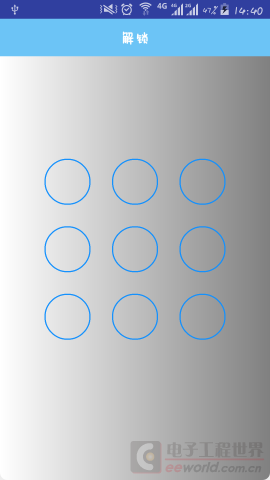
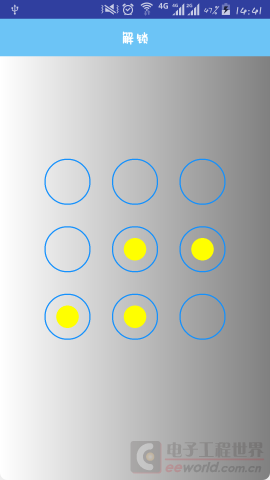
Figure 7 Mobile App Start Unlock Interface
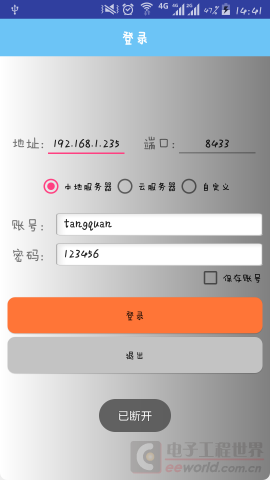
Figure 8 Mobile Login Interface

Figure 9 Mobile Main Interface
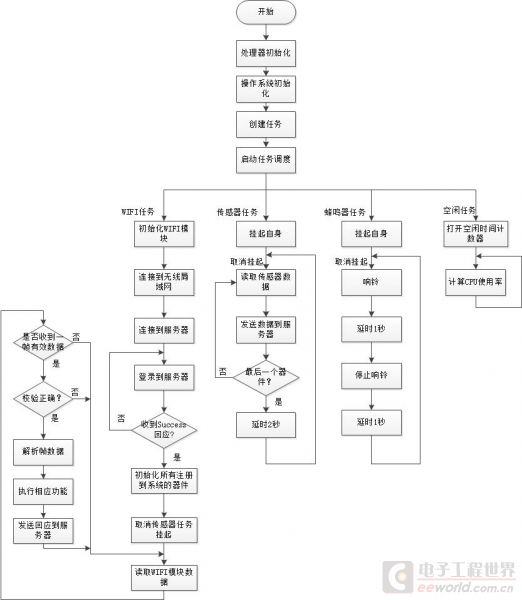
Figure 10 Terminal Software Design Flowchart
The program design for the terminal box is based on RTOS, with just 4 threads; in fact, the program is quite simple, but I think the part involving communication with the ESP8266 module is particularly challenging.

Figure 11 Server Software Design Flowchart

Figure 12 Android Client Software Design Flowchart
Other sensor programs are known to forum friends; I just want to share my ESP8266 control program, as I have spent a lot of time on this, hoping it can serve as a reference for friends wanting to use ESP8266. I apologize for the poor writing. For the related code, please click Read Original to view.
Recommended Reading
DIY | A Brief Discussion on the Frequency Response and Stability of Amplifiers Constructed with Operational Amplifiers
DIY | Annoying Inductor Whining! Don’t Worry, Just Use These Three Tricks to Eliminate It
DIY | A Brief Talk on the Miller Effect
DIY | A Brief Discussion on How to Use RL_RTX
DIY | Running Basic Experience of Apple II on STM32F746-Disco
DIY | About Matrix Keyboards, Using Spreadsheets to Assist Programming
DIY | Timed Constant Temperature Lunch Box
DIY | Homemade PCB Circuit Board for Engraving Machines
DIY | My Own Organization Framework for a Complex Microcontroller Application