1. Requirement Analysis
My hot water heater is a Haier EC5002-05, which can be set to a specific heating power level and target temperature. When switched on, it automatically heats to the preset temperature. Its control switch is a micro switch, which requires a certain amount of force to press. My main task is to use IoT technology to turn on this switch; as long as I can control the power switch with my phone, I can have hot water when I get home.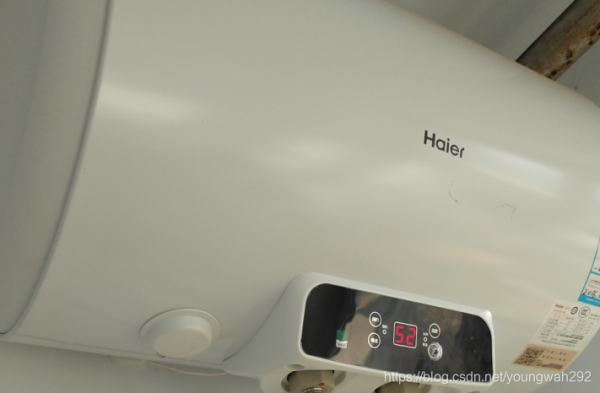
2. General Design
To control the power switch, there are two approaches. The first is to design a mechanical device to simulate a person pressing the switch; the second is to control it with an electrical signal. Based on my previous work experience, I think we can use the following solutions, each controlled by the ESP8266, providing switch control.
(1) Using an electromagnet to simulate a downward pressing action. For example, the one below can create a downward pressing action to complete the press. The disadvantage of this solution is that the working voltage of the electromagnet is very high; some are 220 volts, while others are 12 or 24 volts. It is also large and heavy, requiring a specially designed bracket, which is not easy to design. Additionally, it is uncertain how well the force can be controlled; if the force is too great, it could damage the panel…
(2) Using a standard servo. I happen to have a standard servo at home, the SG90 servo from the Arduino kit, which is small and inexpensive but can perform the clicking action without issues. The downside is that it also requires a special mounting bracket, in addition to a dedicated power source and PWM control signal provider. I previously made an STC calculator that could provide PWM signals with this microcontroller, but it increases the final product’s size and complexity. (The ESP8266 can also provide PWM, but I don’t have time to learn how to use it.)
(3) Using a linear servo. While looking for a suitable servo, I found a type called a “linear servo.” It converts rotational motion into linear motion using a screw and still uses PWM control. This seems suitable for me; if there is a downside, it still requires a designed bracket.
All three solutions simulate a hand pressing a micro switch and require a mounting bracket. Where to install the bracket is a problem; if installed on the wall, it may need a large supporting frame; if mounted on the water heater, it may require drilling holes or using strong adhesive. Even if the fixing issue can be solved, what about the bracket? It can certainly be resolved with 3D printing, but the design process for 3D printing requires multiple iterations, which could be criticized for taking too long, and the aesthetic quality may be questioned by my family member who cares about appearances.
(4) Directly controlling the ESP8266 to provide an electrical signal. This involves opening the water heater to see that the circuit board under the switch provides a high or low level to the control chip when pressed; if pressed, it is high, and if released, it is low. I can let the ESP8266 directly output a high level to the control chip. The advantage of doing this is that the ESP8266 can be hidden inside the water heater, leaving no visible traces. The downside is that the ESP8266 outputs a level of 3.3 volts, while the measured control board level is 5 volts, making them incompatible. I would need to add a level matching circuit, which raises safety concerns over time. Better safe than sorry.
(5) Using the ESP8266 to control a relay, short-circuiting the switch pins. This approach involves bringing the power switch button from the control board of the heater out and using the ESP8266 to build a circuit to control the on/off of these two wires, effectively simulating the button press without needing a mechanical device to press the micro switch.
The benefits of this approach are clear: it is safe. Regardless of what happens with the external control circuit, it merely simulates the heater’s switch being pressed or opened, without causing any faults in the heater. Moreover, this solution can be implemented quickly without extensive mechanical processing work.
Of course, this requires a certain technical foundation, and I do not recommend that readers of this post attempt to DIY without sufficient knowledge. Life is precious, and electricity must be handled with care.
In summary, the overall design adopts the fifth solution. I did not mention the software because I only know how to use Smart Cloud, which is very user-friendly and can generate APP source code.
3. Detailed Design
3.1 Control Line for the Water Heater
Hardware List: Several wires, several connectors (I used what I had on hand; the control signal voltage and current are low, so high-spec connectors are unnecessary).
Steps:
1. Disconnect the power and open the water heater control panel, which is secured with four screws. Use a magnetic-head screwdriver to unscrew it to prevent losing the screws.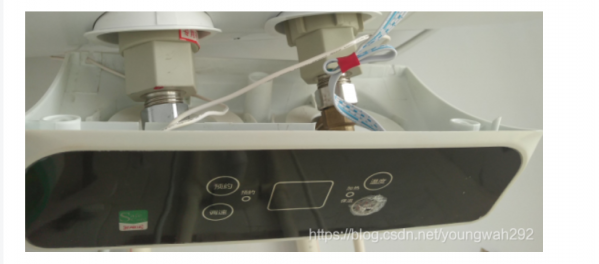
2. Remove the protective cover of the control circuit board.
3. Disconnect the connecting ribbon cable and remove the circuit board. You can see the micro switch; pressing the power switch actually presses the micro switch SW4 in the lower right corner.
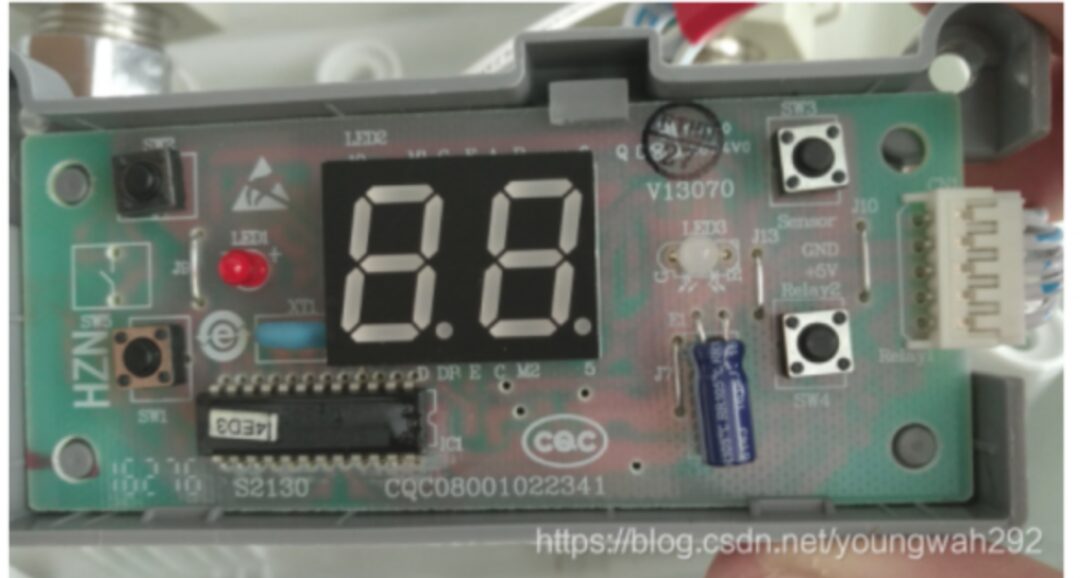
4. Find its pins on the back of the power micro switch. There are four pins in two groups, which are normally not conductive between groups. Use a multimeter to identify the pins and solder wires. I used very good silicone wires, which are soft yet reliable.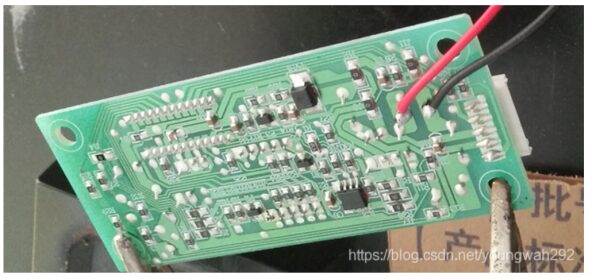
5. Create a connector for the silicone wire. I’m not accustomed to just wrapping tape around; I always feel that kind of connection is unreliable.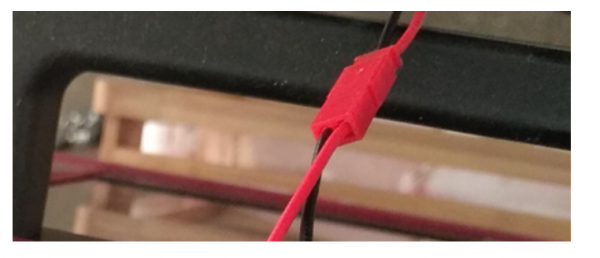
6. Use glue to secure the soldering points to prevent pulling that could cause a short circuit.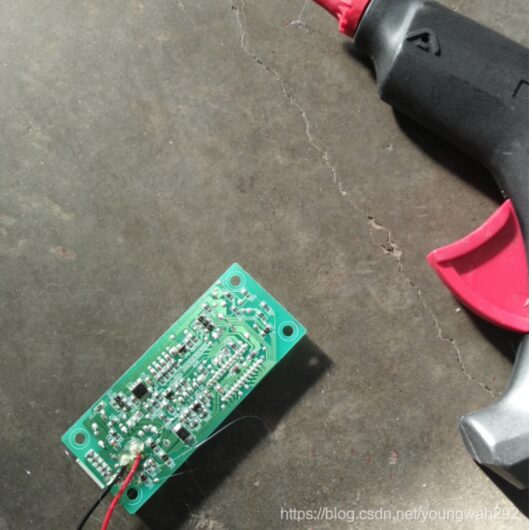
7. Create a connection line to bring the wires outside of the water heater. Make sure to use heat shrink tubing.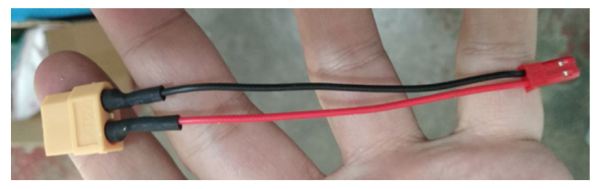
8. Reinstall the control board; there is enough space inside, and leave the red connector inside the water heater control panel casing.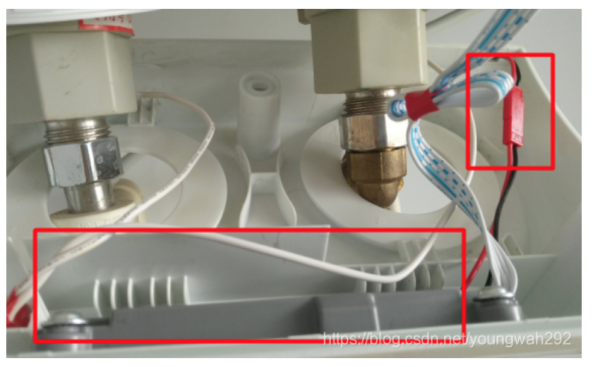
9. The effect after installation looks like this.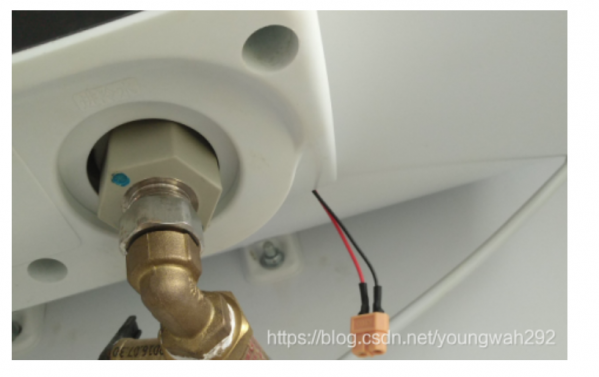
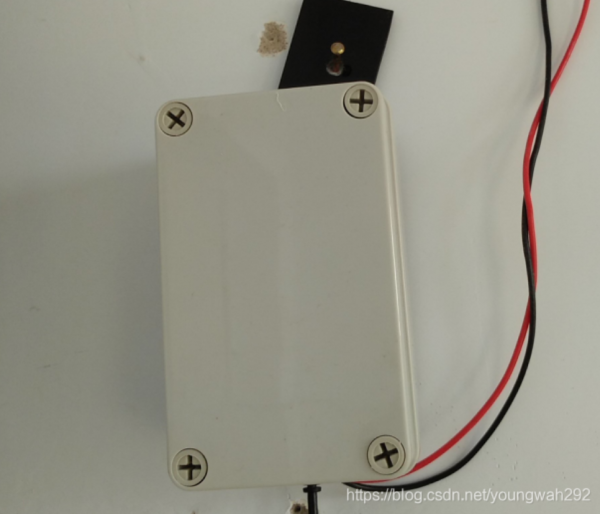
3.2 ESP8266 Controller Design
Hardware List: ESP8266 module, casing, perfboard, transistor, resistors, relay module, several wires.
Steps:
1. Prepare the ESP8266 module. The used pins are three: VCC, GND, and GPIO12 (other pins can also be used, but they need to be initialized during programming).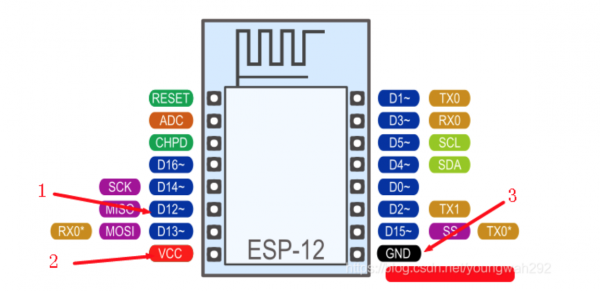
2. Prepare a 3.3V to 5V circuit. Since the output IO level of the ESP8266 is 3.3V and the relay I have requires 5V to control, a level conversion circuit is needed, using an NPN transistor S8050. The principle is shown in the figure below. Note that the resistor connected to the base should be 1K, and the arrowed collector is the output. This circuit utilizes the switching function of the transistor. In reality, the principle of transistors is quite complex, and specialized courses are available for learning analog circuits. Here, we are using a basic circuit to achieve 3.3V driving a 5V device, which is the relay (which works at 5V).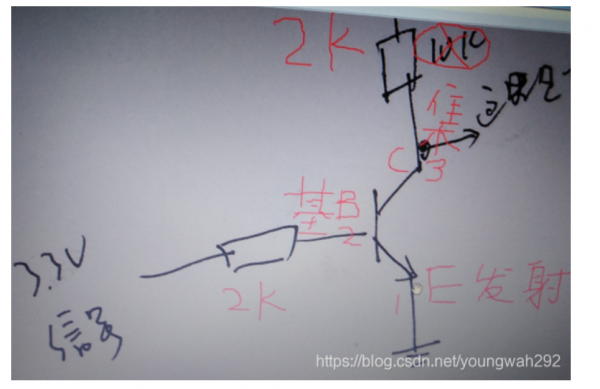
3. Use perfboard to secure single-row female connectors (for the ESP8266 module) and the transistor circuit, providing 5V power to the ESP8266 and connecting GPIO12 to the base resistor of the transistor circuit. Drill 3mm holes in the perfboard to fix it to the casing.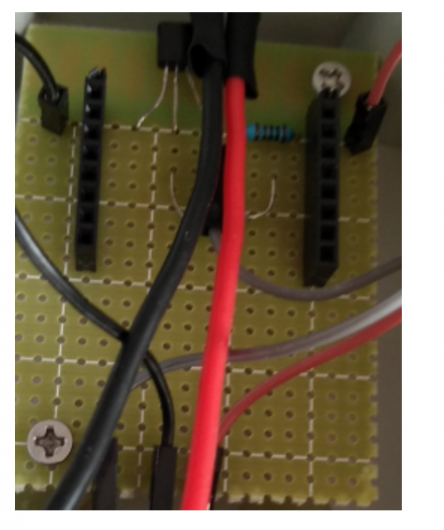
4. Make holes in the casing to connect the wires externally.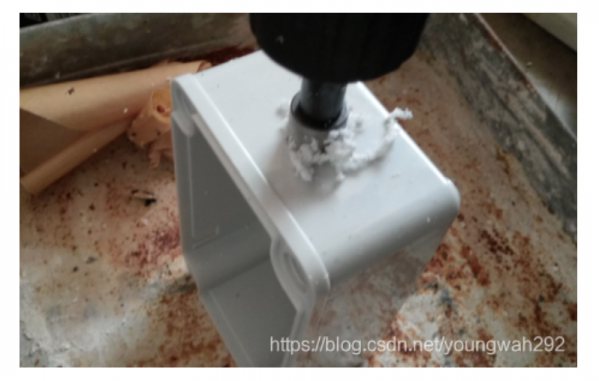
5. Determine the hole positions for the perfboard and relay board inside the casing, then find a way to secure several nylon nuts with glue. Those with hands-on experience will know how to install it; I won’t elaborate on the process here.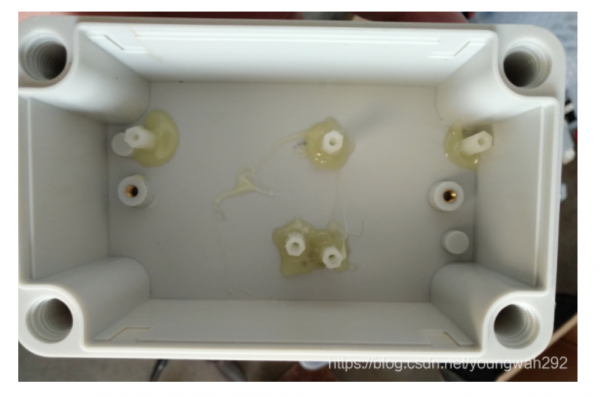
6. Connect VCC, GND, and signal lines properly, also connecting the relay. I only have a dual relay on hand; a single relay would suffice.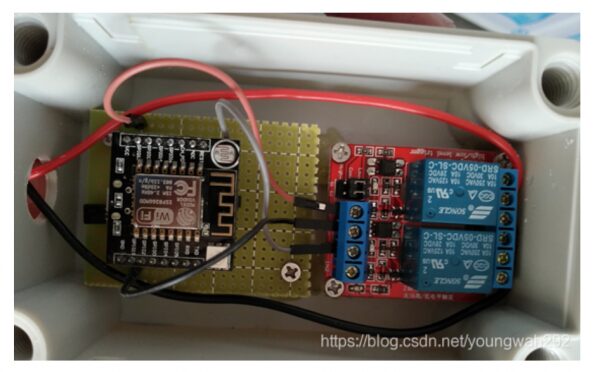
7. The ESP8266 is powered by a USB charger, which is often available at home. Chargers from reputable manufacturers are reliable and suitable for this application (energy-efficient and reliable), much better than making a simple 220V to 5V circuit.
8. Connect the two wires from the relay to the water heater control wires.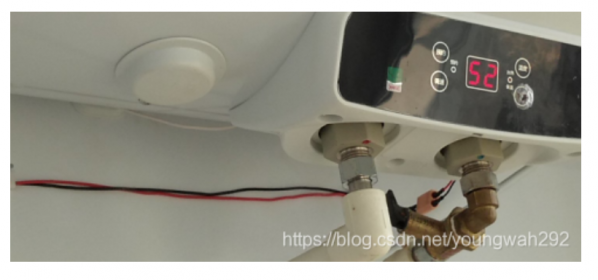
9. To enhance reliability, use multiple layers of heat shrink tubing to cover the connector on the water heater side, protecting it from moisture that could cause short circuits (in fact, a short circuit would simulate pressing the power switch and would not cause harmful consequences). The multiple layers of heat shrink tubing serve a similar purpose to how Germans connect cables. Although many tools are used, the final product looks quite simple.
After completing the hardware section, software support is also needed to achieve the function of controlling the water heater switch.
Source: Smart Cloud Developer
Scan to follow the official account of the Academy and share on other social media platforms

Artificial Intelligence Academy Student Council Propaganda Department
Initial review|Zhang Hao
Review | Wu Zewei
Final review|Zhang Changyou
Production | Student Council Propaganda Department
Welcome to provide | Campus original content | Photography | Video etc.
Please leave a message on the backend after submission to contact us.