
Editor | Heart of Autonomous Driving
1. Preparation Work
1.1 Hardware Environment Requirements
1) Windows 64-bit operating system. The simulator should run on any 64-bit Windows system. 2) 165GB of disk space. CARLA itself will occupy about 32GB, and related major software installations (including Unreal Engine) will take about 133GB. 3) A suitable GPU is required. CARLA is designed for realistic simulation, so the server needs at least a 6GB GPU, with 8GB recommended. A dedicated GPU is strongly recommended for machine learning. 4) Two TCP ports and a good internet connection are needed. The default ports are 2000 and 2001. Ensure these ports are not blocked by firewalls or any other applications.
1.2 Software Environment Installation
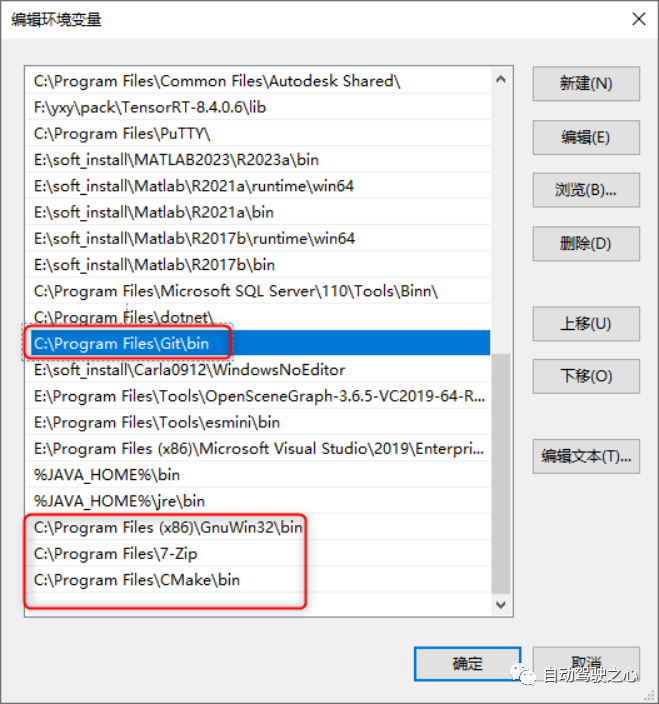
1) CMake official download link version: 3.22.6. Installation tutorial for CMake on Windows. 2) Git official download link version: 2.36.0.windows.1. Installation tutorial for Git on Windows. 3) Make official download link, required version for Carla official Windows Build tutorial: 3.81. Installation tutorial for Make on Windows. 4) Python3 (64bit) official download link version: 3.7.9, installation tutorial for Python 3.7.9 on Windows. 5) 7-zip official download link. Ensure the bin directory of the above programs’ installation paths is added to the system environment variables. As shown in Figure 1.
6) Visual Studio 2019 Community, installation tutorial for Visual Studio 2019 Community, where the Windows 8.1 SDK plugin, x64 Visual C++ Toolset plugin, and .NET Framework 4.6.2 framework must be installed. Note that the Windows 8.1 SDK has been removed from Visual Studio 2019 Community, and you can directly install the Windows 10 SDK.
1.3 Python Dependency Environment Configuration
Starting from CARLA 0.9.12, users can choose to install the CARLA Python API using pip3. Pip needs to be version 20.3 or higher. To check if you have the appropriate version, run the following command in CMD:
pip3 -V
If the Python pip version is too low, you can upgrade it using the following command.
pip3 install --upgrade pip
Install Python dependencies
pip3 install --user setuptools
pip3 install --user wheel
2. CarlaUE4 Compilation Installation
2.1 Register Account
1) Register a GitHub account. 2) Register an Unreal Engine account, log in to the Unreal Engine official registration page to register an account.
2.2 Link Unreal Engine Account with GitHub Account
1) Log in to the Unreal Engine official website with the Unreal Engine account registered in 2.1. 2) Click on the account information in the upper right corner and click on Personal. This will redirect to the personal account settings page. 3) Link the Unreal Engine account with the GitHub account.
2.3 Download CarlaUE4 Source Code
1) Create a Carla folder in the root directory of the drive where you want to install. 2) Use Git Bash to download the CarlaUE4 source code, preferably keeping it in the root directory of the installation drive, for example D:\CarlaUE4.
git clone --depth 1 -b carla https://github.com/CarlaUnreal/UnrealEngine.git .
3) After the download is complete, run the following scripts
Setup.bat
GenerateProjectFiles.bat
4) Compile the CarlaUE4 engine
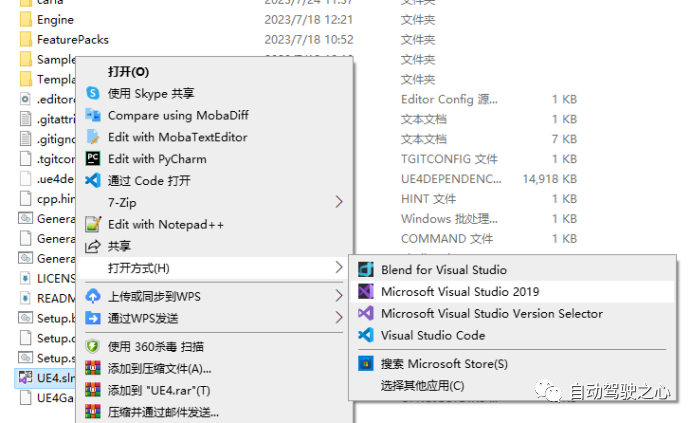
Open the UE4.sln file in the source folder using Visual Studio 2019.
In the build bar, ensure you have selected “Development Editor”, “Win64”, and “UnrealBuildTool” options.

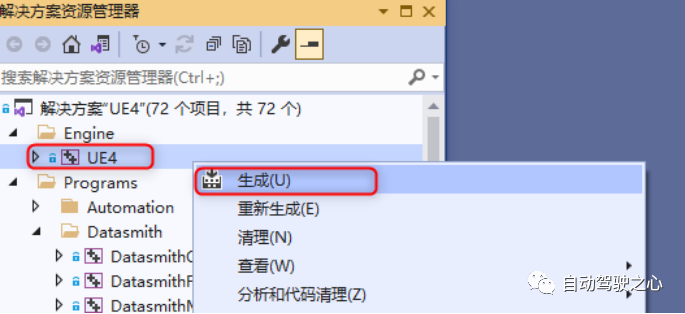
In the Solution Explorer, right-click on UE4 and select Build.
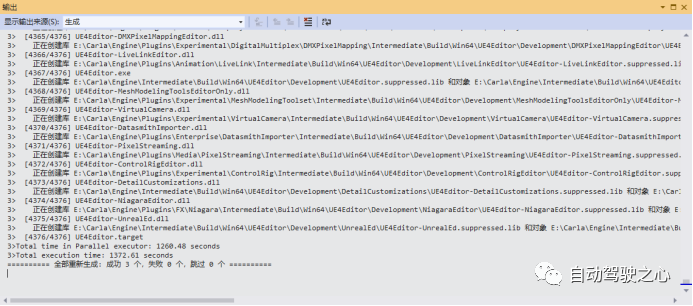
The compilation process will be displayed in the terminal
5) Run Tests
After compiling the solution, you can open the engine and check if everything is installed correctly by launching the executable engine\Binaries\Win64\UE4Editor.exe.
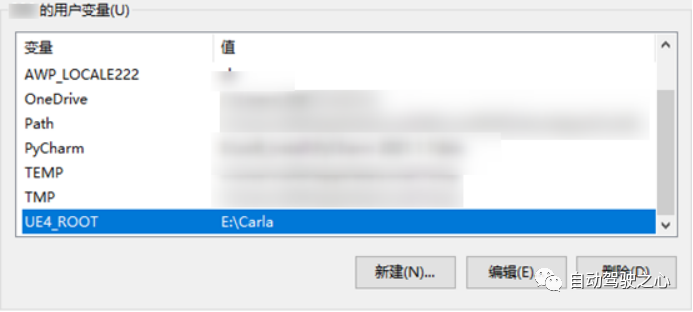
6) Environment Variable Settings
Environment variables must be set so that CARLA can find the Unreal Engine installation folder. This allows users to choose which specific version of Unreal Engine to use. If no environment variable is specified, CARLA will search the Windows registry for Unreal Engine and use the first version it finds. To set the environment variable: open the Windows Control Panel, go to Advanced System Settings, or search for Advanced System Settings in the Windows search bar. In the “Advanced” panel, open “Environment Variables”. Click “New” to create a variable. Name the variable UE4_Root and select the path of the desired Unreal Engine installation folder.
If the installation is successful, the Unreal Engine version selector should recognize this. You can check this by right-clicking any .uproject file and selecting Switch Unreal Engine version. You should see a pop-up window showing the Source Build in PATH, where PATH is the installation path you selected. If you do not see this selector or “Generate Visual Studio project files” when right-clicking the .uproject file, it indicates that there is an issue with the Unreal Engine installation, and you may need to reinstall it correctly.
3. Carla Source Code Compilation
3.1 Clone Carla Source Code from Git Repository
The official Windows Build tutorial for Carla provides the git download link for the Carla source code, but due to instability in Git within the country, you can use the Ghproxy proxy for downloading.
git clone https://ghproxy.com/https://github.com/carla-simulator/carla
After the download is complete, enter the Carla folder and switch to the corresponding version (the Carla version number you want to install; I downloaded version 0.9.12) branch.
cd carla
git checkout 0.9.12
3.2 Download Carla 0.9.12 Asset Package
After the source code download is complete, there will be setup.bat and generateprojectfiles.bat files in the root folder of Carla. Right-click to open setup.bat, the setup.bat script will show that it will download the Carla 0.9.12 asset package from GitHub. Since this asset package is over 10GB and GitHub is unstable within the country, the original setup.bat download will terminate. Therefore, two methods can be used for downloading:
1. Replace the download link in setup.bat with the Southern University of Science and Technology mirror link. Original link: http://carla-assets.s3.amazonaws.com/
{CONTENT_ID}.tar.gz 2. Directly download the Carla 0.9.12 asset package from the Southern University of Science and Technology mirror site, then unzip it to ..\Unreal\CarlaUE4\Content\Carla folder. The corresponding CONTENT_ID for each version can be found in \Util\ContentVersions.txt.
3.3 Carla Compilation
Using the X64 Native Tools Command Prompt for VS 2019 in Visual Studio 2019, open and enter the Carla folder.

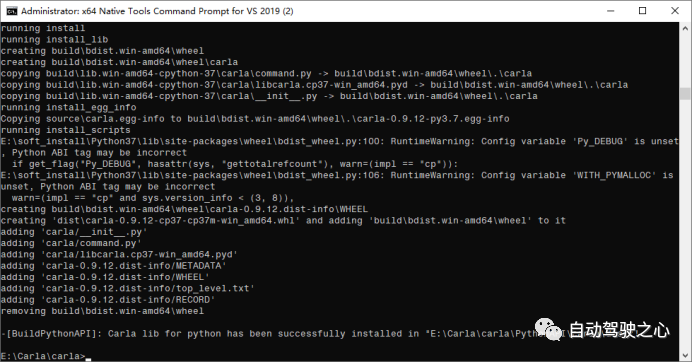
1) Compile Python API Client
The Python API client provides control over the simulation. The Python API client needs to be compiled after the first build of CARLA and any updates. After compiling the client, you can run scripts to interact with the simulation.
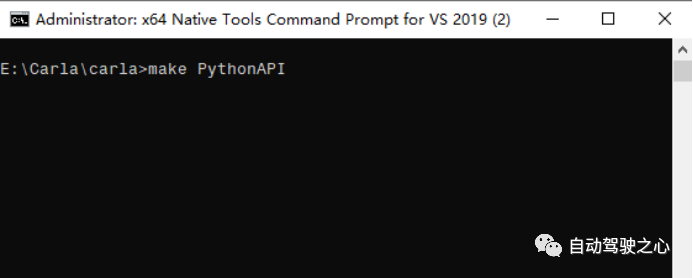
The command make PythonAPI executes the setup.bash script located in the E:\Carla\carla\Util\BuildTools folder, which contains the download and installation of many dependencies. The download and installation scripts for dependencies in the setup.bash script are located in E:\Carla\carla\Util\InstallersWin.
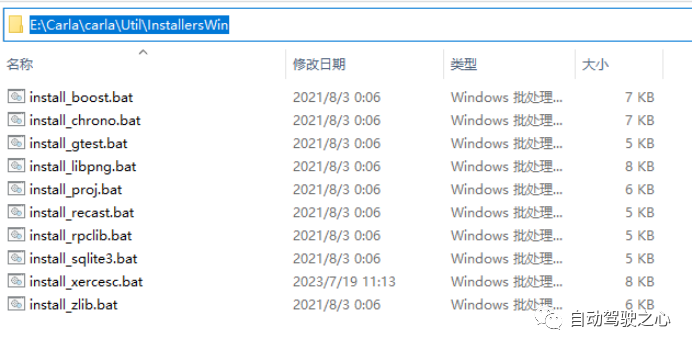
Therefore, when executing make PythonAPI, if there are failures in downloading and installing dependencies, you can run each script separately for installation. Note that running individual scripts in InstallersWin will install them directly in InstallersWin, and you will need to copy them to the E:\Carla\carla\Build folder. It is known that there is an error in the download link in install_xercesc.bat, the original link downloads xercesc-3.2.4, while the required version is 3.2.3.
Original link: setXERCESC_REPO=https://downloads.apache.org/xerces/c/3/sources/xerces-c-%XERCESC_VERSION%.zip
Replacement link: setXERCESC_REPO=https://archive.apache.org/dist/xerces/c/3/sources/xerces-c-%XERCESC_VERSION%.zip
If there are downloads available on GitHub, you can use a proxy to download the source code and unzip it to E:\Carla\carla\Build to continue executing make PythonAPI until make PythonAPI executes perfectly, as shown in the following figure.
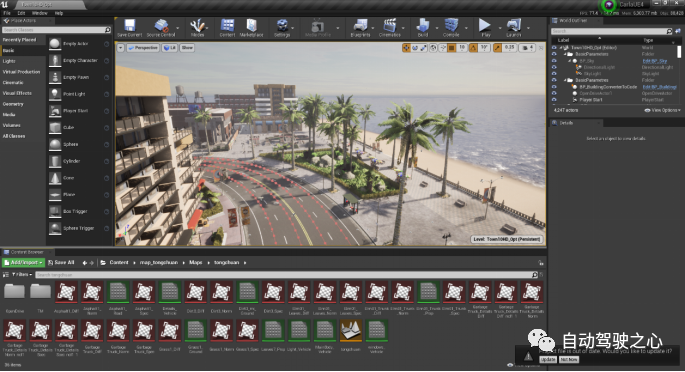
2) Compile Server
Once make PythonAPI executes perfectly, you can launch the CarlaUE4 client with make launch. Run this command each time you start the server or use the Unreal Engine editor:
make launch
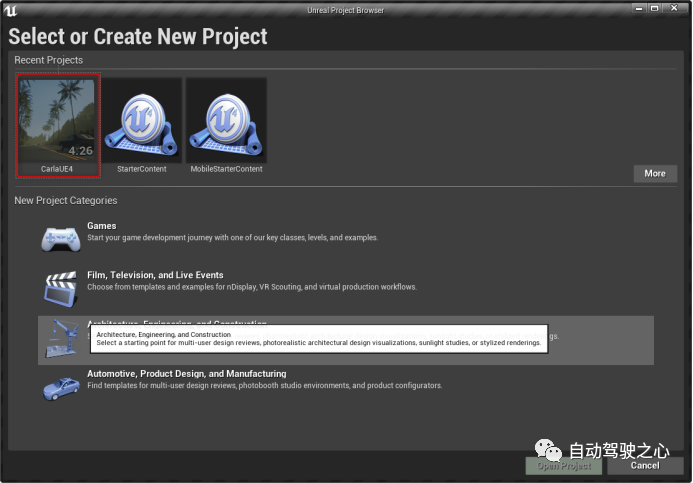
The opened page is shown in the following figure:
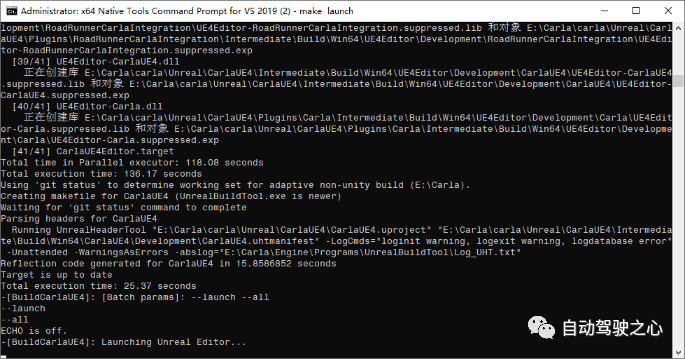
Thus, the source code compilation work has been completed.
4. Client Configuration
The CARLA simulator consists of an extensible client-server architecture. The server is responsible for everything related to the simulation itself: sensor rendering, physical calculations, updating the world state and its participants, etc. As it aims to achieve realistic results, it is best to run the server on a dedicated GPU, especially when handling machine learning. The client consists of a set of client modules that control the logic of the actors on the field and set the world conditions. This is achieved by utilizing the CARLA API (in Python or C++), which serves as a mediator layer between the server and the client, continuously evolving to provide new features.
4.1 Python Client Configuration
The Python client can be configured on multiple terminals within a local area network, mainly achieving multi-threaded concurrent simulation through the Python API interface. Therefore, client configuration needs to be done on the terminal. Copy the source folder E:\Carla\carla\PythonAPI\examples to any computer in the local area network.
1) Install dependencies: In the E:\Carla\carla\PythonAPI\examples folder, open the cmd window and run
cd PythonAPI\examples
pip3 install -r requirements.txt
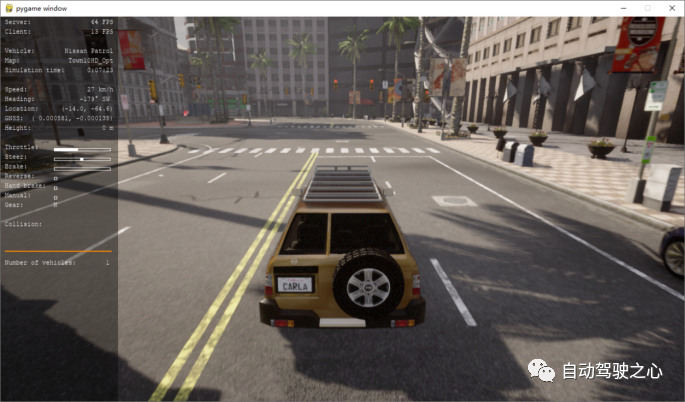
2) Run the manual_control.py script, and before running the script, you need to change the server IP to the server’s IP.
python manual_control.py
3) Python Client Test
After executing the above commands, you can start the client visualization simulation window, as shown in the following figure.
4.3 Carla_ros_bridge Configuration
Like the Python API, Carla_ros_bridge can also be called as a client to access the CARLA server. Carla_ros_bridge can run on Ubuntu, and the configuration process is as follows:
1) Download the source code
mkdir -p ~/carla-ros-bridge/src
cd ~/carla-ros-bridge/src
git clone --recurse-submodules https://github.com/carla-simulator/ros-bridge.git catkin_ws/src/ros-bridge
2) Install dependencies
# Upgrade pip3 version
pip3 install --upgrade pip
# Install Python dependencies
pip3 install carla
sudo apt install ros-noetic-ackermann-msgs
sudo apt install ros-noetic-derived-object-msgs
3) Compile
cd carla-ros-bridge
rosdep update
rosdep install --from-paths src --ignore-src -r
catkin_make
4) Carla_ros_bridge test, before running, change the server’s IP to the server’s IP.
cd carla-ros-bridge/source devel/setup.bahroslaunch carla_ros_bridge carla_ros_bridge.launch
   ABOUT
    About Us
Deep Blue Academy is incubated at the Institute of Automation, Chinese Academy of Sciences, and is an online education platform focused on artificial intelligence, robotics, and autonomous driving, with over 100,000 students learning on the Deep Blue Academy platform, many from well-known domestic and international universities such as Tsinghua and Peking University, aiming to cultivate cutting-edge technical talents that can be used by enterprises.