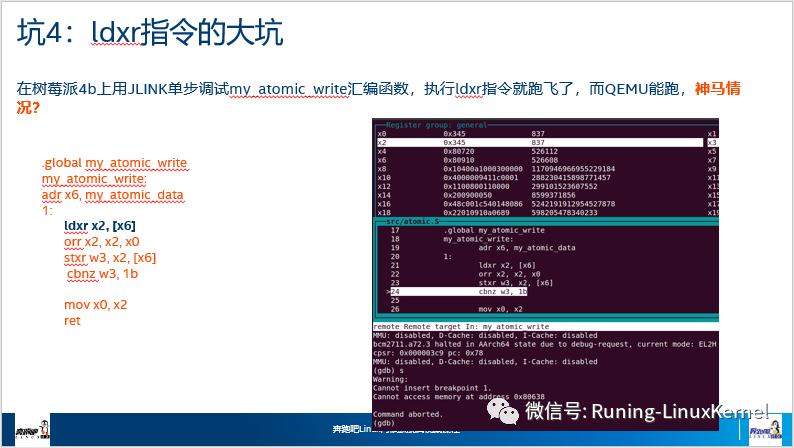
Learning ARMv8, how can we do without a development board? Some friends say, I can use QEMU? I must responsibly say that QEMU cannot simulate the hardware behavior of ARMv8 100%, there are many places that QEMU cannot simulate, so a real hardware board is still needed. For example, in the following two examples, QEMU can run, but it crashes on Raspberry Pi.

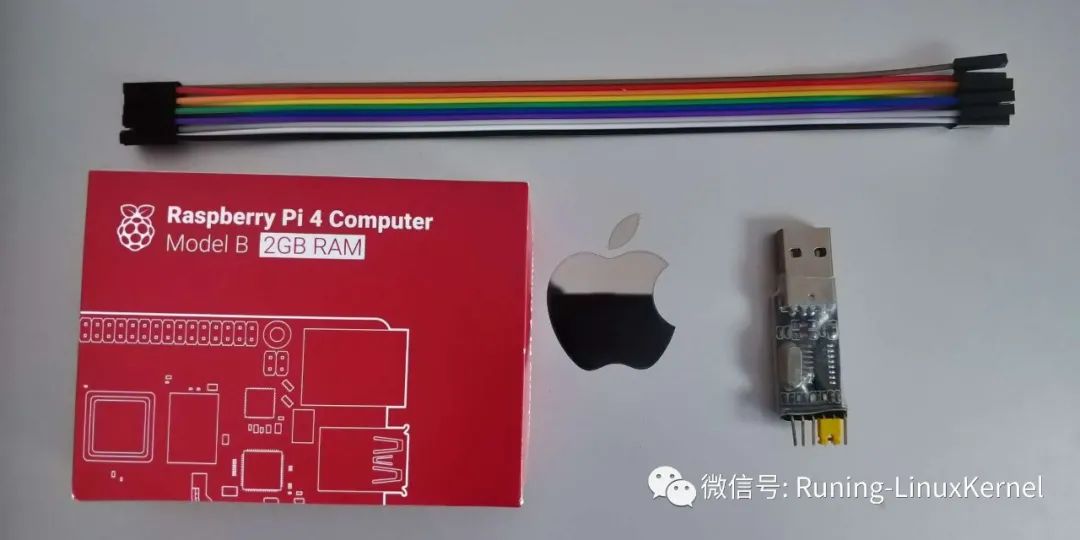
Therefore, it is necessary to use a real physical board. The Raspberry Pi 4 is an excellent representative, with a 4-core Cortex-A72 IP core, high-end and classy. Moreover, the price is super cheap, only about 200-300 RMB, and with a USB serial port that costs a few bucks, you can play with Raspberry Pi.
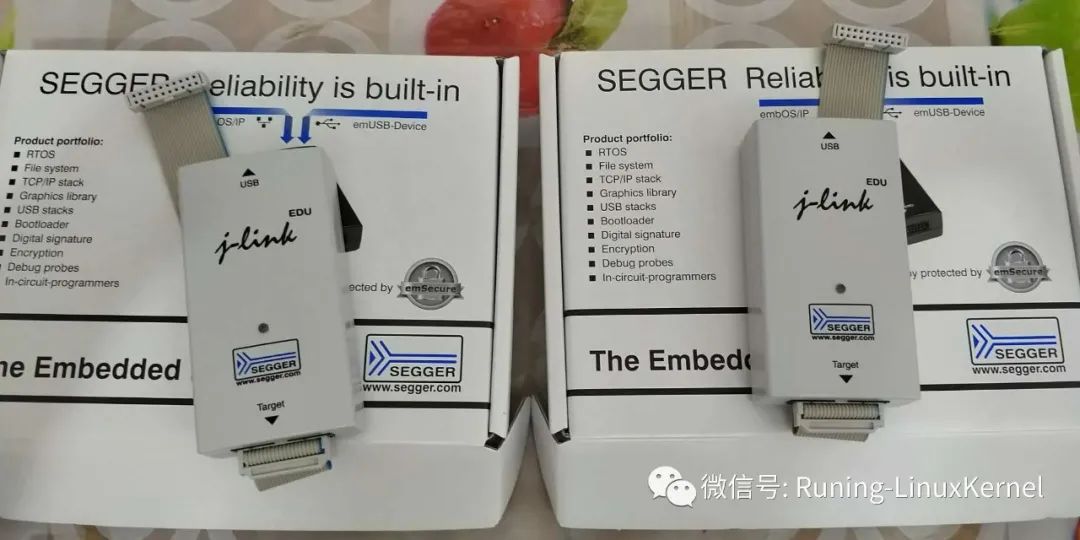
When debugging assembly code on Raspberry Pi, there is often such a distress: if the assembly code is wrong, the machine crashes, and you don’t know which instruction caused the crash. Therefore, we need a cheap and easy-to-use ARM emulator. There are many ARM emulators that support Cortex-A series processors, but most are very expensive, costing at least tens of thousands of RMB, which is generally unaffordable for individual learners. However, the JLINK emulator is relatively affordable, with the JLINK Base version priced at about 2000 RMB, which is the price of a mid-range mobile phone. There is also good news: students can purchase the JLINK EDU version through agents for only 48 euros, about 500 RMB. (To purchase the genuine JLINK, please contact JINLK’s agent in China).
Next, I will teach you how to use the JLINK emulator to debug Raspberry Pi 4b.
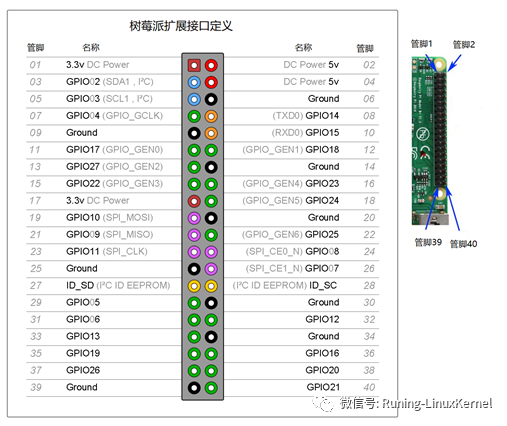
First, we need to connect the Raspberry Pi 4 to the JLINK. To use the J-Link emulator on Raspberry Pi, you first need to connect the J-Link emulator’s JTAG interface to the expansion board of Raspberry Pi. The expansion interface of Raspberry Pi already has a built-in JTAG interface. The expansion interface definition on Raspberry Pi 4b.
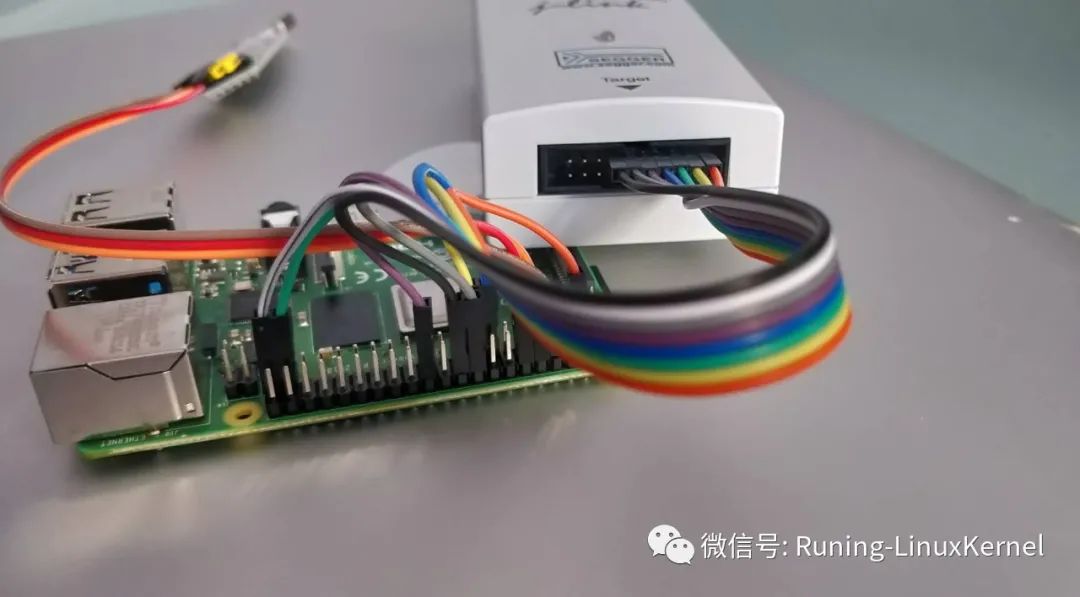
We can use Dupont wires to connect. The J-Link emulator provides a 20-pin JTAG interface.
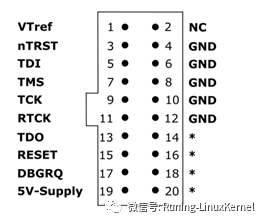
The connection between Raspberry Pi and J-Link emulator requires 8 wires, as shown in Table 16.3. Readers can refer to the above two images to connect the wires carefully.
Connection between Raspberry Pi and J-Link emulator
|
JTAG Interface |
Raspberry Pi Pin Number |
Raspberry Pi Pin Name |
|
TRST |
15 |
GPIO22 |
|
RTCK |
16 |
GPIO23 |
|
TDO |
18 |
GPIO24 |
|
TCK |
22 |
GPIO25 |
|
TDI |
37 |
GPIO26 |
|
TMS |
13 |
GPIO27 |
|
VTref |
01 |
3.3v |
|
GND |
39 |
GND |
The effect after the connection is completed is as follows:
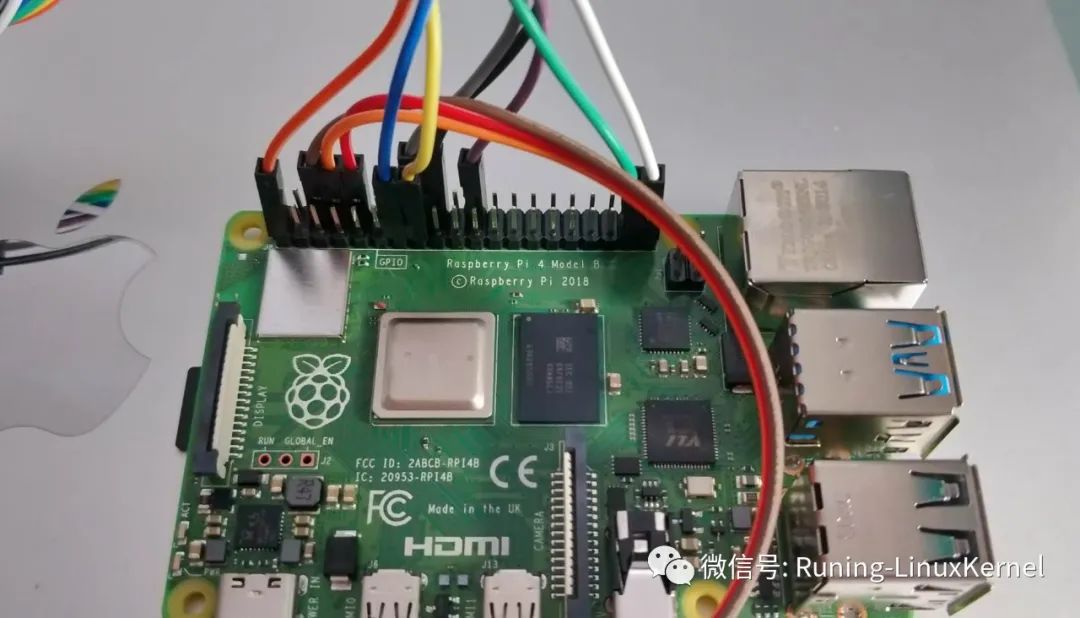

I have a little suggestion for everyone: try to use Dupont wires of different colors so that it is not easy to make mistakes. When you all made complex hammers and radios during your metalworking internship, connecting 8 wires is a piece of cake for everyone.
Next, use OpenOCD for debugging. Friends can use the VMware image v1.2 based on Ubuntu 20.04 provided by me. Currently, this VMware image is only available for friends who have subscribed to the flagship video course. It will be public after the publication of the second edition of the book.
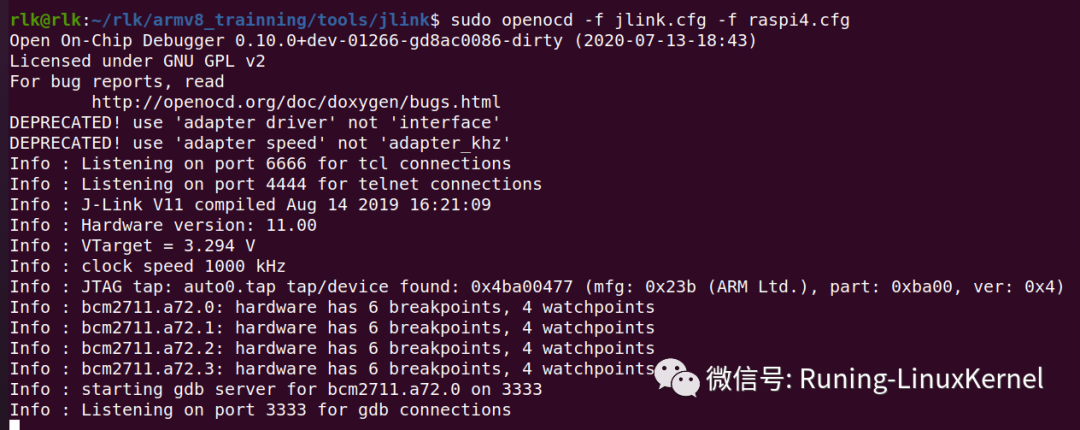
Use the following command to connect to the Raspberry Pi, as shown in the figure.
$sudo openocd -f jlink.cfg -f raspi4.cfg
Then you can start debugging. In the Linux host, create a new terminal and enter the following command to log in to the OpenOCD’s telnet service.
$ telnet localhost 4444
Trying 127.0.0.1…
Connected to localhost.
Escape character is ‘^]’.
Open On-Chip Debugger
> halt
> load_image /home/rlk/rlk/lab01/benos.bin 0x80000
>step 0x80000
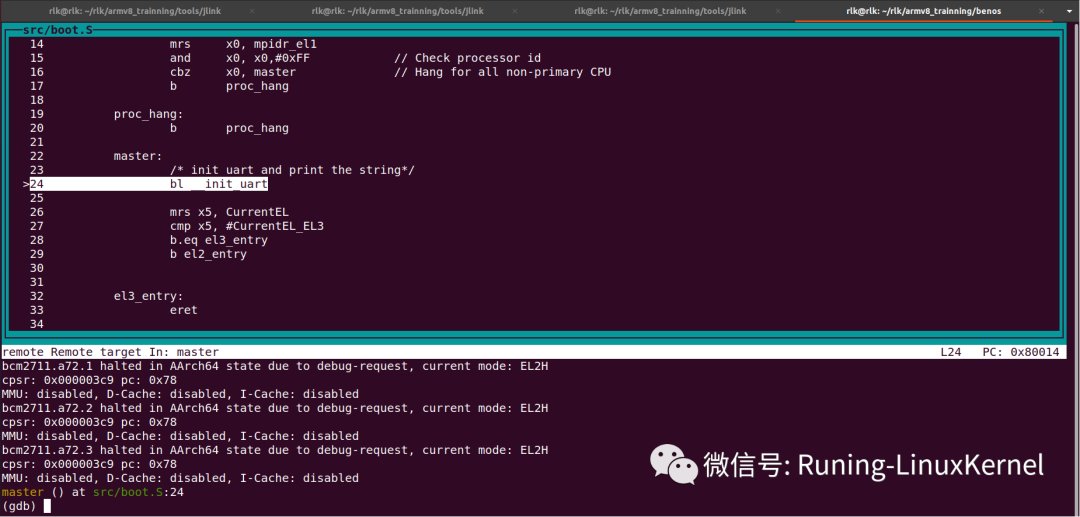
Use GDB to debug the code, first use the gdb-multiarch command to start GDB and use the 3333 port number to connect to OpenOCD’s GDB service.
$ gdb-multiarch –tuibuild/benos.elf
(gdb) target remotelocalhost:3333 <= Connect to OpenOCD’s GDB service
The third season of ARM64 architecture and programming is now online. I will take you to play with Raspberry Pi and conduct experiments on Raspberry Pi with dozens of original experiments from around the world waiting for you! We provide original experimental reference source code and detailed experimental explanation videos!
Click “Read the original” to enter the Run Run micro store.