
Original Kindergarten Crafts: “Past Highlights”
Artificial intelligence and robots are becoming increasingly popular, even children’s robots. Teacher Xiao Li also likes them,
but due to various reasons, there is currently only a vacuum cleaning robot at home. Haha, let’s lighten the mood,
Today, Teacher Xiao Li will teach everyone how to make a simple moving robot. This robot can move forward,
move backward, and even do the splits. The children say the red robot can generate electricity,
and the pink robot can produce flowers. They are all amazing!
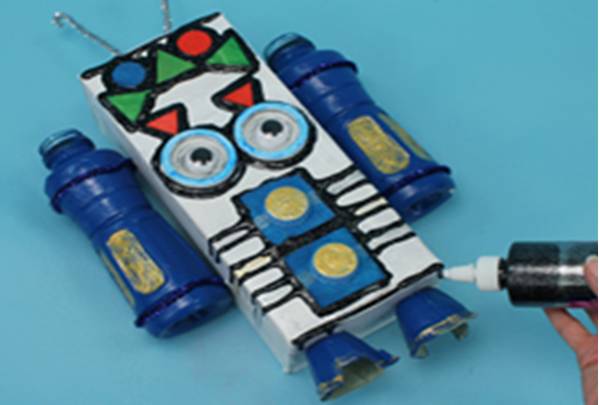
Bottle Robot
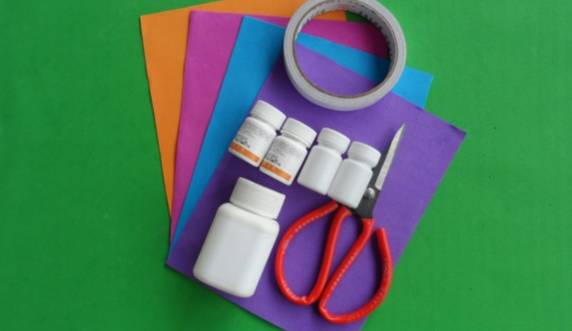
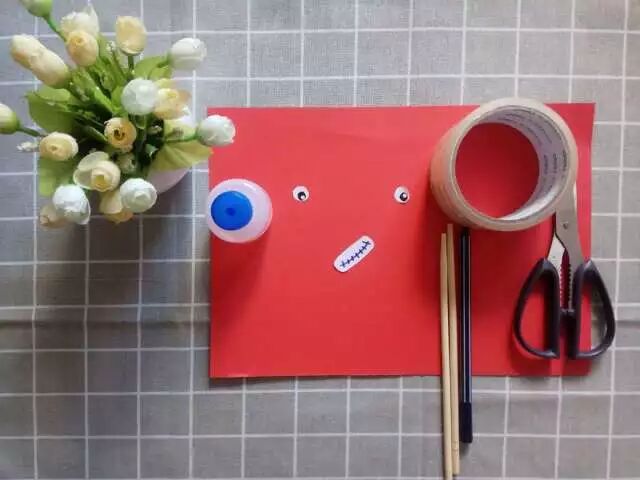
Materials needed: colored sponge paper, medicine bottles, scissors, double-sided tape
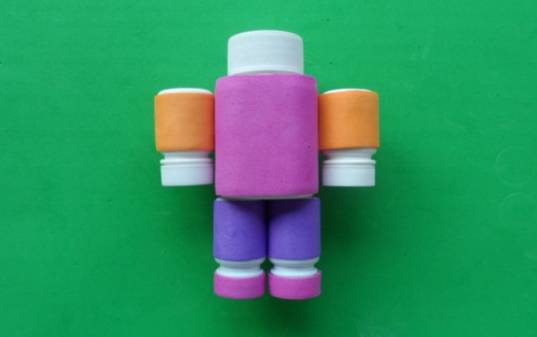
Wrap two small medicine bottles with sponge paper, as shown in the picture. Then arrange all the bottles
neatly according to the above image, and after arranging, use double-sided tape to stick the 5 bottles together.
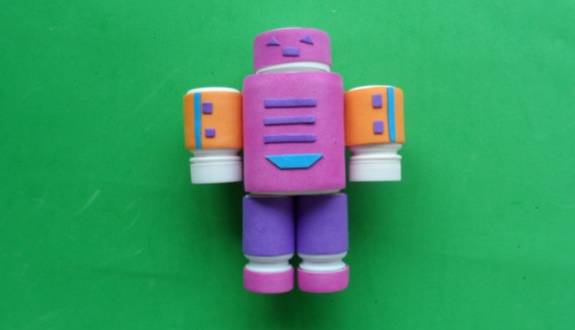
This bottle robot is very easy to operate. Once all the bottles are glued together,
cut the excess sponge paper into corresponding shapes to make eyes, noses, and other decorations.
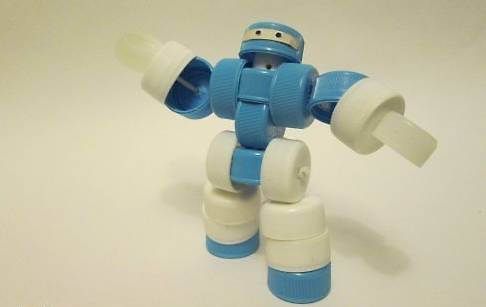
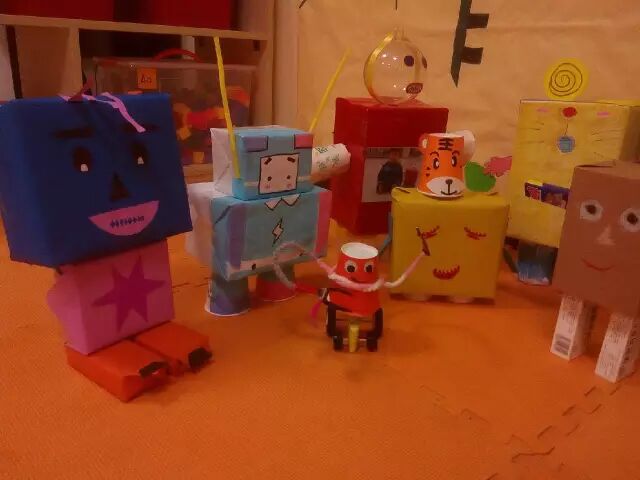
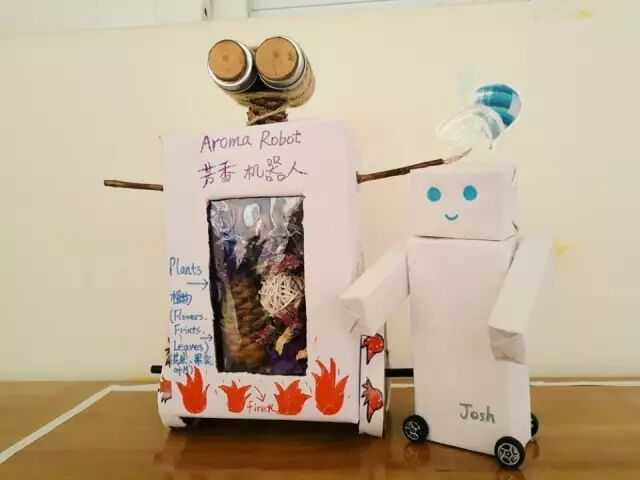
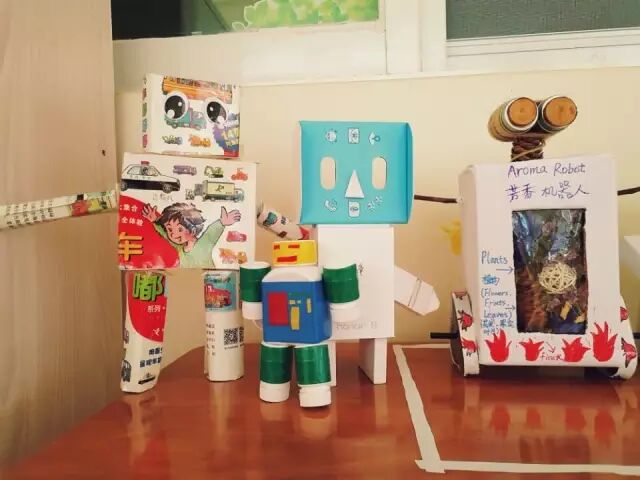
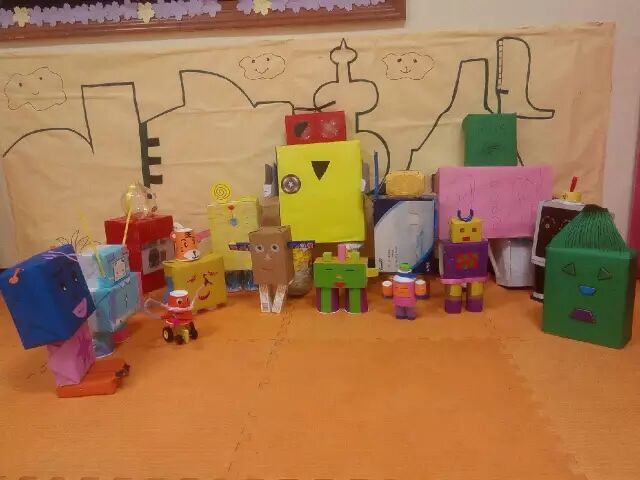
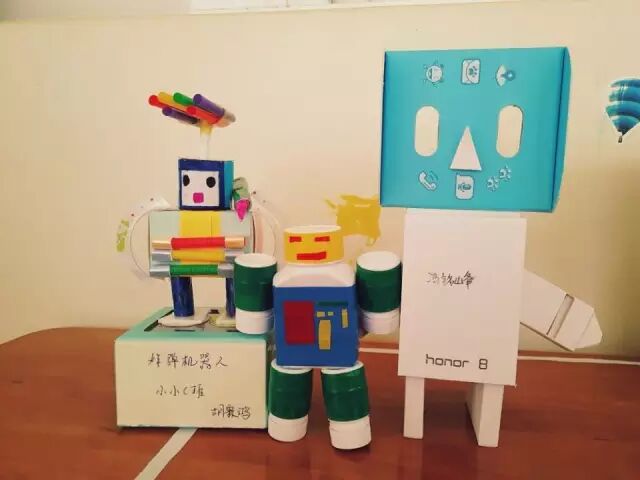
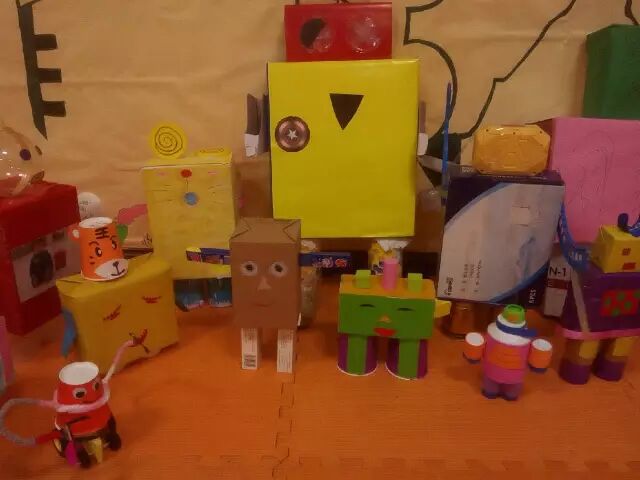
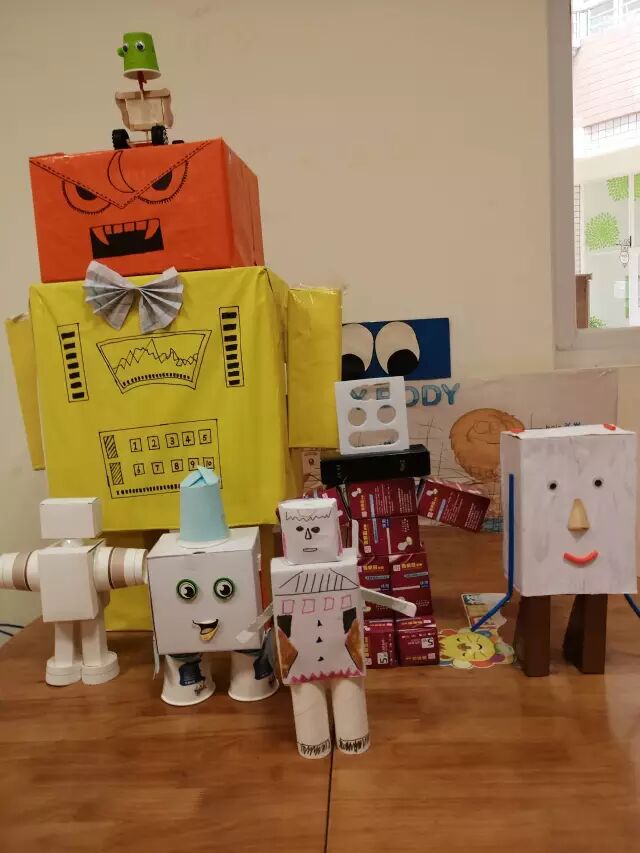
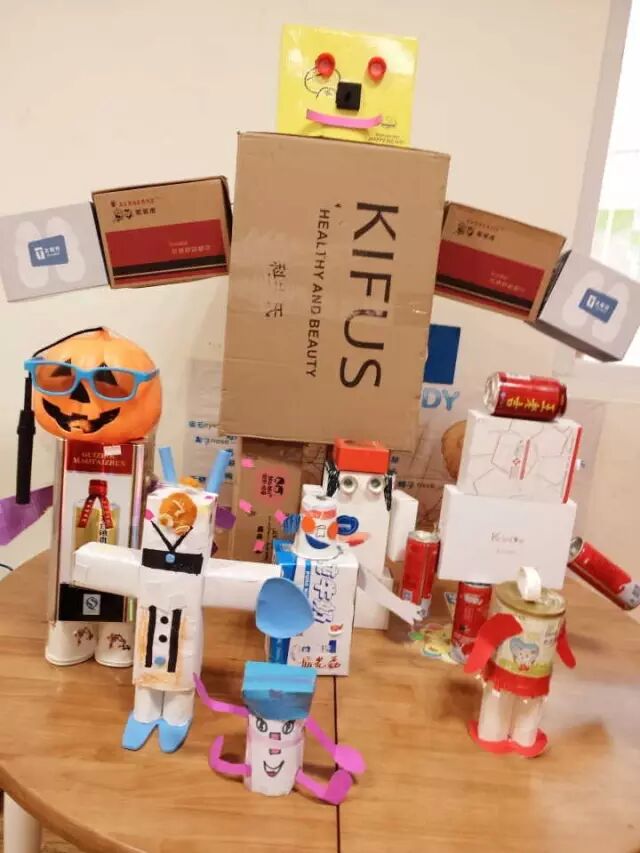
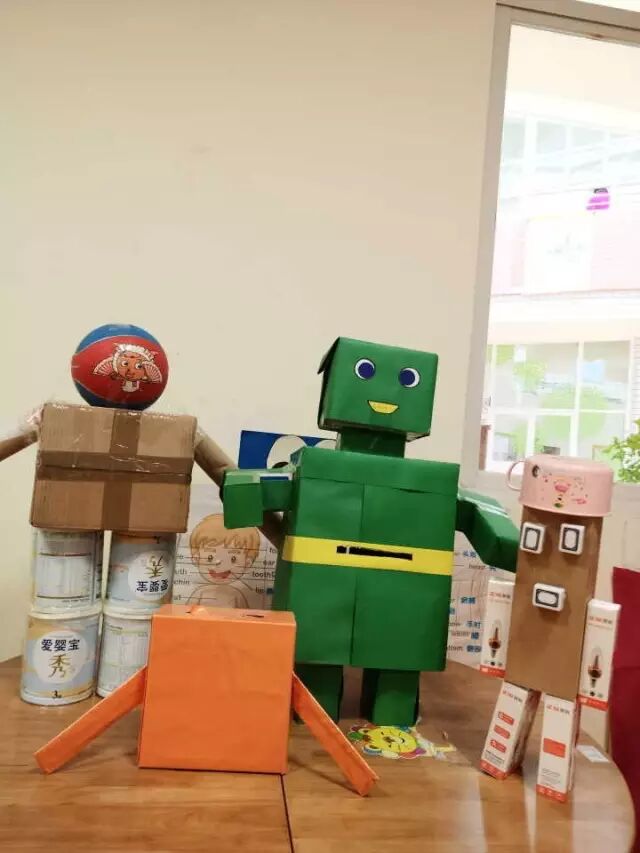
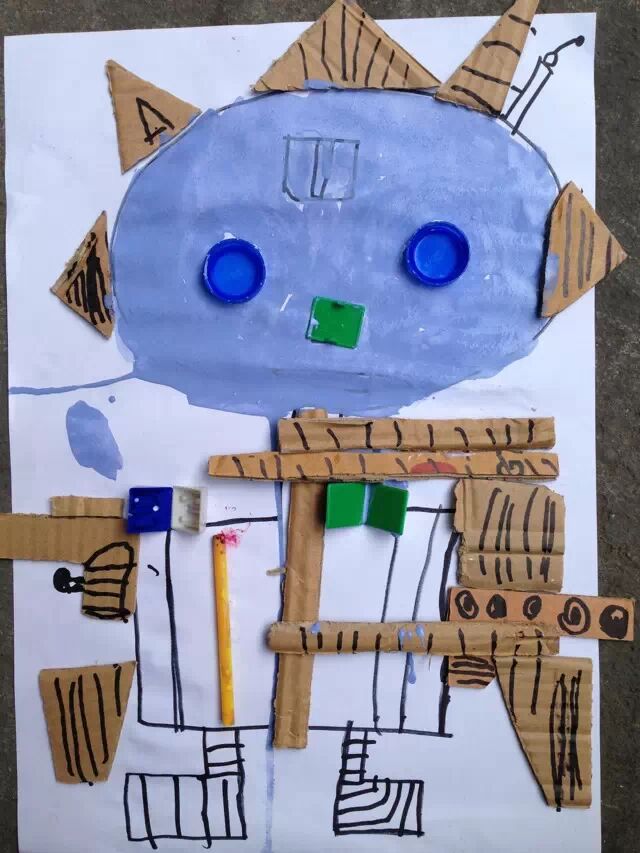
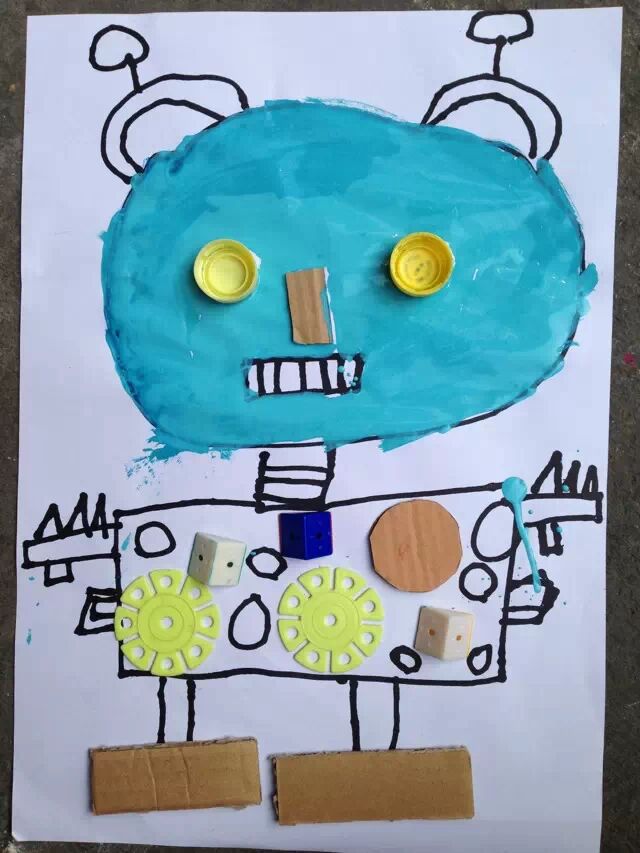
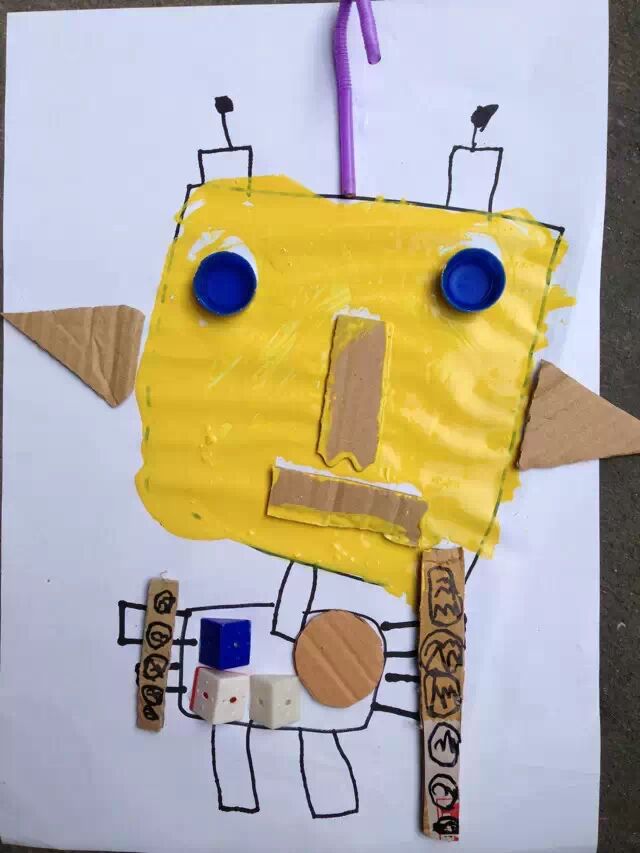
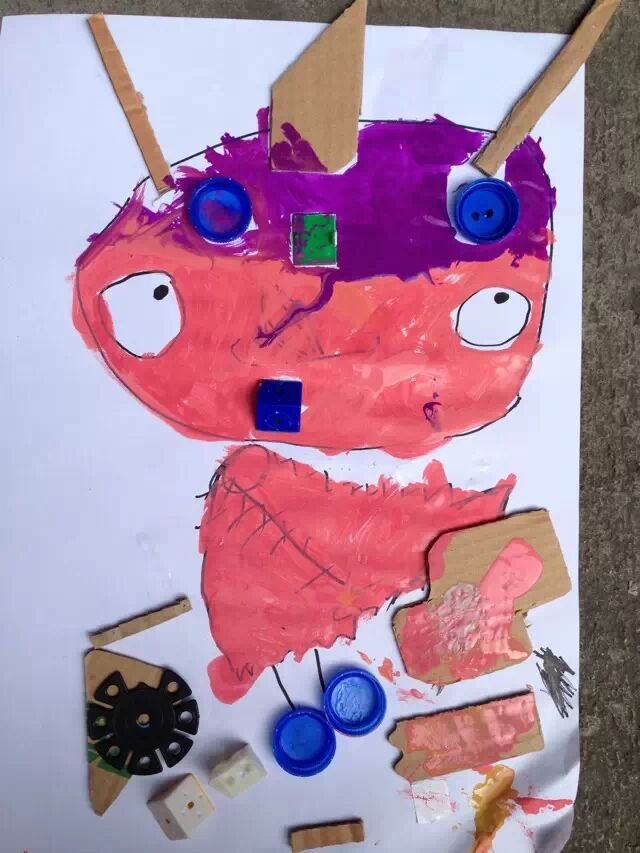
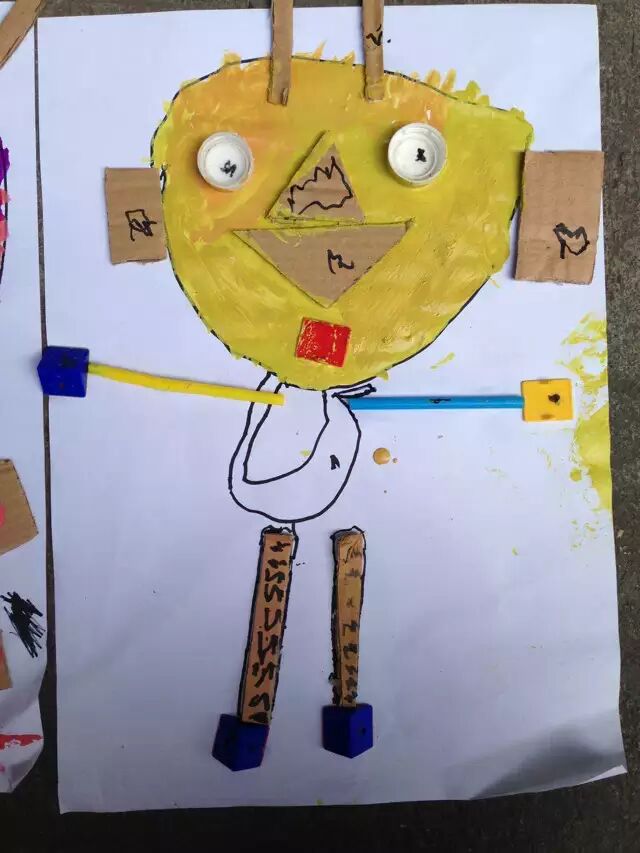
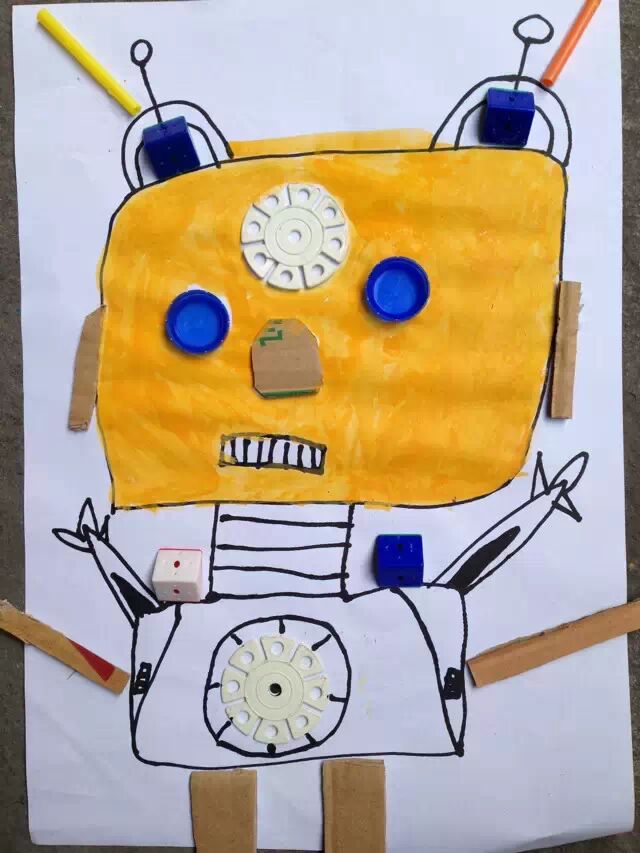
Recycled Material Robot
Let’s take a look at what other similar robots can be made; parents can follow along at home.
Cardboard Robot
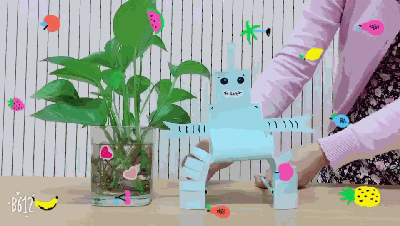
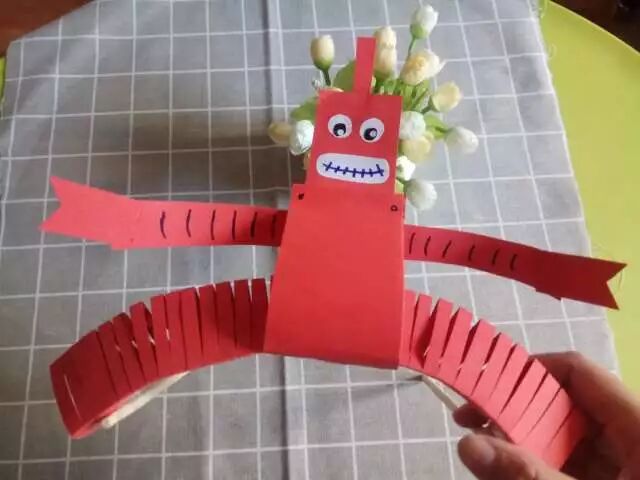
Flexible Robot
Materials needed: one sheet of colored cardboard, scissors, glue, one black pen, eyes, wide tape, disposable chopsticks
Steps to make:
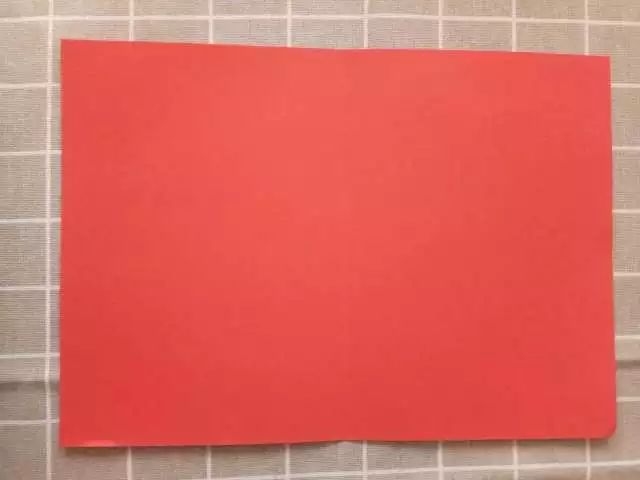
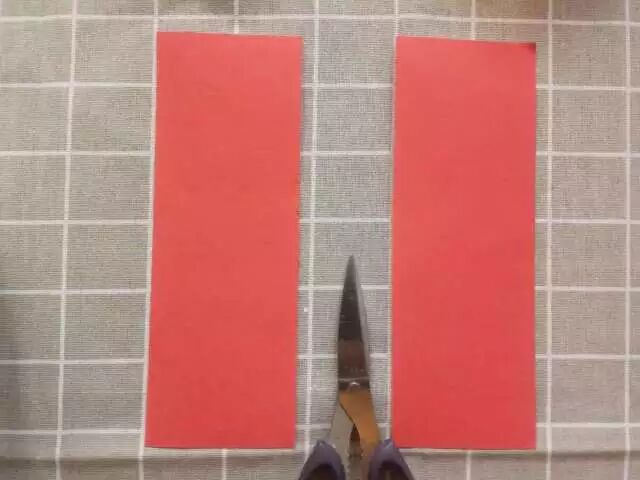
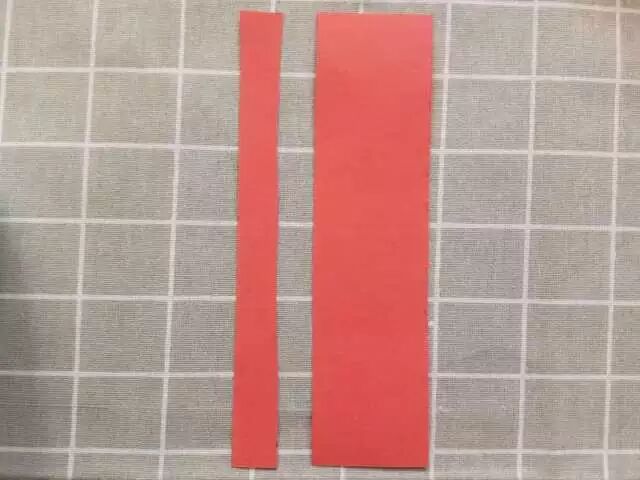
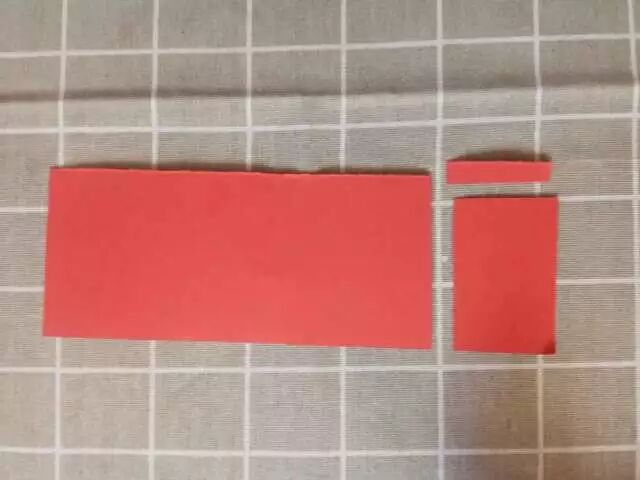
Mom Dou used a slightly harder red cardboard. Fold the A4-sized red cardboard in half along the long edge.
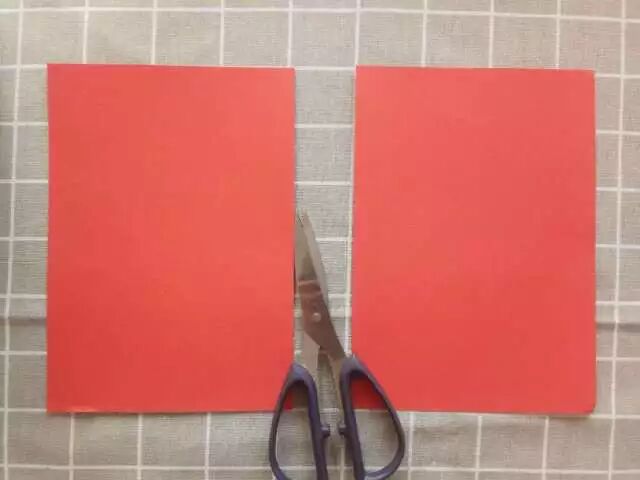
Cut it with scissors to divide the A4 paper into two halves.
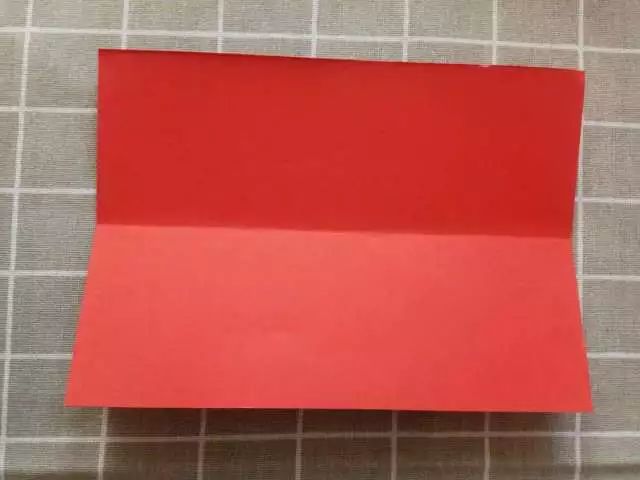
Take one half of the A4 paper and fold it in half along the short edge.
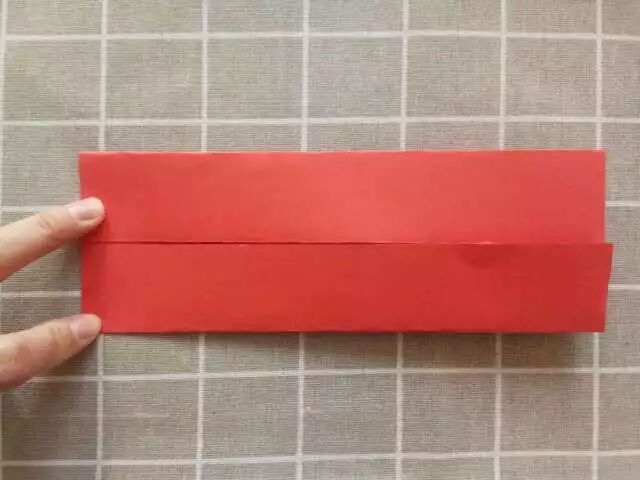
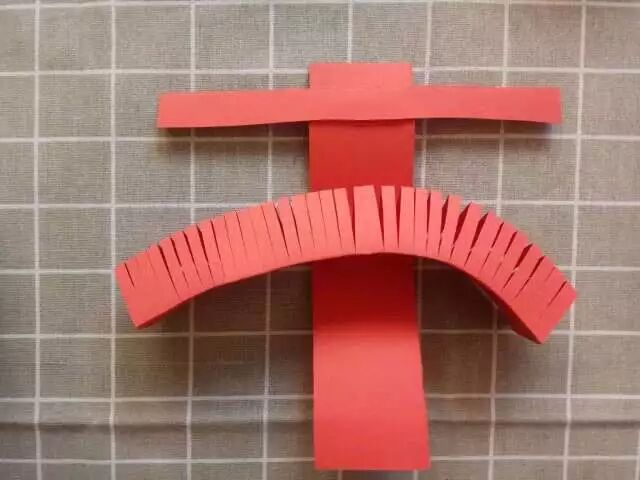
Using the center line as a reference, fold the upper part down and the lower part down.
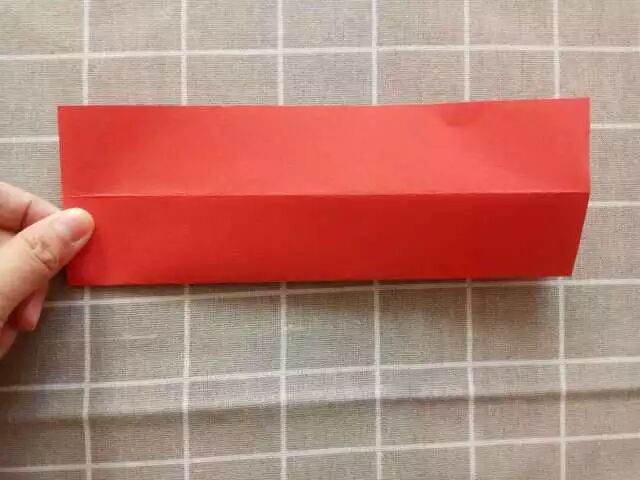
Then open everything and fold it again along the center crease.
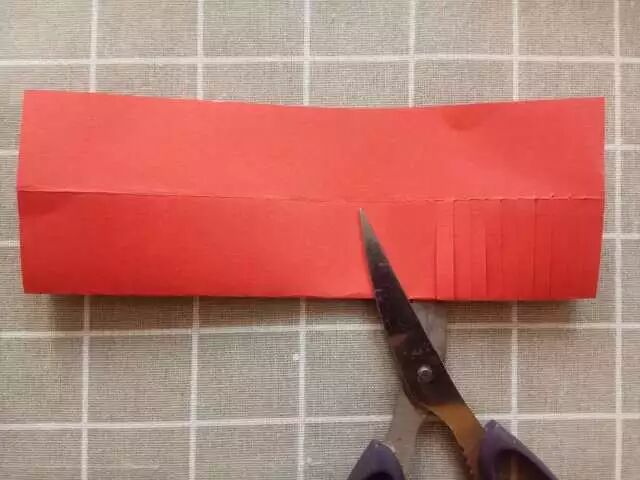
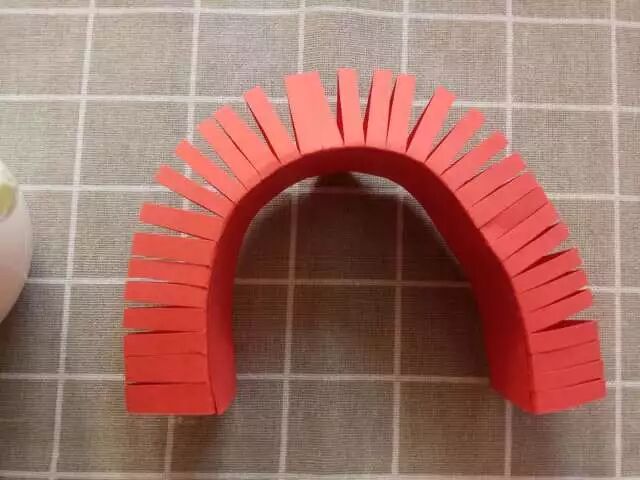
Use scissors to cut the lower part (where the folded paper connects at the bottom) into evenly spaced thin strips,
cutting to the second crease.

Cut all the way through into evenly spaced small strips.
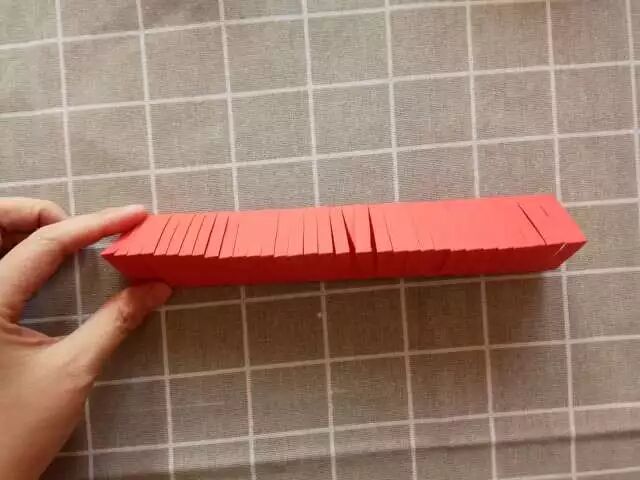
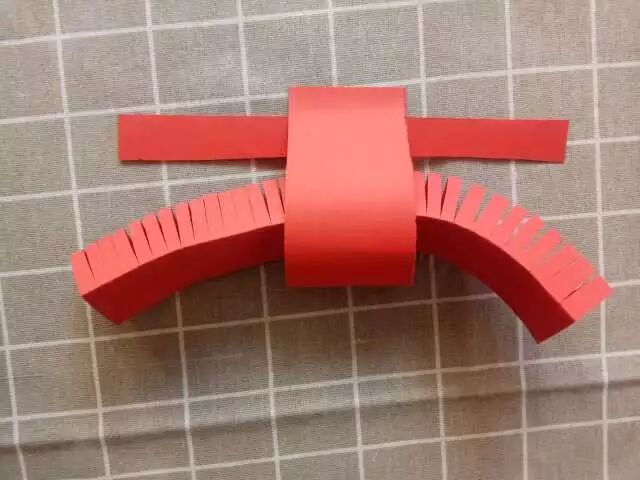
Then, according to the creases, overlap the two uncut sides, with the cut openings facing up, forming a triangle.
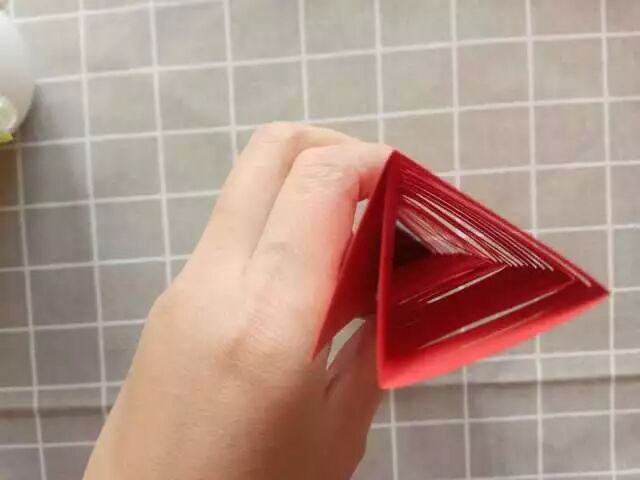
Here’s a top view; the cross-section is triangular.
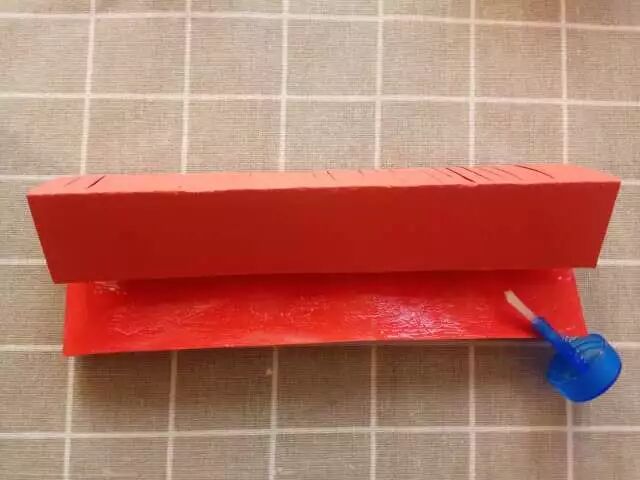
On the uncut side, apply glue to the upper layer of the bottom paper and stick it to the upper paper.
After gluing, let it dry; once it’s secure, this structure can bend freely. Set it aside for later use.
Take the other half of the A4 paper, fold it along the long edge, and cut along the crease,
then divide it in half again. Each strip of paper is 1/4 of an A4 sheet.
Using the 1/4 A4 paper, cut a long strip about 1 cm wide along the long edge.
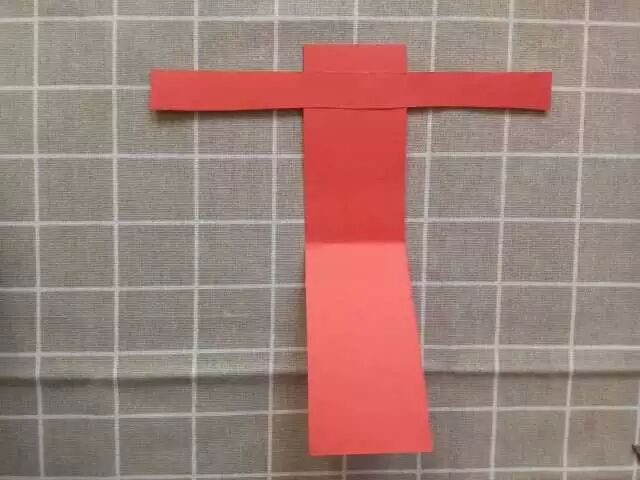
Place the wider paper vertically, and attach the narrow strip horizontally at the top of the paper.
Place the previously made triangular structure in the center.
Fold it over to overlap, and glue the top together.

Top view, with the top glued together.
For the remaining 1/4 of the A4 paper, cut it as shown in the picture. The lower part on the right is the robot’s head,
and the small strip above is the robot’s antenna.
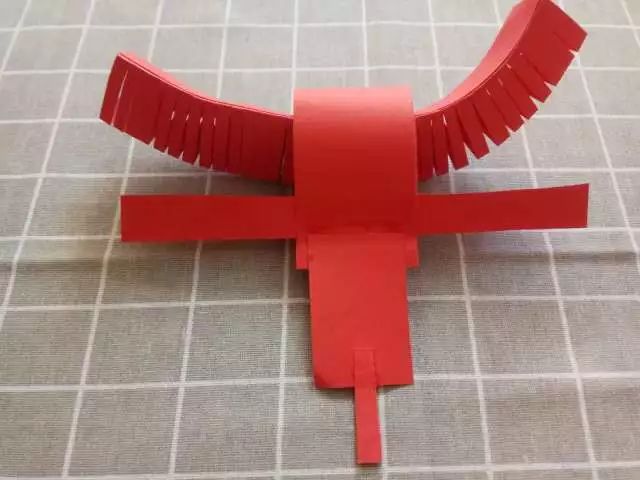
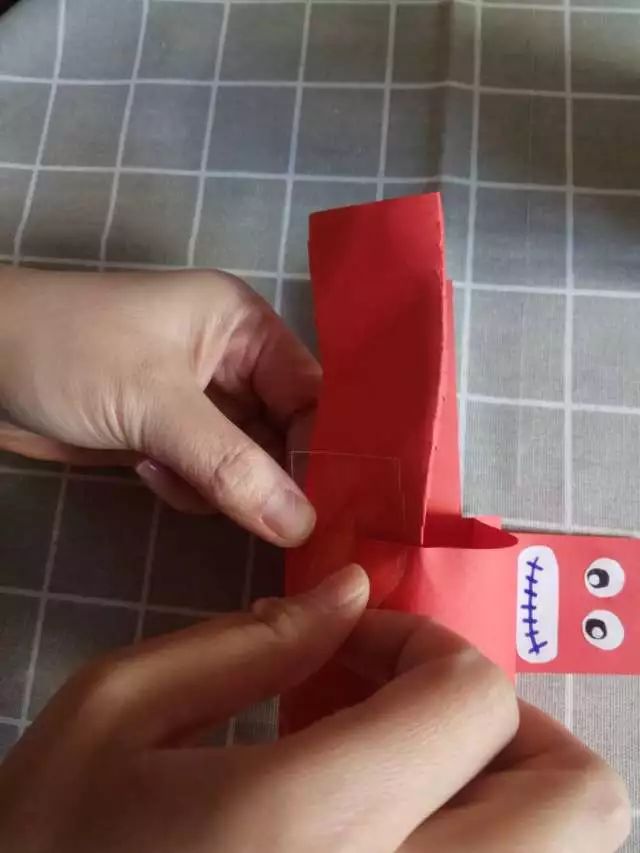
Attach the cut antenna vertically to the middle area of the head,
and glue the head to the top center of the body. This is the back view.
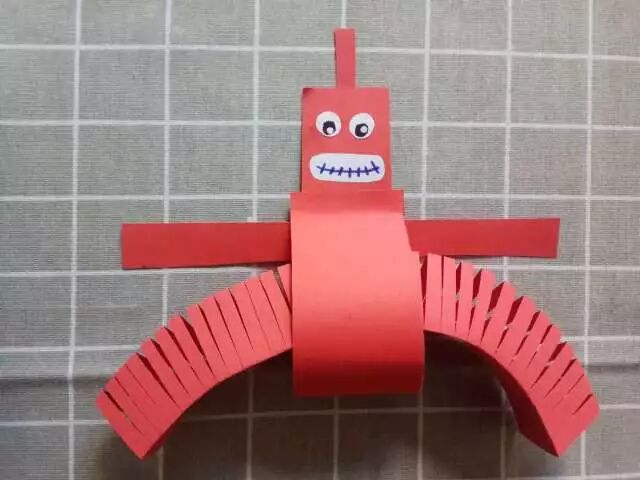
Flip the robot over and attach the prepared eyes and mouth to the robot’s head.
Use transparent tape to attach the robot’s bottom body and legs together with wide tape.
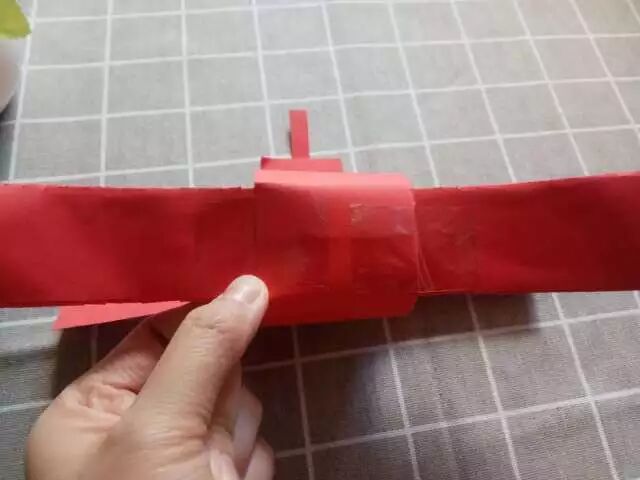
Center it, and secure both sides.
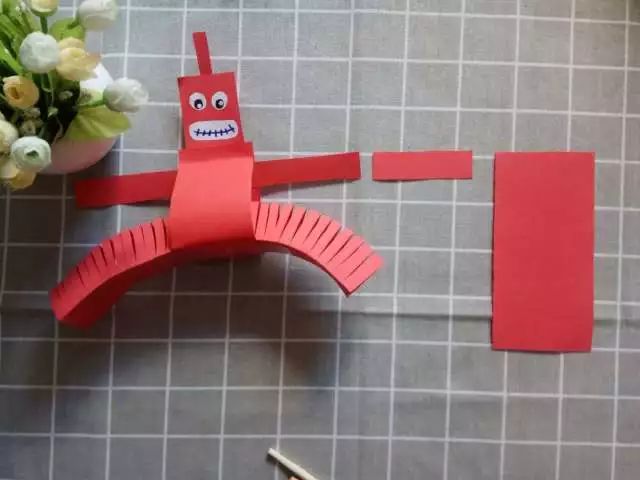
Take the remaining paper, cut a small strip slightly wider than the arms along the short edge.
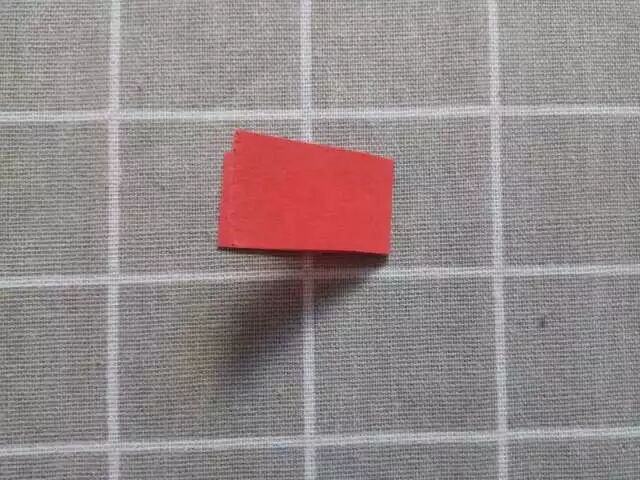
Fold the small strip of paper.
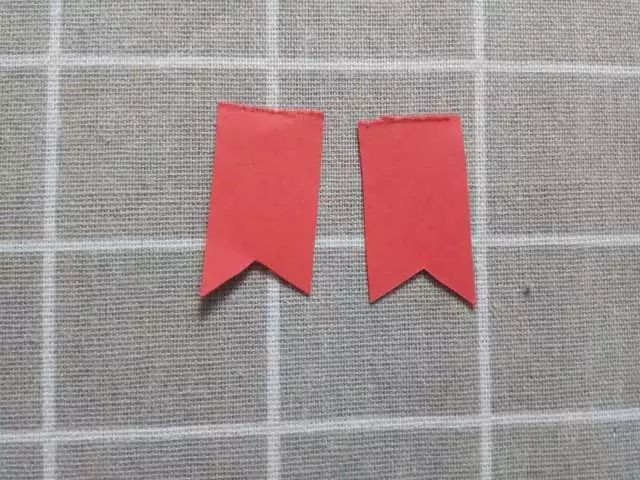
Cut the front end of the small strip into a triangle, and divide it in half from the middle.
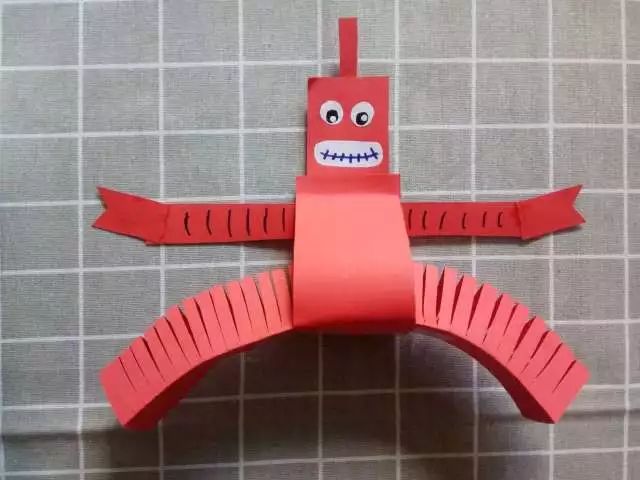
Attach the robot’s hands to the arms and draw the robot’s arm patterns with a black pen.
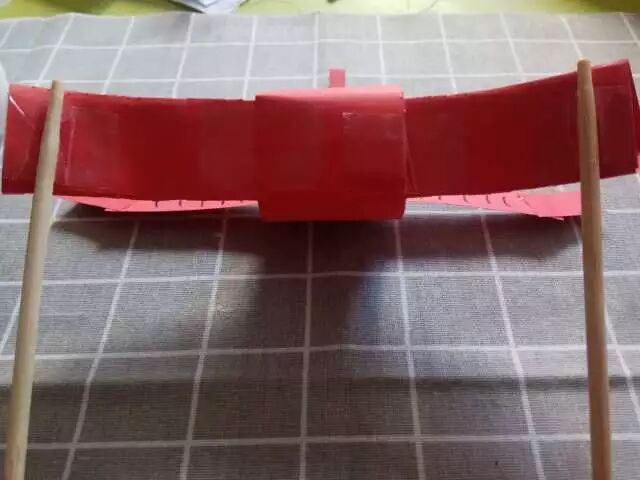
Use transparent glue to attach disposable chopsticks to both ends of the robot’s bottom.
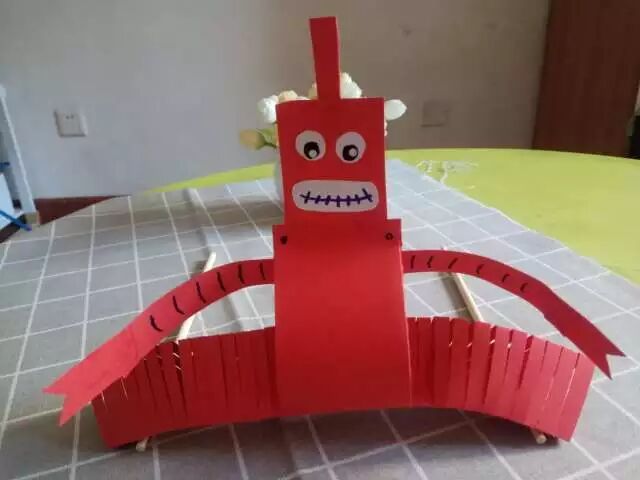
The robot is complete! Hold the tail of the chopsticks to make the robot move.
Teacher Xiao Li’s musings
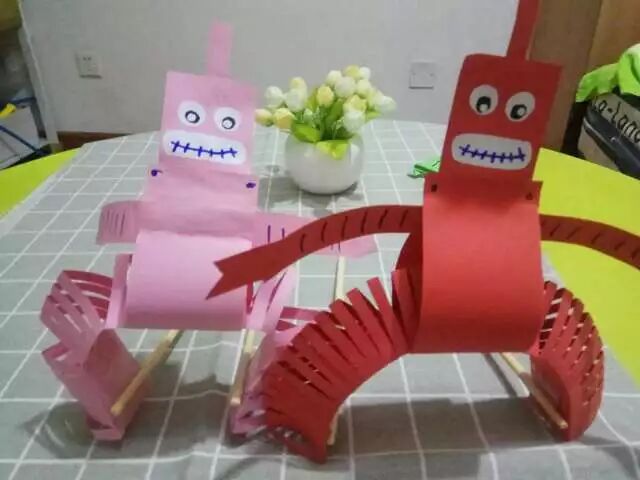
1. The red robot made by Mom Dou used hard cardboard, while the pink robot used regular printing paper thickness. The softness or hardness of the paper determines the degree of twisting of the robot’s body. Dou Dou always says the pink robot is too lazy and its head always droops down to sleep.
2. You can use disposable chopsticks, bamboo skewers, or small wooden sticks; basically, use whatever materials you have at home.
Let’s see how the robot walks.
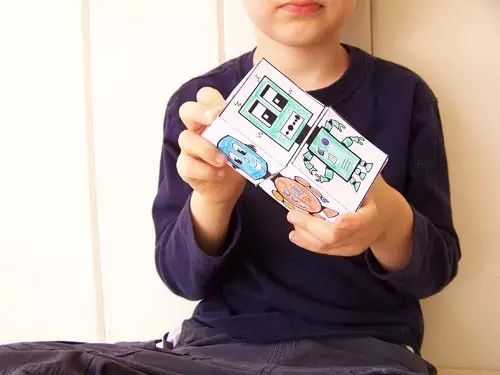
Spliced Robot
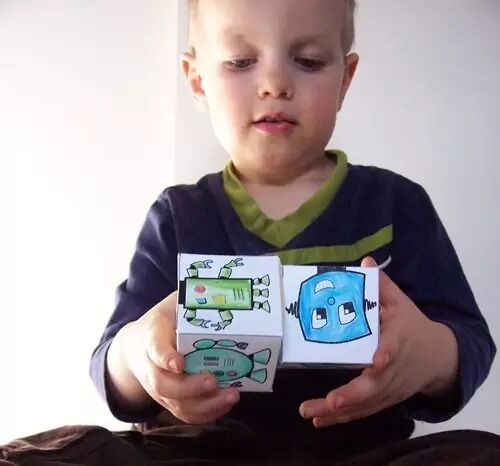
Preparation list: drawing paper, paint, glue, ruler
This paper version of Transformers is the coolest!
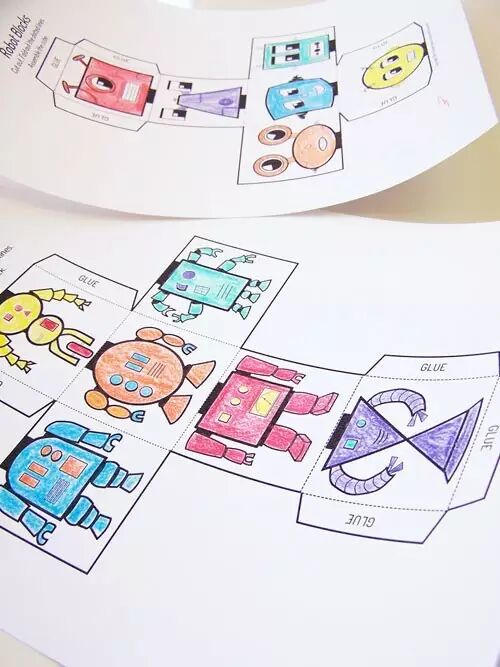
Steps to make: On two sheets of drawing paper, draw the flat layout of a cube as shown in the picture,
one sheet for the robot’s body and the other for the robot’s head.
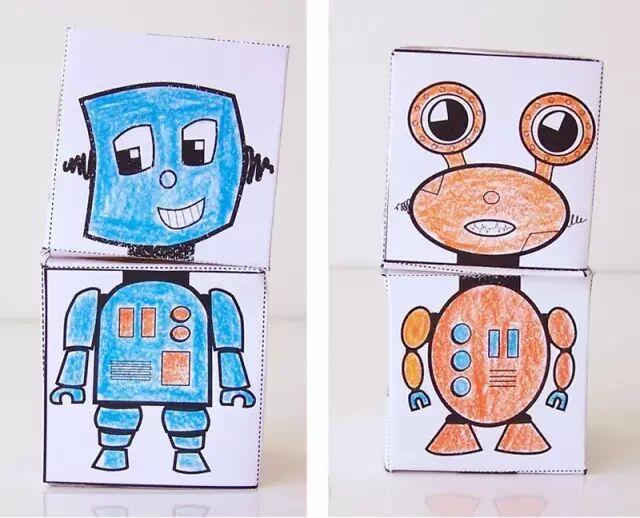
What colors and shapes to use can be left to the child’s imagination.
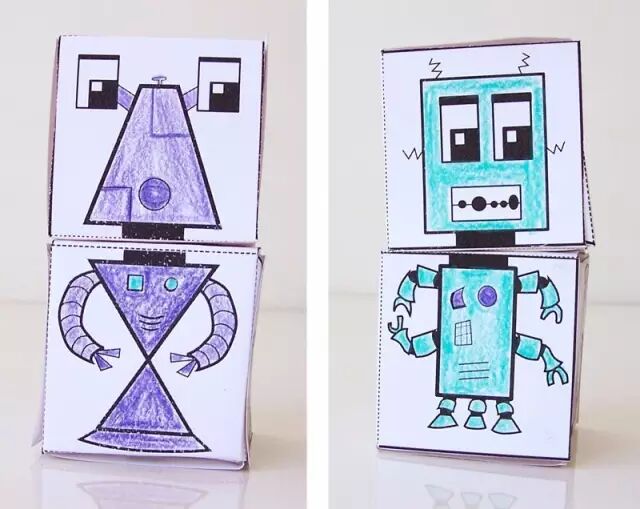
After completing the drawing, use glue to stand up the flat layout and stick it together to form a cube,
and then you can create different combinations of the robot’s head and body!
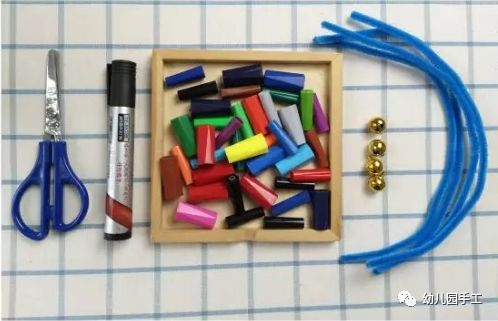
Straw and Pipe Cleaner Robot
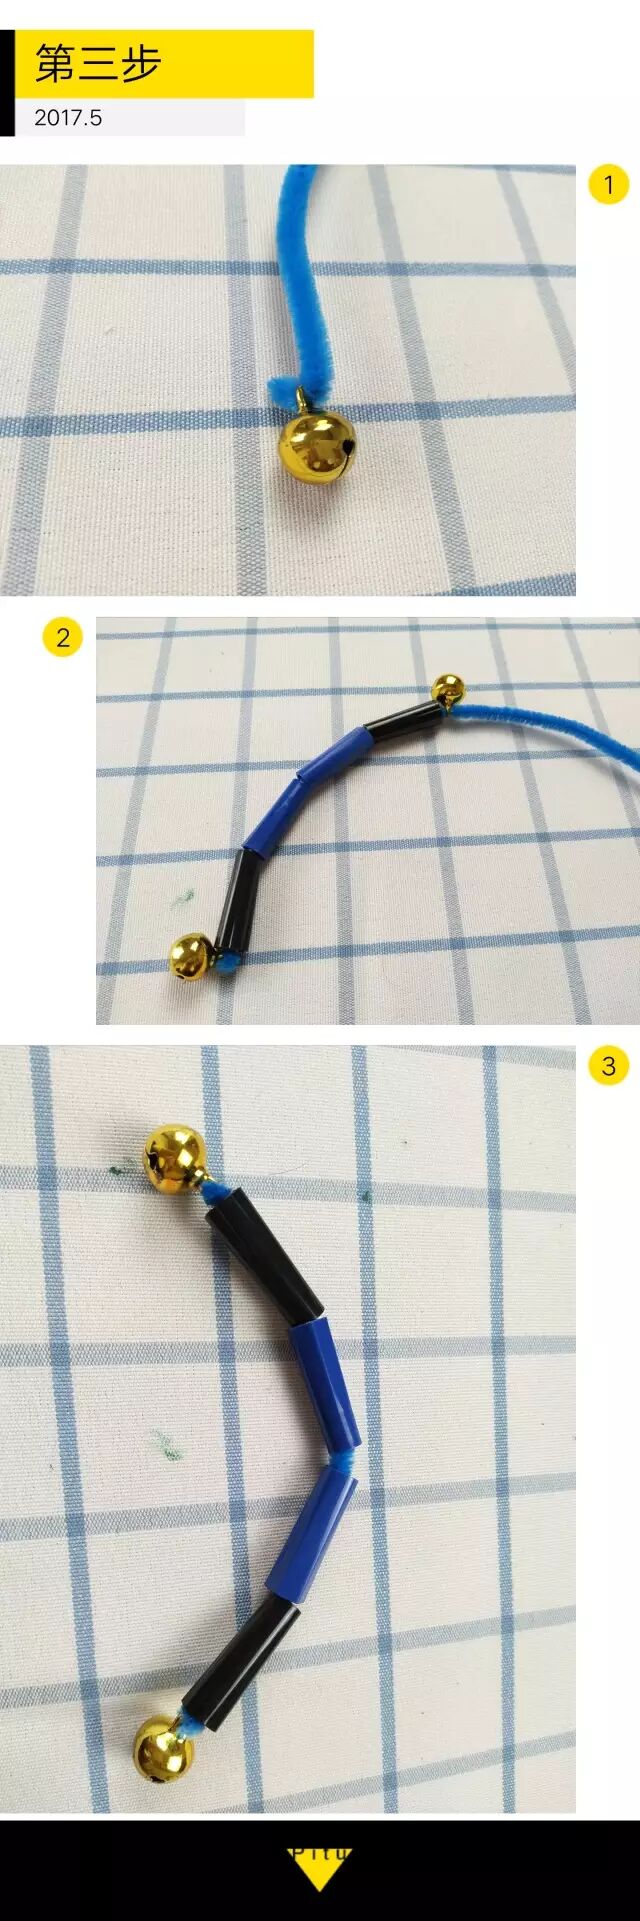
Materials needed: scissors, black marker, pre-punched watercolor pen caps, bells, pipe cleaners.
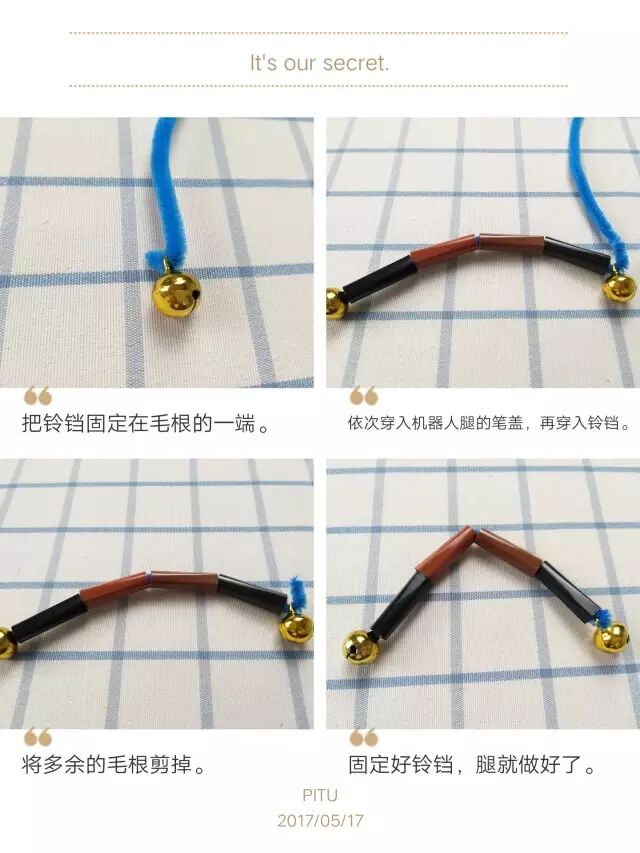
Steps to make: Fix the bell at one end of the pipe cleaner, thread the pen cap for the robot’s legs, and then thread the bell;
Cut off the excess pipe cleaner, secure the bell, and the legs are done.
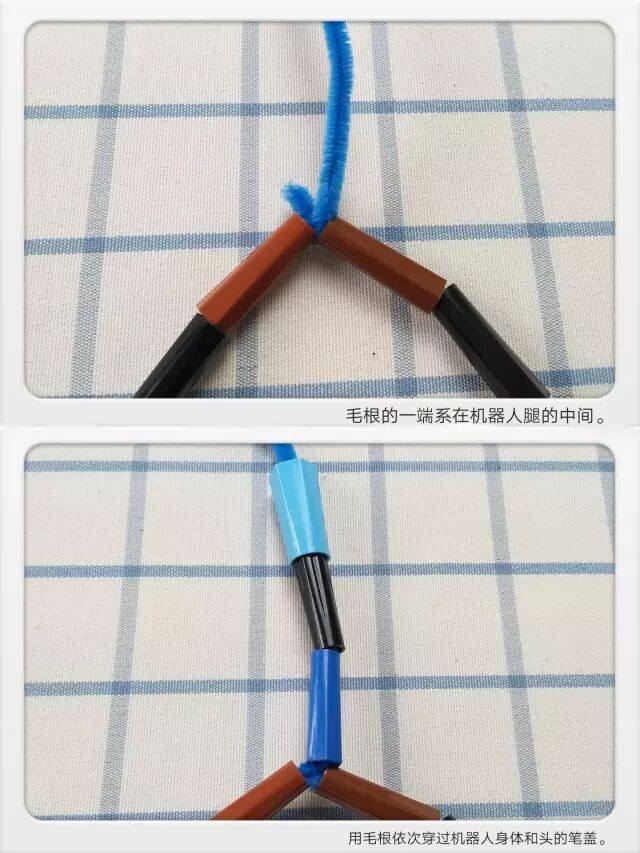
One end of the pipe cleaner is tied to the middle of the robot’s leg, and use the pipe cleaner to thread through the pen caps for the robot’s body and head.
Fix the bell at one end of the pipe cleaner, thread the pen cap for the robot’s hand, and then thread the bell;
Cut off the excess pipe cleaner, secure the bell, and the arms are done.
Twist the robot’s arms and fix them below the head; then tie the pipe cleaner on the head,
and use the excess pipe cleaner to make a circle and secure it as a hanging loop.
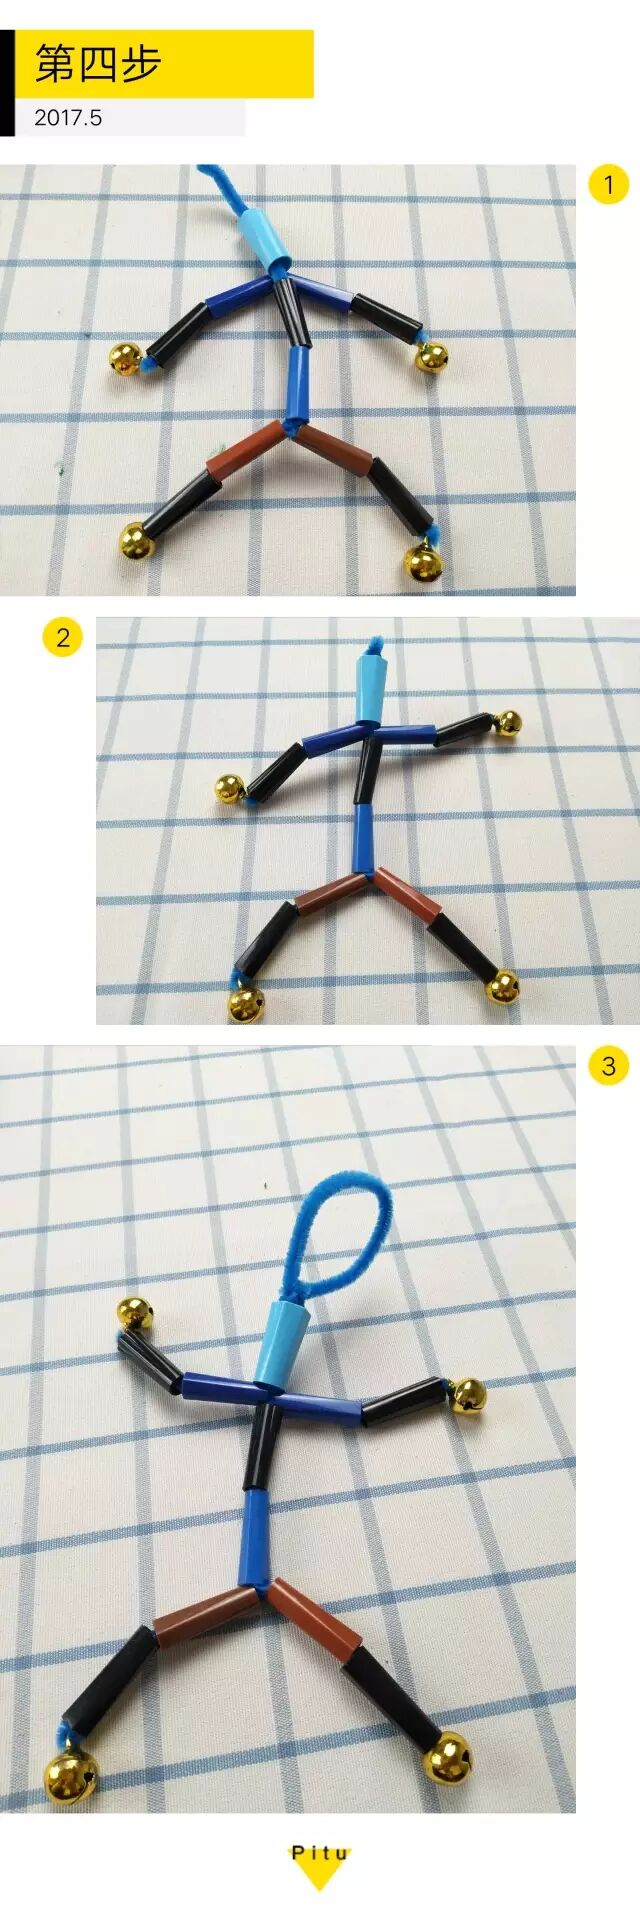
Use the marker to draw the robot’s eyes and mouth, and the colorful robot is complete!
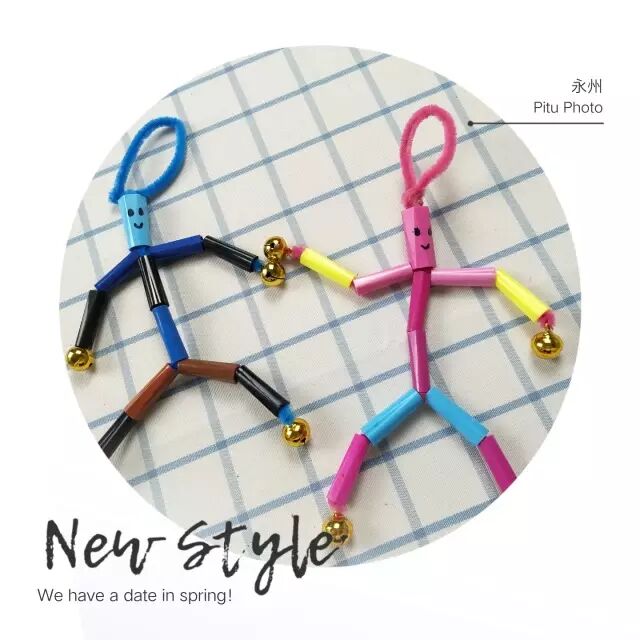
Isn’t it cool? How did your robot turn out?
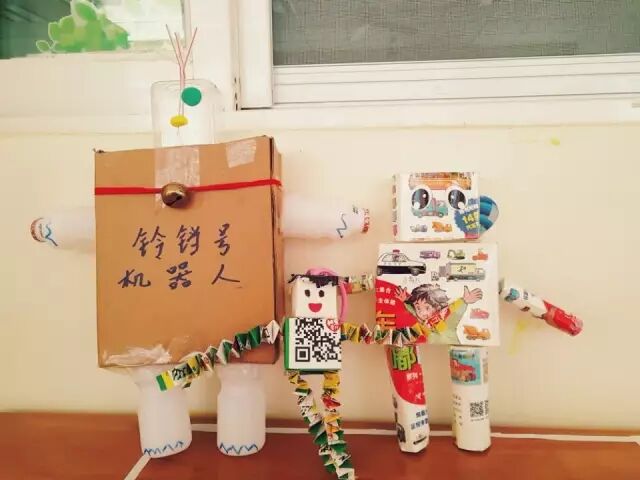
Cardboard Robot Creations


Kindergarten Crafts
✎“Kindergarten Crafts” WeChat Official Account: Professional sharing of kindergarten crafts, art, painting, craft tutorials, creative DIY, environmental decoration, corner areas, doors and windows, corridors, theme walls and other craft arrangements, as well as parent-child crafts and other content.
 Long press the QR code to automatically recognize and follow
Must-Read for Kindergarten Teachers
✎“Must-Read for Kindergarten Teachers” WeChat Official Account: Professional sharing of kindergarten resources, all the kindergarten teaching resources teachers need, making it easier for teachers to prepare lessons and work in kindergarten, “Must-Read for Kindergarten Teachers” is a good helper for 3 million kindergarten teachers!
 Long press the QR code to automatically recognize and follow
Kindergarten Environmental Creation Arrangement
✎“Kindergarten Environmental Creation Arrangement” WeChat Official Account: Professional sharing of kindergarten environmental arrangements, classroom environmental arrangements, corner area arrangements, doors and windows, corridors, stairs, hanging decorations, theme walls and other environmental creations, as well as kindergarten parent-child crafts and other content!

Long press the QR code to automatically recognize and follow
Kindergarten Rhythm
✎“Kindergarten Rhythm” WeChat Official Account: Professional sharing of kindergarten dance, break time exercises, morning exercises, finger games, kindergarten holiday performances, kindergarten report performances, kindergarten activity plans, holiday plans and other kindergarten resources, making it easier for teachers!

Long press the QR code to automatically recognize and follow