0. Introduction
This article references the official Visual Studio Code documentation on Using GCC with MinGW, but provides a more detailed analysis of the parameters in the four configuration files located in the <span>.vscode</span> folder of the project directory: <span>c_cpp_properties.json</span>, <span>launch.json</span>, <span>settings.json</span>, and <span>tasks.json</span>. It explains how to configure these four files to achieve the effect of running the program in a separate external terminal window during debugging, rather than in the built-in terminal of VS Code, and provides solutions for encoding issues caused by temporary file paths containing Chinese characters due to Windows usernames. This article will be published in multiple parts due to its length. This is the first part, covering the creation of a Hello World file and successfully compiling and running it.
1. Installing VS Code and its C/C++ Extension
① Install VS Code; ② Install the C/C++ extension for VS Code. You can install the C/C++ extension by searching for “C++” in the “Extensions” view (<span>Ctrl+Shift+X</span>).
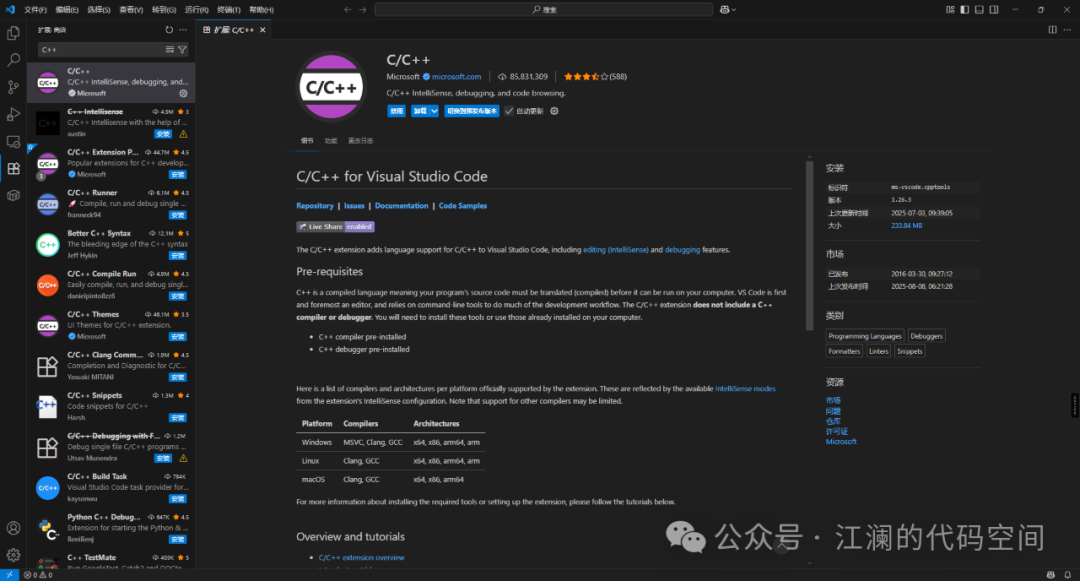
(If the plugin installation is slow, you can refer to my article: Resolving Docker Image Pull Failures, Slow VSCode Plugin Installations, and Slow or Failed Linux System Package Downloads by Changing Sources.)
2. Installing the MinGW-w64 Toolchain
We obtain the latest version of MinGW-w64 through MSYS2, which provides the latest native versions of GCC, MinGW-w64, and other useful C++ tools and libraries. The official website for MSYS2 is https://www.msys2.org/, but this site may not be very stable when accessed from within China, so we can choose to access the MSYS2 software repository at Tsinghua University’s open-source software mirror to download MSYS2 and configure pacman. The specific steps are as follows:① (Taking the x86_64 system platform as an example) Access the <span>distrib/</span> directory under the mirror directory, and find the file named <span>msys2-<architecture>-<date>.exe</span> (e.g., <span>msys2-x86_64-20250622.exe</span>), and download it.② Run the installer and follow the steps in the installation wizard. Note that installing MSYS2 requires Windows 10 or higher, 64-bit.③ In the wizard, select the desired installation folder. Record this directory for future use. In most cases, the recommended directory is acceptable. If you choose a custom installation folder, ensure that the selected path is an ASCII short path on an NTFS volume, without diacritics, spaces, symbolic links, subst or network drives, and not FAT (for example, I set it to <span>D:\MSYS64</span>). When setting up the start menu shortcut, it is usually fine to keep the defaults. After completion, ensure that the box for Run MSYS2 now is checked, then select Finish. This will automatically open an MSYS2 terminal window (UCRT64 environment terminal).④ In the terminal, run the following command:
sed-i"s#https\?://mirror.msys2.org/#https://mirrors.tuna.tsinghua.edu.cn/msys2/#g" /etc/pacman.d/mirrorlist*After changing the mirror source, run the command:
pacman -S --needed base-devel mingw-w64-ucrt-x86_64-toolchainto install the MinGW-w64 toolchain. During the installation, press <span>Enter</span> to accept the default number of packages in the toolchain group; when prompted to continue with the installation, enter <span>Y</span>.
⑤ Add the path of the MinGW-w64 <span>bin</span> folder to the Windows <span>PATH</span> environment variable (taking Windows 11 Pro as an example):
- In the Windows search bar, type “Environment Variables“, and select Edit the system environment variables;
- In the pop-up window, click Environment Variables(N)…, then find the
<span><your username> user variables</span>list and locate the<span>PATH</span>variable, click Edit(E)… (i.e., edit the user variable<span>PATH</span>); - In the pop-up window, click New(N)…, and add the MinGW-w64 target folder recorded during installation to the list. If using the default settings, the path will be:
<span>C:\msys64\ucrt64\bin</span>. - Then keep clicking
<span>OK</span>until all three pop-up windows are closed.
⑥ To check if the installed MinGW-w64 tools are correctly installed and available, you can open a new command prompt and type:
gcc --version g++ --version gdb --versionIf installed correctly, you should see output indicating which versions of GCC, g++, and GDB are installed.
3. Creating a Hello World Application
① Create a project folder, ensuring that the path does not contain Chinese characters; for example, I set it to <span>D:\projects\helloworld</span>. Then right-click inside the folder → Show more options → Open with Code. If a window pops up asking Do you trust the authors of the files in this folder?, select Yes, I trust the authors.② In the file explorer title bar, select the New File button and name the file <span>helloworld.cpp</span>, then paste the following code into the file:
#include <iostream>#include <vector>#include <string>using namespace std;int main(){ vector<string> msg {"Hello", "C++", "World", "from", "VS Code", "and the C++ extension!"}; for (const string& word : msg) { cout << word << " "; } cout << endl;}Then press <span>Ctrl+S</span> to save the file.③ Click the drop-down arrow next to the play button in the upper right corner of the editor, and select Run C/C++ File, 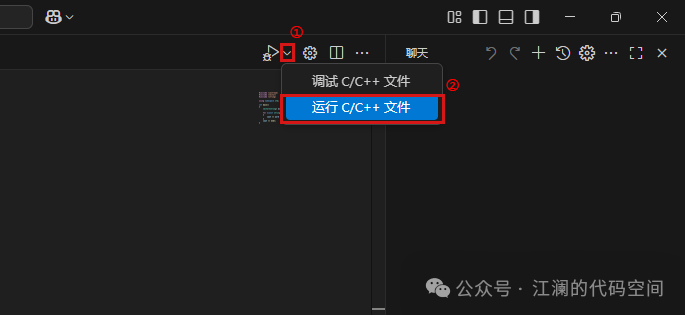 Select C/C++: g++ build and debug active file,
 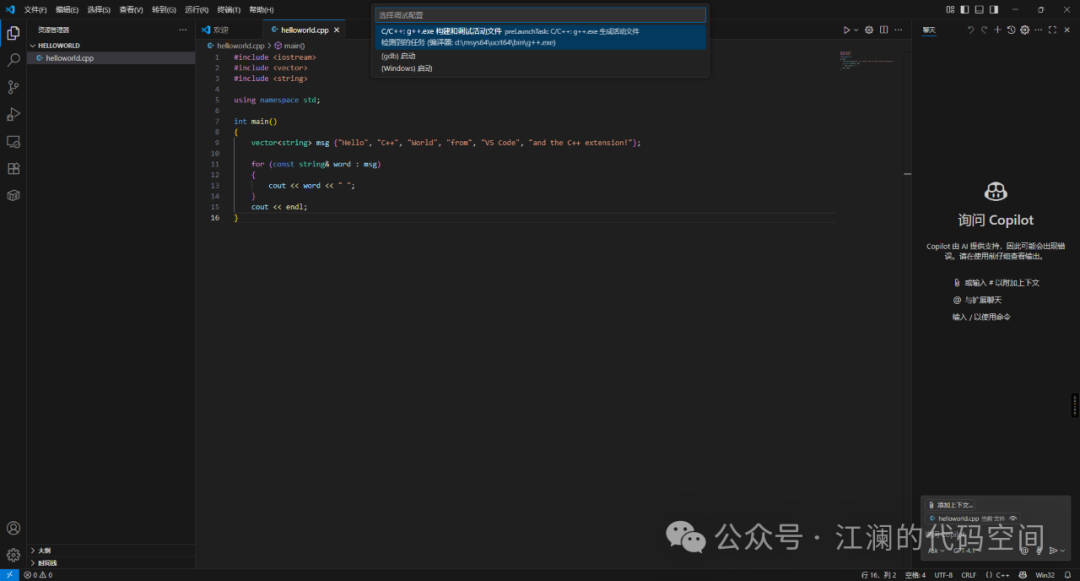 Return to the terminal and find that the output was successful:
This concludes the first part; stay tuned for the next part.
Closing Remarks for Part 1
Readers can follow my WeChat public account, where I will share my essays and life insights from time to time. Thank you~