When we usually use CMake, it is mainly on x86 or x86_64 platforms. Let’s see how to compile programs using CMake.
1. Linux-x86 Environment
Build a simple project according to the structure below.
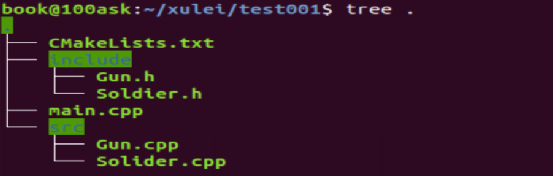
The content of Gun.h is as follows:
|
#pragmaonce #include
class Gun { private: int bullet_count; std::string type; public: Gun(std::string type) { this-> bullet_count = 0; this-> type = type; } //~Gun(); void addBullet(int bullet_num); bool shoot(); };
|
The content of Soldier.h is as follows:
|
#pragmaonce #include #include “Gun.h”
class Soldier { private: std::string name; Gun * _ptr_gun; public: Soldier(std::string name); void addBulletToGun(int num); void addGun(Gun* ptr_gun); bool fire(); ~Soldier(); }; |
The content of Gun.cpp is as follows:
|
#include “Gun.h” #include
void Gun:: addBullet(int bullet_num) { this-> bullet_count += bullet_num; }
bool Gun:: shoot() { if (this-> bullet_count <= 0) { std::cout<<“this is no bullet!”<<std::endl; returnfalse; }
this-> bullet_count -=1; std::cout<<“shoot success !”<<std::endl; returntrue; }
|
The content of Soldier.cpp is as follows:
|
#include “Soldier.h”
Soldier:: Soldier(std::string name) { this-> name= name; this-> _ptr_gun = NULL; }
void Soldier:: addGun(Gun* ptr_gun) { this-> _ptr_gun = ptr_gun; }
void Soldier:: addBulletToGun(int num) { this-> _ptr_gun-> addBullet(num); }
bool Soldier:: fire() { return this-> _ptr_gun-> shoot(); }
Soldier:: ~Soldier() { if (this-> _ptr_gun == NULL) { return; } delete this-> _ptr_gun; this-> _ptr_gun = NULL; } |
The content of main.cpp is as follows:
|
#include “Gun.h” #include “Soldier.h”
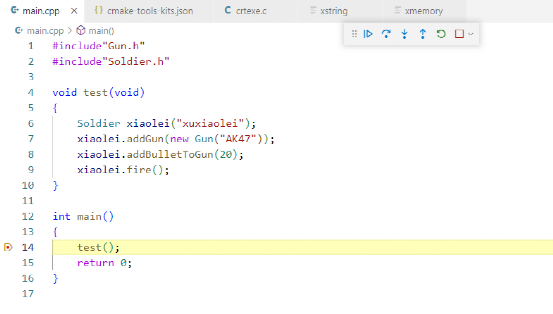
void test(void) { Soldier xiaolei(“xuxiaolei”); xiaolei. addGun( new Gun(“AK47”)); xiaolei. addBulletToGun(20); xiaolei. fire(); }
int main() { test(); return0; }
|
The content of CMakeLists.txt is as follows:
|
cmake_minimum_required(VERSION 3.0) project(Gun) #set(CMAKE_CXX_FLAGS “${CMAKE_CXX_FLAGS} -g -o2 -Wall”) include_directories(${CMAKE_SOURCE_DIR}/include) add_executable(TEST11 main.cpp src/Gun.cpp src/Solider.cpp) |
This is a standard project. To compile, just cd to the build directory and execute cmake .. && make. The execution result is shown in the figure below.
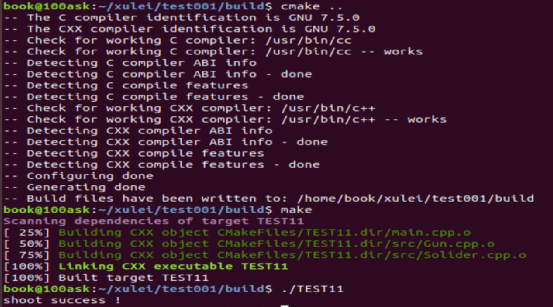
The file type is x86-64 ELF type data.

2. Linux-ARM64 Environment
Now we want the final compiled program to run on the ARM Linux system, which requires cross-compilation.
For cross-compilation, CMake does not know what the target system is, so we need to set some CMake variables to inform CMake.
CMAKE_SYSTEM_NAME: the target system name, which is Linux here.
CMAKE_SYSTEM_PROCESSOR: the target system’s processor name, which is ARM here.
These variables can be passed to CMake via command line when calling CMake, but this method is prone to errors and inconvenient, so CMake provides a toolchain file to pass this variable information.
We create a file called arm_linux_setup.cmake in the project, placed as follows (it can also be placed elsewhere).
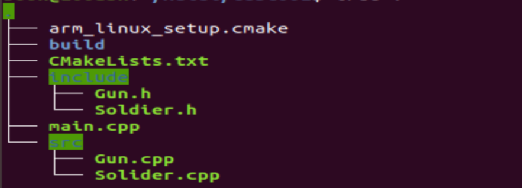
The content is as follows:
|
set(CMAKE_SYSTEM_NAME Linux) set(CMAKE_SYSTEM_PROCESSOR arm)
set(tools /home/book/100ask_stm32mp157_pro-sdk/ToolChain/arm-buildroot-linux-gnueabihf_sdk-buildroot) set(CMAKE_C_COMPILER ${tools}/bin/arm-buildroot-linux-gnueabihf-gcc) set(CMAKE_CXX_COMPILER ${tools}/bin/arm-buildroot-linux-gnueabihf-g++) |
tools is the path of the cross-toolchain I use, and you can modify it according to your actual file.
Use the CMake variable CMAKE_TOOLCHAIN_FILE to specify the toolchain file, cd to the build directory, and then execute the following command,
// Note, the toolchain file specification must immediately follow the cmake command and cannot be placed after .. cmake -DCMAKE_TOOLCHAIN_FILE=../arm_linux_setup.cmake ..
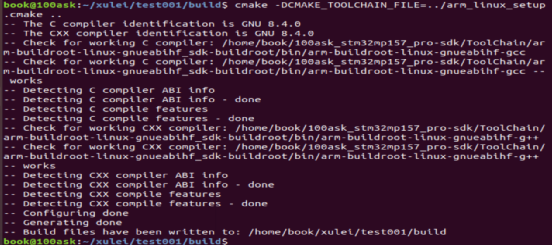
After ok, execute make, and the main elf file can be generated.
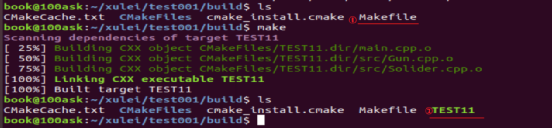
Using the file command to check this file, you can see that its running platform is a 32-bit ARM processor on the Linux system.

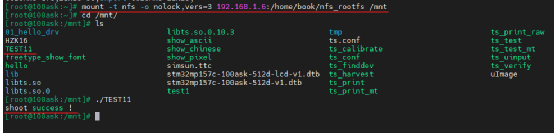
After copying the file to the network file system and mounting it, run it on the development board, and the result is as follows:
3. Windows-MSVC Environment
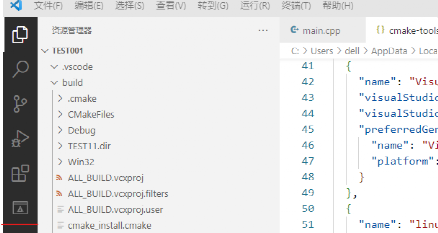
Download the vscode software and the c/c++, cmake toolkits. Open the above code in the working directory, with the file structure as follows:
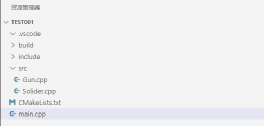
The cmake code is consistent with the linux environment code. Click the CMAKE button to select the compilation options,

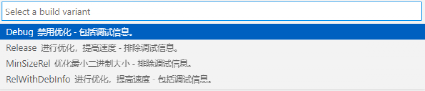
Here, select DEBUG to generate debugging information. Use shift+ctrl+P to open the control panel, type “cmake edit”, and the content will pop up as follows:
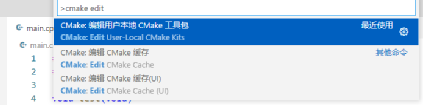
You can add a compiler.
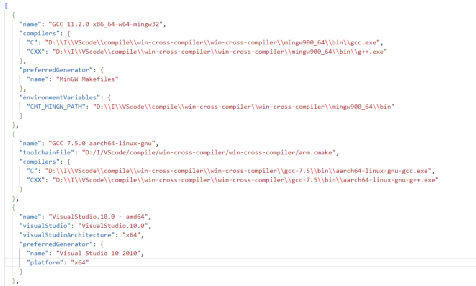
Click the button below to select the compiler.

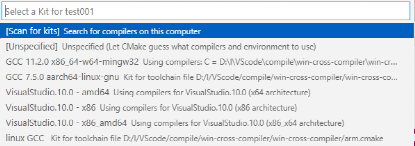
The compilation result is as follows:
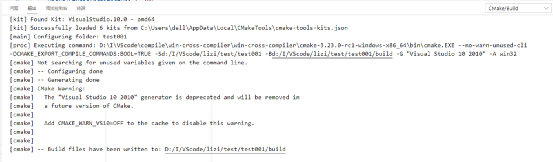
After the compilation is complete, select build to link. As shown in the figure below:

The output information is shown in the figure:

Click △ to debug, and the debugging information is as follows:

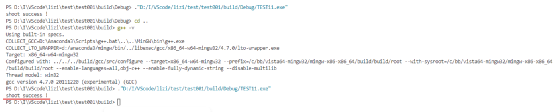
In addition, you can also set breakpoints for single-step debugging. The specific operation is as follows: click the A button.
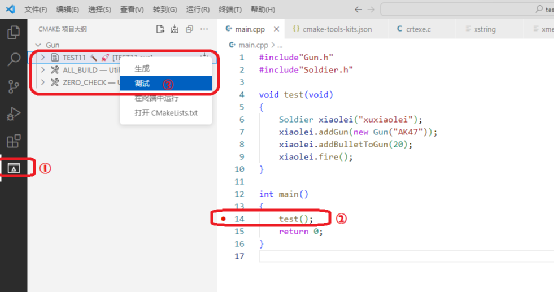
You can enter the debugging interface.