This article introduces the method of compiling and debugging Fluent UDF using Visual Studio and CMake.
Note: This article refers to the article published by
<span>Jiaoran Today What to Play</span>at https://zhuanlan.zhihu.com/p/492619039, and I extend my highest respect to the author’s spirit of sharing.”
There are many methods for compiling Fluent UDF. As a piece of C code, any method that can compile C programs can be used to compile Fluent UDF. Users can choose to use either Visual Studio or the built-in compiler in Fluent to complete the UDF compilation work. However, the Fluent documentation only describes how to compile UDFs and does not mention how to debug them. For very short UDF programs, manual debugging may be sufficient, but for complex programs, it is necessary to use IDE tools to assist in the compilation.
The specific implementation principles have been explained very clearly in the referenced article, so I will not repeat them here.
Below describes the specific usage of the method mentioned in the article.
1 File Preparation
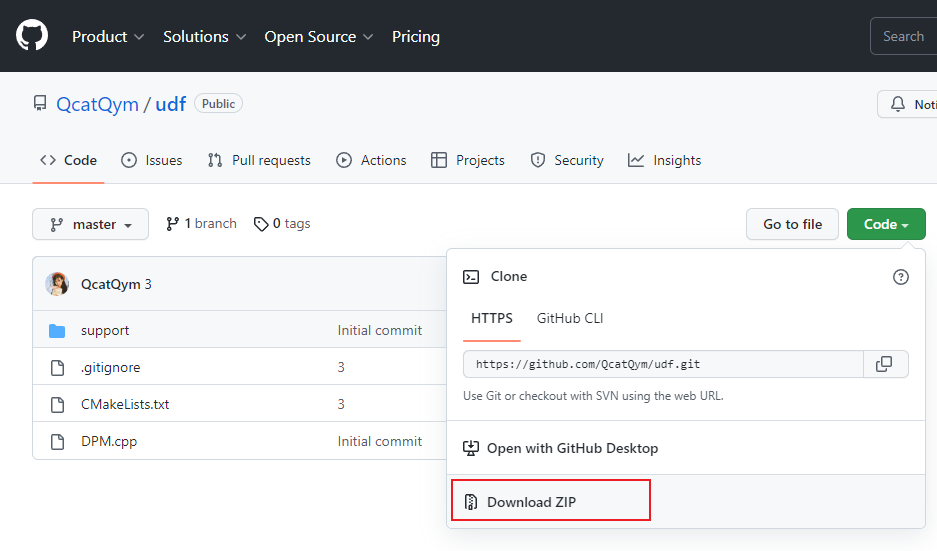
The required files are open-source and can be found at: https://github.com/QcatQym/udf.
-
Download the files and place them in the Fluent Case path, creating a file structure similar to the one below.
cas folder:
│  your_CAS.cas
│
└─lib_name //custom, can be habitually changed to libudf
    │  your_udf.c //udf source file
    │  CMakeLists.txt
    │
    └─support
		pre_chore.cmd
		pre_pre_make.cmd
            pre_make.cmd
            udf_names.c
            ud_io1.h
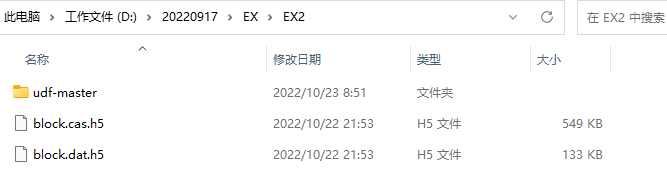
However, it can actually be placed in any English path. As shown in the figure below, the folder downloaded from GitHub, udf-master, is placed directly under the case path.
2 Add Environment Variables
-
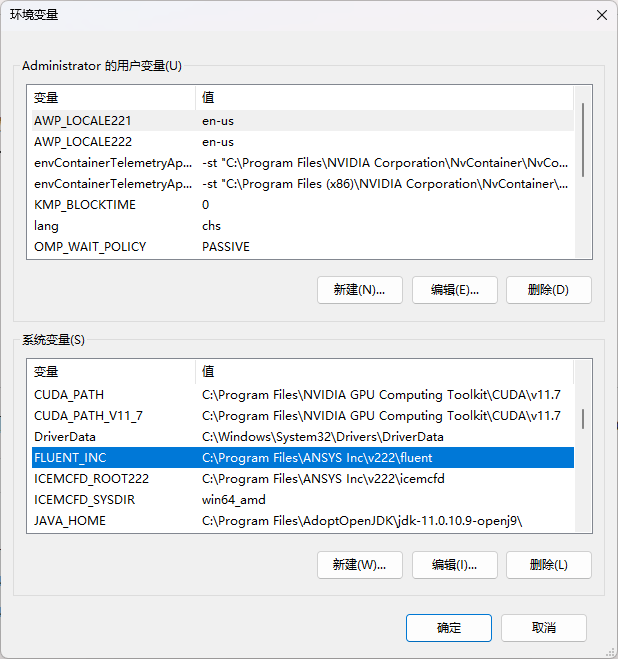
Add the system environment variable FLUENT_INC. As shown in the figure below.
3 Modify Configuration and Source Files
-
Start Visual Studio and select Open Local Folder

-
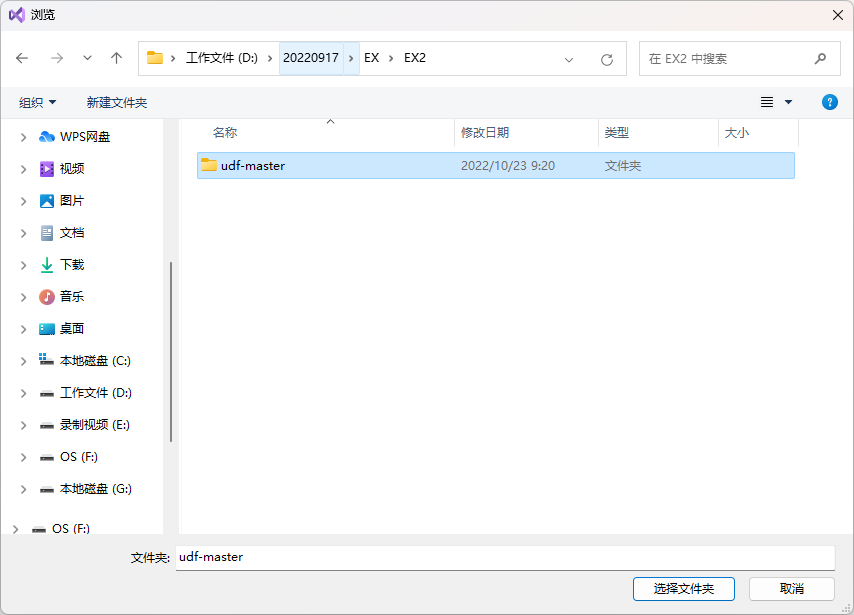
Select the previous udf-masterfolder and open it
-
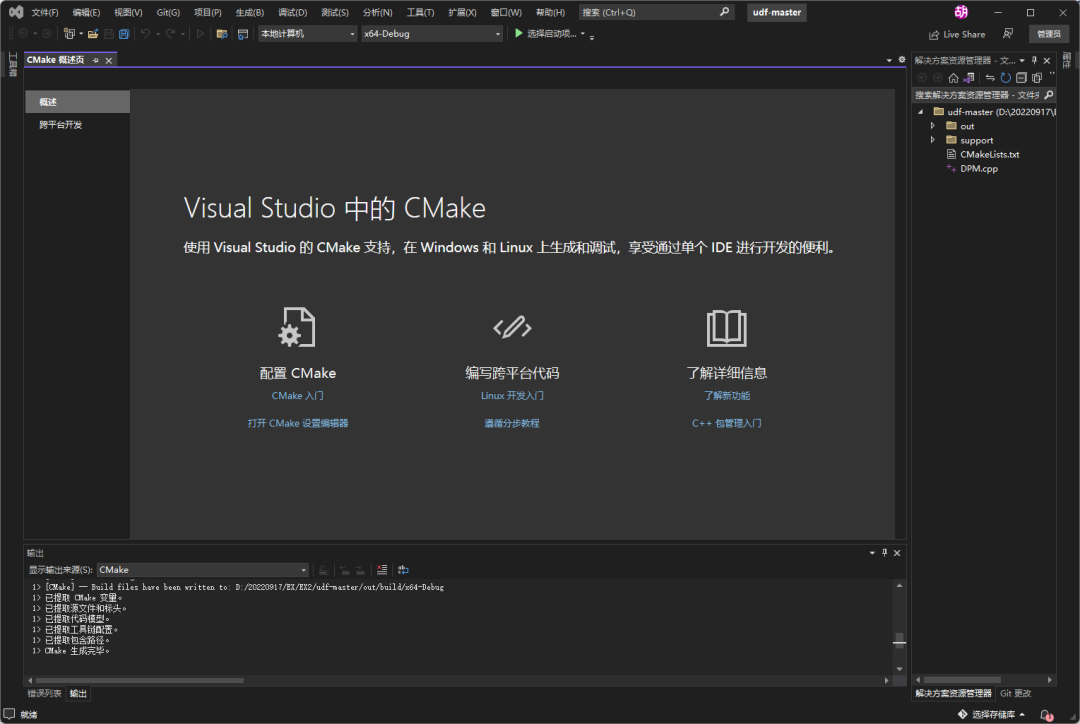
If the CMake tool was selected during Visual Studio installation, it should look like this. Different versions of VS may show slight variations; the image below shows the results displayed by my installed VS 2022.
-
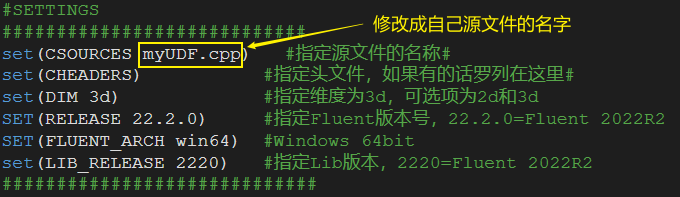
Open the CMakeLists.txtfile and modify the relevant content

The comments are quite clear. Note that the version number set here must be consistent with the version specified in the environment variable FLUENT_INC. In addition, the UDF version compiled here is 3ddp; if you want to compile the 3d version, you need to modify the second line of the CMakeLists.txt file in both node and host by removing dp.
-
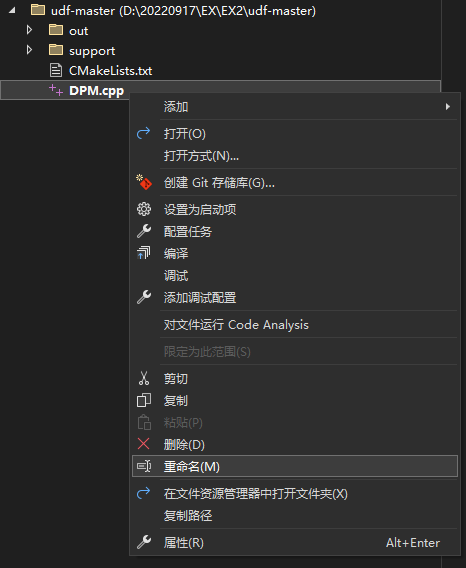
Rename the source file to myUDF.cpp
-
Correspondingly, the example source file DPM.cppshould also be renamed to your desired name, for instance, here it is changed tomyUDF.cpp. After renaming the file, VS will prompt an error, at which point you can refresh by using the menuBuild → Clean All.
Note: You can actually keep the original file name; just ensure that the file name in
CMakeLists.txtmatches the UDF file name. However, my OCD prevents me from not changing the file name.”
-
Modify the source file myUDF.cppaccording to your needs; at this point, VS can provide intelligent prompts, as shown in the figure below.
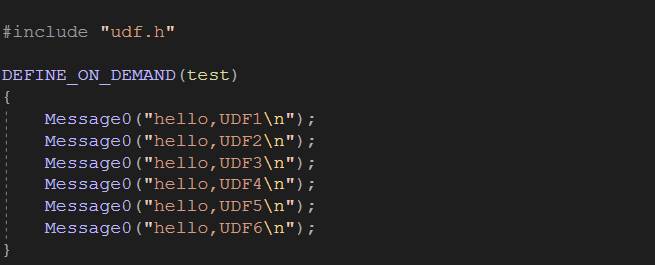
For example, the code written below.

-
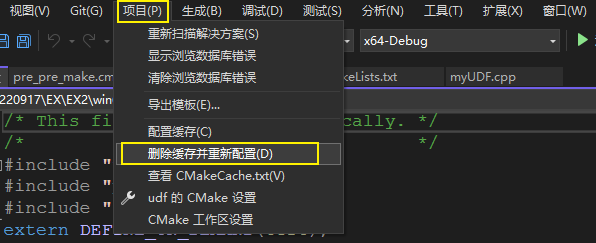
Having modified the files earlier, before compiling, you can use the menu Project → Delete Cache and Reconfigureto refresh the parameter information in the configuration file.
-
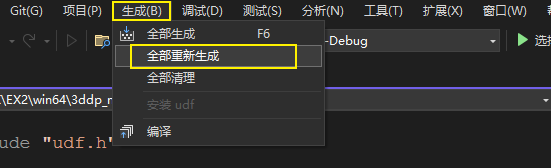
Click the menu Build → Rebuild Allto compile the source files.
At this point, a libudf.dll file can be generated, but it ends up in the EX2 folder.
Solution 1:
At this point, you can create a new folder in the EX2 path called libudf, and move the entire win64 folder into the libudf folder. After processing, the file structure will look like the one shown in the figure below, allowing you to directly load libudf in the case files.

If you only want to compile the UDF, this method is sufficient.
Solution 2:
If you want to debug the UDF, you can modify it as follows.
-
Open the host/CMakeLists.txtandnode/CMakeLists.txtfiles, modifying thehost/CMakeLists.txtfile as shown in the figure below.

Modify the node/CMakeLists.txt file as shown in the figure below.

Note: There are two additional dots in the source file, causing the output path to run to the upper-level menu.
”
-
Click the menu Build → Rebuild Allto compile the source files.

-
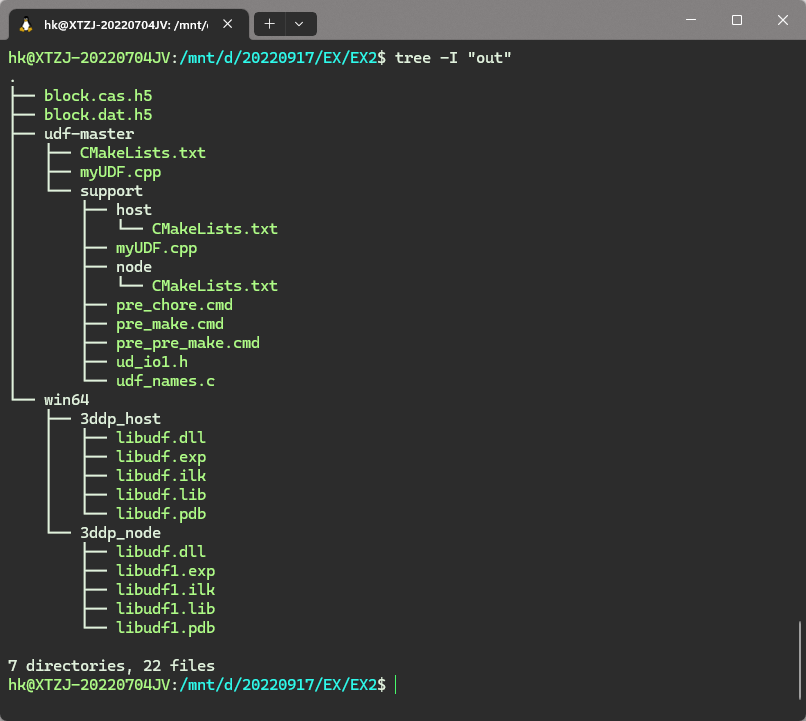
At this point, a new win64 folder will appear under the udf-master folder, containing the compiled dll files of the UDF, as shown in the figure below.

Note that the folder udf-master was not renamed earlier, so when calling UDF in Fluent, you must enter udf-master. The subsequent testing and debugging work will be based on this.
Note: If you want to use libudf, you can rename the udf-master folder to libudf during the file preparation stage.
”
4 Test UDF
-
Start Fluent in 3ddpmode (keeping consistent with the previous configuration) -
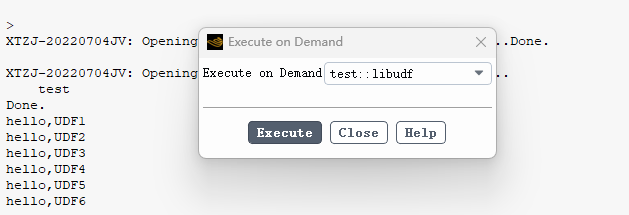
Load the UDF as shown in the figure below.
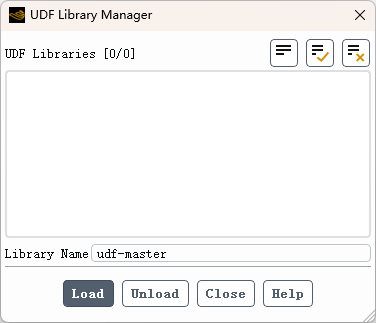
Click Load to load the dll, and the figure below shows a successful load.

Test the UDF, as shown in the figure below, which can execute successfully.
5 Debug UDF
Visual Studio has powerful program debugging capabilities.
-
Start Fluent and load the UDF -
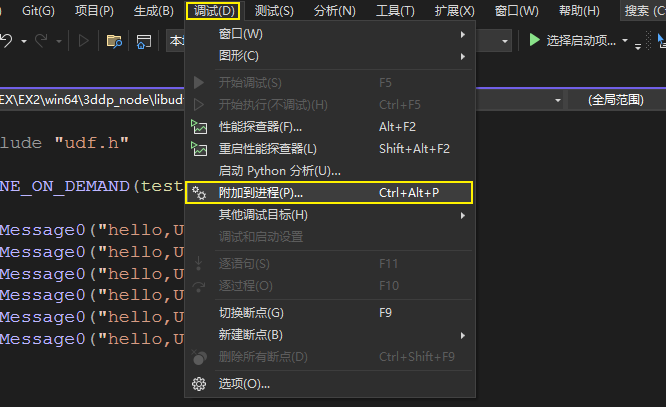
Click the menu Debug → Attach to Process...
-
In the dialog box, find the Fluent process, as shown in the figure below with fl2220.exe, and click theAttachbutton
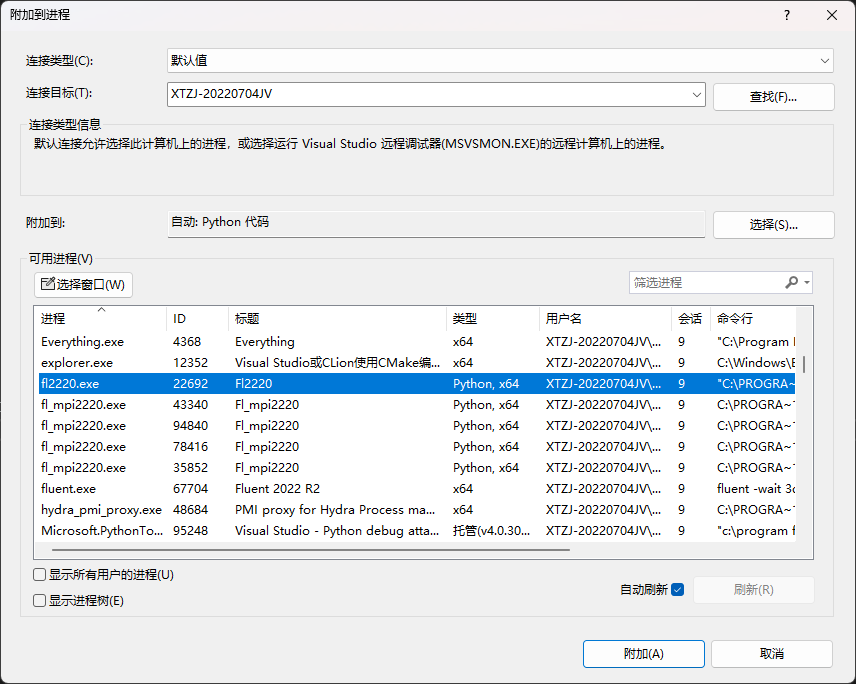
After that, you can set breakpoints in the source code for debugging, which is no different from conventional debugging methods, so I won’t elaborate further.
(End)