* This article is originally authored by: Cybersecurity Tong, and is part of the FreeBuf original reward program. Unauthorized reproduction is prohibited.
Revisiting this year’s 315 Gala. After watching, one can only curse the fraudsters! The gala revealed a way to control a user’s phone through charging. As modern people who feel like they’ve lost half their life without their phones, we often encounter situations where our phones run out of battery and we have to borrow someone else’s charger or power bank.When you think you’ve met a good person, you might just be sold out and helping them count their money.
As network security maintainers, we must resolutely disclose such behaviors to prevent more people from being deceived. However, the control method in the video is not very clear, and just as it happens, our lab received a batch of Raspberry Pi (card-sized computers), so we decided to conduct this experiment using Raspberry Pi.
Materials Needed
The materials needed are shown in the picture below:

(The toxic power bank primarily consists of Raspberry Pi; components 2, 3, and 4 are the usual components of a power bank.)
Configuring the Raspberry Pi
1. We need to install the Linux-based raspbian-jessie operating system on the Raspberry Pi. Detailed steps for installing the operating system can be found on the Raspberry Pi official website, so we won’t elaborate here: https://www.raspberrypi.org
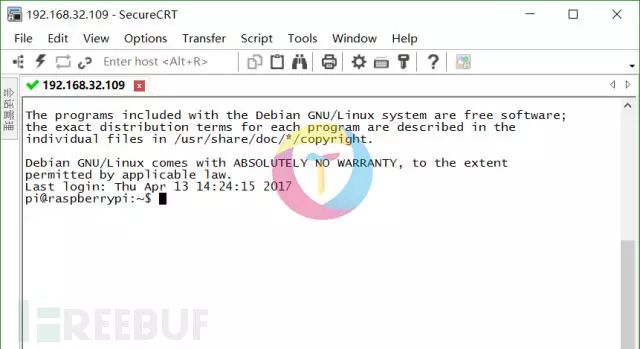
2. Set up the Raspberry Pi by first entering the operating system. Here, we use the remote login tool SecureCRT to log into the Raspberry Pi operating system, as shown in the interface below:
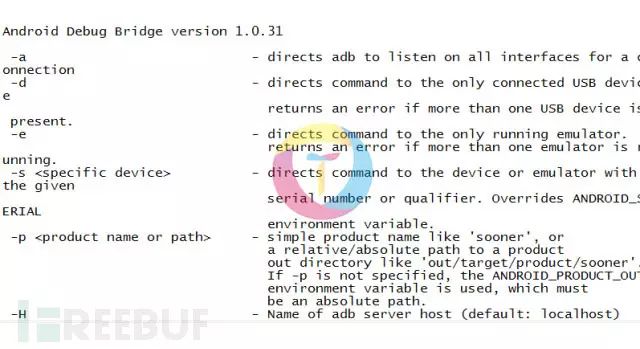
3. Remotely operate the Raspberry Pi to install the ADB tool. (The ADB tool stands for Android Debug Bridge.)
However, before proceeding with this step, we first need to modify the source of the Raspberry Pi, changing it to the following:
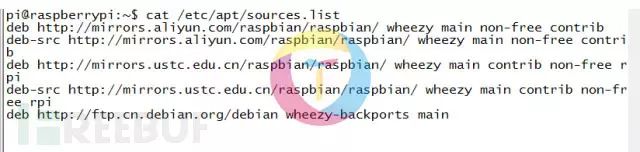
The specific command on the Raspberry Pi is as follows:
apt-get install android-tool-adbAfter the command runs successfully, the ADB tool will be installed on the Raspberry Pi. If you enter the command
adband see the interface, it indicates that the ADB tool has been successfully installed.
Once the Raspberry Pi is configured, the experiment is almost complete. The next steps are to open the box, put the components inside, and close the box.
Adjusting the Power Bank Shell
To ensure that the size of the box can accommodate the Raspberry Pi, we need to modify the purchased power bank shell; the modified box is shown below:
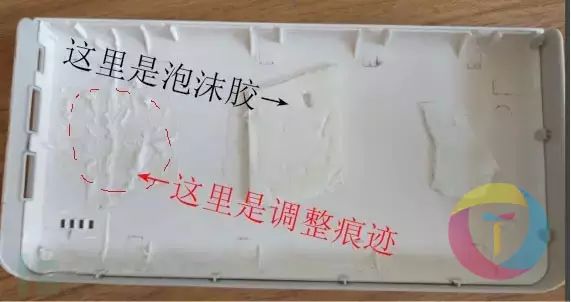
Foam can align the interfaces of the Raspberry Pi and the charging port of the power bank. It takes a lot of effort to adjust the box you have to fit with the Raspberry Pi; how well you do it depends on your skill level. As can be seen from the picture, our skill in tearing foam is truly top-notch.

Therefore, it is very important to buy the right box at the beginning, as it can save you a lot of time in this step.
Adjusting the Battery
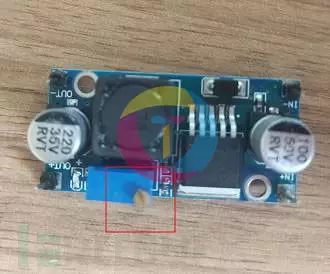
After fiddling with the box, we need to consider how to power the Raspberry Pi. Here, we use two 18650 high-capacity batteries, which together exceed 7V, while the Raspberry Pi can only operate normally at 5V. Therefore, we need to adjust the output voltage of the batteries. The voltage regulator module used here is an adjustable voltage regulator module, as shown below:
1. The red box outlines the knob for adjusting the output voltage.
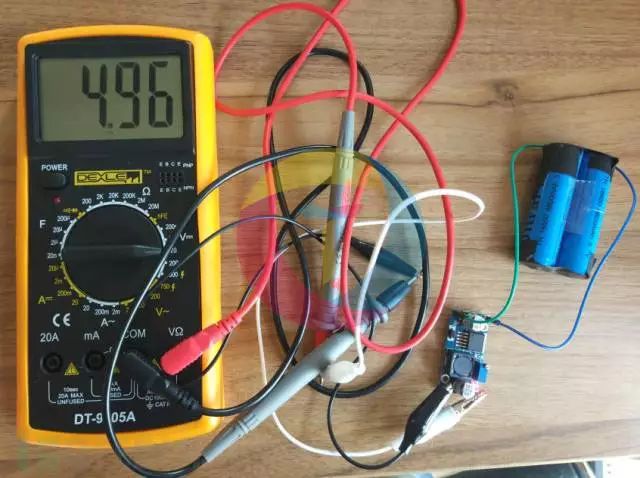
2. To accurately adjust the voltage, we also need a multimeter, as shown below:

3. The situation of adjusting the output voltage is as follows: twist and look.
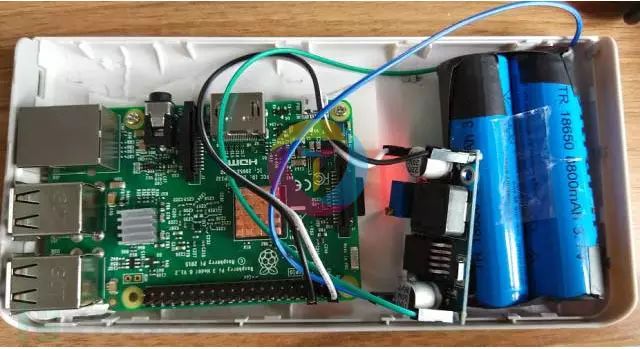
After adjusting the voltage, we can assemble all the modules together. Since the box was already adjusted to the size of the Raspberry Pi, it is easy to put the modules inside. Our finished product is shown below:
Close the lid:

Testing
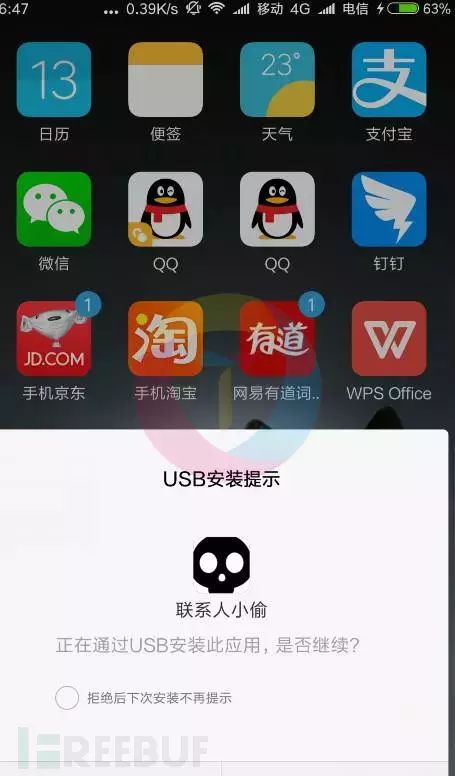
When users use this power bank, they can control it remotely, for example, using the ADB tool to push malicious apps to the user’s phone, as shown below:
Safety Tips
1. When using various charging devices, be wary of those so-called charging tips.
2. Do not download so-called charging assistant applications.
3. If not necessary, please turn off your phone’s developer mode.
4. Disable the option to allow USB installation of applications, as many Trojan apps are installed via USB.
5. Never download and use applications from unknown sources.
6. Try to avoid connecting to other people’s charging devices.
* This article is originally authored by: Cybersecurity Tong ([email protected]), and is part of the FreeBuf original reward program. Unauthorized reproduction is prohibited.