
⬆ Follow “Python-Wu Liu Qi” to learn easily together~

Read this article: You will learn how to batch watermark images with Python
🌈 Hi, friends! Have you ever faced the following troubles:
① Photos in your album were taken without watermarks, and you want to add information like the shooting location to make the images traceable, but you have to add them one by one manually, which is time-consuming and labor-intensive.
② Carefully designed images are accidentally taken by others without permission, used in ways that make you laugh and cry.
③ Using third-party software to add watermarks requires uploading photos, raising concerns about privacy leakage, and the watermark styles are often unsatisfactory.
🎯 Don’t worry, today I will teach you how to batch watermark images with Python, add anti-theft “protective covers”, customize watermark styles, and solve your troubles!
💡 Solution
Python is currently the most popular programming language, with many convenient and practical libraries, such as the pillow library, which can easily help you add watermarks to images.
Moreover, you don’t need to be a programming expert; following my tutorial, even beginners can easily get started, and the code includes detailed comments to ensure you understand it at a glance!
🛠️ Preparation
☘️ Enter the following command in the command line to install the library:
pip install pillow
pillow: is an upgraded version of the Python Imaging Library (PIL), supporting various file formats, providing powerful functions such as cropping, rotating, filtering, etc., and also supports batch processing, efficiently completing tasks like batch watermarking.
🗂️ Case 1: Automatically Add Watermarks in Batch
📸 Image materials: placed in the folder to be processed
☘️ In the images folder, there are 7 seascape photos from Dongshan Island, Fujian, that need watermarks, and the watermarked photos will be stored in the output folder.
📁 The file structure is as follows:
images/
├── seascape1.jpg
├── seascape2.jpg
├── seascape3.jpg
├── seascape4.jpg
├── seascape5.jpg
└── seascape6.jpg
└── seascape7.jpg
output/
The image content is as follows:

✨ Requirement: Add a watermark to each photo
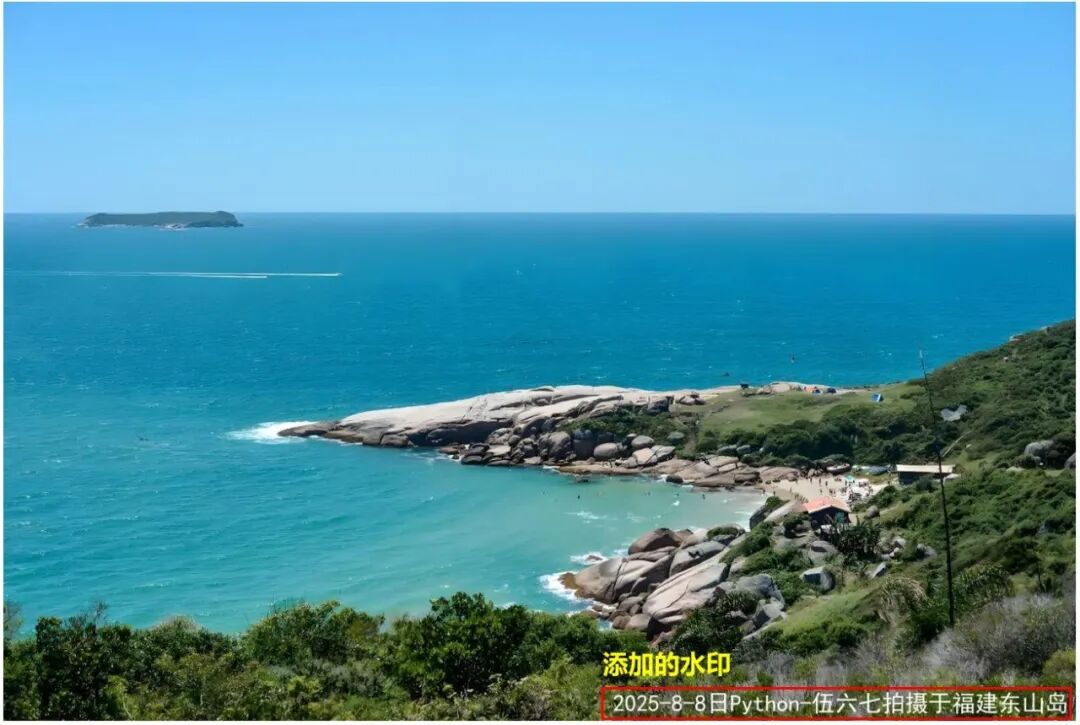
Watermark style: Add a line of text in the lower right corner of the photo, with the content: “Date + Photographer + Location”
Function Code:
from PIL import Image, ImageDraw, ImageFont
import os

# Set watermark using bold font, size 40
font = ImageFont.truetype("simhei.ttf", 32)
watermark_text = "2025-8-8 Python-Wu Liu Qi taken in Dongshan Island, Fujian"  # Watermark text content

# Iterate through all image files in the images directory
for filename in os.listdir("images"):
    # Only process image format files (png, jpg, jpeg)
    if filename.lower().endswith((".png", ".jpg", ".jpeg")):
        # Open the image and convert to RGBA mode (supports transparency)
        img = Image.open(f"images/{filename}").convert("RGBA")
        draw = ImageDraw.Draw(img)  # Create drawing object
        # Calculate the bounding box size of the watermark text
        bbox = draw.textbbox((0, 0), watermark_text, font=font)
        text_width = bbox[2] - bbox[0]  # Text width
        text_height = bbox[3] - bbox[1]  # Text height
        # Calculate watermark position (lower right corner, leaving a 10-pixel margin)
        position = (img.width - text_width - 10, img.height - text_height - 10)
        # Add watermark text (white, 220 transparency)
        draw.text(position, watermark_text, font=font, fill=(255, 255, 255, 220))
        # Convert to RGB mode and save to output directory
        img.convert("RGB").save(f"output/{filename}")

print("Watermark added successfully!")  # Completion prompt
☘️ Watermark before: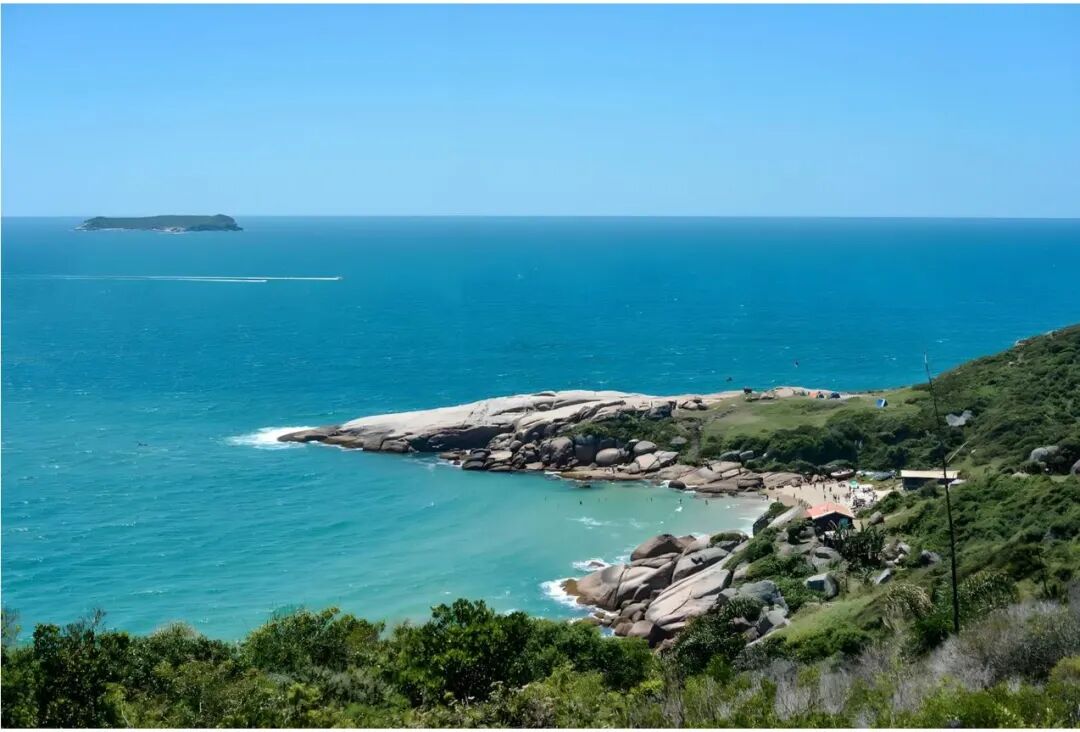 🔥 Watermarked effect is as follows:
 ☘️ Watermark before:
 🔥 Watermarked effect is as follows:
 ☘️ Watermark before:
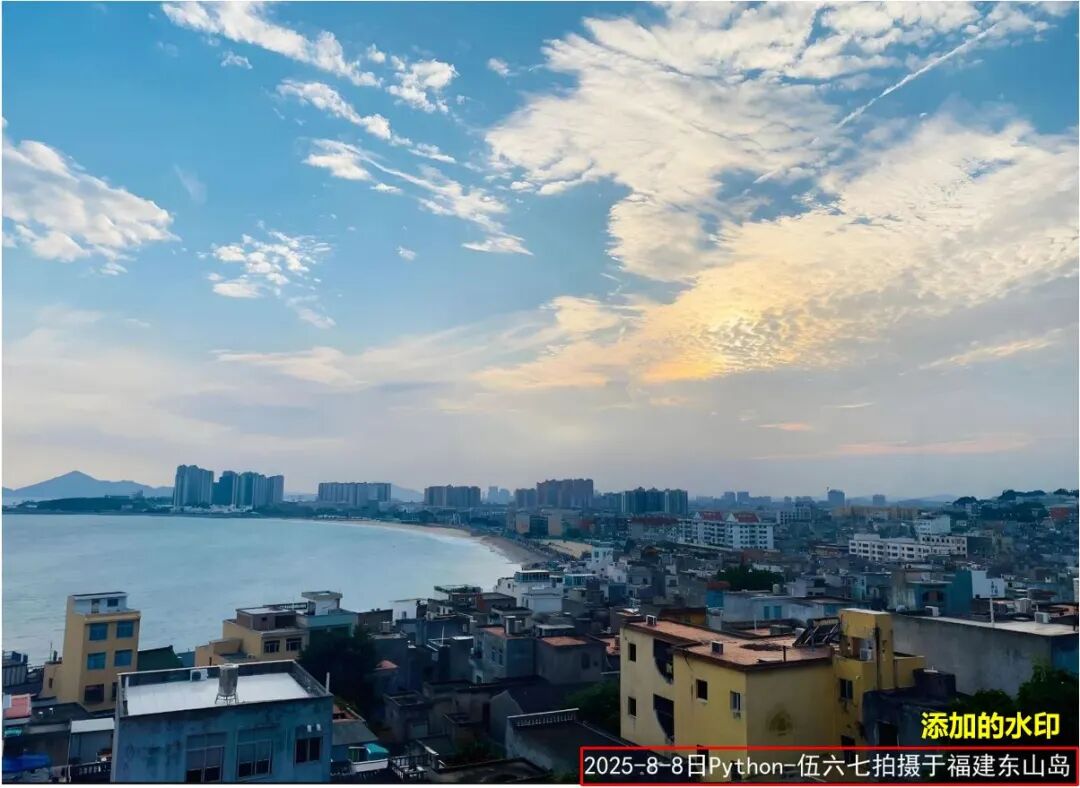 🔥 Watermarked effect is as follows:
📈 With the above code, the program can automatically read the files and each photo, and add your designed watermark (you can specify font style, size, icon, etc.) at lightning speed, greatly improving efficiency!
🗂️ Case 2: Add an “Anti-Theft” Watermark
📸 Image data: placed in the folder to be processed
If there are 2 personal portrait photos to be posted on a public account, but you don’t want them to be randomly used or stolen.
✨ Requirement: Add an anti-theft watermark to the portrait photos
Watermark style: Add content diagonally in the photo: “ For public account use, no reprinting allowed!”“
Function Code:
# Set watermark parameters
watermark_text = "For public account use, no reprinting allowed!"
image_folder = "images1"  # Original image folder
output_folder = "watermarked_images"  # Output folder
watermark_spacing = 70  # Watermark spacing
angle = 30  # Watermark tilt angle

# Pre-create a rotated watermark text image (dark watermark)
text_img = Image.new("RGBA", (500, 100), (0, 0, 0, 0))
text_draw = ImageDraw.Draw(text_img)
# Use color: gray (150,150,150) and transparency (220/255)
text_draw.text((0, 0), watermark_text, font=font, fill=(150, 150, 150, 255))
rotated_text = text_img.rotate(angle, expand=1)  # Rotate watermark
rotated_width, rotated_height = rotated_text.size

# Process all images
for filename in os.listdir(image_folder):
        # Create watermark layer and add tilted watermark
        watermark = Image.new("RGBA", img.size, (0, 0, 0, 0))
        # Loop to add watermark, starting from negative coordinates to ensure full coverage
        for y in range(-rotated_height, img.size[1], rotated_height + watermark_spacing):
            for x in range(-rotated_width, img.size[0], rotated_width + watermark_spacing):
                watermark.paste(rotated_text, (x, y), rotated_text)
        # Merge watermark and original image, convert back to RGB mode and save
        Image.alpha_composite(img, watermark).convert("RGB").save(
            os.path.join(output_folder, filename)
        )
☘️ Watermark before: 🔥 Watermarked effect is as follows:
 ☘️ Watermark before:
 🔥 Watermarked effect is as follows:
📈 With the above code, the program can automatically read each photo, add a custom anti-theft watermark, and you can adjust the content, depth, and angle as you wish!
Key Code Explanation:
① Set watermark text: You can change watermark_text to your name or any text you want to display.
② Set font and size: Here, the arial.ttf font is used. If you don’t have this font file, you can use a system-provided font or download one, and the size can be adjusted according to the image.
③ Folder path: Place your images in the images folder, and the script will automatically process these images and save the watermarked images to the output folder.
④ Watermark position: The watermark is by default placed in the lower right corner of the image; you can adjust the position as needed.
⑤ Watermark style: The watermark color is white (RGB: 255,255,255), and the transparency is 220 (range 0-255, 0 is completely transparent, 255 is completely opaque). You can adjust the color and transparency by modifying the fill parameter value.
💡 Notes
1. Watermark transparency: Adjust the transparency of the watermark to make it look more natural, and not too conspicuous.
2. Watermark size: The watermark size should not be too large, otherwise it will cover important content of the image.
3. Watermark position: Try to place the watermark in a position that does not significantly affect the main subject of the image, such as a corner.
4. Batch processing: Choose the right images; this script can handle them all at once, saving time and effort.
🏁 Conclusion
👉 Is it super easy to batch watermark images with Python?
👉 Save this article for easy reference when needed.
👉 Follow me, in the next issue, I will teach you how to add exclusive date and location watermarks to different photos, instantly handling hundreds of photos!
🌟 Appendix: Get the Complete Code
Click the little heart❤ and reply 「Photo Watermark」 to get the example code~
(PS: If you have any questions, feel free to leave a message in the comments for discussion)


👇Click to read previous articles
1. One-click merge Excel with Python, say goodbye to copy-paste, a must-have skill for workers!2. Don’t group manually in Excel anymore! Use Pandas for automatic grouping, fast and accurate!3. Don’t use VLOOKUP anymore! Use Python to match Excel data in one click, efficiency skyrockets!4. Pandas + Excel: Data filtering, VLOOKUP, pivoting, formulas, and plotting all in one case5. Generate QR codes with Python: Custom backgrounds, logos, and styles, batch generation super practical case!6. Manipulate PDFs with Python: Text extraction/image capture/PPT conversion techniques (with complete code)7. C drive space insufficient? Just 3 steps, easily expand with EaseUS Partition Master!8. Python code comments: Pay attention to these details to make your code clear at a glance!9. The 8 most commonly used time-date processing scenarios in Python (time & datetime)10. The 4 major containers in Python: Differences between lists, tuples, dictionaries, and sets11. The Miniconda package management tool for Python: A beginner’s guide12. Capture camera images with Python for AI recognition (IV): Implementation of AI flame automatic warning13. Automatically send graphic, file, audio, and video messages on WeChat with Python implementation guide