Author: Beihang University 2nd Department of Science and Technology Practice (Click Me)
Arduino, as a convenient, flexible, and easy-to-use open-source electronic prototyping platform, is popular among various groups of people. We will launch a series of Arduino learning posts to help you quickly master this increasingly popular microcontroller. Our “Arduino Learning Series: Getting Started with Arduino” will guide everyone to understand Arduino, starting with the simplest “Hello World!” program, helping you step into the world of Arduino.
1. Microcontrollers and Arduino

1. What is a microcontroller?
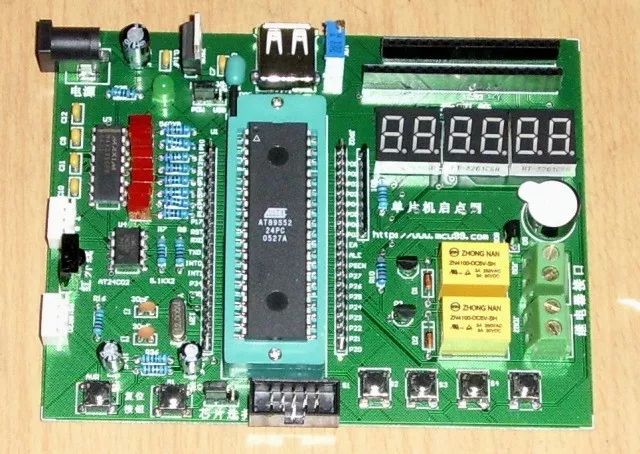
In simple terms, a microcontroller is an integrated chip, but the functions of this integrated chip require us to write programs to control and implement. It integrates circuits with data processing capabilities such as CPU, RAM, ROM, various I/O ports, terminal systems, timers/counters, etc., onto a silicon chip, forming a small but complete microcomputer system.
As microcontrollers have developed to the present, their family now includes members such as 51, MSP430, TMS, STM32, PIC, AVR, STC, etc. Each member is further divided into many different series, making it overwhelming in the market. The reason for its development into such a scale is closely related to its compactness, flexibility, and powerful functions. These characteristics have made microcontrollers indispensable in the system-on-chip field. Its wide application can be found in smart instruments, automatic control, household appliances, medical equipment, and various fields. It can be said that our world has long been inseparable from microcontrollers.

2. What is Arduino?
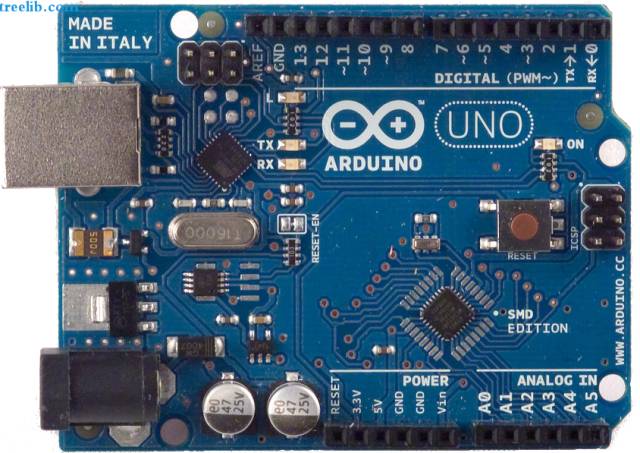
Arduino is a type of microcontroller, a very unique one. Strictly speaking, Arduino is a convenient, flexible, and easy-to-use open-source electronic prototyping platform. The term open-source means that anyone can modify and develop its technology, whether hardware or software. It is this philosophy that has made Arduino increasingly popular and well-received among different groups of people.
Compared to ordinary microcontrollers, Arduino is more beginner-friendly due to its extensive, highly integrated standard library functions, making it particularly suitable for students and hobbyists. Learning Arduino microcontroller can be done without needing to understand its internal hardware structure and register settings; one can have no hardware knowledge at all, and even the software knowledge requirement is minimal—users only need a basic understanding of C language to write beautiful and powerful Arduino code by referring to the function library. Additionally, its low cost is a major feature, so there is no need to hesitate about the learning cost. Of course, Arduino has many more advantages, which we will not list here.
2. The software to control Arduino—Arduino IDE
01
Downloading and Installing Arduino IDE.
Because Arduino is completely open-source, its IDE can be directly downloaded for free from the official website (http://arduino.cc/en/main/software). The IDE has versions for Windows, OS X, and Linux, and readers can download according to their needs. This article will take Windows as an example to explain the installation of Arduino IDE.
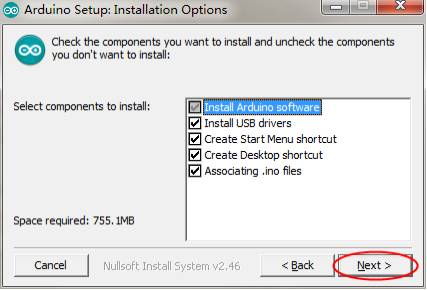
First, obtain the standard .exe file of the IDE from the official website, double-click to run it, and open the installation wizard for Arduino IDE. Follow the wizard’s prompts to proceed, and note that when selecting installation content, you must choose the “install USB drivers” option, as shown in the figure below, to ensure normal use after connecting the microcontroller.
02
Introduction to the Arduino IDE Interface
After opening the IDE, you will find the following interface, with commonly used button functions as shown in the figure.
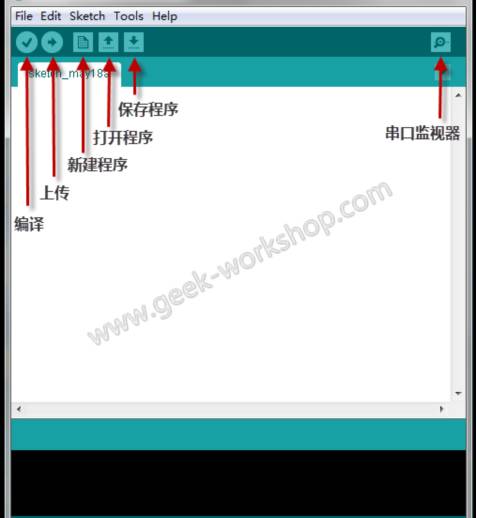
Compile: Compiles the written program to ensure there are no syntax errors.
Upload: Uploads/burns/downloads the program to the microcontroller board for application.
Create New Program, Open Program, Save Program: Functions as named.
The remaining menu functions are quite simple, and we will gradually cover them as we delve deeper into learning, so we will not elaborate here.
3. Taking the First Step in Learning—Hello World!
01
First Attempt
Initially using the Arduino development board, we will use the “Hello World!” example to lead everyone into the magical world of microcontrollers.
The function of this example is to communicate with the computer via the serial port and continuously send the string “Hello world!” to the computer, displaying it on the monitor. If you do not understand serial communication, don’t worry; we will introduce it in later chapters. For now, just follow the steps to experience the basic steps of Arduino development.
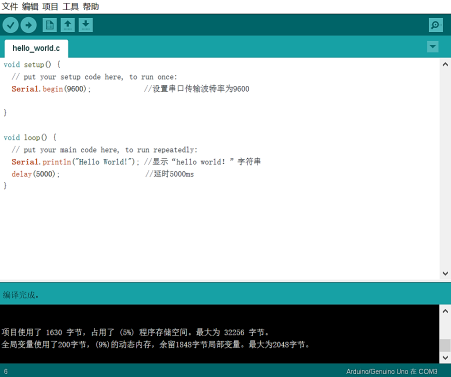
As shown in the figure, input the program into the editing area, then click verify to compile the program and ensure it is correct.
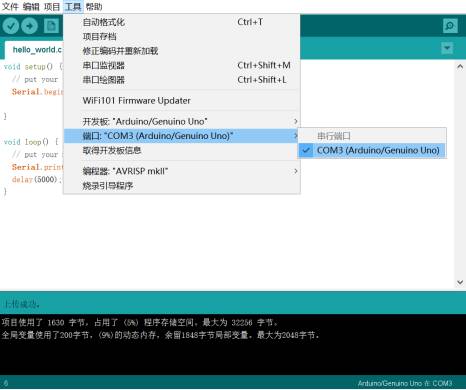
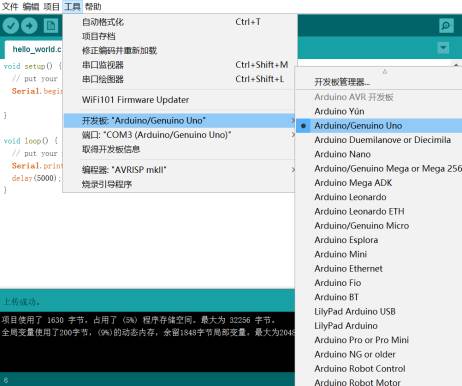
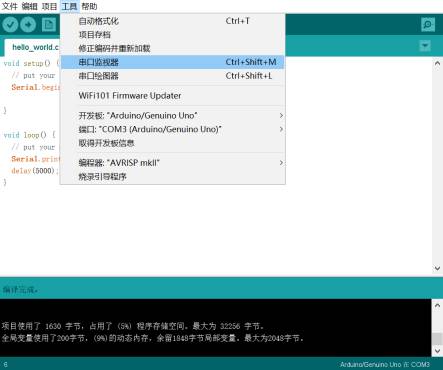
In the menu bar, select “Tools” -> “Port” to configure the serial port number connected to the development board (i.e., the serial port number connecting the current computer to the microcontroller); then select “Tools” -> “Board” to choose the board model.
Since we are using the Uno development board distributed by the school, we select the “Arduino/Genuino Uno” option, as shown in the figure below. It should be noted that these two steps are very important and essential; the correctness of the configuration will directly affect whether the program can be successfully uploaded to the board.
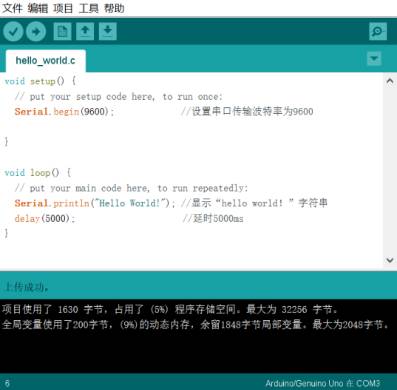
After configuring, click the upload button, and once you see the “Upload Successful” message, the program has been burned onto the development board and is running.
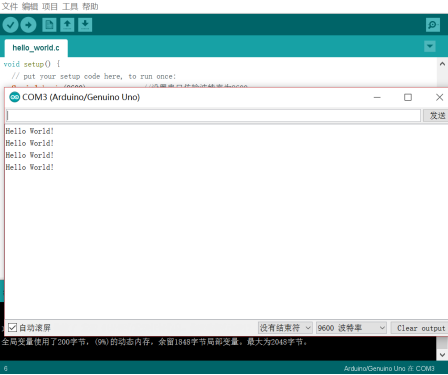
Although the program has been successfully burned onto the development board and is running, we still cannot see the program’s running results. This is because serial communication needs to be monitored through a dedicated serial monitor. Fortunately, the Arduino IDE has integrated a serial monitor, so we do not need to download it separately.
As shown in the figure below, select “Tools” -> “Serial Monitor” to open the serial monitor, and you will see the screen continuously refreshing “Hello World!”, which also indicates that our first project has been perfectly successful.
02
Explanation of the “Hello World!” Program
Through imitation and execution of the example, we can easily find that at the beginning of learning, the first thing to master is how to write a program that can be compiled and uploaded. Let’s analyze the structure of an Arduino program.
In standard C language, the main function is the entry point of the program. However, upon observing an Arduino program, we find that there is no main function; instead, there are setup and loop functions. As the name suggests, the setup function is for some initial preparations at the beginning of the program’s execution; it initializes variables or interfaces and only runs once; while the loop function, as the name implies, is for looping, functioning similarly to a do…while(1) loop, meaning it runs indefinitely. Thus, the program in this example can be translated as:
void setup() { // The following content is for initialization
Serial.begin(9600); // Set the serial port baud rate to 9600
}
void loop() { // The following content runs indefinitely:
Serial.println(“Hello World!”); // Send “Hello World!” via serial and print
delay(5000); // Delay for 5000ms
}
This is the basic structure of an Arduino program. As for the knowledge of serial, baud rate, delay, etc., don’t worry; we will explain them in subsequent tutorials. We look forward to your continued attention!
Produced by Beihang University Electronic Science and Technology Association
Planning/ Hou Fuchao
Copywriting/ Zhou Bowen, Liang Jiawei, Hou Fuchao
Editing/ Hou Xiaopeng