Authorized reprint from the public account CVPy (ID: x-cvpy)
With the arrival of Christmas, many people are tagging the official WeChat account to add a Christmas hat to their profile pictures. Of course, this can be done with many photo editing software. However, as someone learning image processing, I believe it is necessary to write a program to accomplish this task. Moreover, this can serve as a small project to practice, requiring minimal effort and being quite interesting.
Tools Used
-
OpenCV (after all, our main content is OpenCV…)
-
dlib (as mentioned in the previous article, dlib’s face detection is more effective than OpenCV, and dlib has keypoint detection that OpenCV lacks.)
The programming language used is Python. However, it can easily be converted to C++. Due to time constraints, I won’t write that version. Interested friends can use this as practice.
Process
1. Material Preparation
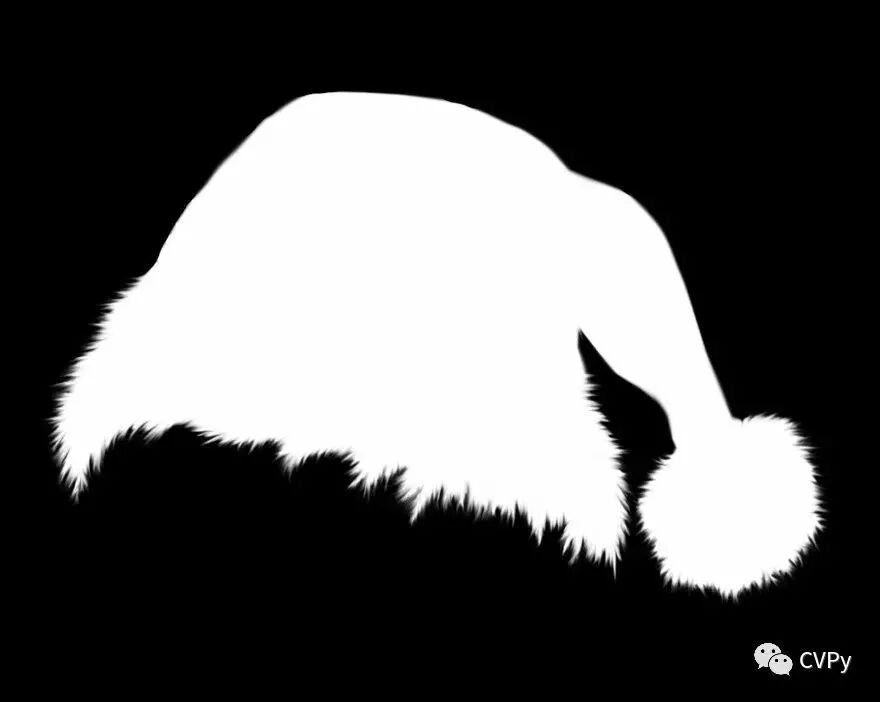
First, we need to prepare a material for the Christmas hat, preferably in PNG format, as we can directly use the Alpha channel as a mask. The Christmas hat we will use is shown below:

By separating the channels, we can obtain the alpha channel of the Christmas hat image. The code is as follows:
r,g,b,a = cv2.split(hat_img)
rgb_hat = cv2.merge((r,g,b))
cv2.imwrite("hat_alpha.jpg",a)
To perform operations with the RGB channel of the profile picture, we combine the RGB three channels into a single RGB color hat image. The alpha channel image is shown below.
2. Face Detection and Facial Keypoint Detection
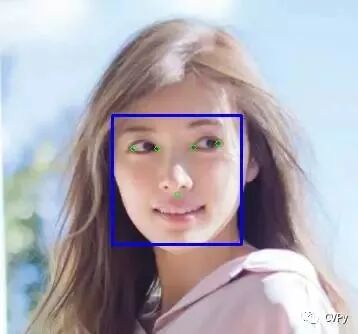
We will use the following image as our test image.

Next, we will use dlib’s frontal face detector for face detection and extract five keypoints of the face using the model provided by dlib. The code is as follows:
# dlib face keypoint detector
predictor_path = "shape_predictor_5_face_landmarks.dat"
predictor = dlib.shape_predictor(predictor_path)
# dlib frontal face detector
detector = dlib.get_frontal_face_detector()
# Frontal face detection
dets = detector(img, 1)
# If a face is detected
if len(dets) > 0:
    for d in dets:
        x,y,w,h = d.left(),d.top(), d.right()-d.left(), d.bottom()-d.top()
        # x,y,w,h = faceRect
        cv2.rectangle(img,(x,y),(x+w,y+h),(255,0,0),2,8,0)
        # Keypoint detection, 5 keypoints
        shape = predictor(img, d)
        for point in shape.parts():
            cv2.circle(img,(point.x,point.y),3,color=(0,255,0))
        cv2.imshow("image",img)
        cv2.waitKey()
The effect of this part is shown in the image below:
3. Adjusting the Size of the Hat
We select the points of the outer corners of the eyes to find the center as the reference coordinate for placing the hat in the x-direction, while the y-coordinate is represented by the y-coordinate of the top line of the face rectangle. Then, we adjust the size of the hat based on the size of the detected face to ensure the hat fits appropriately.
# Select the outer corners of the eyes
point1 = shape.part(0)
point2 = shape.part(2)
# Calculate the center of the two points
eyes_center = ((point1.x+point2.x)//2,(point1.y+point2.y)//2)
# cv2.circle(img,eyes_center,3,color=(0,255,0))
# cv2.imshow("image",img)
# cv2.waitKey()
# Adjust the size of the hat based on the face size
factor = 1.5
resized_hat_h = int(round(rgb_hat.shape[0]*w/rgb_hat.shape[1]*factor))
resized_hat_w = int(round(rgb_hat.shape[1]*w/rgb_hat.shape[1]*factor))
if resized_hat_h > y:
    resized_hat_h = y-1
# Adjust the size of the hat based on the face size
resized_hat = cv2.resize(rgb_hat,(resized_hat_w,resized_hat_h))
4. Extracting the Hat and the Area to Add the Hat
As previously mentioned, we use the Alpha channel as a mask and invert it. These two masks are used to extract the hat area from the hat image and to leave the area in the person’s image where the hat needs to be filled. You will see this later.
# Use the alpha channel as a mask
mask = cv2.resize(a,(resized_hat_w,resized_hat_h))
mask_inv =  cv2.bitwise_not(mask)
# Extract the area where the hat needs to be added from the original image, using bitwise operations.
# Offset of the hat relative to the top line of the face rectangle
dh = 0
dw = 0
# Original image ROI
# bg_roi = img[y+dh-resized_hat_h:y+dh, x+dw:x+dw+resized_hat_w]
bg_roi = img[y+dh-resized_hat_h:y+dh,(eyes_center[0]-resized_hat_w//3):(eyes_center[0]+resized_hat_w//3*2)]
# Extract the area to place the hat from the original image ROI
bg_roi = bg_roi.astype(float)
mask_inv = cv2.merge((mask_inv,mask_inv,mask_inv))
alpha = mask_inv.astype(float)/255
# Ensure both sizes are consistent before multiplication (may be inconsistent due to rounding)
alpha = cv2.resize(alpha,(bg_roi.shape[1],bg_roi.shape[0]))
# print("alpha size: ",alpha.shape)
# print("bg_roi size: ",bg_roi.shape)
bg = cv2.multiply(alpha, bg_roi)
bg = bg.astype('uint8')
The background area (bg) is shown in the image below. You can see that it perfectly matches the area where the hat needs to be filled.
Next, we extract the hat area.
# Extract the hat area
hat = cv2.bitwise_and(resized_hat,resized_hat,mask = mask)
The extracted hat area is shown in the image below. The hat area perfectly complements the previous background area.

5. Adding the Christmas Hat
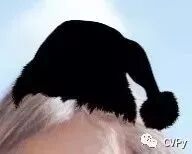
Finally, we add the two areas together and place them back into the original image to obtain the desired Christmas hat image. It is important to ensure that both areas are resized to match in size before adding, as they may be inconsistent due to rounding.
# Ensure both sizes are consistent before adding (may be inconsistent due to rounding)
hat = cv2.resize(hat,(bg_roi.shape[1],bg_roi.shape[0]))
# Add the two ROI areas together
add_hat = cv2.add(bg,hat)
# cv2.imshow("add_hat",add_hat)
# Place the area with the added hat back into the original image
img[y+dh-resized_hat_h:y+dh,(eyes_center[0]-resized_hat_w//3):(eyes_center[0]+resized_hat_w//3*2)] = add_hat
The final result image is shown below.

Wishing everyone a Merry Christmas! As many have said, years ago, forwarding QQ messages could earn you a QQ membership, and now forwarding to WeChat’s official account still fools the same group of people. Perhaps we just want to believe in this beautiful story. May we return as youth many years later.
The complete code can be found at the GitHub address:
https://github.com/LiuXiaolong19920720/Add-Christmas-Hat

Previous Exciting Articles
Click the image to read
This MIT Autonomous Driving Course Allows You to Build Your Own “Driverless Car” (Translated Video)