In our daily work, as business data continues to grow, we often face the issue of insufficient disk space on the host. In the short term, we generally delete redundant files such as logs to temporarily free up space, while the long-term solution is to expand the server’s disk capacity. This is especially true in data centers where many disks have a capacity greater than 2TB. In such cases, how to partition large disks for system expansion is a common problem encountered by many. This article mainly discusses how to use parted to partition large disks.
First, we need to locate the large disk that needs to be operated on. For physical machines, verify the disk serial number and capacity; for virtual machines, add the disk and verify its capacity and device name. It is crucial to check this information carefully in a production environment to avoid failures that could impact normal operations. This article takes the common case of expanding a virtual machine disk as an example.
First, log into the system and use the following command to check the current distribution of system disks:
fdisk -l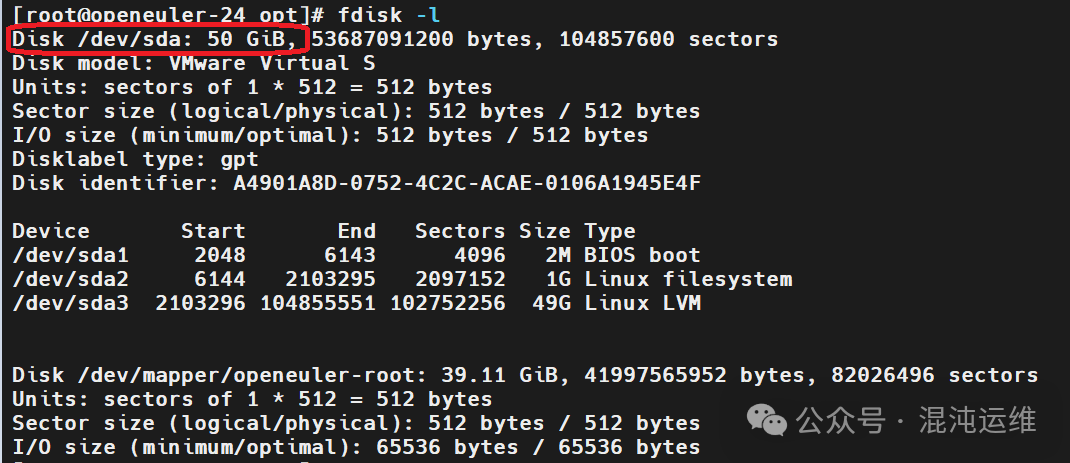
We can see that the system currently has only one disk named /dev/sda, and no new disks have been detected. At this point, we can use the following command to make the system recognize the newly added disk without rebooting.
echo "- - -" > /sys/class/scsi_host/hostX/scan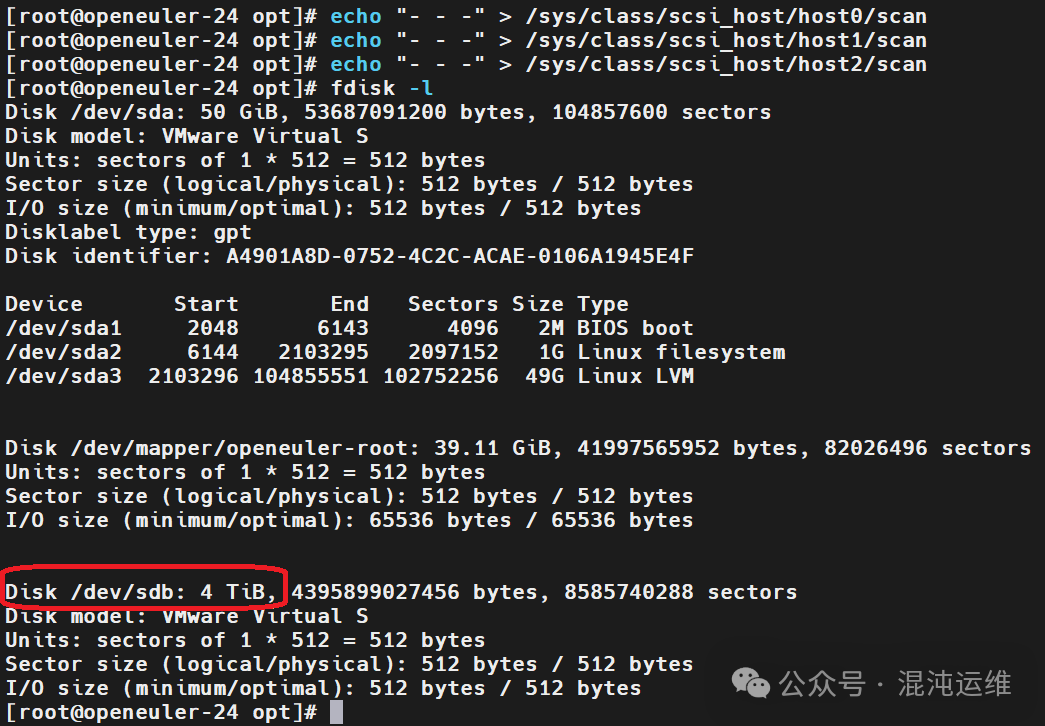
We can see that a new disk has appeared in the system, named /dev/sdb. Now we can start partitioning the sdb disk using the parted command.
parted /dev/sdbFor large disks, we need to convert it to GPT format.
mklabel gpt Use print to check if the result is gpt.
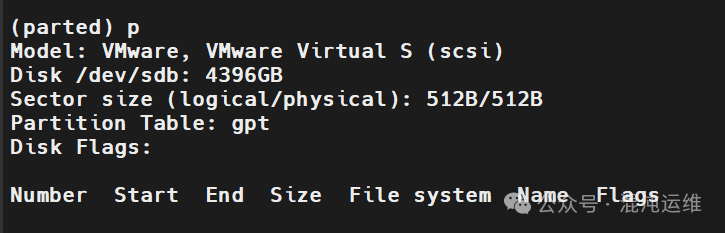 Use mkpart to start creating partitions, entering the following information in sequence:Partition name: sdb1File system type: xfsStart position: 1End position: 4396GB
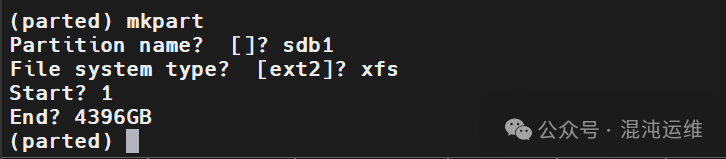 To facilitate future disk expansion, set it as LVM, thenprint to save the current partition operation.toggle 1 lvm
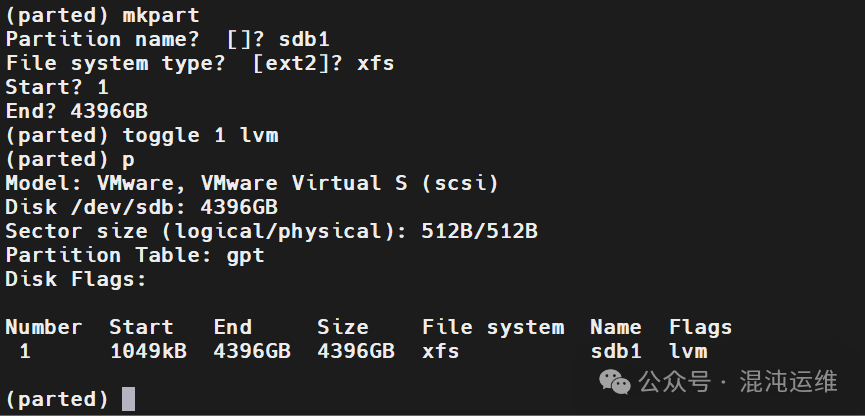 Then exit with quit and use partprobe to update the partition table information.
 Next, use the following commands to create LVM.
# Create physical partition
pvcreate /dev/sdb1# Check the creation result
pvdisplay# Create volume group, named vg01
vgcreate vg01 /dev/sdb1# Check volume group information
vgdisplay# Create logical partition, allocating all space
lvcreate -l 100%VG -n lvdata vg01# Check the created logical volume information
lvdisplay# Format the logical volume
mkfs.xfs /dev/vg01/lvdata# Create mount directory data in the system
mkdir -p /dataMount the partition to the /data directory
mount /dev/mapper/vg01-lvdata /data# Write the mount information to the /etc/fstab file to avoid losing mount information after the next host reboot.
echo "/dev/mapper/vg01-lvdata /data xfs defaults 0 0" >> /etc/fstab
df -Th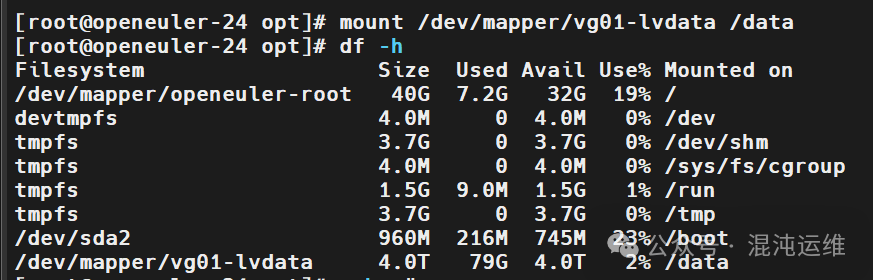
Finally, use the commands cat /etc/fstab and lsblk -lf to verify the information.
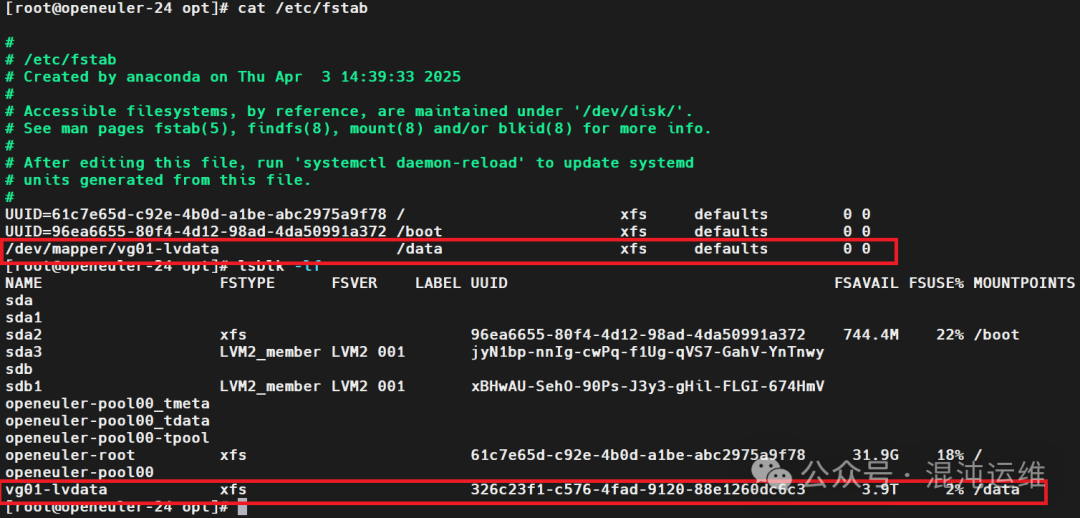
At this point, the newly added large disk has been successfully expanded.