
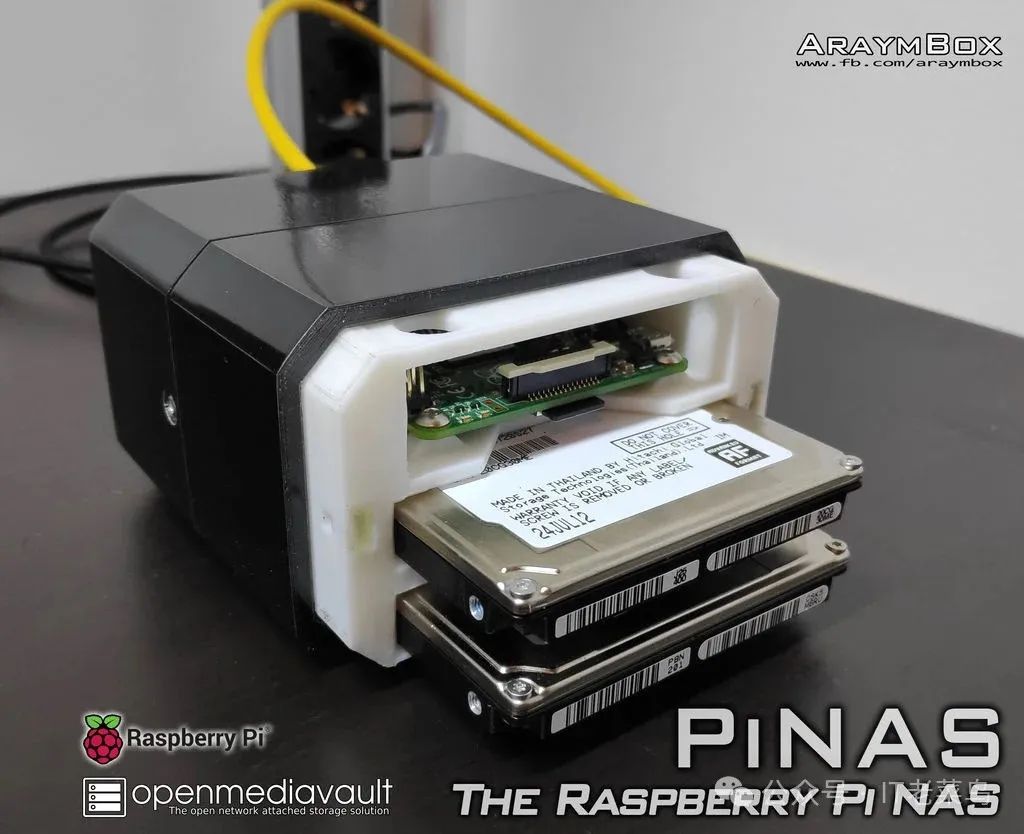
- 1x Raspberry Pi 3 or 4
- 1x micro SD Card – 8GB or 16GB [$5.79]
- USB micro splitter [$6.99]
- SATA to USB converter [$7.99] x 2
- 2.5″ hard drive x 2
- Raspberry Pi power supply (5V / min. 2A) [$9.99] x 1
- Cables
- 4x screws: M3x8mm
- 4x screws: M3x6mm
- 4x nuts: M3 square
- Soldering tools
- Screwdriver
- Hot glue gun
- 3D printer or 3D printing service
The bolts and nuts are made according to Aramybox’s case design. If you are creating your own case and making adjustments that might affect the specifications of the bolts and nuts, you may need to disregard the listed bolts and nuts and just obtain ones suitable for your design.
Case Design
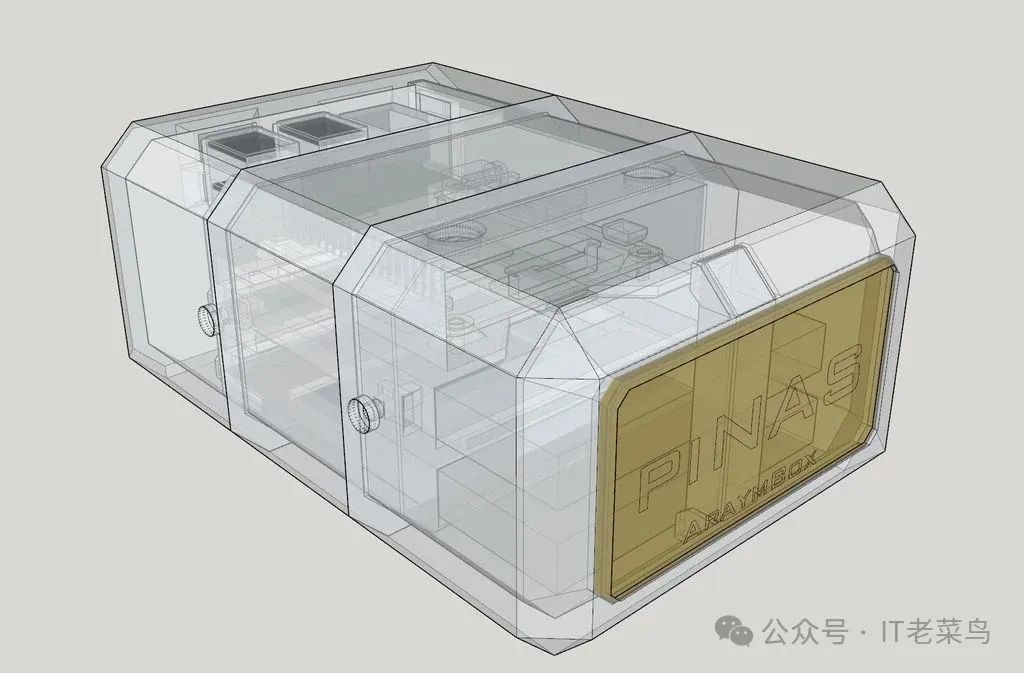
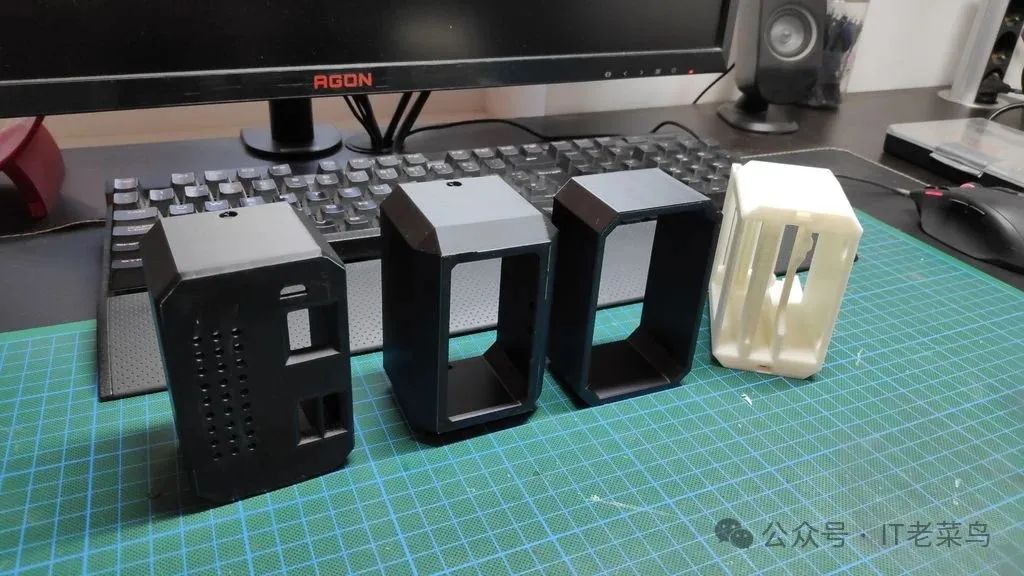
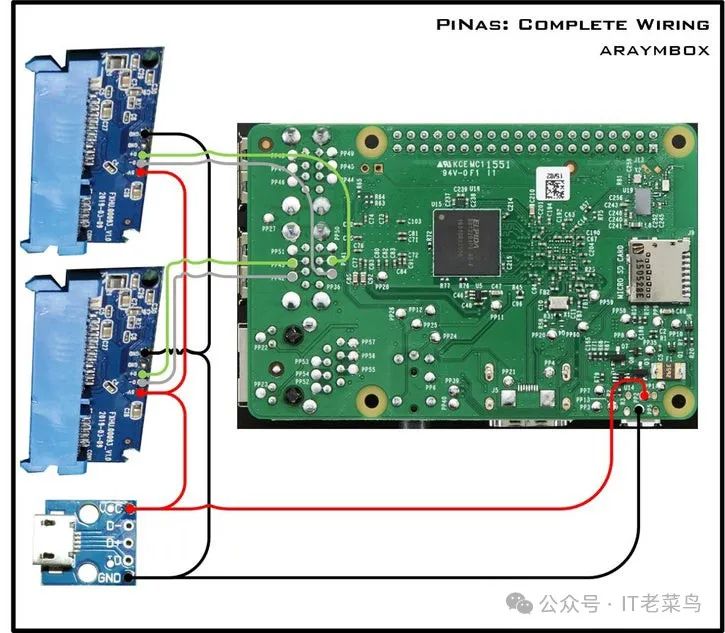
You can choose to use male/female pins instead of directly soldering wires to the SATA interface. This is just for neatness.
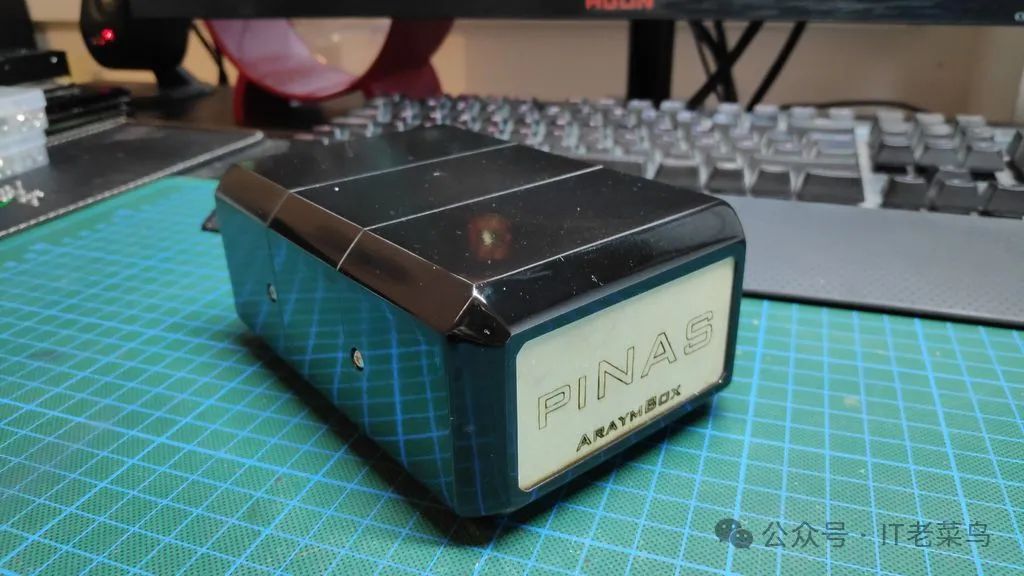
The configuration after connecting all components should look as follows.
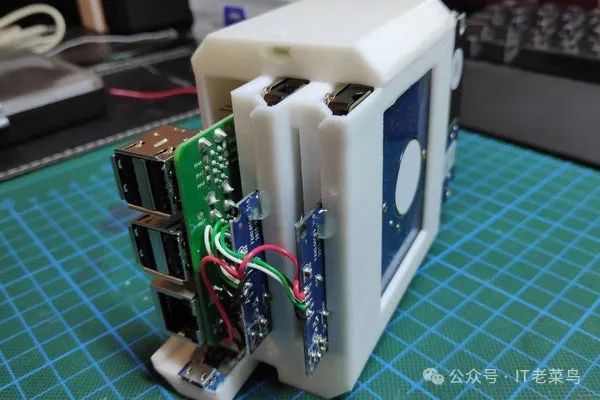
To give our device NAS functionality, we will use a modified version of Raspberry Pi OS, namely Open Media Vault, as the main control for the project.
First, we will burn the image of the Open Media Vault operating system onto the SD card. Now, I assume you already know how to use tools like Balena (for macOS and Windows users) to burn the Raspbian operating system onto the SD card. If you are new to this task, you can check our related tutorials online.
Once the SD card is successfully flashed with the operating system, install the card into the Pi’s slot, connect the Pi to the network via an Ethernet cable, and then power on the system. During the first boot setup, it is recommended to connect a monitor to the Pi. This will allow you to access important information like the IP address, username, and password.
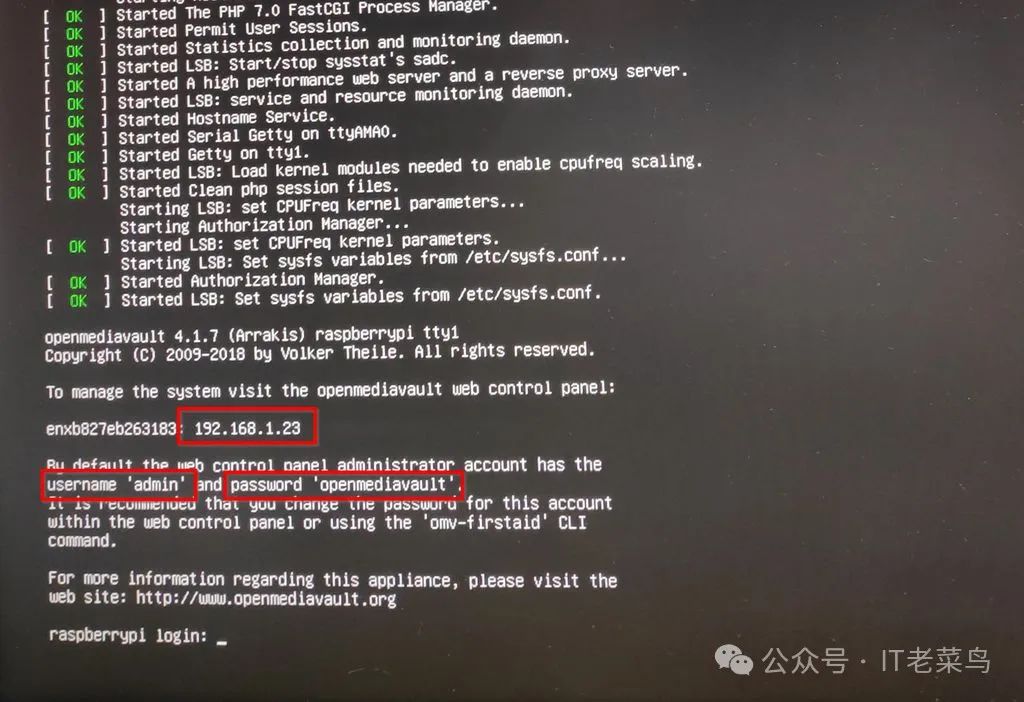
With this information, you can now disconnect the Pi from the monitor and continue configuring Open Media Vault. There are 5 main parts to configure in Open Media Vault:
- ✔️ System
- ✔️ Storage
- ✔️ Access Management
- ✔️ Services
- ✔️ Diagnostics
2. Enter the IP address of PiNAS in the browser’s address bar.
3. You should now see the login screen for Open Media Vault.
4. Enter your username and password, then click “Login”.
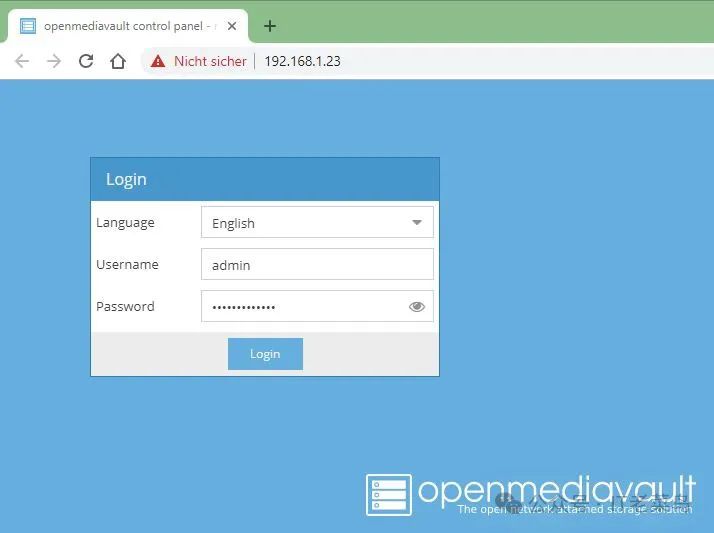
5. After successfully logging in, start the configuration from the system settings.
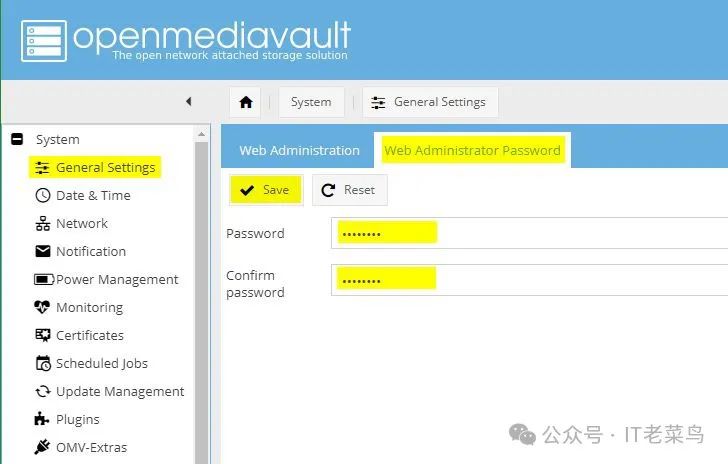
6. For system configuration, we start with security. To ensure security, be sure to reset the password and username to something you can remember. On the page that appears, click on the network administrator password panel and fill in the new password. Click the save button.
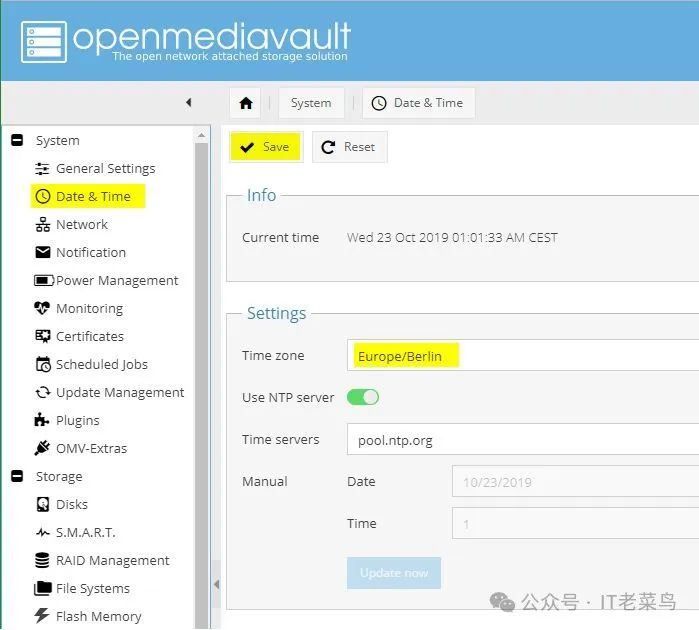
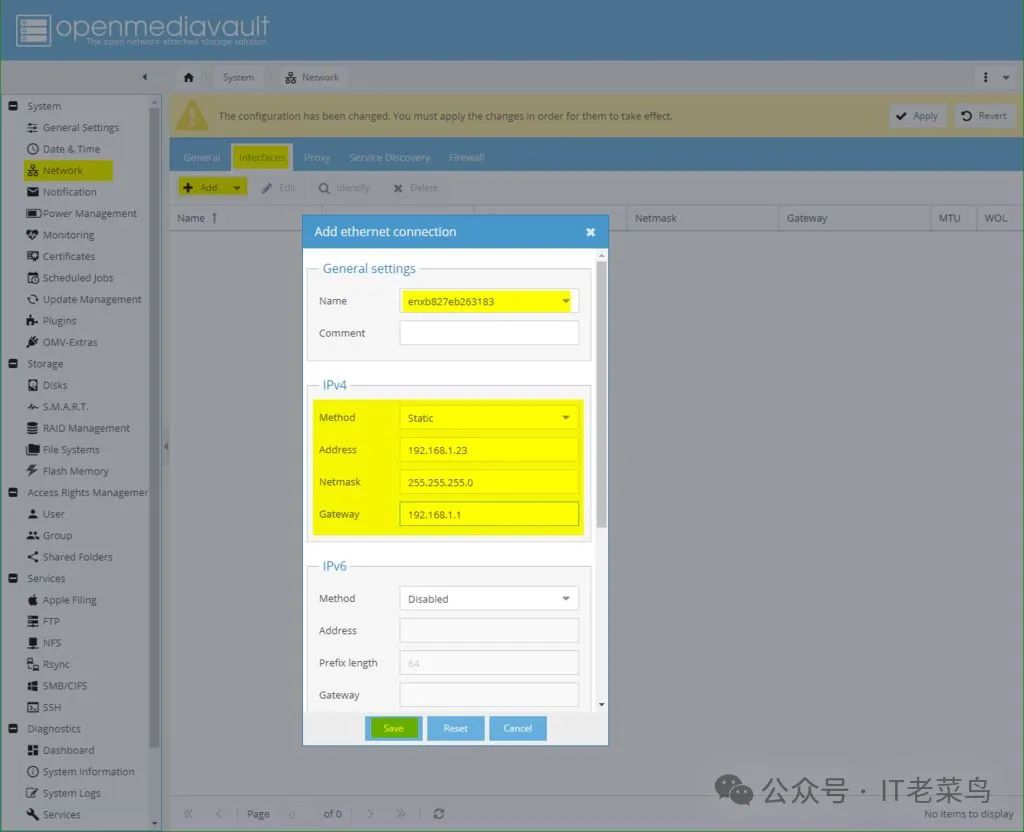
9. Next, we will configure the parameters related to “Storage”. Under “Storage”, we will set up disks, RAID management, and file systems for easy addressing.
Disks
1. Click on the “Disks” button
2. Make sure both disks are recognized and listed on the results page
3. Perform the following steps for both disks:
i. Select the disk, click edit, and enable write caching.
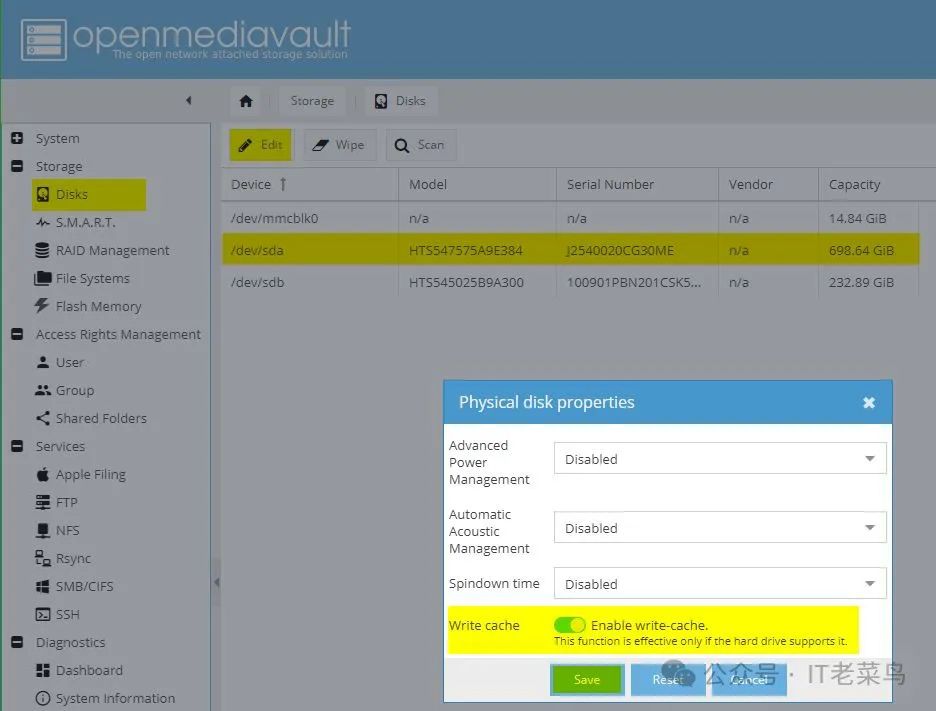
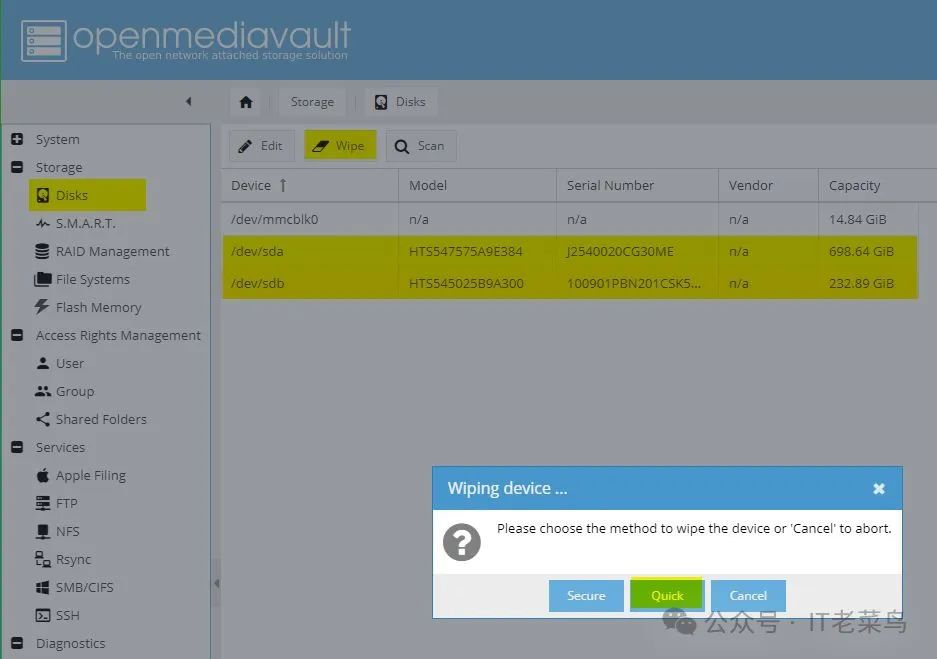
RAID Management
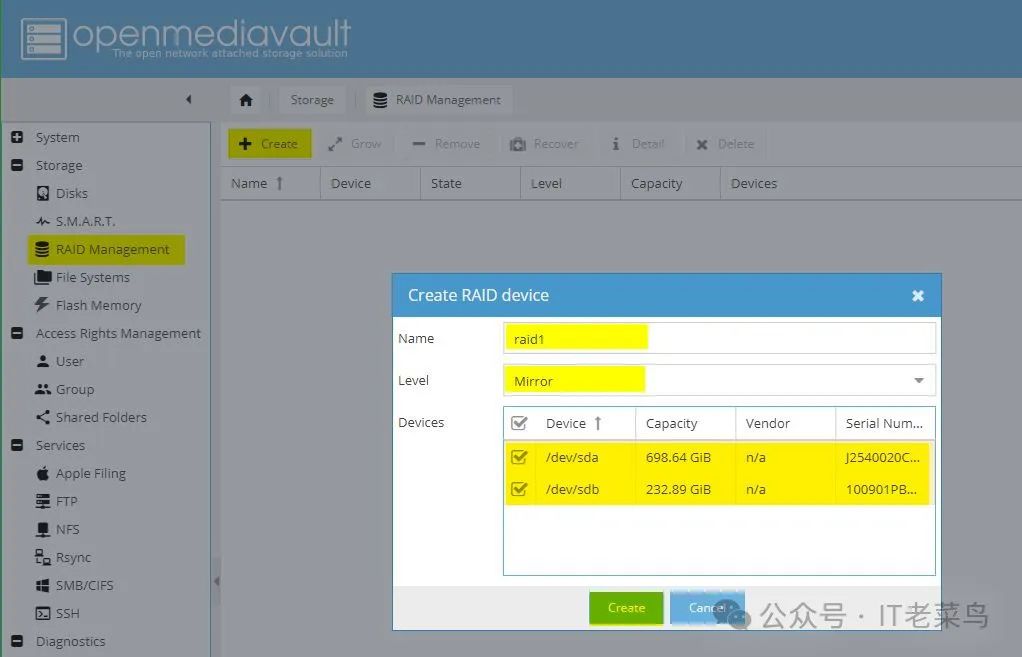
1. In the dropdown menu on the right, select RAID() management, then click the create button.
2. In the window that appears, fill in the RAID name (e.g., raid1), RAID level (e.g., mirroring (RAID level 1)), select the devices to add to the RAID (select both disks), and other parameters.

File System
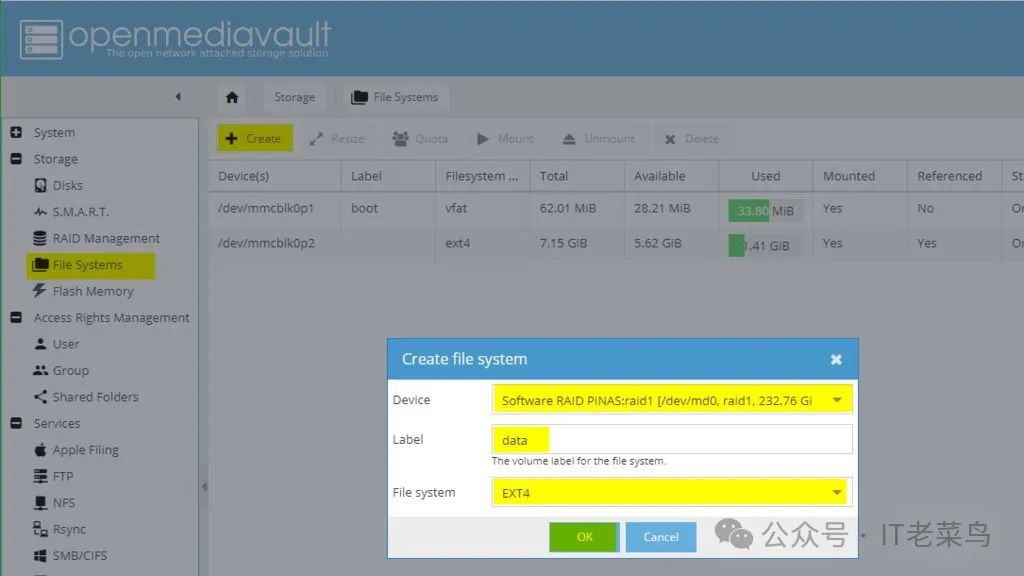
1. In the dropdown menu on the right, select File System, then click the create button.
2. Select your device, in this case, it should be the previously created “raid1” (or whatever name you gave it)
3. Give your file system a label for easy identification
4. Choose the type of file system you want
6. Wait for the file system to finish initializing (the status must be online)
7. Select the initialized file system and click mount to make it available
Next, we will proceed with the configuration related to access management. For this, we will create users and user groups to allocate access permissions. We will also create shared folders so that files on the PiNAS can be accessed just like files on a PC.
Accessing the file system requires user accounts.
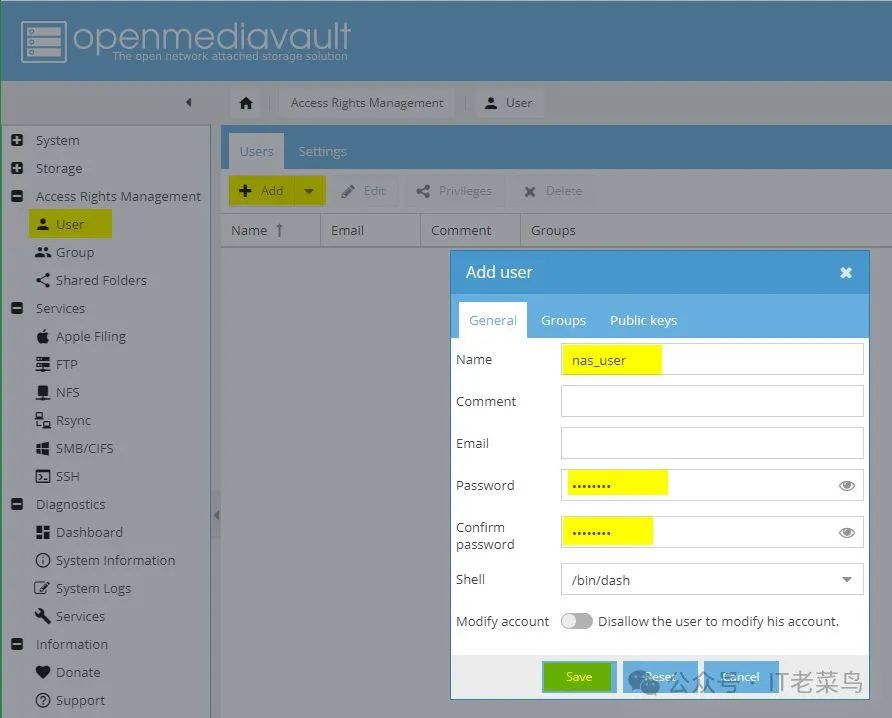
1. Expand the “Access Management” dropdown menu and click on the “Users” tab.
2. Click “Add” to create a new user, fill in the name and password in the pop-up window, and click the “Save” button when done.
User groups can easily manage access permissions. For example, you can restrict multiple users’ access to their group. Follow the steps below to create a user group.
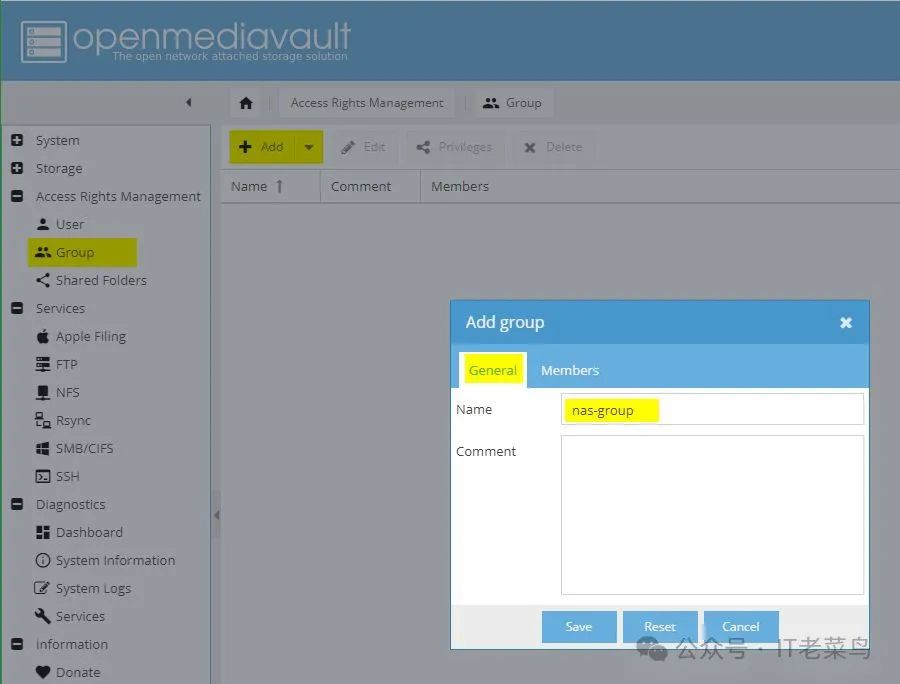
1. Click on the “Groups” tab under “Access Management”.
3. In the pop-up window, enter a group name of your choice.
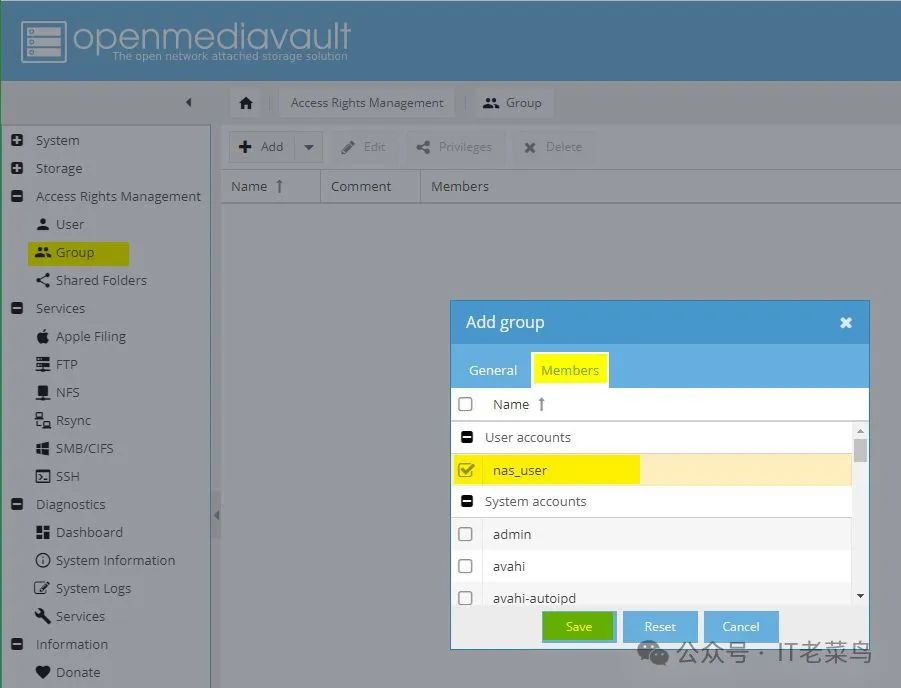
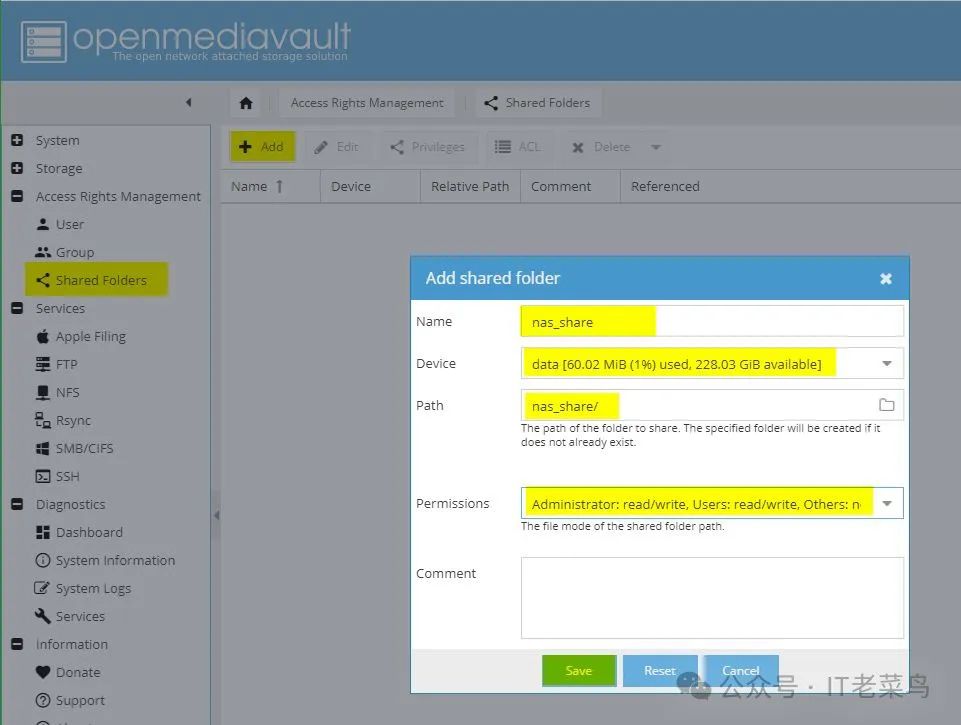
2. In the pop-up window, click “Add” to create a new shared folder.
3. Enter the name of the new shared folder (this name will connect to other machines).
4. Select the device to create the shared folder on (the previously created file system).
5. Choose or enter the path for the shared folder.
6. Set the desired permissions for the shared folder (more permissions will be set in the next step).
7. Click “Save” to create the shared folder.
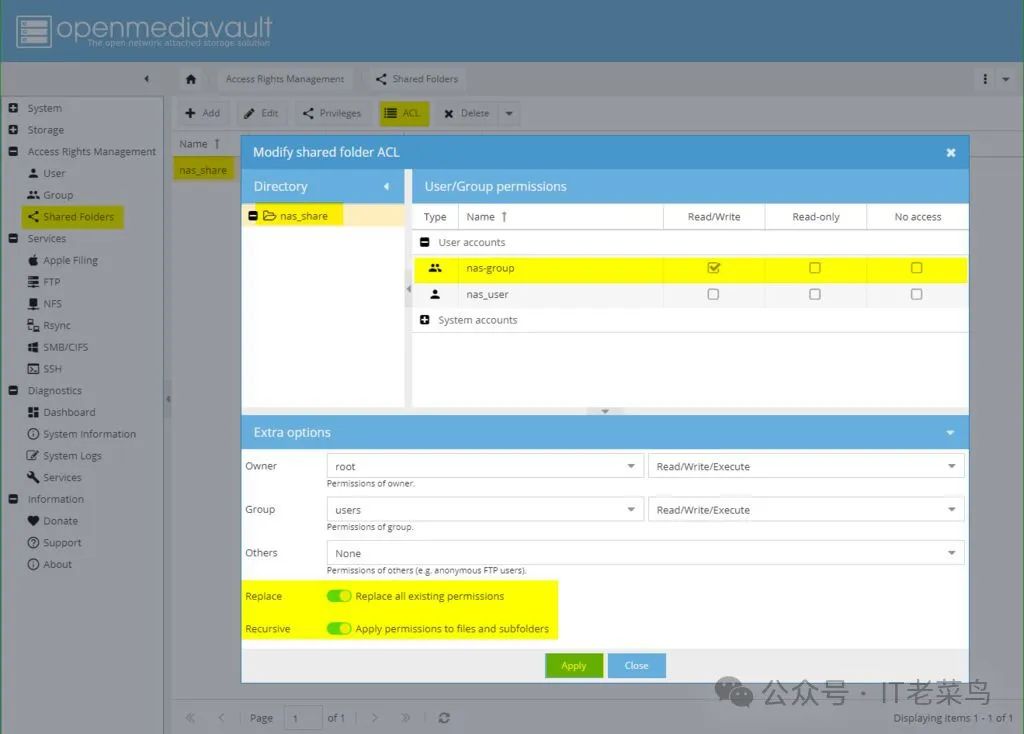
8. Click “Permissions” to set permissions for users or user groups
9. Set the desired permissions for the user and/or user group
11. Click ACL to create a new access control list for the shared folder.
13. Enable “Replace all existing permissions” and “Apply permissions to files and subfolders”.
SMB/CIFS
In the services section, we will only configure the SMB/CIFS section.
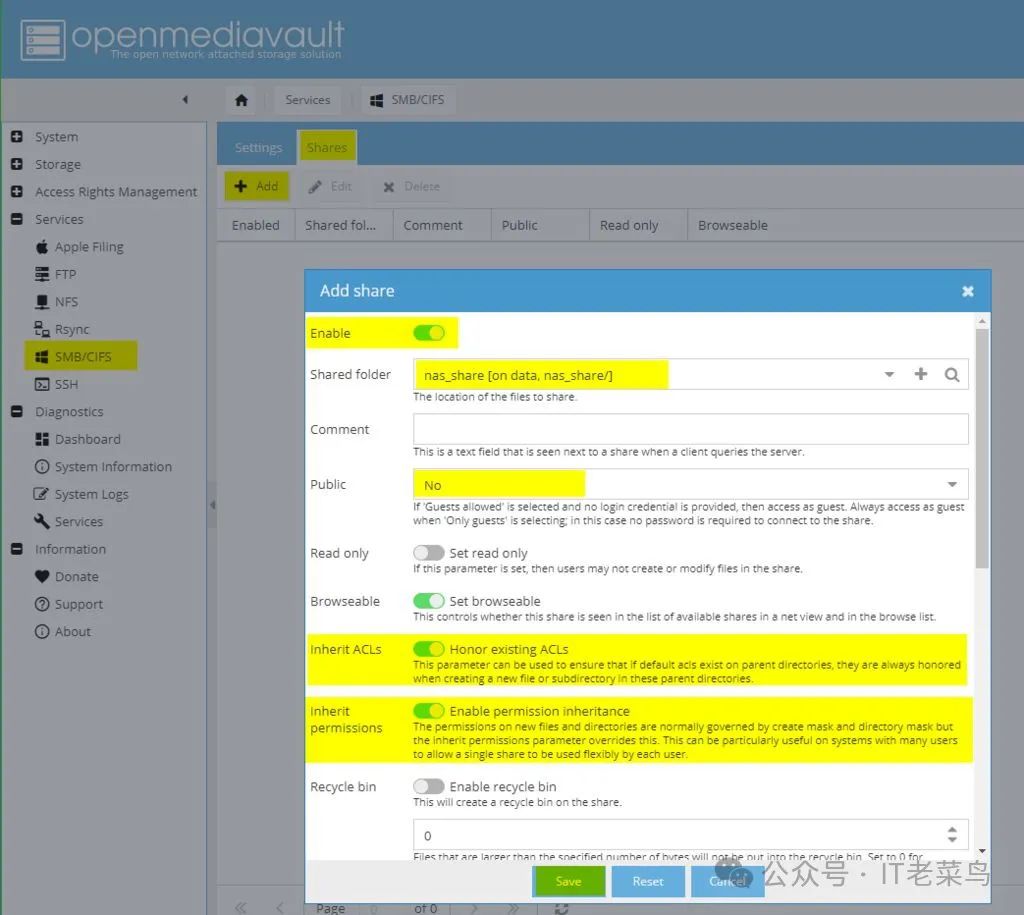
1. Expand the services tab and select SMB/CIFS.
2. On the generated page, click the settings tab and enable SMB/CIFS.
3. Open the “Settings” tab.
5. Enable the new share.
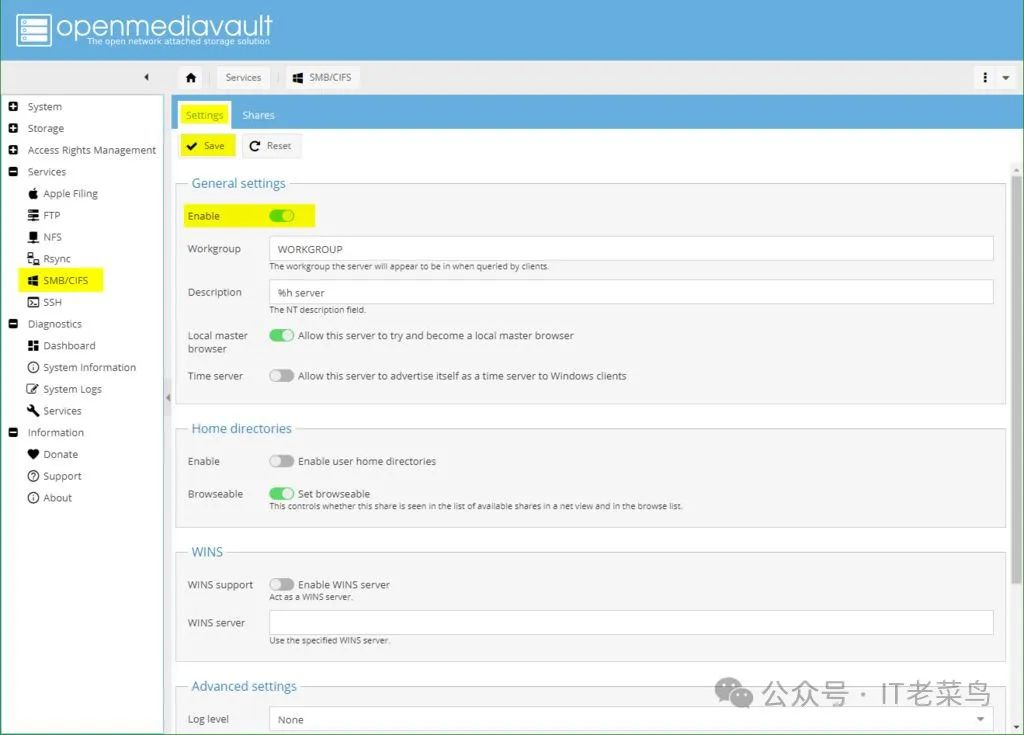
7. Choose whether the share is public (the PiNAS will be clearly listed).
9. Enable permission inheritance.
Please follow the steps below.
1. Press the Windows button on your keyboard, type cmd, and press Enter. The Windows command prompt will pop up.
3. Now the command prompt will ask you to enter a username for authentication. Enter the PiNAS username nas_user.
Now, the command prompt will ask for the password for nas_user; type in the password and hit Enter.
4. The command prompt should display a message like “The command completed successfully”.
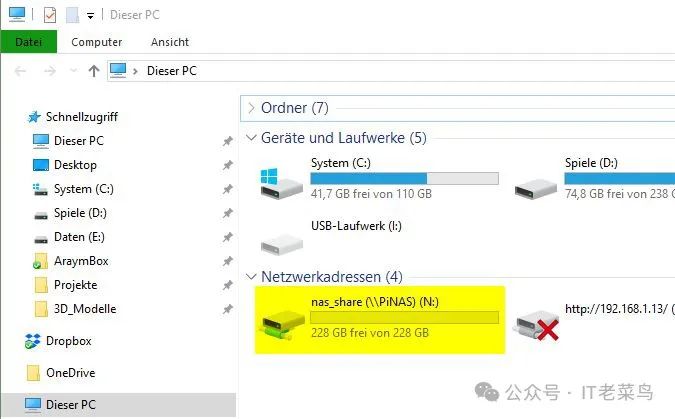
The new group will contain all mapped network folders, just like the connected nas_share, and you should now be able to drag and drop data onto this drive, backing it up to the two mirrored disks of PiNAS.
This tutorial ends here. Feel free to explore and add more features to this project.
This project is credited to Aramybox’s contribution.
Like, bookmark, share, and follow for more updates!
