Today, I bring you an ultra low-cost FPGA JTAG solution, where the hardware core is based on the Raspberry Pi Pico. Using related chips to create your own JTAG is very cheap; the RP2040 is priced at only 4 yuan on Taobao, making the production cost extremely low. Of course, the cost of using the Pico is also not very high, so today we will use the Pico as an example to discuss how to create JTAG and validate it.

Production Steps
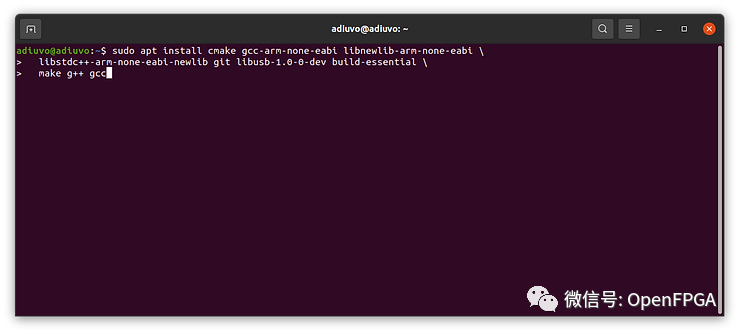
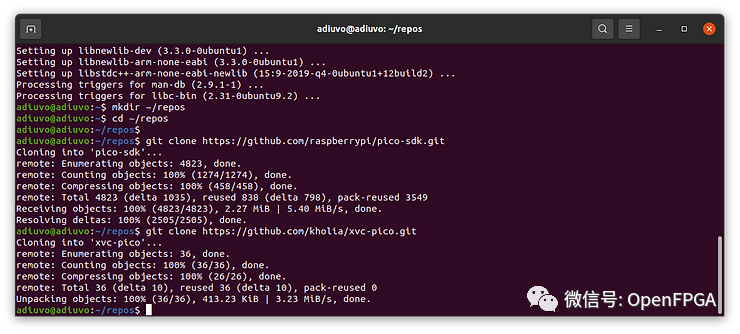
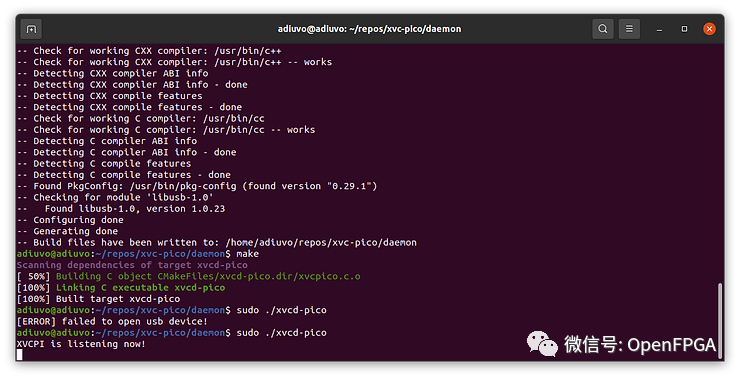
First, follow the GitHub instructions (https://github.com/kholia/xvc-pico) to install dependencies on a virtual machine, then create a new repository directory and clone the pico-SDK and XVC-Pico projects.
After cloning the repository, we can build the host-side daemon. It runs on the Linux host and the RPi Pico image. We execute this according to the instructions provided in GitHub.
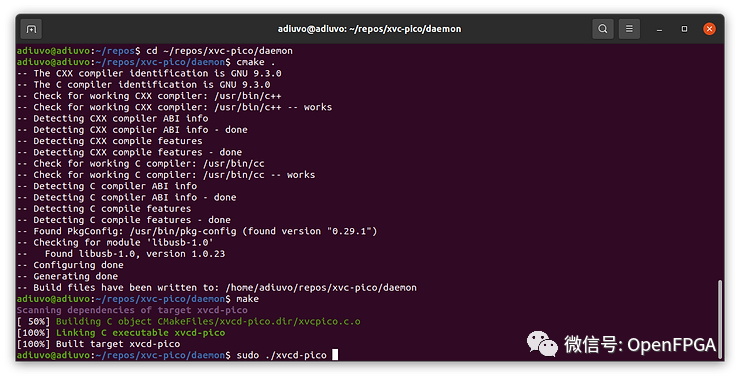
After building the daemon using XVC-Pico, we let it run on the development computer.
To download the image to the RPi Pico once the UF2 file is available, press and hold the bootsel button while powering on the RPi Pico; the board will mount to the file system. Just copy the UF2 file, and it will be installed and ready.
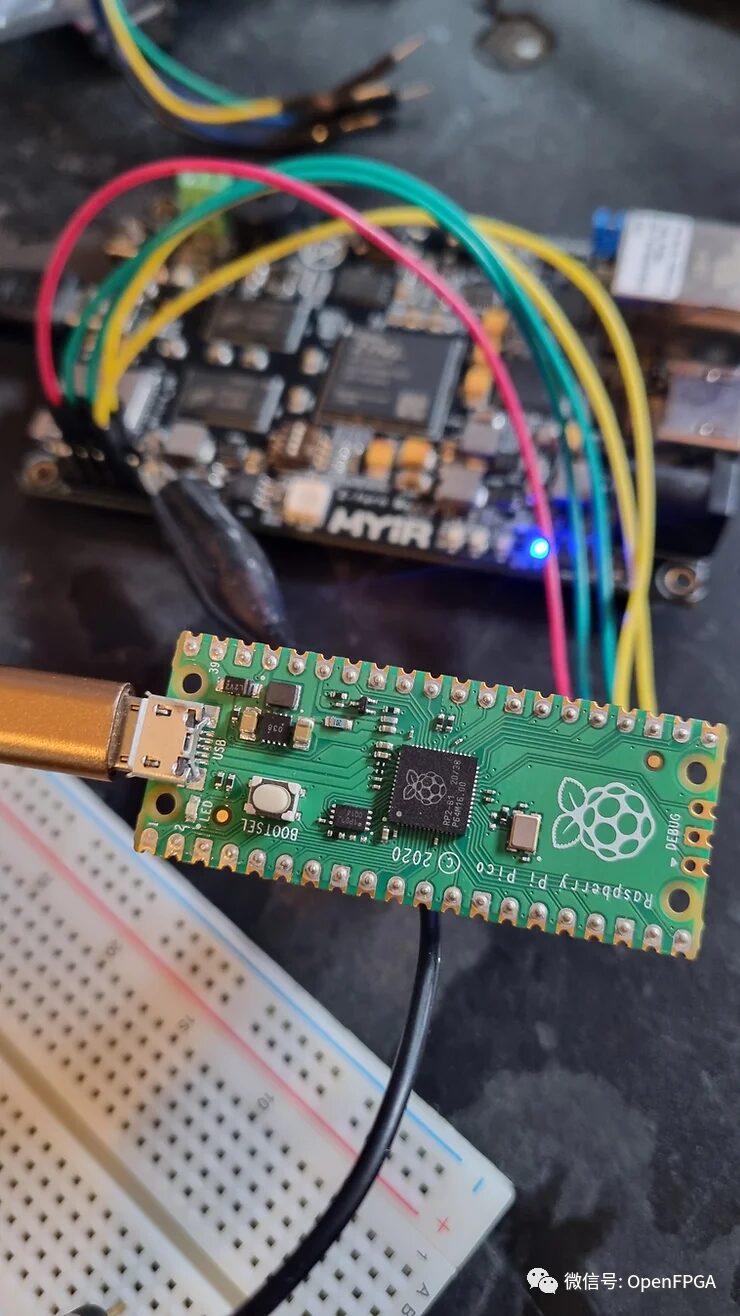
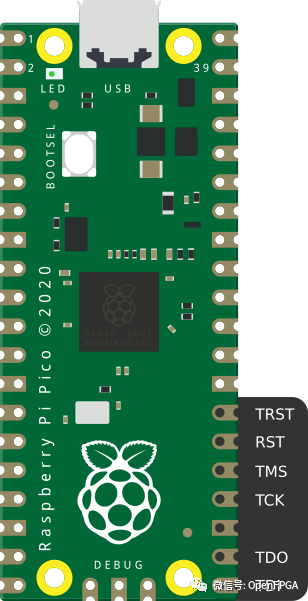
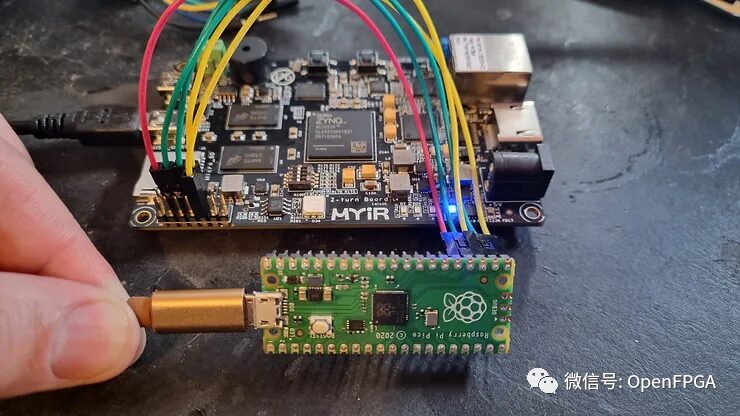
By programming the RPi Pico, we can connect the GPIO used for providing JTAG signals to the JTAG socket on the FPGA board. For other boards like GPIO, the RPi Pico operates at 3.3V, so it is essential to ensure the target board provides 3.3V to Bank 0, or there is a risk of damaging the FPGA device.
The JTAG pin assignments are as follows:
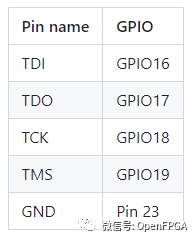
Ensure to connect the ground reference between Pico Pin 23 and the target board. Otherwise, the device cannot connect.
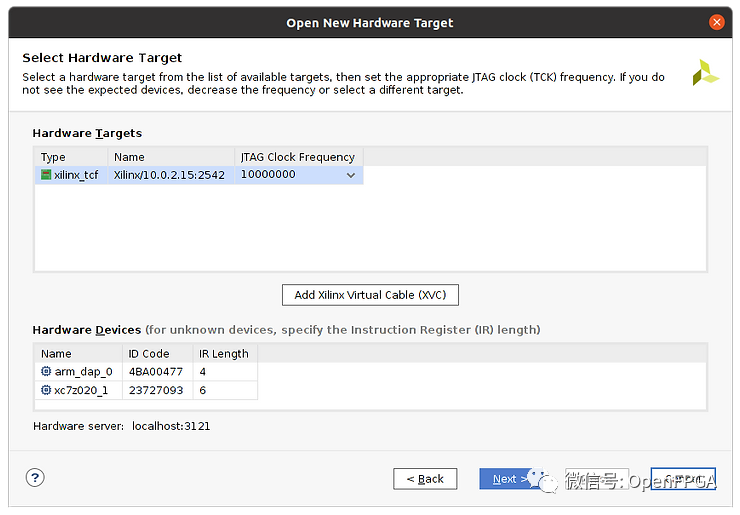
When the daemon is running and the board is connected and powered, we can start Vivado and try to connect to the target FPGA using the hardware manager.
When Vivado starts, open the hardware manager and create a new hardware target. Use the Xilinx Virtual Cable (XVC) option. When prompted for the XVC, use the IP address of the Linux development computer.
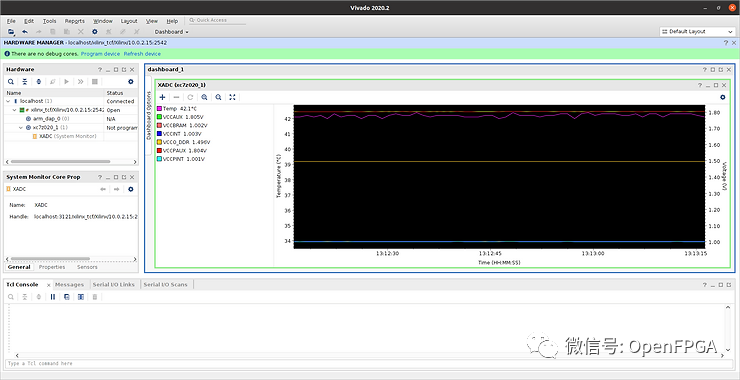
The next step is to use the hardware manager to read the XADC temperature and voltage.
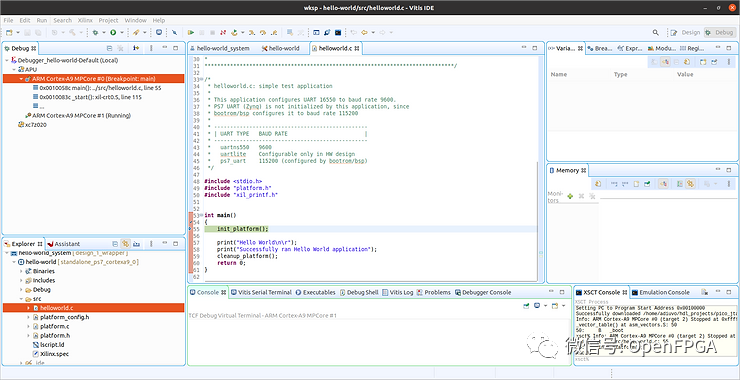
Vitis testing is also supported:
Overall, the XVC-Pico application left a deep impression on me, and in cost-optimized development, low-cost solutions have significant advantages.
Reference Links
❝
https://github.com/kholia/xvc-pico
❞
❝
https://www.adiuvoengineering.com/microzed-chronicles-jtag-using-a-raspberry-pi-pico
❞
– -THE END- –
Previous Highlights


[Free] FPGA Engineer Recruitment Platform
FPGA talent recruitment, enterprise HR, take a look!
System Design Highlights | Real-time Image Edge Detection System Design Based on FPGA (with Code)
Gigabit Ethernet RGMII Interface Design Based on Primitives
Timing Analysis Theory and TimeQuest Usage – Chinese Electronic Edition
Job Interview | Latest Compilation of FPGA or IC Interview Questions
FPGA Image Processing Special Course Added Vivado Content, Registration Available Online and Offline
FPGA Timing Analysis and Constraints Special Course Added Vivado Content, Registration Available Online and Offline
Resource Compilation | FPGA Software Installation Packages, Books, Source Code, Technical Documents… (Updated 2023.07.09)
FPGA Employment Class, Starting on 2023.09.12, Systematic Learning of FPGA for High-Paying Employment, Available Online and Offline!


FPGA Technology Community Broadly Issues Community Posts
No Ads, Pure Mode, Providing a Clean Space for Technical Communication, From Beginners to Industry Elites and Big Shots, Covering All Directions from Military to Civil Enterprises, from Communication, Image Processing to Artificial Intelligence, etc., QQ WeChat Dual Selection, FPGA Technology Community Creates the Cleanest and Most Professional Technical Communication and Learning Platform.
FPGA Technology Community WeChat Group

Add the group owner’s WeChat, note your name + school/company + major/position to join the group
FPGA Technology Community QQ Group

Note: Name + School/Company + Major/Position to join the group
