Hey, everyone! Today I’m sharing some amazing Raspberry Pi smart mirror projects. This link contains 8 of the best Raspberry Pi smart mirror projects we’ve seen so far. Each project has its unique charm and creativity. Whether you are a tech enthusiast or a DIY lover, these Raspberry Pi smart mirror projects are definitely worth a look.
Creating a magic mirror that displays real-time weather, news, travel information, and more is a popular project. Learn how to make a DIY smart mirror using a Raspberry Pi single-board computer at a very low cost and get inspired by some examples.
Why do you need a Raspberry Pi??
A smart mirror is essentially a mirror with a screen behind it. This screen can be an Android tablet or a computer monitor. Of course, a monitor can create a larger mirror. This is also a great way to repurpose an old LCD monitor. However, you can’t fit a complete computer in there unless you use a Raspberry Pi.
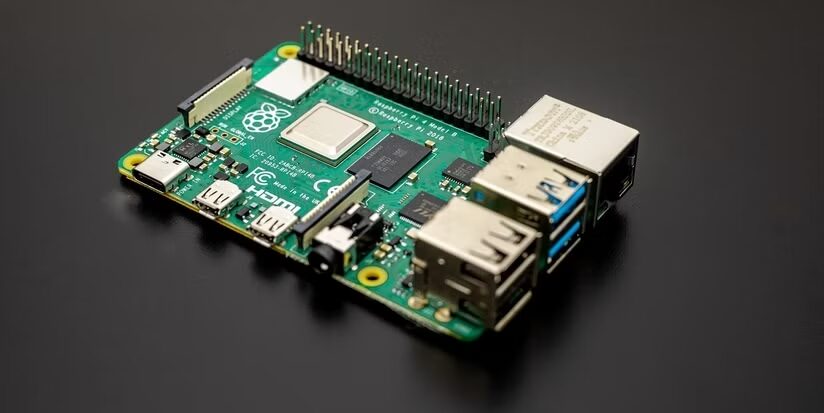
The Raspberry Pi is a credit card-sized computer that runs a Linux-based operating system and has a large developer community. In fact, the DIY smart mirror community tends to prefer using Raspberry Pi over other methods. Plus, with its low price starting at $35 for the full-sized model, choosing it is a wise decision compared to any other gadget.
You can even use the $15 Raspberry Pi Zero 2 W with wireless capabilities to make a smart mirror. Find out which Raspberry Pi model is best for your next project.
https://www.makeuseof.com/which-raspberry-pi-model-next-project/
Items needed to make a smart mirror
No matter which smart mirror project you decide to try from the list, there are some essential elements you’ll always need. To make your search easier and avoid repetitive explanations, here are the most important components.
Since this is a smart mirror, you’ll need a mirror, which shouldn’t be surprising, right? This project requires a two-way mirror, which you can buy from TwoWayMirrors.com or visit a local hardware store. Ideally, buying from the website is better because you can customize the height, width, and edges.

A screen will be installed behind the mirror. While you can buy a new one, repurposing an old computer monitor is also a great choice.
While you can use the $15 Pi Zero 2 W to make a smart mirror, it won’t deliver the best results. Instead, consider the more powerful Raspberry Pi 4 or 5, priced at $35 or $60, respectively. Choose the product and vendor that best suits your needs from the official website.


Used to secure the mirror and the monitor behind it. You can choose to skip this step, but the edges may look a bit rough, and you’ll need strict cable management. Your local hardware store should have what you need.
Besides these, you’ll also need all the basic tools required to operate them. So, make sure you have screwdrivers, screws, sanders, woodworking tools, etc.
1. MagicMirror²: The Original Pi Smart Mirror
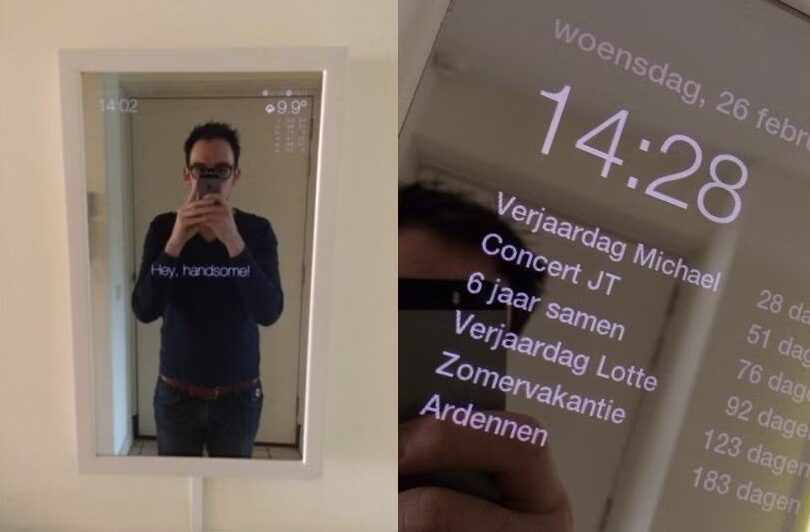
This is MagicMirror². There are many similar projects, but this one was created by Michael Teeuw. He was one of the first to use Raspberry Pi to create and document the entire smart mirror process. In fact, he has open-sourced and modularized all of his work so that anyone can build and improve it themselves.
Michael has written a series of MagicMirror² tutorials that you can read on his blog. He will guide you through the entire setup and building process.
The best part is how simple he made this process. Run a simple Bash script in MagicMirror², and your Raspberry Pi will be ready. Default modules include clock, calendar, weather forecasts, news subscriptions, and a greeting message. Plus, people are also developing third-party modules that you can install.
If you are new to the smart mirror field, this is the first project you should try. It has a large community where you can seek help on the MagicMirror² forum.
Complete guide:https://michaelteeuw.nl/post/magic-mirror-part-i-the-idea-the-mirror
2. MirrorMirror: Best Hardware Guide
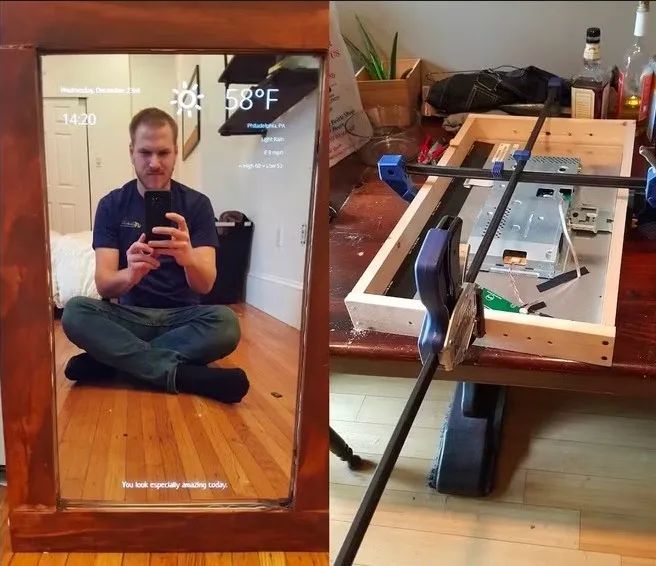
Dylan Pierce’s MirrorMirror is unrelated to MagicMirror² but is equally useful. Mainly because Pierce’s original blog post is the best step-by-step guide for the actual construction process.
Pierce broke the mold by installing the Raspbian (now called Raspberry Pi OS) operating system on Raspberry Pi and configuring Chromium to run at startup. Finally, he created his own webpage and server.
Before making your own smart mirror, read the entire article. Pierce made this smart mirror as a gift, so he ensured it looked great. Although the guide is somewhat outdated, it contains some useful steps, such as how to disassemble the monitor’s bezel or manage cables. But the best part is his woodworking.
Complete guide:http://blog.dylanjpierce.com/raspberrypi/magicmirror/tutorial/2015/12/27/build-a-magic-mirror.html
3. Voice-Controlled Smart Mirror
You can interact with Evan Cohen’s smart mirror just like talking to an Android phone. Yes, it still runs on Raspberry Pi, so you don’t need an Android device.
Cohen provides complete documentation on how to build, install, and operate his smart mirror. The video is very impressive; it supports multiple third-party applications. For example, you can control smart LED lights by talking to the mirror.
This project also has a great and detailed hardware guide. If you plan to make it, use the provided guide instead of Pierce’s method.
Complete guide:https://docs.smart-mirror.io/
4. Voice and Gesture Controlled Smart Mirror
Can you make a touchscreen smart mirror? Of course, we will see that later. Another way to interact with your magic mirror is through gesture control or voice control. Therefore, builder Josep Cumeras i Khan got to work.
This smart mirror has some cool features. You need to clap to activate voice recognition and then issue commands like “play the radio” or “show the news.”
Khan has compiled a lot of documentation about it, so you should be able to quickly run your favorite applications. To navigate within the app, use simple gestures.
This project is one of the more expensive magic mirrors on the market, priced at 400 euros. But when you see the effects in the video, you will know it’s worth it.
Complete guide:https://imgur.com/gallery/j0BFU
5. Touchscreen Smart Mirror with Face Recognition
Eben Kouao not only made a touchscreen smart mirror but even added face recognition functionality to recognize the person standing in front of it.
Making a touchscreen smart mirror is not easy, as the thickness of the two-way mirror prevents the use of standard capacitive touch screens. Instead, Eben added an infrared frame for touch functionality: one side has LEDs, and the other side has a light detector that can determine which part of the mirror you touched.
By adding a Raspberry Pi camera module, the mirror can see users and use the OpenCV face detection module to recognize them. There is a step-by-step build tutorial available, which will ultimately cover adding home automation and multiple user profiles.
Complete guide:https://smartbuilds.io/smart-mirror-touchscreen-raspberry-pi/

YogAI takes the concept of the smart mirror to a new level by providing an AI personal trainer to guide and correct users’ yoga poses.
This smart mirror was created by self-proclaimed fitness enthusiasts Salma Mayorkin and Terry Rodriguez. It uses a Raspberry Pi camera module and TensorFlow machine learning technology to assess various yoga poses. The virtual avatar on the screen even mimics the user’s movements.
Additionally, users can control the mirror through voice commands to start, stop, pause, and restart yoga sessions. It also uses the Flite speech synthesizer for feedback, guiding users into the correct poses.
Complete guide:https://www.hackster.io/yogai/yogai-smart-personal-trainer-f53744
7. $100 Smart Mirror: A Cheap and Simple Method
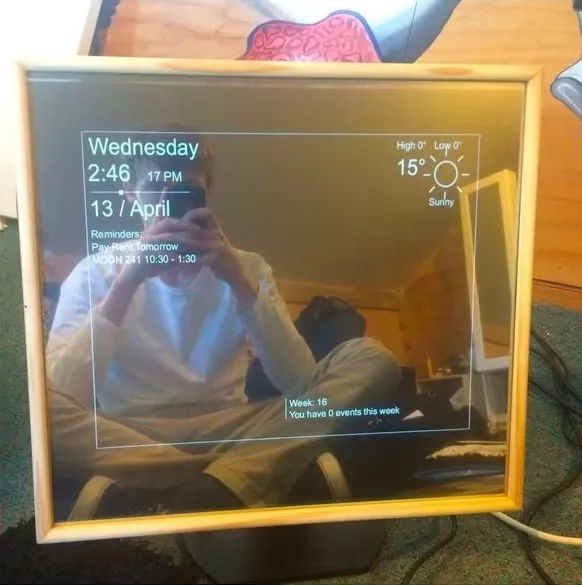
You don’t need to spend a lot of money to make a smart mirror. As Carl Gordon demonstrates, you can make one for about $100 (in Gordon’s case, 150 New Zealand dollars). His goal with this project was to make it as cheap and practical as possible.
Gordon’s smart mirror does not use the popular MagicMirror² operating system, but there’s nothing in the construction that suggests this would compromise the system. The final result is a fully functional smart mirror at a low price, lightweight and portable, which you can use in multiple rooms if you want.
Complete guide:https://www.instructables.com/100-Smart-Mirror-Pi/
8. Magic Mirror Made from Recycled iPad
Another way to save money is to repurpose old devices. In this case, Chris Greening recycled a broken first-generation iPad to create his magic mirror, carefully extracting the LCD panel from the broken screen.
Additionally, using a $15 Raspberry Pi Zero W (running the standard Raspberry Pi operating system) helps keep costs down. A video driver board sends the Raspberry Pi’s HDMI output to the LCD panel.
To reduce the brightness of the LCD panel and prevent it from being too obvious behind the two-way mirror, Chris added some colored acetate sheets. The final result is a convincing magic mirror made at an extremely low cost.
Complete guide:http://www.youtube.com/watch?v=ENKhizrCuPU
Make Your Own Magic Mirror
If you plan to make a magic mirror yourself, you can use different devices, such as a Windows computer. But if you enjoy DIY electronics and making, you probably already have an idle Raspberry Pi. When combined with the MagicMirror² operating system, it can make the creation of a smart mirror much easier.
Raspberry Pi products can be purchased directly from Raspberry Pi agents in the following ways:
1. Scan the QR code to add Engineer Yang for consultation and purchase.

2. Send us your contact information via private message to place an order directly.
3. Consult and place an order on the official website of Raspberry Pi dealers:https://www.edatec.cn/cn
We will update regularly~
Follow Raspberry Pi developers~
Learn more about Raspberry Pi related content~