
13.6.2 Understanding the MQTT Protocol Visually
Using the roles of a TV station, reporter, and audience makes it easier to understand:
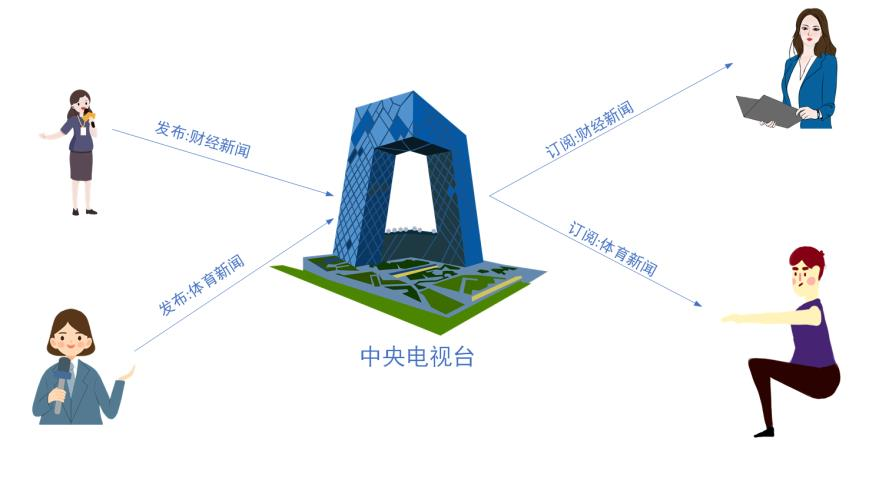
TV Station: In MQTT, it is referred to as the server (broker).
It has the following functions:
① Accepts network connections from clients; // reporters/audience connect to the TV station
② Accepts application information published by clients; // accepts messages published by reporters
③ Handles subscription and unsubscription requests from clients; // processes audience subscription and unsubscription requests
④ Forwards application messages to subscribed clients; // forwards messages reported by reporters to the audience
Both reporters and audiences are clients, reporters can also be audiences, and audiences can also be reporters.
They have the following functions:
① Publish information; // publish, reporters
② Subscribe to messages; // Subscribe, audience
③ Unsubscribe or delete messages;
④ Disconnect from the server

13.6.3 Using PC MQTT Tools
1. Install Software
The software is in the cloud disk directory:
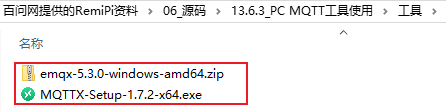
On the PC, you need to run the MQTT server software emqx and the MQTT client software MQTTX.
For emqx, unzip “emqx-5.3.0-windows-amd64.zip” to a directory without Chinese characters. Assume it is unzipped to “d:\abc”.
For MQTTX, double-click to install “MQTTX-Setup-1.7.2-x64.exe”.
2. Start and Stop MQTT Service
Assuming the emqx installation directory is “D:\abc\emqx-5.3.0-windows-amd64”, execute the following command in the command line to start the MQTT service:
Swipe left or right to view the complete content
D:\abc\emqx-5.3.0-windows-amd64\bin\emqx startThen you can access “http://localhost:18083” through the browser to access the EMQX Dashboard management console for device connection and related metrics monitoring management. The default username is “admin” and the password is “public”.
If you want to stop the MQTT service, execute the following command in the command line:
Swipe left or right to view the complete content
D:\abc\emqx-5.3.0-windows-amd64\bin\emqx stop3. Using the MQTT Client
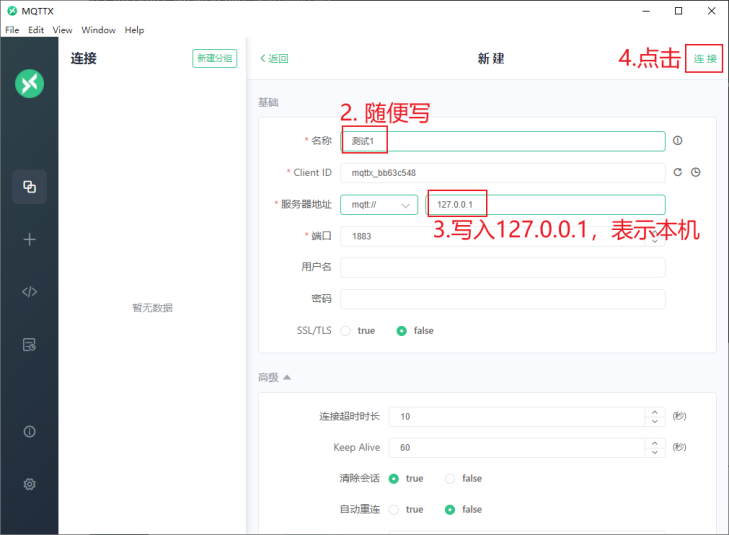
After running MQTTX, establish a connection as shown in the figure below:
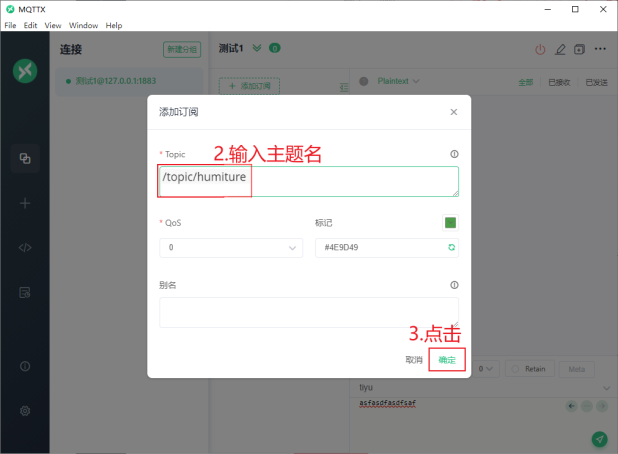
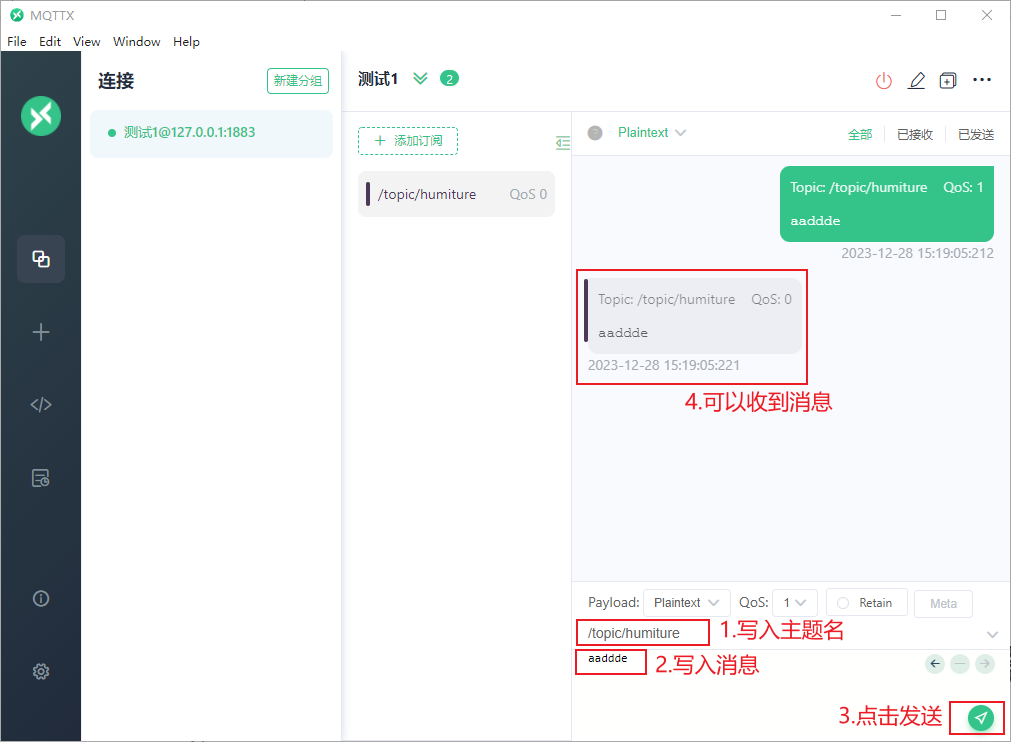
After establishing a connection, subscribe to a topic (for example, “/topic/humiture”) as shown in the figure below:
Then, you can publish messages to yourself as shown in the figure below:

13.6.4 MQTT Test Program
The source code for this section is located in the following directory:
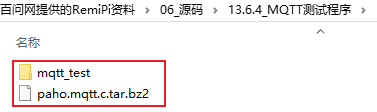
paho.mqtt.c.tar.bz2 is the library and example code.
mqtt_test is the source code corresponding to this section.
The core source code of the test program “mqtt_test.c” is as follows:
1. Define some parameters
Swipe left or right to view the complete content
22 #define ADDRESS "tcp://192.168.5.10:1883"23 #define CLIENTID "ExampleClientSub"24 #define TOPIC_SUBSCRIBE "/iot/down"25 #define TOPIC_PUBLISH "/iot/up"26 #define QOS 127 #define TIMEOUT 10000L2829 #define USER_NAME "100ask"30 #define PASSWORD "100ask"2. Connect to the broker
The code is as follows:
Swipe left or right to view the complete content
57 int main(int argc, char* argv[])58 {59 MQTTClient client;60 MQTTClient_connectOptions conn_opts = MQTTClient_connectOptions_initializer;61 int rc;6263 if ((rc = MQTTClient_create(&client, ADDRESS, CLIENTID,64 MQTTCLIENT_PERSISTENCE_NONE, NULL)) != MQTTCLIENT_SUCCESS)65 {66 printf("Failed to create client, return code %d\n", rc);67 rc = EXIT_FAILURE;68 goto exit;69 }7071 if ((rc = MQTTClient_setCallbacks(client, NULL, connlost, msgarrvd, delivered)) != MQTTCLIENT_SUCCESS)72 {73 printf("Failed to set callbacks, return code %d\n", rc);74 rc = EXIT_FAILURE;75 goto destroy_exit;76 }7778 conn_opts.keepAliveInterval = 20;79 conn_opts.cleansession = 1;80 conn_opts.username = USER_NAME;81 conn_opts.password = PASSWORD;82 if ((rc = MQTTClient_connect(client, &conn_opts)) != MQTTCLIENT_SUCCESS)83 {84 printf("Failed to connect, return code %d\n", rc);85 rc = EXIT_FAILURE;86 goto destroy_exit;87 }-
Line 63, creates a client.
-
Line 71, sets the callback functions: callback function when the connection is lost, callback function when a message is received, callback function after a message is published successfully.
-
Lines 78-81, sets the username and password.
-
Line 82, connects to the broker.
3. Subscribe to messages
The code is as follows:
Swipe left or right to view the complete content
91 if ((rc = MQTTClient_subscribe(client, TOPIC_SUBSCRIBE, QOS)) != MQTTCLIENT_SUCCESS)92 {93 printf("Failed to subscribe, return code %d\n", rc);94 rc = EXIT_FAILURE;95 }When a subscribed message is received, the “message received callback function” set in line 71 is called, and the code is as follows:
Swipe left or right to view the complete content
40 int msgarrvd(void *context, char *topicName, int topicLen, MQTTClient_message *message)41 {42 printf("Message arrived\n");43 printf(" topic: %s\n", topicName);44 printf(" message: %.*s\n", message->payloadlen, (char*)message->payload);45 MQTTClient_freeMessage(&message);46 MQTTClient_free(topicName);47 return 1;48 }This function simply prints the message.
4. Publish messages
The code is as follows:
Swipe left or right to view the complete content
98 int ch;99 int cnt = 0;100 MQTTClient_message pubmsg = MQTTClient_message_initializer;101 char buf[100];102 MQTTClient_deliveryToken token;103104 while (1)105 {106 ch = getchar();107108 if (ch =='Q' || ch == 'q')109 {110 break;111 }112113 sprintf(buf, "publish %d", cnt++);114 pubmsg.payload = buf;115 pubmsg.payloadlen = (int)strlen(buf);116 pubmsg.qos = QOS;117 pubmsg.retained = 0;118119 if ((rc = MQTTClient_publishMessage(client, TOPIC_PUBLISH, &pubmsg, &token)) != MQTTCLIENT_SUCCESS)120 {121 printf("Failed to publish message, return code %d\n", rc);122 continue;123 }124125 rc = MQTTClient_waitForCompletion(client, token, TIMEOUT);126 printf("Message with delivery token %d delivered\n", token); 127 }-
Lines 100, 113-117: sets the message. The message is stored in buf.
-
Line 119: publishes the message.
-
Line 125: waits for the message to be sent.


Need Product and Solution Support
Please scan the code to register

Need Technical Support?
If you have any questions while using Renesas MCU/MPU products, you can scan the QR code below or copy the URL to your browser to open the Renesas Technical Forum to find answers or get online technical support.

https://community-ja.renesas.com/zh/forums-groups/mcu-mpu/
To Be Continued
Recommended Reading

Framework Design – RZ MPU Industrial Control Tutorial Series (48)

LVGL Related and JSON-RPC Related – RZ MPU Industrial Control Tutorial Series (49)

Backend Program Development Related Operations – RZ MPU Industrial Control Tutorial Series (50)
For more exciting content, please stay tuned


Need Product and Solution Support
Please scan the code to register