 1. What is PVEProxmox VE (Virtual Environment) is an open-source, enterprise-level server virtualization management platform. It integrates two main virtualization technologies, allowing you to efficiently run and manage virtual machines and containers on a single physical server or cluster.It provides full virtualization capabilities through KVM (Kernel-based Virtual Machine), which is used to run virtual machines (VMs) for various operating systems (such as Linux, Windows, BSD, etc.). KVM utilizes the processor’s hardware virtualization extensions (Intel VT-x / AMD-V) to deliver near-native performance virtualization.It offers operating system-level virtualization through LXC (Linux Containers), which is used to run lightweight Linux containers. Containers share the host’s kernel, start faster, and have lower resource overhead, making them ideal for running isolated Linux application environments.Proxmox VE provides a powerful web-based management interface, allowing easy management of virtual machines, containers, storage, networks, clusters, and high availability features through a browser.2. Core Advantages of PVEOpen Source and Free: Proxmox VE itself is free and open-source (GPL v3 license). Commercial support subscriptions are optional, providing access to tested update repositories, enterprise-level repository access, and technical support.Integrated Platform: Supports both virtual machines and containers on a single platform, eliminating the need to deploy and manage separate systems.Powerful Web Management Interface: Intuitive and user-friendly, with comprehensive features that significantly lower the barrier to virtualization management.Enterprise-Level Features:
- High Availability (HA): After configuring a cluster, if a physical node fails, the virtual machines/containers on it can automatically migrate to other healthy nodes and restart, maximizing business continuity.
- Centralized Storage: Supports various local and shared storage types (ZFS, LVM, Ceph, NFS, iSCSI, CIFS/SMB, GlusterFS, etc.). It is particularly well-integrated with Ceph, allowing for the direct deployment and management of distributed Ceph storage within the Proxmox VE cluster, providing high reliability, performance, and scalable storage pools.
- Software-Defined Networking (SDN): Offers flexible network configurations, including Linux Bridge, Open vSwitch, VLAN, Bonding, Firewall, etc. VEBR (Virtual Ethernet Bridge) is its core network model.
- Backup and Recovery: Built-in powerful backup solutions support full backups, incremental backups, scheduled backups, backups to various storage (including deduplicated storage), and flexible recovery options (including recovery to different clusters).
- Live Migration: Supports live migration of virtual machines/containers between different physical nodes within the cluster without downtime, facilitating load balancing, hardware maintenance, or upgrades.
- Role-Based Access Control (RBAC): Fine-grained control over user and user group permissions.
- Logging and Auditing: Provides detailed system logs and operational audits.
Based on Debian Linux: The underlying system is the stable and reliable Debian GNU/Linux, inheriting its vast software ecosystem and stability. Users can directly access the underlying system for advanced configurations or to install additional software when needed.Active Community: There is a large and active global community of users and developers, providing rich documentation, forum support, and third-party tools/scripts.3. PVE Application ScenariosPVE can be used in the following scenarios:
- Building private cloud infrastructure.
- Server consolidation to improve hardware resource utilization.
- Creating and managing development/testing environments.
- Deploying application servers, databases, web servers, etc., in production environments.
- Running containerized applications.
- Building virtual desktop infrastructure (VDI) backends.
- Deploying network function virtualization (NFV).
- Providing disaster recovery solutions.
4. PVE VersionsProxmox Virtual Environment (PVE) is an open-source virtualization platform based on Debian, supporting KVM virtual machines and LXC containers. Its version iterations are distinguished by major version numbers (e.g., 7.x, 8.x, 9.x) that indicate core architecture updates. Below are the details of the current and recent major versions:
| Version Number | Release Date | Core Features | Support Status |
|---|---|---|---|
| 9.0 | August 5, 2025 | – Based on Debian 13 “Trixie” + Linux 6.14 kernel– New thick provisioning LVM snapshot support (for iSCSI/FC SAN)– SDN Fabrics network architecture (supports spine-leaf topology)– HA resource affinity rules (fine control over load distribution)– Mobile management interface restructured in Rust | Current stable version, officially maintained |
| 8.x | 2024 (8.4 version to be released in April 2025) | – Based on Debian 12 “Bookworm”– Supports Ceph Reef/Squid– Introduced pve8to9 upgrade script | 8.4 support until August 2026 (security updates) |
| 7.x | 2022 | – Based on Debian 11 “Bullseye”– Initial integration of Ceph Quincy– Enhanced ZFS and QEMU support |
Each major version (e.g., 8.x, 9.x) provides approximately 3-4 years of security updates, with the support period of old and new versions typically overlapping by 1 year (e.g., PVE 8.4 support until August 2026, alongside PVE 9.0), facilitating gradual upgrades for users.For production environments, it is recommended to use PVE 9.0 (latest features with long-term support) or PVE 8.4 (stable transition period); testing/learning environments can try historical versions, but security risks should be noted.Official ISO download link:https://www.proxmox.com/en/downloads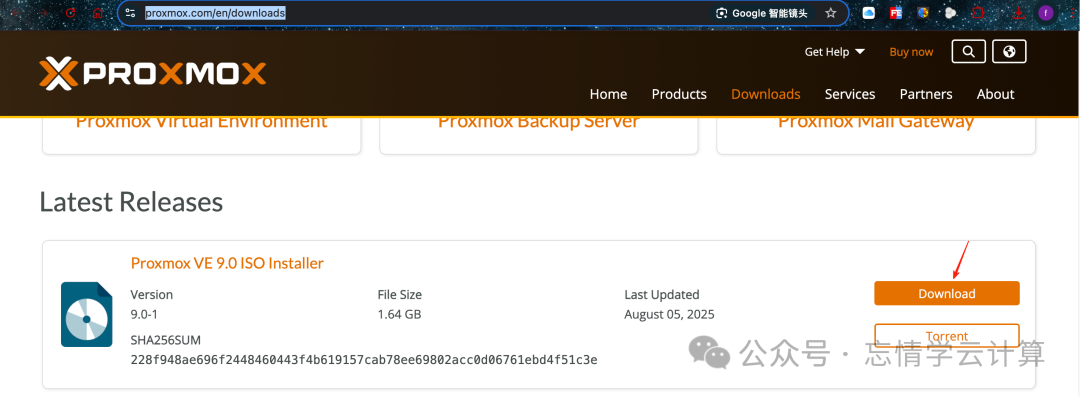 5. PVE DeploymentExperimental Environment
| Hostname | IP | Hardware Configuration |
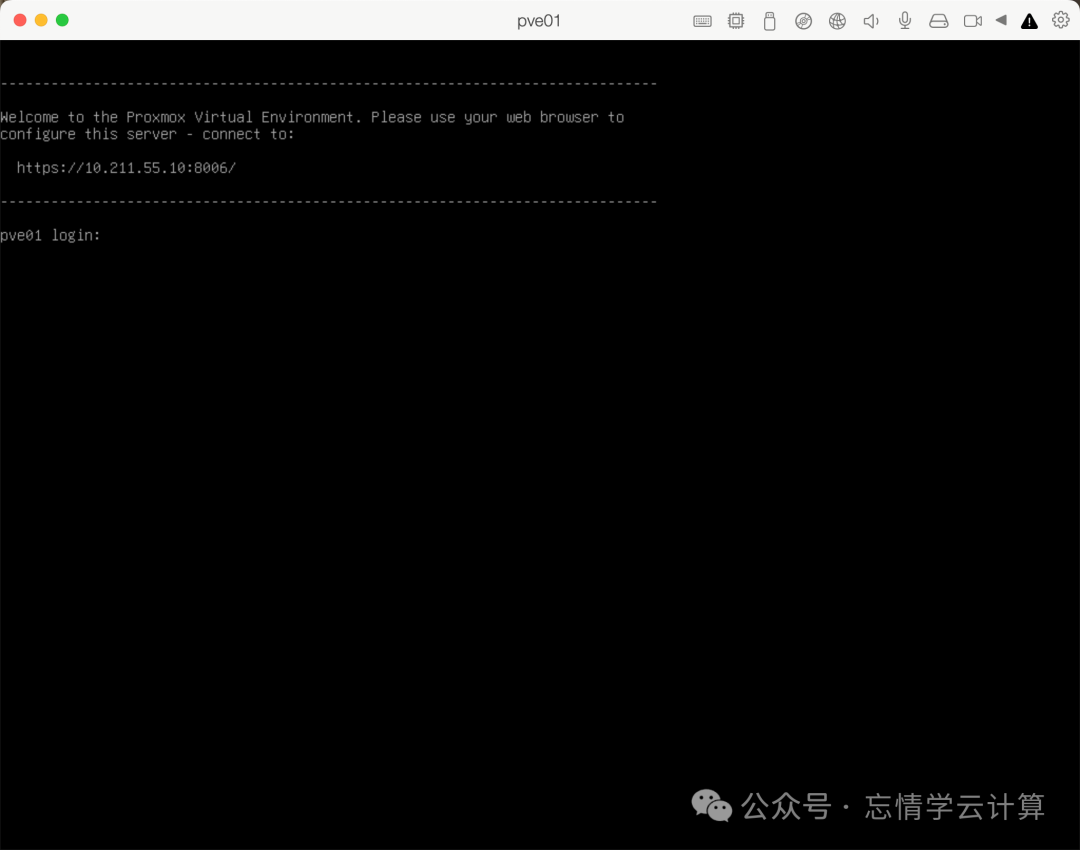
| pve01.wangqing.com | 10.211.55.10 | 2-core CPU8GB RAM2 x 1TB hard drives |
| pve02.wangqing.com | 10.211.55.11 | 2-core CPU8GB RAM2 x 1TB hard drives |
| pve03.wangqing.com | 10.211.55.12 | 2-core CPU8GB RAM2 x 1TB hard drives |
Deploying pve01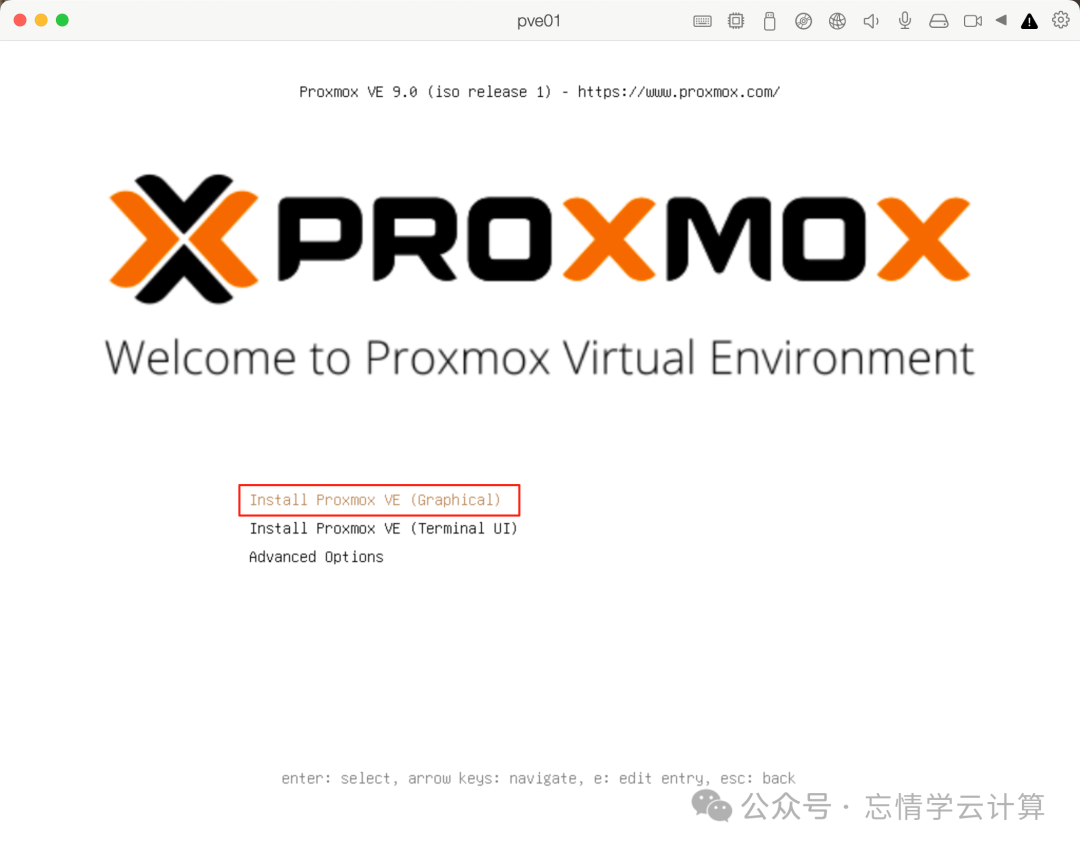 Select graphical installation
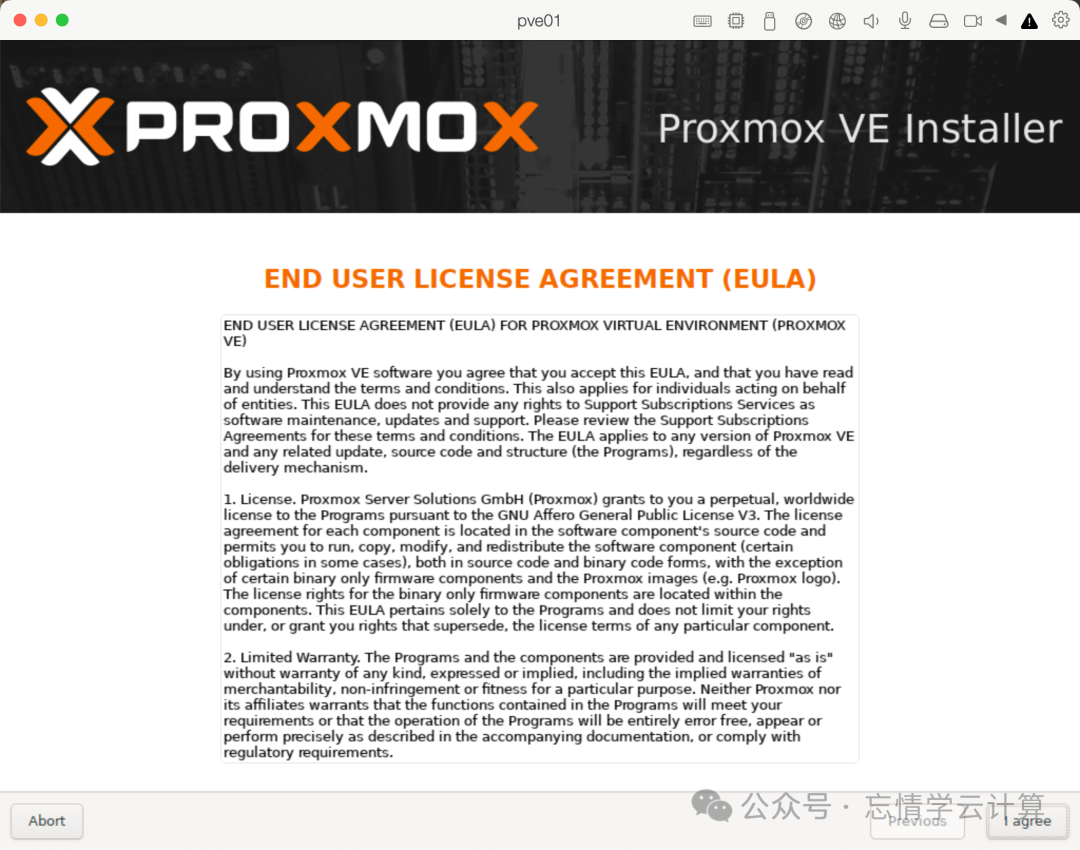 Click I agree to accept the agreement
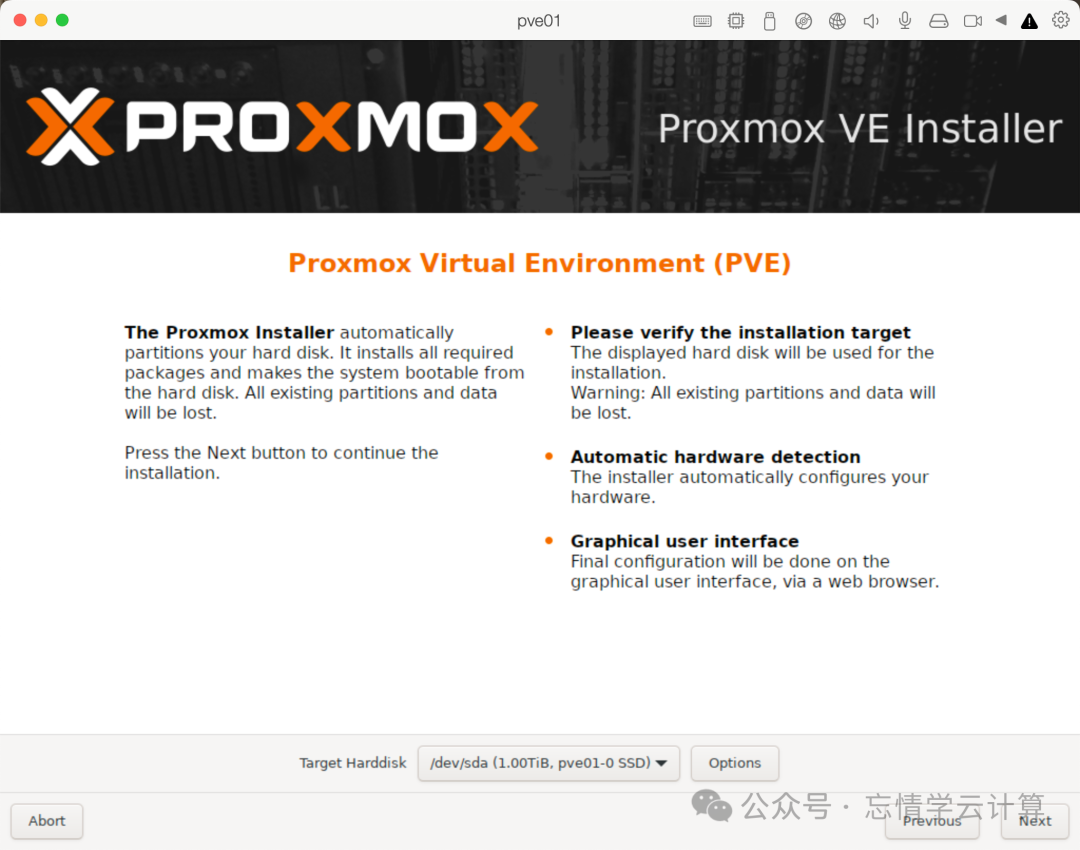 Select to install on /dev/sda hard drive, click Next
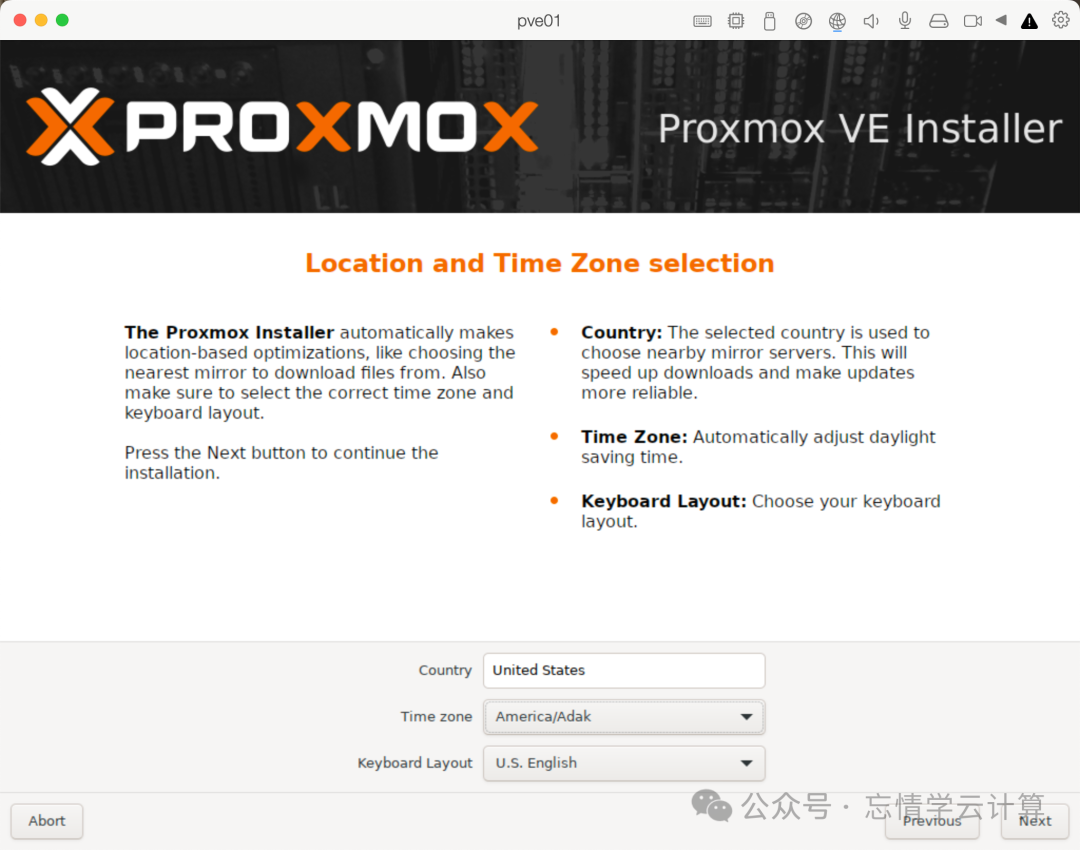 Configure time zone and keyboard layout; you can keep the default here and modify it later in the web management interface, click Next
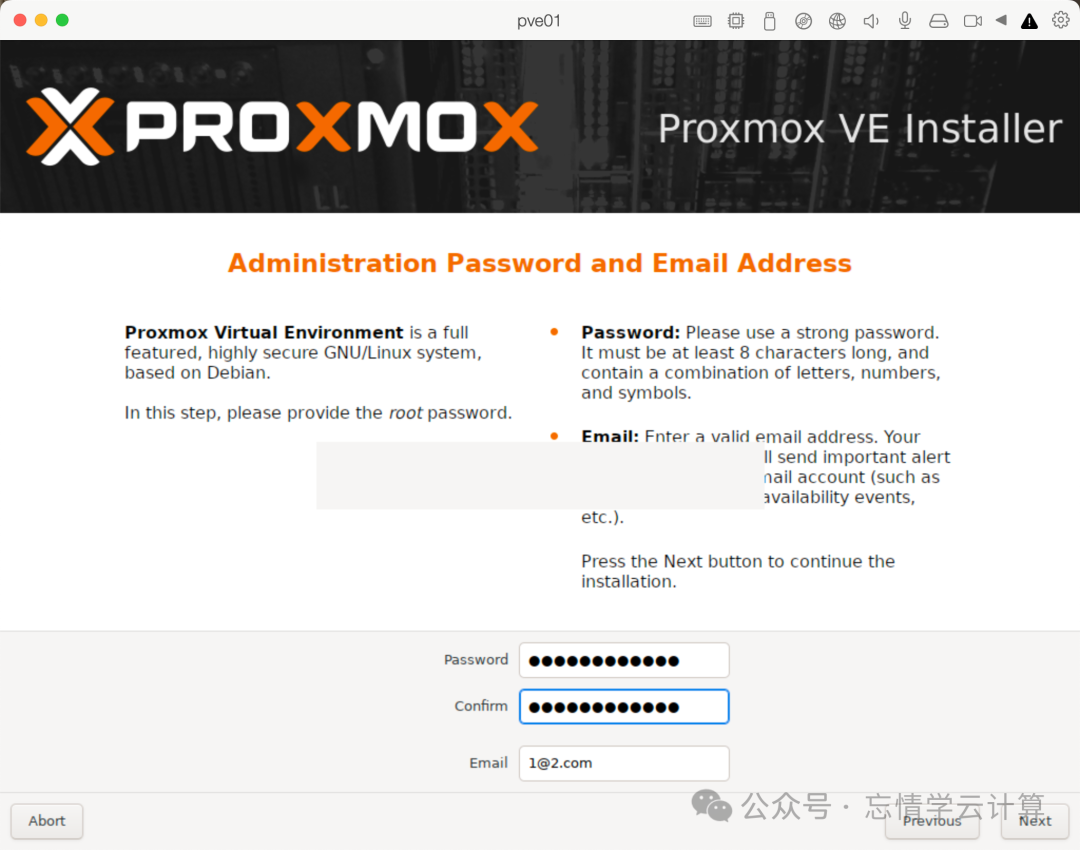 Set the administrator password to meet complexity requirements, click Next
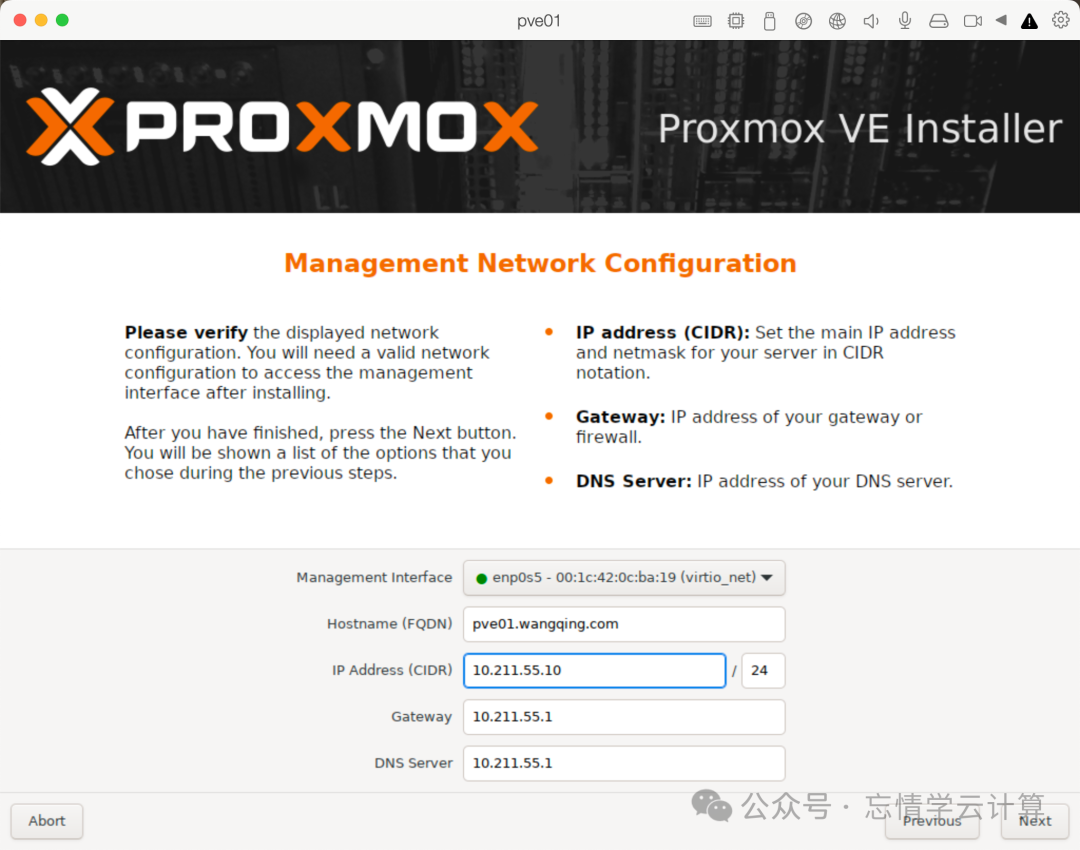 Configure the IP address, subnet mask, gateway, DNS, and hostname as planned, click Next
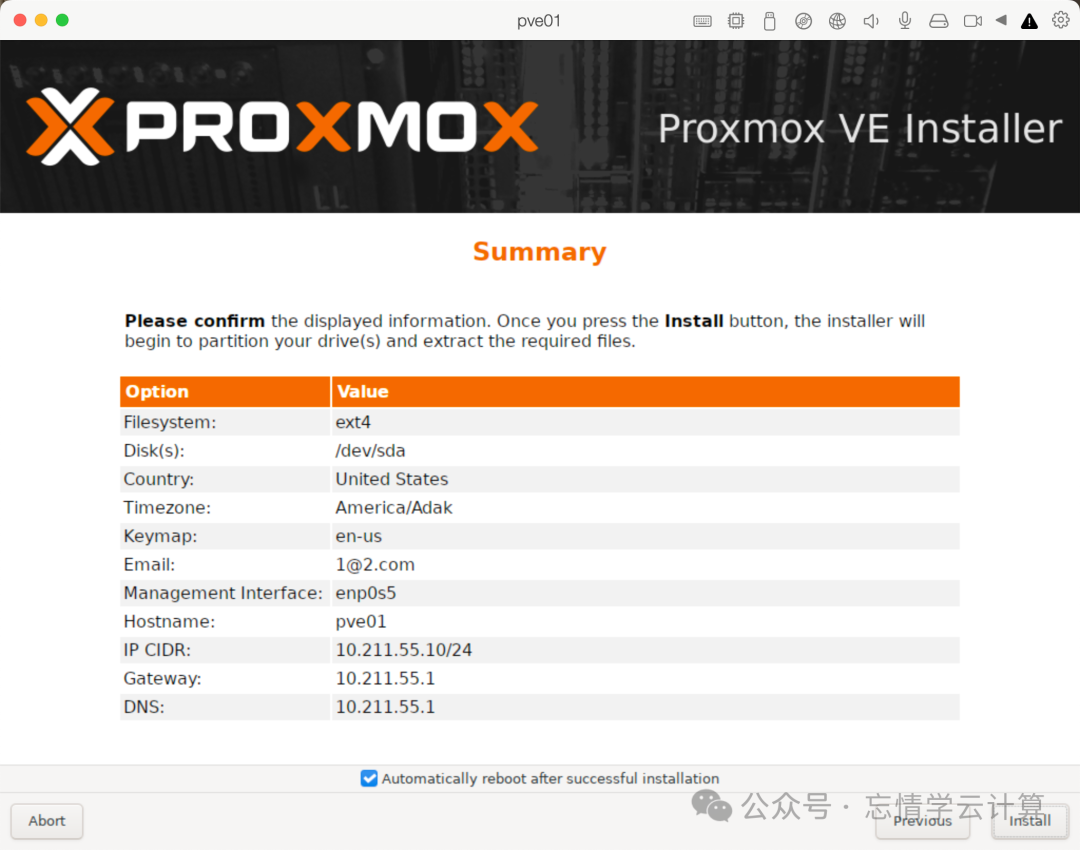 Click Install to proceed with the installation
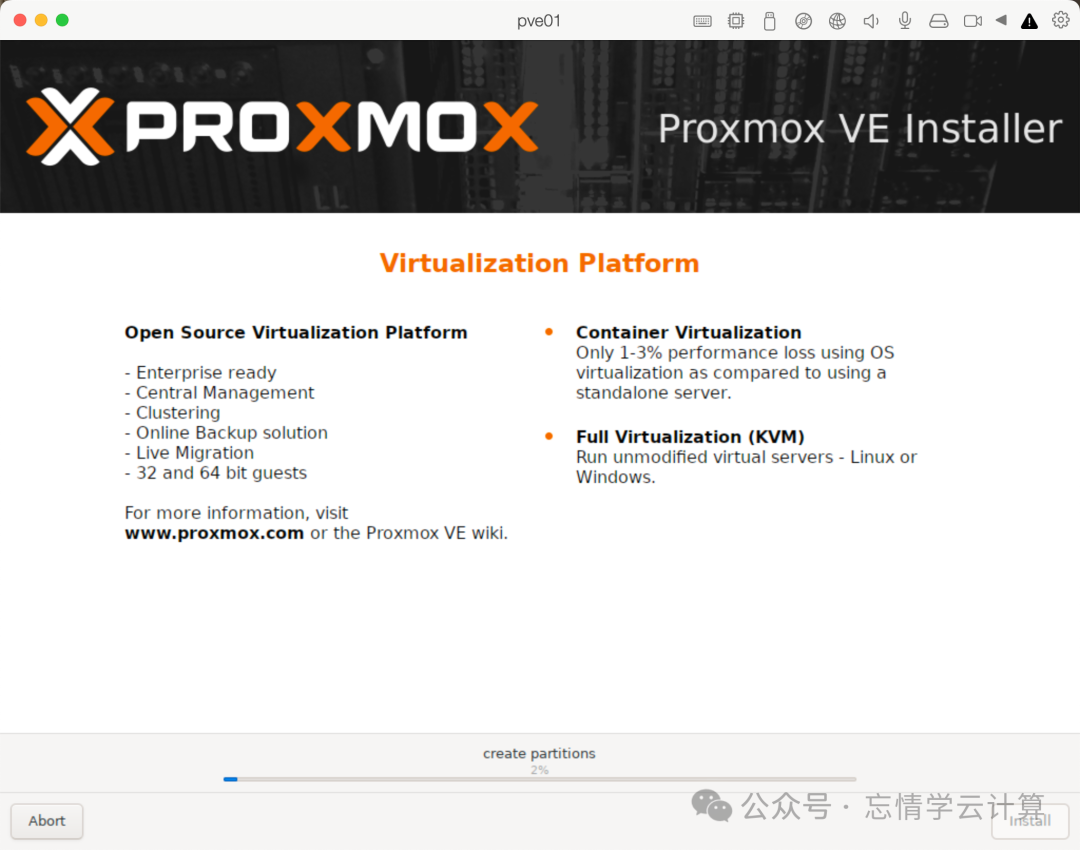 The installation process is shown above; the system will automatically reboot after completion
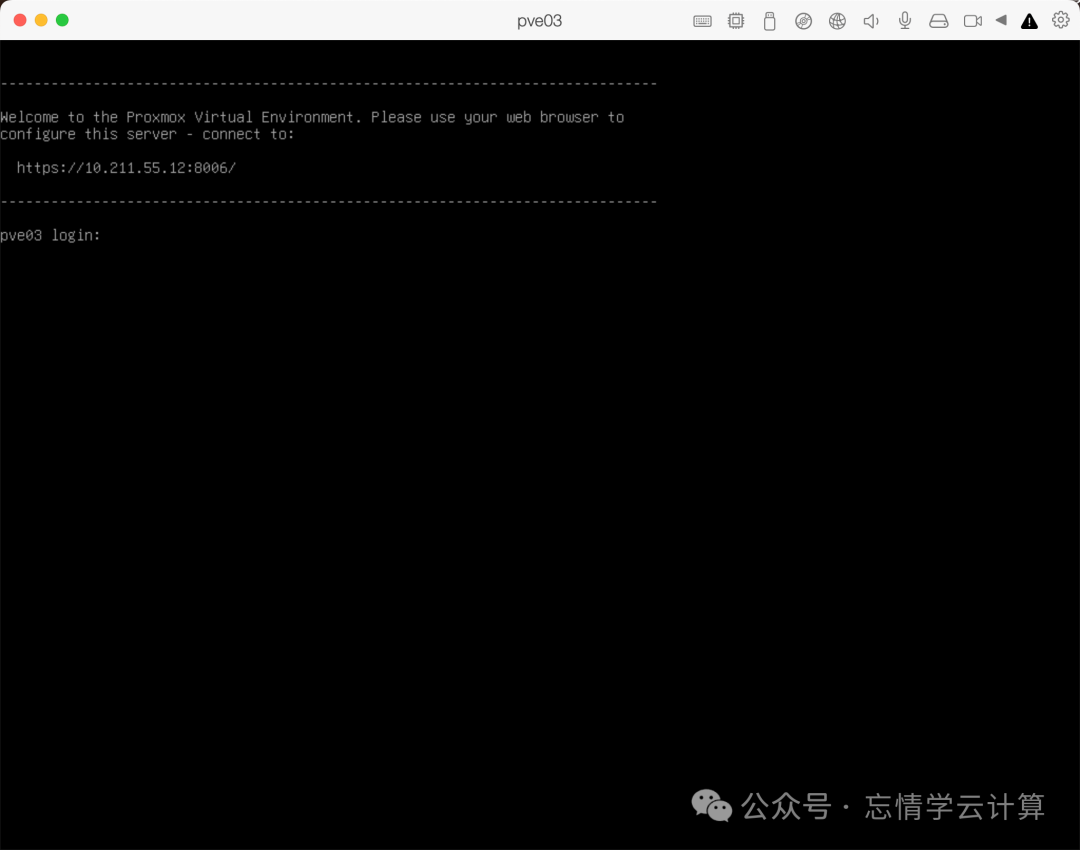
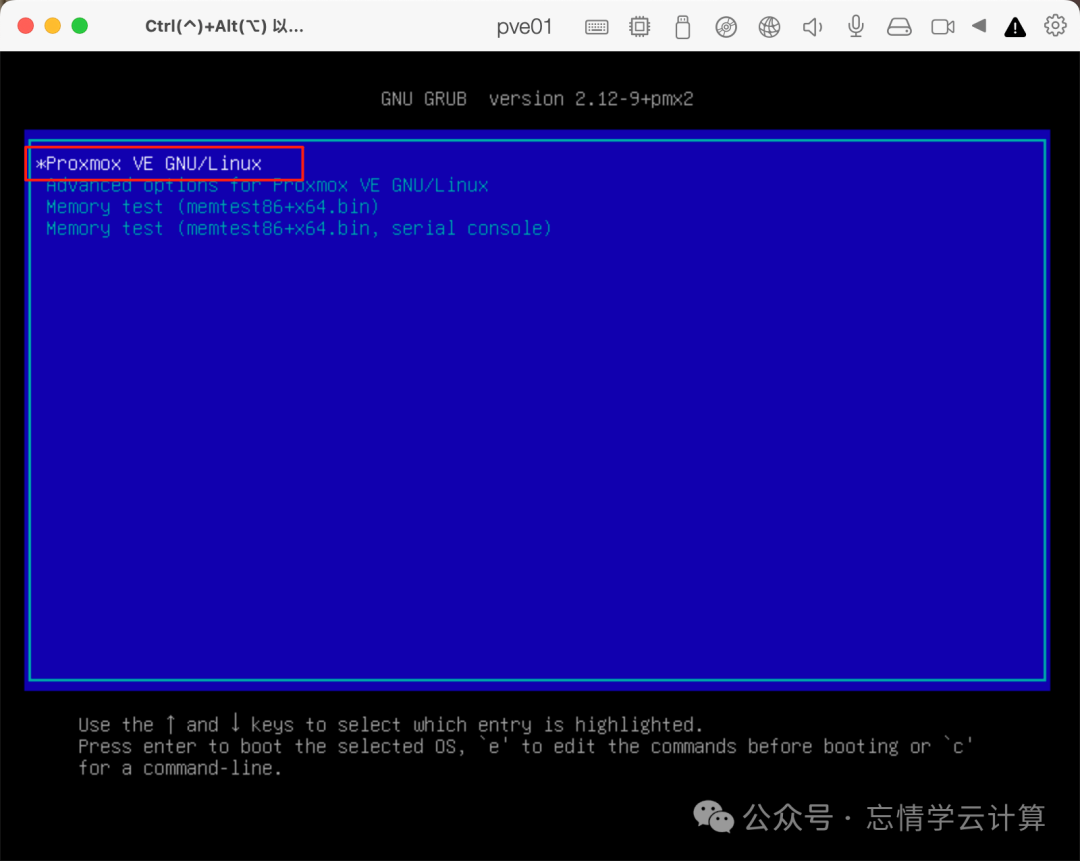 Select the first option to boot; after booting, it will look like this
 Install pve02 and pve03 in the same way; after installation, it will look like the following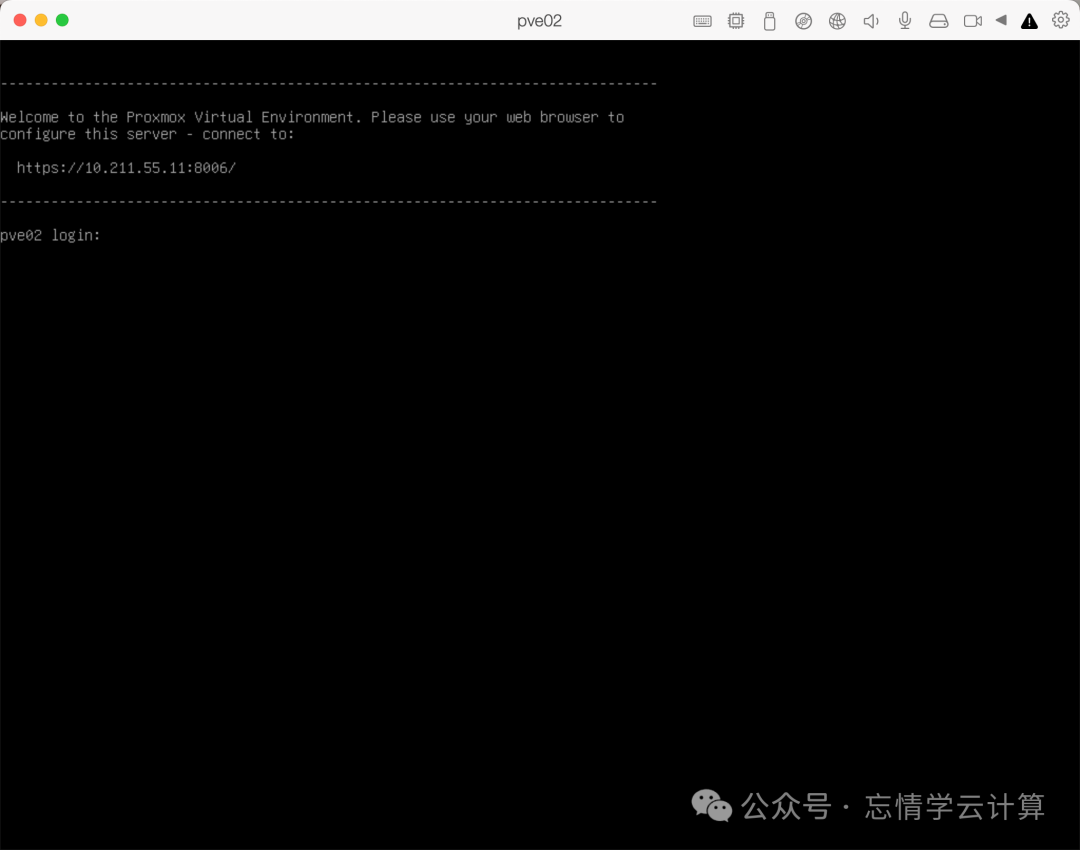
 PVE installation will create LVM and divide it into two partitions, which is not conducive to management. Therefore, you can merge the partitions. Merge the partitions on all three pve as follows:Click shell, enter lvremove pve/data, and press y to confirm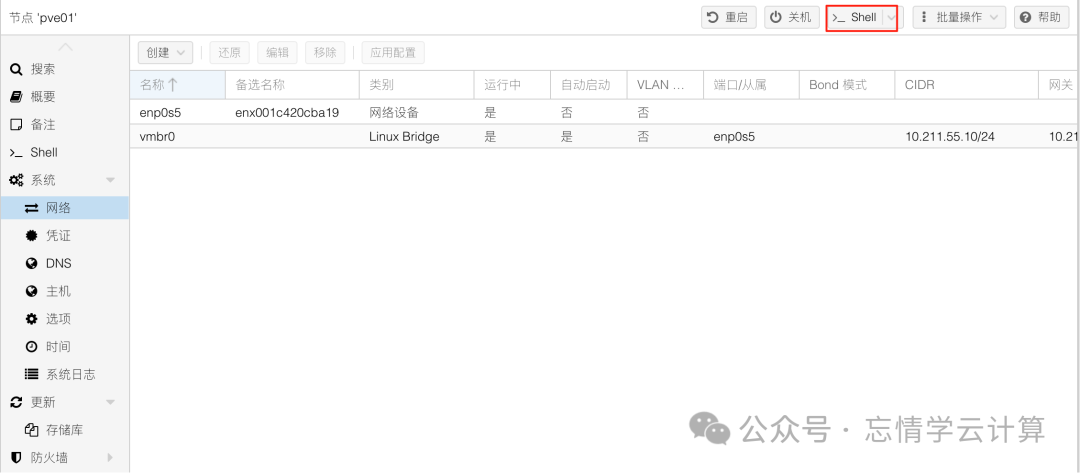


 Then enter lvextend -l +100%FREE -r pve/root to extend the remaining capacity to the root volume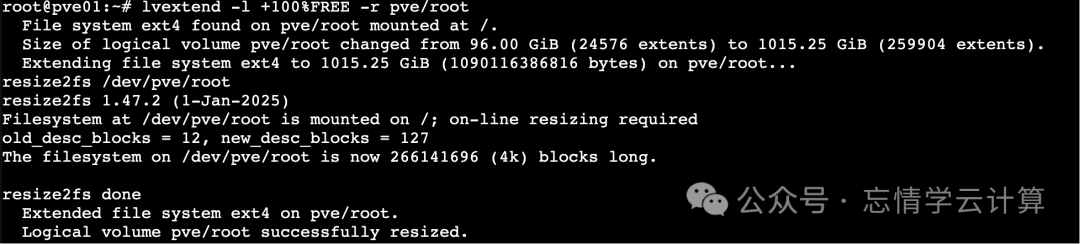
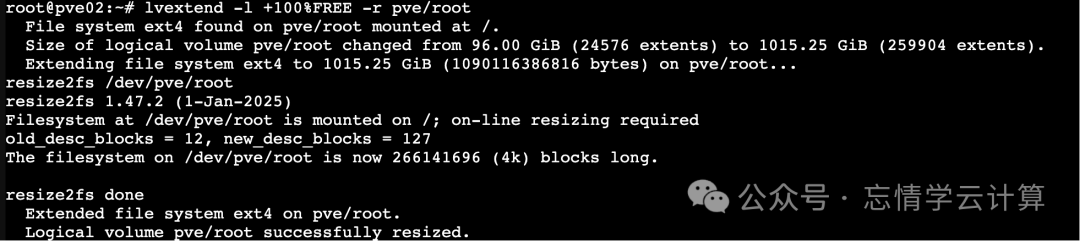
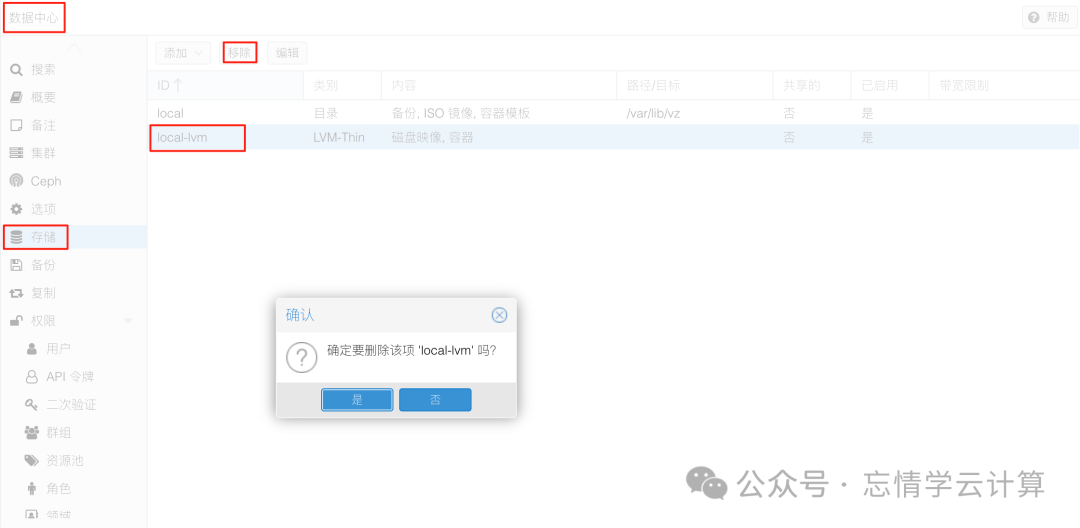
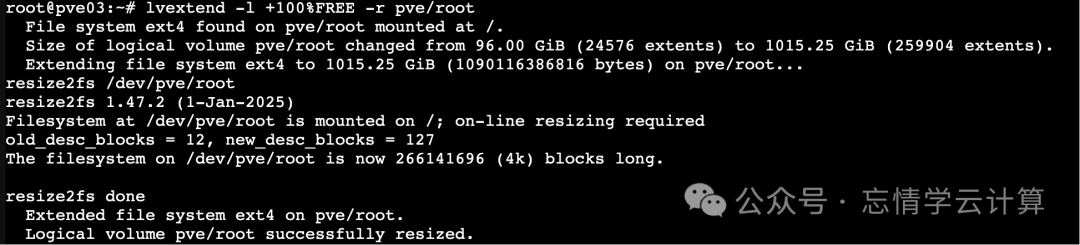 Thus, the partitions are merged. Next, click on the data center, storage, select local-lvm, and click remove
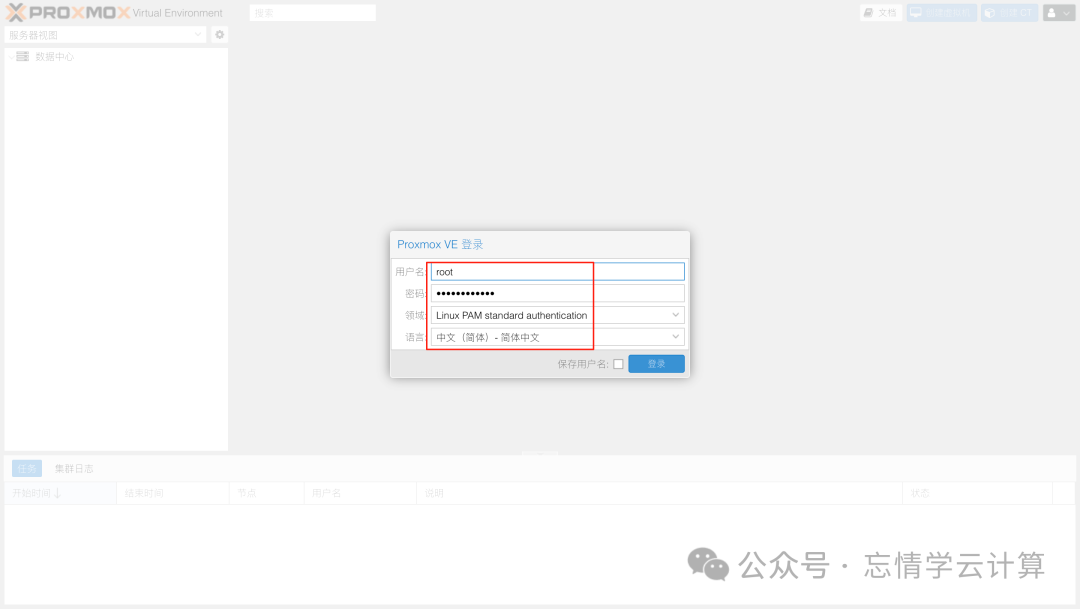
 6. Building a PVE ClusterAccess the web interface by entering https://10.211.55.10:8006 in the browser, and log in with your username and password
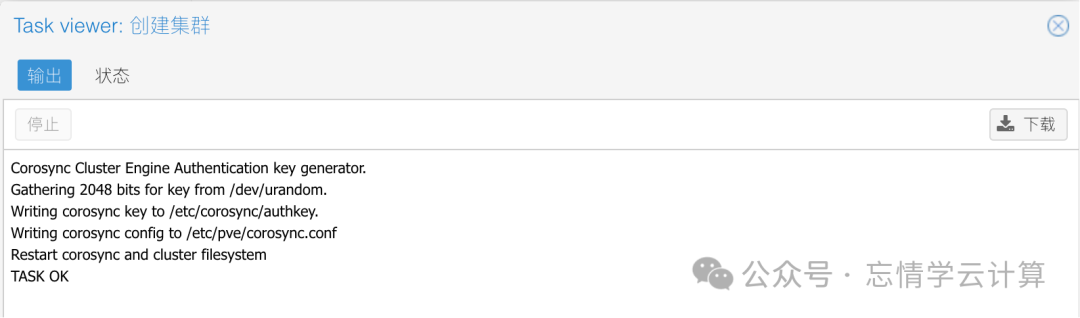
 Create a cluster and add the current host to the cluster
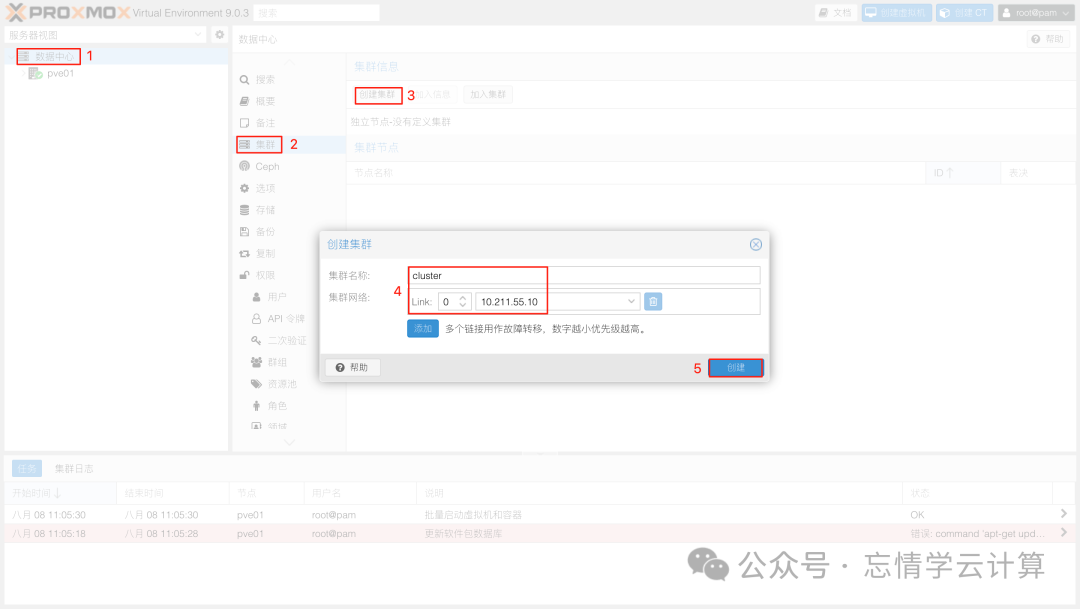 The cluster is successfully created as shown below
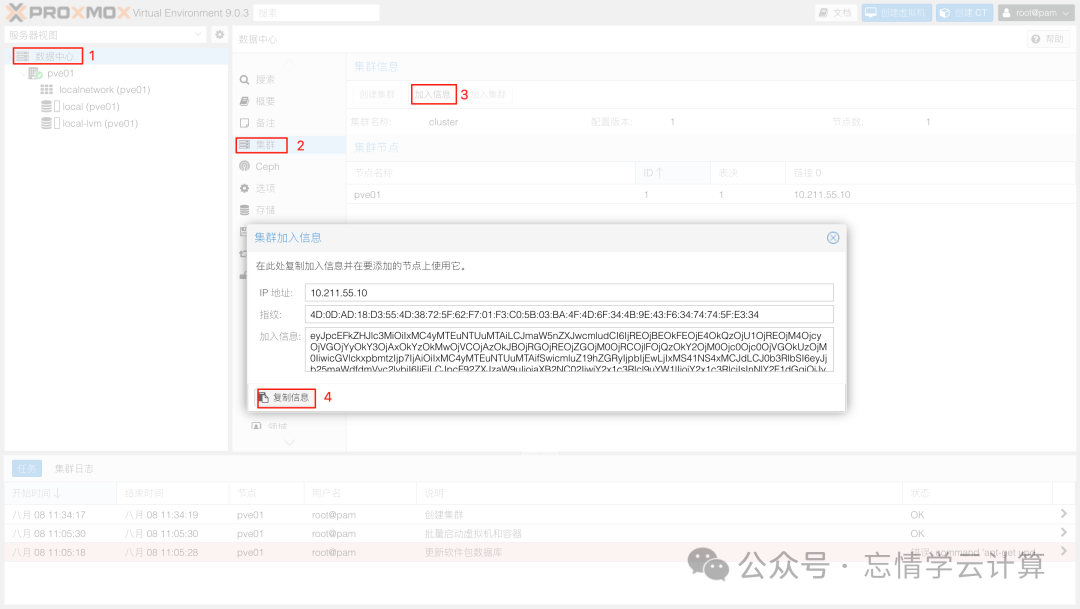
 Copy the cluster join information
 Log in to pve02 and add pve02 to the cluster
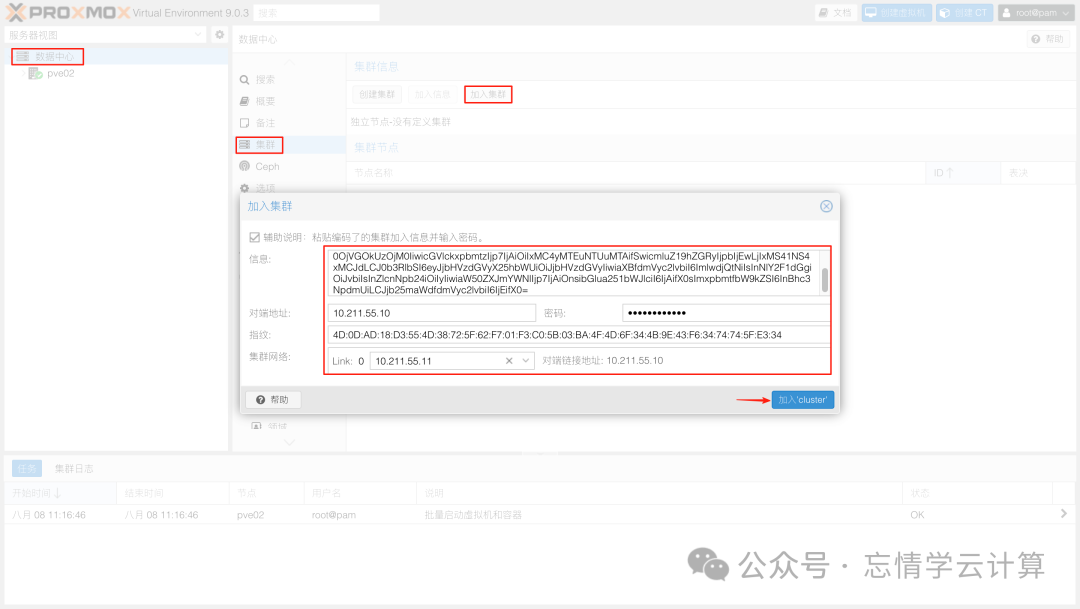 Paste the previously copied cluster join information, select the IP address of pve01 and enter its password, then click the join cluster button. After waiting for completion, click the close button X in the upper right corner.
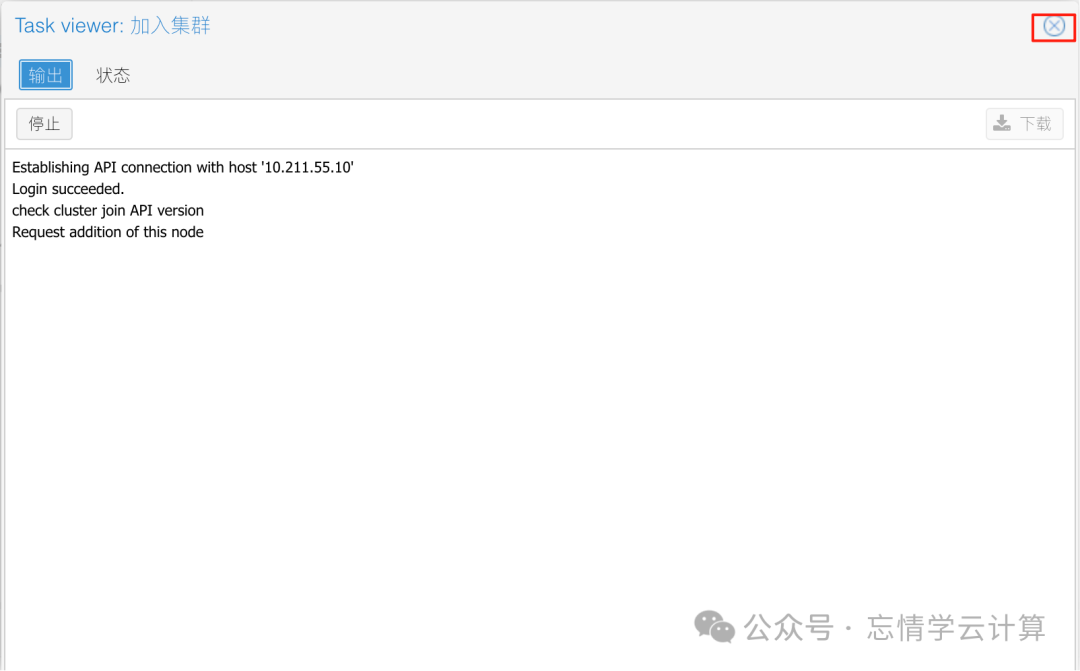 The interface will show a connection error; do not panic, just refresh the browser
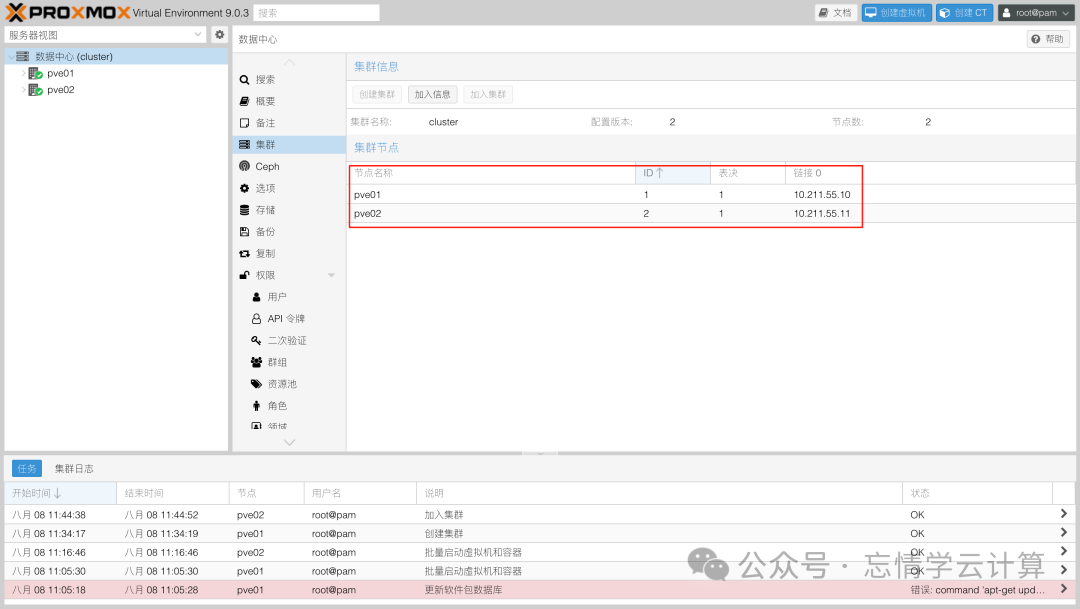
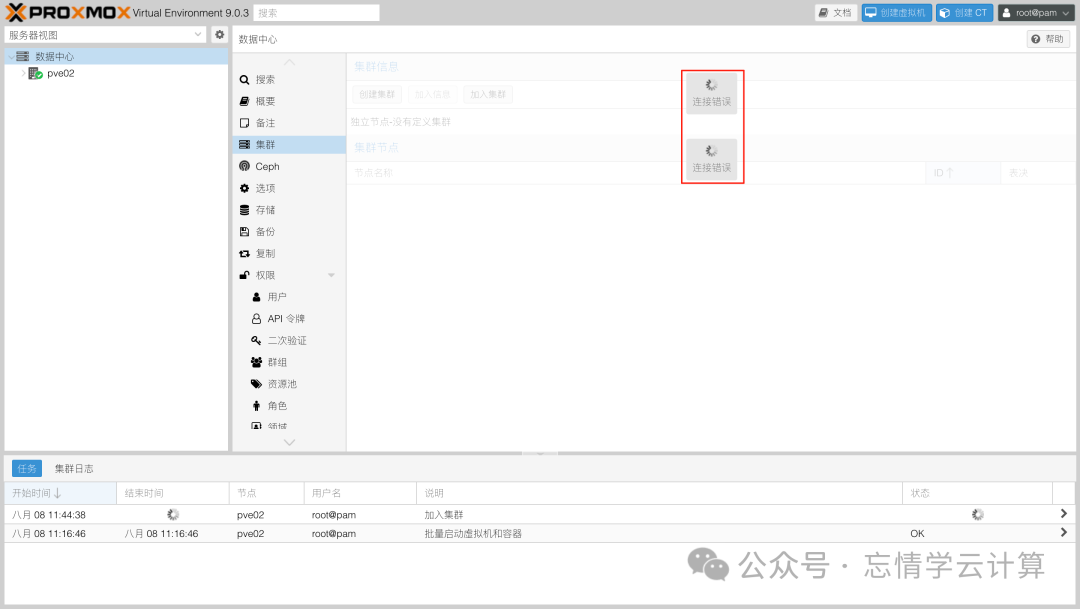 After refreshing the browser and logging in again, you will find that pve02 has been added to the cluster, as shown below
 Use the same method to add pve03 to the cluster, and the addition will be successful as shown below
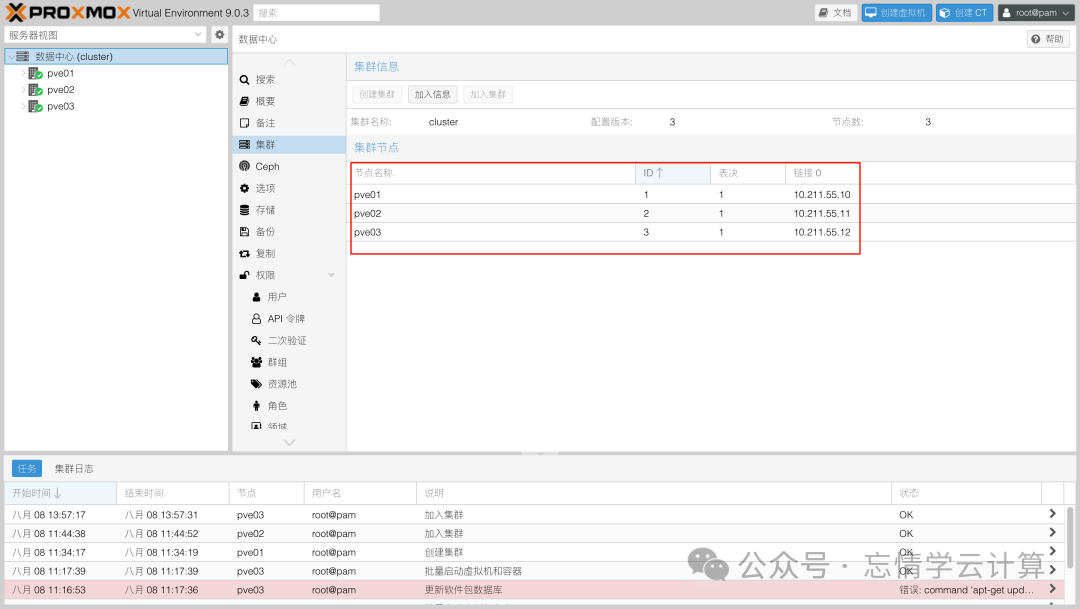 Once the cluster is successfully built, you can access the cluster using the IP of any host in the cluster + port 8006.