Follow + Star, learn new Python skills every day
Due to changes in the public account’s push rules, please click “View” and add “Star” to get exciting technical shares at the first time
Source: Internet
In today’s fast-paced world, voice assistants are ubiquitous in our daily lives, making tasks easier to manage and our interactions with technology more intuitive.From setting reminders and creating to-do lists to searching the web, voice assistants have evolved into digital companions in our lives. With the continuous advancement of artificial intelligence, OpenAI’s GPT-4 has become a groundbreaking language model capable of generating highly accurate and relevant content, including code snippets for various applications.In today’s article, we will delve into the fascinating world of GPT-4 and explore how to leverage its powerful capabilities to implement your own voice assistant.We will guide you through the process of generating code for essential functions such as speech recognition, text-to-speech conversion, and task execution using GPT-4.By the end of this article, you will have a solid foundation for developing a state-of-the-art voice assistant that can seamlessly integrate with your projects and elevate your user experience to new heights.Join us on this exciting journey as we unleash the potential of GPT-4 and transform the way we interact with technology through voice assistants.Now, let’s get started!Provide the following prompt text to ChatGPT 4:Implement a voice assistant in Python that must be able to help complete the following tasks:
- Set reminders
- Create to-do lists
- Search the web
- Provide an overview of available commands as help to the user
The assistant must use speech recognition to accept all commands through recordings.In response, ChatGPT 4 provides you with detailed instructions on how to implement a Python voice assistant.Create a new Python project using a virtual environmentTo start creating a new Python project, first create a new project folder:
$ mkdir voice_assist$ cd voice_assistNext, create a new Python virtual environment:
$ python3 -m venv envThe command python3 -m venv env creates a new virtual environment named env using the Python 3 venv module.
Here’s a breakdown of the command:
- python3: This specifies that the command should use Python 3 as the interpreter.
- -m venv: This flag indicates that the command should run the built-in venv module, which is used to create virtual environments.
- env: This is the name of the virtual environment you want to create. In this case, the virtual environment will be named env.
A virtual environment is an isolated Python environment that allows you to install packages and dependencies specific to a particular project without interfering with the system-wide Python installation or other projects. This isolation helps maintain consistency and avoid potential conflicts between different project requirements.
Once the virtual environment is created, you can activate it using the following command:
$ source env/bin/activateInstall Packages
With the virtual Python environment set up, we can install Python packages according to the instructions provided by ChatGPT:
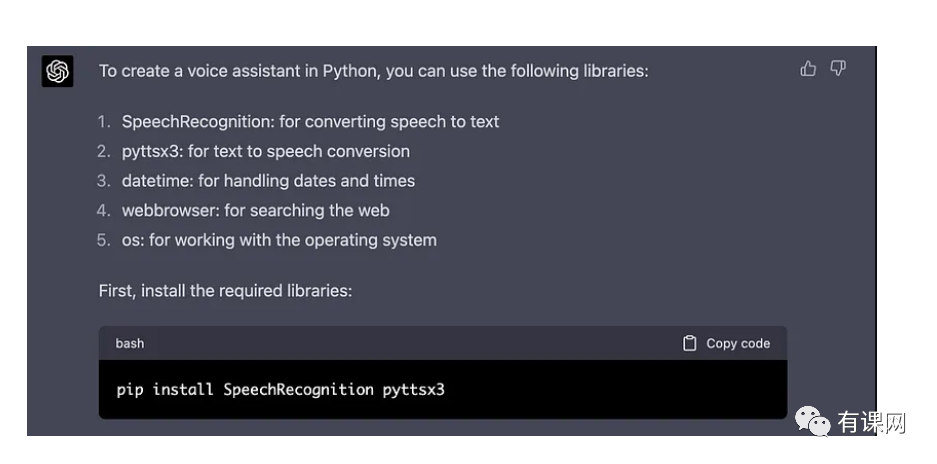
Copy and paste the command into the command line and press enter to execute:
$ pip install SpeechRecognition pyttsx3You also need to install the PyAudio library required for accessing the microphone with the SpeechRecognition library. On MacOS, you only need to execute the following commands:
$ brew install portaudio$ pip install pyaudioImplementing the Voice Assistant
To copy and paste the Python code provided by ChatGPT, you first need to create a new Python file:
$ touch voice_assistant.pyIn the first step, ChatGPT tells us to start the implementation by adding the following import statements in voice_assistant.py:
import osimport datetimeimport webbrowserimport speech_recognition as srimport pyttsx3This code block imports several Python modules necessary for implementing the voice assistant. Each line imports a different module:
- import os: Imports the os module, which provides a way to interact with the operating system. This module includes functions for handling directories, files, processes, and environment variables, among other tasks.
- import datetime: Imports the datetime module, which provides classes for manipulating dates and times. This module can be used in the context of the voice assistant to set reminders or use timestamps.
- import webbrowser: Imports the webbrowser module, which provides a high-level interface for displaying web-based documents and browsing the web. Using this module, you can open URLs in a web browser, which aids the voice assistant’s web search functionality.
- import speech_recognition as sr: Imports the speech_recognition module and assigns it the alias sr, which is used for performing speech recognition tasks, such as converting the user’s voice commands into text. The alias sr is used for more concise references to the module in the code.
- import pyttsx3: Imports the pyttsx3 module, which is a text-to-speech conversion library. This module allows the voice assistant to convert text (responses or prompts) into audible speech, enabling it to communicate with users verbally.
Next, ChatGPT will guide you to create a function to set up the text-to-speech engine:
def initialize_engine(): engine = pyttsx3.init() return engineThen, ChatGPT provides a function that can read any text aloud:
def speak(engine, text): engine.say(text) engine.runAndWait()The speak function is a simple utility function designed to convert text to speech using the pyttsx3 library. It has two parameters: engine and text.
Here’s a breakdown of the function components:
- def speak(engine, text): Defines a function named speak that has two parameters: engine and text. The engine parameter represents an instance of the pyttsx3 engine responsible for handling the text-to-speech conversion. The text parameter represents the text to be converted to speech.
- engine.say(text): Calls the say method of the pyttsx3 engine instance, passing the text parameter as an argument. This method schedules the engine to read the provided text aloud.
- engine.runAndWait(): Calls the runAndWait method of the pyttsx3 engine instance. This method processes the speaking tasks queued by the say method and blocks further execution of the program until all tasks are completed. Essentially, it ensures that the text-to-speech conversion is completed before the program continues executing other tasks.
The speak function is used in the voice assistant implementation to provide audio feedback or responses to user voice commands. It simplifies the process of converting text to speech, making it easier to use the pyttsx3 library throughout the program.
Next, create a speech recognition function:
def listen(): r = sr.Recognizer() with sr.Microphone() as source: print("Listening...") audio = r.listen(source) try: command = r.recognize_google(audio) print(f"User said: {command}\n") except Exception as e: print("Sorry, I didn't catch that. Could you please repeat?") return "None" return command.lower()The listen function uses the speech_recognition library to capture the user’s voice input and convert it to text. It is designed to facilitate the processing of voice commands in the voice assistant implementation.
Here’s a breakdown of the function components:
- r = sr.Recognizer(): Creates an instance of the Recognizer class from the speech_recognition library (aliased as sr). The Recognizer class is responsible for recognizing speech from audio sources.
- with sr.Microphone() as source: Opens the default microphone as the audio source using the Microphone class from the speech_recognition library.
- print(“Listening…”): Prints a message to the console indicating that the program is listening for user input.
- audio = r.listen(source): Uses the listen method of the Recognizer instance to capture audio input from the microphone source. The captured audio is stored in the audio variable.
- try: Starts a try-except block to handle potential exceptions during the speech recognition process.
- command = r.recognize_google(audio): Calls the recognize_google method of the Recognizer instance, sending the captured audio to the Google Web Speech API for speech-to-text conversion. The resulting text is stored in the command variable.
- print(f”User said: {command}\n”): Prints the recognized text to the console to provide visual confirmation of the captured command.
- except Exception as e: Catches any exceptions that may occur during the speech recognition process.
- print(“Sorry, I didn’t catch that. Could you repeat?”): If an exception occurs, prints a message to the console asking the user to repeat their command.
- return “None”: If an exception occurs, returns the string “None”, indicating that the speech command was not successfully recognized.
- return command.lower(): If speech recognition is successful, returns the recognized command in lowercase format. This ensures that the command can be easily compared with other strings in the program, regardless of the original casing.
- listen: The listen function is used in the voice assistant implementation to capture and recognize the user’s voice commands, allowing the assistant to respond to user requests.
Next, you need to implement the four functions to execute the voice assistant’s commands:
def set_reminder(engine, command):    speak(engine, "What should I remind you about?")    reminder = listen()    speak(engine, "When do you want to be reminded? Please say the time in hours and minutes.")    reminder_time = listen()    try:        hour, minute = map(int, reminder_time.split())        now = datetime.datetime.now()        reminder_datetime = now.replace(hour=hour, minute=minute)        if now > reminder_datetime:            reminder_datetime += datetime.timedelta(days=1)        speak(engine, f"Alright, I will remind you about '{reminder}' at {hour:02d}:{minute:02d}.")        while True:            if datetime.datetime.now() >= reminder_datetime:                speak(engine, f"Reminder: {reminder}")                break    except ValueError:        speak(engine, "Sorry, I couldn't understand the time you provided. Please try again.")
def create_todo_list(engine, command):    todo_list = []    speak(engine, "Let's create a to-do list. Please say the tasks one by one. Say 'done' when you're finished.")    while True:        task = listen()        if task == "done":            break        todo_list.append(task)        speak(engine, f"Added: {task}")    speak(engine, "Here's your to-do list:")    for task in todo_list:        speak(engine, task)
def search_web(engine, command):    search_terms = command.replace("search", "").strip()    if search_terms:        url = f"https://www.google.com/search?q={search_terms}"        speak(engine, f"Searching for '{search_terms}'")        webbrowser.open(url)    else:        speak(engine, "Please provide a search term.")
def show_help(engine): help_text = """ I can help you with the following tasks: 1. Set reminders: Say 'set reminder' followed by the reminder and time. 2. Create to-do lists: Say 'create to-do list' and then list your tasks one by one. 3. Search the web: Say 'search' followed by the search terms. 4. Show available commands: Say 'help'. 5. To exit, say 'exit' or 'quit'. """ print(help_text) speak(engine, help_text)- set_reminder: This function helps set reminders for the user. It prompts the user to provide a reminder description and the time they wish to be reminded. The function then waits until the specified time and audibly reminds the user of their task.
- create_todo_list: This function creates a to-do list by asking the user to provide tasks one by one. When the user says “done”, the function stops accepting tasks and reads back the complete to-do list to the user.
- search_web: This function accepts a voice command containing search terms and performs a web search using Google. It opens the search results in the default web browser.
- show_help: This function displays and audibly reads the help text explaining the available voice commands and tasks the assistant can help with, such as setting reminders, creating to-do lists, searching the web, showing available commands, and exiting the assistant.
The last part of the code you need to get from ChatGPT’s response is the main function:
def main(): engine = initialize_engine() speak(engine, "Hello, I am your voice assistant. How can I help you today?") while True: command = listen() if "reminder" in command: set_reminder(engine, command) elif "to-do" in command or "todo" in command: create_todo_list(engine, command) elif "search" in command: search_web(engine, command) elif "help" in command: show_help(engine) elif "exit" in command or "quit" in command: speak(engine, "Goodbye!") breakThe main function serves as the entry point of the program, managing the workflow of the voice assistant. The voice assistant continuously listens for user commands and calls the appropriate functions to handle each command until the user chooses to exit the program.
Here’s a step-by-step explanation of the code:
- engine = initialize_engine(): Calls the initialize_engine function to set up the pyttsx3 text-to-speech engine. The engine instance is then assigned to the engine variable.
- speak(engine, “Hello, I am your voice assistant. How can I help you today?”): The voice assistant uses the speak function to send a welcome message to the user.
- while True:: Starts an infinite loop that keeps the voice assistant running and listening for user commands.
- command = listen(): Calls the listen function to capture and recognize the user’s voice command. The recognized command text is assigned to the command variable.
- The following conditional statements check for specific keywords in the user command and call the corresponding functions:
-
If the command contains “reminder”, the set_reminder function is called.
-
If the command contains “to-do” or “todo”, the create_todo_list function is called.
-
If the command contains “search”, the search_web function is called.
-
If the command contains “help”, the show_help function is called.
6. elif “exit” in command or “quit” in command:: If the user’s command contains “exit” or “quit”, the voice assistant will say “Goodbye!” using the speak function and terminate the loop with a break statement.
In summary, the main function coordinates the workflow of the voice assistant by continuously listening for voice commands and calling the appropriate functions to handle each command. The assistant runs in an infinite loop until the user says “exit” or “quit”.
The last few lines of code to add are:
if __name__ == "__main__": main()This code snippet is a common Python idiom used to check if the script is being run as the main program (rather than being imported as a module in another script). When running a Python script, the interpreter sets a special variable named __name__ to “__main__” for the script being executed. If the script is imported as a module into another script, the __name__ variable is set to the name of the module.
In this case, the code checks if __name__ is equal to “__main__”. If so, it indicates that the script is being run as the main program, and the main() function is called to start the voice assistant.
By using this construct, you can create Python scripts that can be run as standalone programs or imported as modules, depending on how they are executed. When the script is imported as a module, the code in the if __name__ == “__main__”: block will not be executed, helping to separate the script’s functionality from its execution when imported.
Finally, let’s take a look at the complete code:
import osimport datetimeimport webbrowserimport speech_recognition as srimport pyttsx3
def initialize_engine():    engine = pyttsx3.init()    return engine
def speak(engine, text):    engine.say(text)    engine.runAndWait()
def listen():    r = sr.Recognizer()    with sr.Microphone() as source:        print("Listening...")        audio = r.listen(source)    try:        command = r.recognize_google(audio)        print(f"User said: {command}\n")    except Exception as e:        print("Sorry, I didn't catch that. Could you please repeat?")        return "None"    return command.lower()
def set_reminder(engine, command):    speak(engine, "What should I remind you about?")    reminder = listen()    speak(engine, "When do you want to be reminded? Please say the time in hours and minutes.")    reminder_time = listen()    try:        hour, minute = map(int, reminder_time.split())        now = datetime.datetime.now()        reminder_datetime = now.replace(hour=hour, minute=minute)        if now > reminder_datetime:            reminder_datetime += datetime.timedelta(days=1)        speak(engine, f"Alright, I will remind you about '{reminder}' at {hour:02d}:{minute:02d}.")        while True:            if datetime.datetime.now() >= reminder_datetime:                speak(engine, f"Reminder: {reminder}")                break    except ValueError:        speak(engine, "Sorry, I couldn't understand the time you provided. Please try again.")
def create_todo_list(engine, command):    todo_list = []    speak(engine, "Let's create a to-do list. Please say the tasks one by one. Say 'done' when you're finished.")    while True:        task = listen()        if task == "done":            break        todo_list.append(task)        speak(engine, f"Added: {task}")    speak(engine, "Here's your to-do list:")    for task in todo_list:        speak(engine, task)
def search_web(engine, command):    search_terms = command.replace("search", "").strip()    if search_terms:        url = f"https://www.google.com/search?q={search_terms}"        speak(engine, f"Searching for '{search_terms}'")        webbrowser.open(url)    else:        speak(engine, "Please provide a search term.")
def show_help(engine):    help_text = """    I can help you with the following tasks:    1. Set reminders: Say 'set reminder' followed by the reminder and time.    2. Create to-do lists: Say 'create to-do list' and then list your tasks one by one.    3. Search the web: Say 'search' followed by the search terms.    4. Show available commands: Say 'help'.    5. To exit, say 'exit' or 'quit'.    """    print(help_text)    speak(engine, help_text)
def main():    engine = initialize_engine()    speak(engine, "Hello, I am your voice assistant. How can I help you today?")    while True:        command = listen()        if "reminder" in command:            set_reminder(engine, command)        elif "to-do" in command or "todo" in command:            create_todo_list(engine, command)        elif "search" in command:            search_web(engine, command)        elif "help" in command:            show_help(engine)        elif "exit" in command or "quit" in command:            speak(engine, "Goodbye!")            break
def __name__ == "__main__":    main()
Run the Application
Let’s execute the program by entering the following:
$ python voice_assistant.py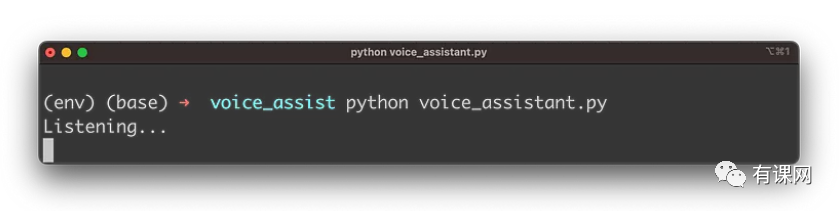
Lowering the Speed
When you run the voice assistant, you may notice that the speech output is quite fast. By default, the speed is set to 200 words per minute, which is quite fast. If you want to adjust the speed, you can again request ChatGPT to provide the necessary instructions:
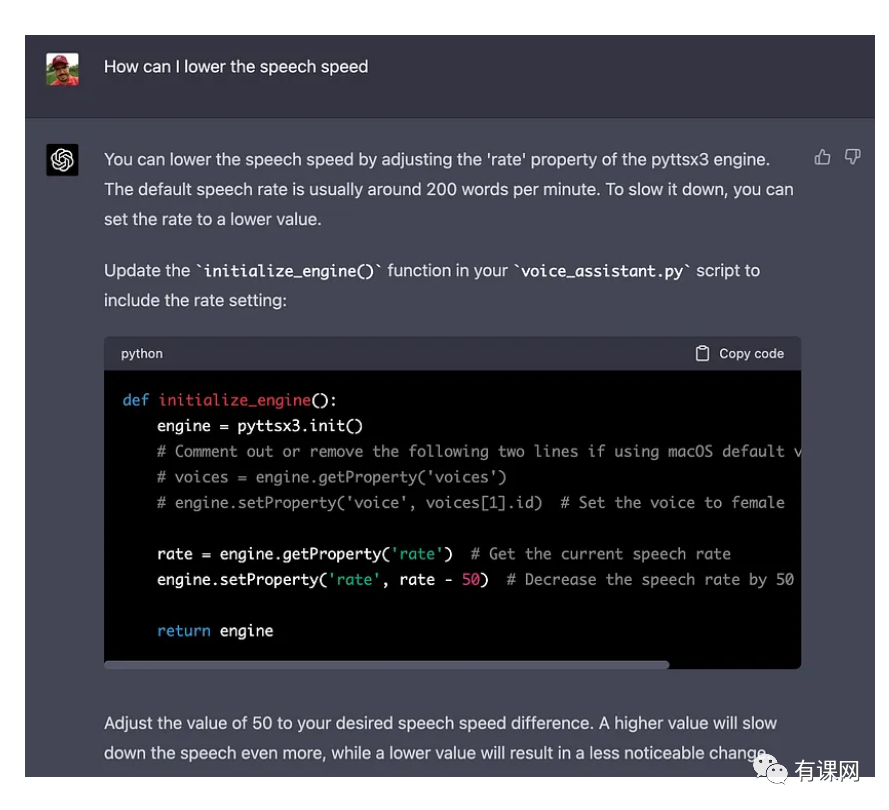
With the instructions provided by ChatGPT, it is easy to change the implementation of the initialize_engine function to the following to lower the speed:
def initialize_engine(): engine = pyttsx3.init() rate = engine.getProperty('rate') engine.setProperty('rate', rate - 50) return engineConclusion
In conclusion, implementing a Python voice assistant using ChatGPT has proven to be a very effective and efficient method. By leveraging the powerful capabilities of GPT-4, we were able to gain valuable insights and code snippets that form the building blocks of our voice assistant. The process not only saved time but also provided a solid foundation for understanding the code and its functionality.
The resulting voice assistant is capable of handling various tasks such as setting reminders, creating to-do lists, searching the web, and providing an overview of available commands. By combining various Python libraries like speech_recognition, pyttsx3, and webbrowser, we built an assistant that showcases the potential of integrating GPT-4 into the development process.

Long press or scan the QR code below to get free access to Python public courses and hundreds of gigabytes of learning materials organized by experts, including but not limited to Python e-books, tutorials, project orders, source code, etc.

▲ Scan the QR code - Get it for free
Recommended Reading
12 Python Scripts to Boost Daily Efficiency, Ready to Use
Python Programming Without Classes, What Else Can Be Used
25 Amazing Python Tricks to Immediately Improve Your Code
Summary of Python Code Performance Optimization, Valuable Collection
Click Read the Original to learn more