Because the space provided by the firmware is really too small, just installing a few software can cause problems, so it is strongly recommended to prioritize disk expansion after installation!
Disk expansion involves different methods for different versions. The version we downloaded and used is ext4, while another version is squashfs.
Ext4 Disk Expansion
1. In a powered-off state, directly edit the virtual machine’s hard disk capacity

2. Restart OpenWrt, you will see that even if the capacity has been adjusted, it will not directly reflect in the system, still only 102.33M

3. SSH into OpenWrt and enter the following command to install necessary software
|
|

Any SSH tool can be used, such as putty, MobaXterm, tabby, etc.
If none are available, open the Windows terminal and enter
ssh [email protected]

4. Configure Disk Space
Enter the following commands sequentially:
-
fdisk -lYou can see
/dev/sdahas become 4GB.
-
fdisk /dev/sda
You can input
mhere to see help, which will introduce some command usages -
Input
n(to create a new partition)Three prompts will appear, just press enter.

-
Input
p(to print partition information), you can see an additionalsda3partition
-
Input
w(to write partition information and exit)
-
Input
mkfs.ext4 /dev/sda3(to format the partition) and copy the UUID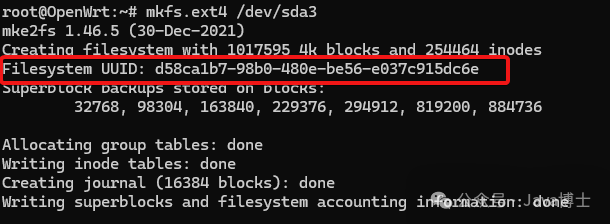
-
Restart with
reboot.
5. Configure fstab
Execute the following commands:
|
|

It is recommended to run each command separately, don’t learn from me by pasting them all at once, you may miss some
6. Copy the root directory to the new partition
Execute the following commands:
|
|
7. Enable Boot
|
|

8. Restart
|
|
9. Enter the system to check partition information

Successfully expanded.
The expansion above requires you to change one thing, which is the disk mount letter. Mine is
/dev/sda3, and the other isUUID, everything else can be copied as is.
Squashfs Disk Expansion
What is Overlay
The file system generally used by OpenWRT is SquashFS, and the characteristic of this file system is: read-only.
How can a read-only file system save settings and install software? This is where the partition /overlay is used. As the name suggests, overlay means covering over the top layer. Although the original files cannot be modified, the modified parts are placed in the overlay partition and then mapped to the original location, so that when reading, the modified files can be accessed.
Why use such a complicated method? OpenWRT can also use the EXT4 file system, but using SquashFS + overlay has certain advantages.
SquashFS is compressed, allowing more items to be stored in devices like routers with small ROMs.
The factory reset of OpenWRT also relies on this method. When you reset, it only needs to clear the overlay partition, and everything will return to the state just after flashing.
If it were an EXT4 file system, it would only be able to back up each modified file and copy them back during a factory reset, which is very complicated.
Of course, SquashFS + overlay also has its drawbacks:
Modifying files will take up more space. First, you cannot delete files because deleting a file actually writes a delete marker in the overlay partition, which takes up more space. Additionally, modifying files effectively creates a copy of the file, occupying double the space.

Steps
1. Create a New Partition
First, shut down OpenWrt and adjust your hard disk size to the desired size (for example, 4G):

Open OpenWrt, connect via SSH, and install cfdisk software:
|
|
Then enter:
|
|
Open the disk management interface:

Here you can see that there are currently three existing partitions, now create a new partition:
Select Free Space, then select New, and enter the required size, for example, 3G.
Then select Write

Enter yes to complete the creation of the new partition

Select Quit to exit
2. Format the Partition
Use the following command to format the partition:
|
|

3. Mount the New Partition
Enter the command:
|
|
4. Transfer to the New Partition
Then copy the data from the original upper layer to the new partition:
|
|
5. Background Configuration
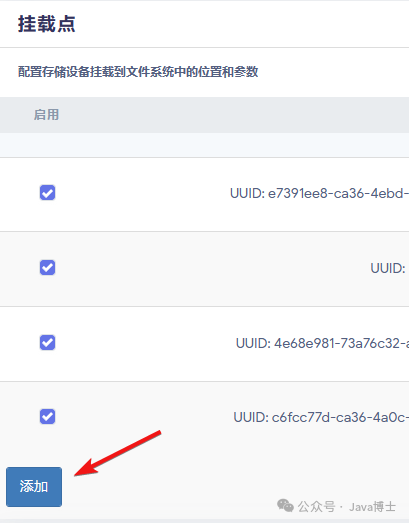
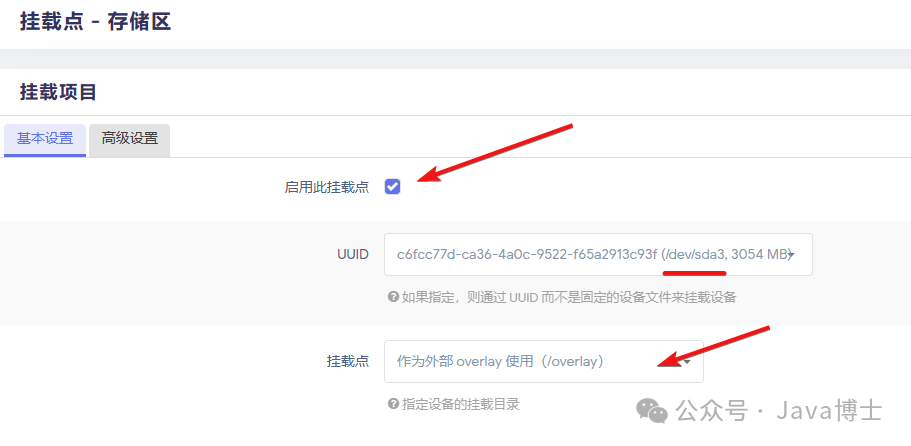
Enter the OpenWRT background under [System] – [Mount Points], click the [Add] button under the [Mount Points] column, find the partition dev/sda3 in [UUID], and select [Use as External Overlay]:
6. Completion
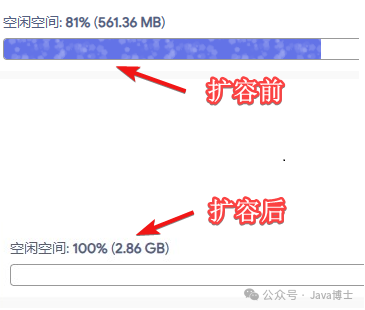
At this step, just restart OpenWRT to successfully expand.
After restarting, go to [System] -> [Packages] to see the increased space capacity.
The partition will automatically mount after OpenWRT restarts. If you encounter a situation where it is not mounted, you need to edit
/etc/rc.localAdd a line
mount /dev/sda3 /overlaybeforeexit 0to do so.