The programming language of PLC software has distinct characteristics compared to general computer languages. It is neither a high-level language nor a typical assembly language, and it must meet the requirements of being easy to write and debug.
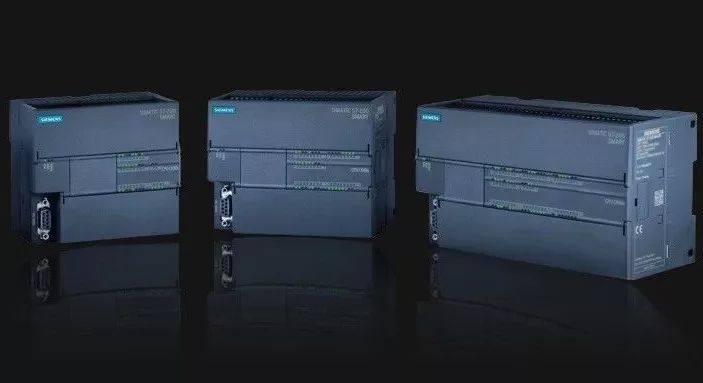
Early PLCs only supported ladder diagram programming and instruction list programming. Currently, according to the International Electrotechnical Commission, five programming languages that support PLC programming have been established: Ladder Diagram (LD), Instruction List (IL), Function Block Diagram (FBD), Sequential Function Chart (SFC), and Structured Text (ST). Today, I will share some PLC control circuits and ladder diagrams, which are relatively basic and practical. Let’s take a look!
The start, self-lock, and stop control can use drive instructions (OUT) and can also use set/reset instructions (SET, RST).
1. Using coil drive instructions to implement start, self-lock, and stop control
<img alt="Master These 8 PLC Programming Ladder Diagrams" src="https://boardor.com/wp-content/uploads/2025/03/99f45c37-315d-4eb0-ab40-e4a8f16544e4.jpeg" /><img alt="Master These 8 PLC Programming Ladder Diagrams" src="https://boardor.com/wp-content/uploads/2025/03/209f4e78-9c4b-4ca3-8290-ba287c58b247.png" />Explanation of the circuit and ladder diagram:
When the start button SB1 is pressed, the start contact X000 in the PLC internal ladder program closes, the output coil Y000 is energized, the internal hard contact between output terminal Y0 and COM closes, the contactor coil KM is energized, the main contact KM in the main circuit closes, and the motor is energized to start.
When the stop button SB2 is pressed, the stop contact X001 in the PLC internal ladder program opens, the output coil Y000 is de-energized, the internal hard contact between Y0 and COM opens, the contactor coil KM is de-energized, the main contact KM in the main circuit opens, and the motor is de-energized to stop.
2. Using set/reset instructions to implement start, self-lock, and stop control
<img alt="Master These 8 PLC Programming Ladder Diagrams" src="https://boardor.com/wp-content/uploads/2025/03/3b4093e4-19fc-4139-a673-13faeff3557f.png" />The PLC wiring diagram is similar to the above.
Explanation of the circuit and ladder diagram:
When the start button SB1 is pressed, the start contact X000 in the ladder diagram closes, [SET Y000] instruction is executed, and the result of the instruction execution sets the output relay coil Y000 to 1, which is equivalent to energizing coil Y000, making the internal hard contact between Y0 and COM close, the contactor coil KM is energized, the main contact KM in the main circuit closes, and the motor is energized to start.
When the stop button SB2 is pressed, the stop contact X001 in the ladder program closes, and the [RST Y000] instruction is executed, resulting in the output coil Y000 being reset, which is equivalent to de-energizing coil Y000, opening the internal hard contact between Y0 and COM, de-energizing the contactor coil KM, opening the main contact KM in the main circuit, and the motor is de-energized to stop.
<img alt="Master These 8 PLC Programming Ladder Diagrams" src="https://boardor.com/wp-content/uploads/2025/03/d1202095-e737-4faa-9194-c292be68f1e7.jpeg" /><img alt="Master These 8 PLC Programming Ladder Diagrams" src="https://boardor.com/wp-content/uploads/2025/03/d4792890-1de0-43e1-b9e9-e4ff88774cca.png" />Explanation of the circuit and ladder diagram:
1) Forward interlock control
Pressing the forward button SB1 → the forward contact X000 in the ladder program closes → coil Y000 is energized → Y000 self-locking contact closes, the internal hard contact between Y0 and COM closes → Y000 self-locking contact closes, allowing coil Y000 to remain energized even after X000 contact opens; Y000 interlock contact opens, preventing coil Y001 from being energized even when X001 contact closes (due to misoperation of SB2), achieving interlock control; the internal hard contact between Y0 and COM closes, energizing the contactor coil KM1, the main contact KM1 in the main circuit closes, and the motor is energized in the forward direction.
2) Reverse interlock control Pressing the reverse button SB2 → the reverse contact X001 in the ladder program closes → coil Y001 is energized → Y001 self-locking contact closes, the internal hard contact between Y1 and COM closes → Y001 self-locking contact closes, allowing coil Y001 to remain energized even after X001 contact opens; Y001 interlock contact opens, preventing coil Y000 from being energized even when X000 contact closes (due to misoperation of SB1), achieving interlock control; the internal hard contact between Y1 and COM closes, energizing the contactor coil KM2, the main contact KM2 in the main circuit closes, and the motor is energized in the reverse direction.
3) Stop control Pressing stop button SB3 → both stop contacts X002 in the ladder program open → coils Y000 and Y001 are both de-energized → contactor coils KM1 and KM2 are both de-energized → both main contacts KM1 and KM2 in the main circuit open, and the motor is de-energized to stop.
<img alt="Master These 8 PLC Programming Ladder Diagrams" src="https://boardor.com/wp-content/uploads/2025/03/18e65946-ef45-4d60-9f33-86dac1339d3b.jpeg" />(1) Single Person Multi-Location Control
<img alt="Master These 8 PLC Programming Ladder Diagrams" src="https://boardor.com/wp-content/uploads/2025/03/279a683a-0cff-4744-953d-9df239ede43b.png" />Control at location A. When the start button SB1 is pressed at location A → contact X000 closes → coil Y000 is energized → self-locking contact Y000 closes, the internal hard contact at terminal Y0 closes → self-locking contact Y000 locks the power supply to coil Y000, the internal hard contact at terminal Y0 closes, energizing the contactor coil KM → the main contact KM in the main circuit closes, and the motor is energized to operate.
Control to stop at location A. When the stop button SB2 is pressed at location A → contact X001 opens → coil Y000 is de-energized → self-locking contact Y000 opens, the internal hard contact at terminal Y0 opens → contactor coil KM is de-energized → the main contact KM in the main circuit opens, and the motor is de-energized to stop.
(2) Multi-Person Multi-Location Control
<img alt="Master These 8 PLC Programming Ladder Diagrams" src="https://boardor.com/wp-content/uploads/2025/03/0bfae355-ba84-4098-872d-2941274b5820.png" />Start control. When buttons SB1, SB3, and SB5 are pressed at locations A, B, and C respectively → coil Y000 is energized → self-locking contact Y000 closes, the internal hard contact at terminal Y0 closes → coil Y000 locks the power supply, energizing the contactor coil KM → the main contact KM in the main circuit closes, and the motor is energized to operate.
Stop control. When any of the stop buttons SB2, SB4, or SB6 are pressed at locations A, B, or C → coil Y000 is de-energized → self-locking contact Y000 opens, the internal hard contact at terminal Y0 opens → self-locking contact Y000 opens, cutting off the power supply to coil Y000, the internal hard contact at terminal Y0 opens, de-energizing the contactor coil KM → the main contact KM in the main circuit opens, and the motor is de-energized to stop.

1. Delayed Start Timing Control Ladder Diagram
<img alt="Master These 8 PLC Programming Ladder Diagrams" src="https://boardor.com/wp-content/uploads/2025/03/4755cace-e77b-436e-b990-bc102103b477.png" /><img alt="Master These 8 PLC Programming Ladder Diagrams" src="https://boardor.com/wp-content/uploads/2025/03/20ff56ad-2888-4642-b9c2-a1aedc9bdc14.png" />It can achieve: after pressing the start button for 3 seconds, the motor starts working, and after working for 5 seconds, it stops automatically.
Explanation of the PLC circuit and ladder diagram is as follows:
<img alt="Master These 8 PLC Programming Ladder Diagrams" src="https://boardor.com/wp-content/uploads/2025/03/20ff56ad-2888-4642-b9c2-a1aedc9bdc14.png" />2. Multi-Timer Combined Control Ladder Diagram
<img alt="Master These 8 PLC Programming Ladder Diagrams" src="https://boardor.com/wp-content/uploads/2025/03/4755cace-e77b-436e-b990-bc102103b477.png" /><img alt="Master These 8 PLC Programming Ladder Diagrams" src="https://boardor.com/wp-content/uploads/2025/03/20ff56ad-2888-4642-b9c2-a1aedc9bdc14.png" />It can achieve: after pressing the start button, motor B runs immediately, motor A starts working after 30 seconds, motor B stops after 70 seconds, and motor A stops after 100 seconds.
Explanation of the PLC circuit and ladder diagram is as follows:
<img alt="Master These 8 PLC Programming Ladder Diagrams" src="https://boardor.com/wp-content/uploads/2025/03/4755cace-e77b-436e-b990-bc102103b477.png" />The maximum timing for Mitsubishi FX series PLCs is 3276.7 seconds (about 54 minutes), and using timers and counters can extend the timing.
<img alt="Master These 8 PLC Programming Ladder Diagrams" src="https://boardor.com/wp-content/uploads/2025/03/4755cace-e77b-436e-b990-bc102103b477.png" /><img alt="Master These 8 PLC Programming Ladder Diagrams" src="https://boardor.com/wp-content/uploads/2025/03/20ff56ad-2888-4642-b9c2-a1aedc9bdc14.png" />Explanation of the PLC circuit and ladder diagram is as follows:
<img alt="Master These 8 PLC Programming Ladder Diagrams" src="https://boardor.com/wp-content/uploads/2025/03/4755cace-e77b-436e-b990-bc102103b477.png" />The timer T0 in the diagram has a timing unit of 0.1 seconds (100ms). When paired with counter C0, its timing can be extended: T = 30000 × 0.1 seconds × 30000 = 90000000 seconds = 25000 hours. If you need to reset the timer, you can disconnect switch QS2, close the [2]X000 normally closed contact, and then execute the “RST C0” instruction. After that, the counter C0 will be reset, and then close QS2 to restart the 250000-hour timing.
<img alt="Master These 8 PLC Programming Ladder Diagrams" src="https://boardor.com/wp-content/uploads/2025/03/4755cace-e77b-436e-b990-bc102103b477.png" /><img alt="Master These 8 PLC Programming Ladder Diagrams" src="https://boardor.com/wp-content/uploads/2025/03/20ff56ad-2888-4642-b9c2-a1aedc9bdc14.png" />Explanation of the PLC circuit and ladder diagram is as follows:
(1) Start control
<img alt="Master These 8 PLC Programming Ladder Diagrams" src="https://boardor.com/wp-content/uploads/2025/03/20ff56ad-2888-4642-b9c2-a1aedc9bdc14.png" />(2) Stop control
<img alt="Master These 8 PLC Programming Ladder Diagrams" src="https://boardor.com/wp-content/uploads/2025/03/20ff56ad-2888-4642-b9c2-a1aedc9bdc14.png" /><img alt="Master These 8 PLC Programming Ladder Diagrams" src="https://boardor.com/wp-content/uploads/2025/03/4755cace-e77b-436e-b990-bc102103b477.png" /><img alt="Master These 8 PLC Programming Ladder Diagrams" src="https://boardor.com/wp-content/uploads/2025/03/20ff56ad-2888-4642-b9c2-a1aedc9bdc14.png" />Explanation of the PLC circuit and ladder diagram:
(1) Start control
Pressing the start button SB1 → [1]X001 normally open contact closes → [SET Y001] instruction is executed → Y001 coil is set, i.e., Y001 coil is energized → internal hard contact at terminal Y1 closes → contactor KM coil is energized → KM main contact closes → motor is energized to operate.
(2) Stop control
Pressing the stop button SB2 → [2]X002 normally open contact closes → [RST Y001] instruction is executed → Y001 coil is reset, i.e., Y001 coil is de-energized → internal hard contact at terminal Y1 opens → contactor KM coil is de-energized → KM main contact opens → motor is de-energized to stop.
(3) Overload protection and alarm control
<img alt="Master These 8 PLC Programming Ladder Diagrams" src="https://boardor.com/wp-content/uploads/2025/03/20ff56ad-2888-4642-b9c2-a1aedc9bdc14.png" /><img alt="Master These 8 PLC Programming Ladder Diagrams" src="https://boardor.com/wp-content/uploads/2025/03/4755cace-e77b-436e-b990-bc102103b477.png" /><img alt="Master These 8 PLC Programming Ladder Diagrams" src="https://boardor.com/wp-content/uploads/2025/03/4755cace-e77b-436e-b990-bc102103b477.png" />Explanation of the circuit and ladder diagram:
Closing switch QS → contact X000 closes → timer T0 starts timing for 3 seconds → after 3 seconds, timer T0 acts, and T0 normally open contact closes → timer T1 starts timing for 3 seconds, meanwhile Y000 is energized, the internal hard contact at terminal Y0 closes, and lamp HL lights up → after 3 seconds, timer T1 acts, and T1 normally closed contact opens → timer T0 resets, T0 normally open contact opens → coil Y000 is de-energized, simultaneously timer T1 resets → coil Y000 de-energizes and lamp HL goes out; timer T1 resets, making T1 close, since switch QS remains closed, contact X000 is also closed, and timer T0 starts timing again for 3 seconds.
Then, the above process repeats, and lamp HL flashes with a frequency of 3 seconds on, 3 seconds off.
PLC Control of Fountain
<img alt="Master These 8 PLC Programming Ladder Diagrams" src="https://boardor.com/wp-content/uploads/2025/03/20ff56ad-2888-4642-b9c2-a1aedc9bdc14.png" />The system requires two buttons to control three groups of nozzles A, B, and C (achieved by controlling the motors of the three groups of nozzles), arranged as shown in the figure. The system control requirements are as follows:
After pressing the start button, group A nozzles spray for 5 seconds and then stop, followed by groups B and C spraying simultaneously. After 5 seconds, group B stops, group C continues to spray for 5 seconds and then stops, followed by groups A and B spraying for 7 seconds, with group C stopping in the first 2 seconds of those 7 seconds and spraying in the last 5 seconds. Then, groups A, B, and C stop spraying for 3 seconds, and the above process repeats. After pressing the stop button, all three groups of nozzles stop spraying.
Disclaimer: This article is reprinted from the internet, and the copyright belongs to the original author. If there are any copyright issues, please contact us promptly for deletion. Thank you!
Complete question bank for the 2021 electrician junior exam (including answers)
Three essential tools for electricians, easily accessible via WeChat!
[Collection] The “way out” for ten-year veteran electricians, the secret to earning over ten thousand a month!
Which of the five major electrical drawing software (CAD, Eplan, CADe_simu…) do you prefer?
Latest electrical CAD drawing software with a detailed installation tutorial!
Latest electrical drawing software EPLAN with a detailed installation tutorial!
Common issues for beginners using S7-200 SMART programming software (with download link)
Comprehensive electrical calculation EXCEL templates, automatically generated! No need to ask for help with electrical calculations!
Bluetooth headphones and beginner electrician/PLC books available for free? Come and claim your electrical gifts!
Basic skills in PLC programming: ladder diagrams and control circuits (with 1164 practical Mitsubishi PLC cases)
Still can’t understand electrical diagrams? Grab the basic electrical diagram reading skills and simulation software for quick practical application!
12 free electrician video courses, 10GB software/e-book resources, and 30-day free electrician live classes are available!