Introduction:
In the previous chapter, we discussed the basics of Clickhouse and its deployment in a Linux environment. In this chapter, we will learn how to synchronize and update data using Maxwell. This will be explained in a straightforward manner. Please ensure that your server has MySQL database and RabbitMQ middleware installed, along with a running SpringBoot environment.
1. What is Maxwell?
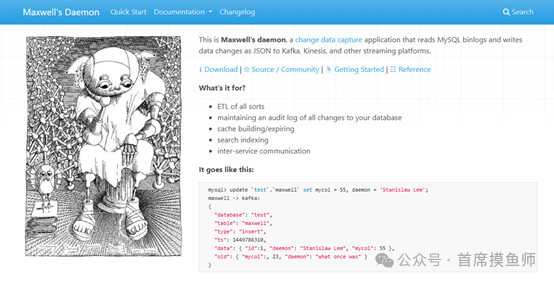
Maxwell is an open-source tool developed by Zendesk in the USA, written in Java. It reads MySQL binary logs (Binlog) in real-time and generates JSON formatted messages, which are sent as producers to applications like Kafka, Kinesis, RabbitMQ, Redis, Google Cloud Pub/Sub, files, or other platforms.
Official website: https://maxwells-daemon.io/
2. How Maxwell Works
The working principle of Maxwell is quite simple: it disguises itself as a MySQL slave and pretends to replicate data from the MySQL master.Master-slave replication is a well-known concept, and those who have set up MySQL master-slave synchronization will be familiar with it. The main steps involve enabling MySQL BinLog logging.
1. The Master database writes change records to the binary log (binary log). 2. The Slave sends a dump protocol to the MySQL master, copying the master’s binary log events to its relay log. 3. The Slave reads and replays the events in the relay log, synchronizing the changed data to its own database.1. What is BinLog?
BinLog is arguably the most important log in MySQL. It records all DDL and DML (except data query statements) in the form of events, including the time consumed by the executed statements. MySQL’s binary log is transaction-safe.
Usage Scenarios:
1. MySQL Replication: Enable binlog on the Master side, and the Master passes its binary log to slaves to achieve data consistency between master and slave. 2. Data recovery: Use the mysqlbinlog tool to recover data.File Types:
Binary log index files (with the .index suffix) record all binary files. Binary log files (with the .00000* suffix) record all DDL and DML (except data query statements) events.2. How to Enable BinLog
Modify the MySQL configuration file
vim /etc/my.cnfAdd the following in the [mysqld] section:
[mysqld] log-bin=mysql-bin server-id=1 binlog-format=ROW
log-bin=mysql-bin: Enable binlog and specify the prefix for the binlog files as mysql-bin. server-id=1: Set a unique server ID, which is required for master-slave replication. binlog-format: Set the format of the binlog. Common formats include STATEMENT, ROW, and MIXED. ROW format provides more accurate data replication and is recommended.3. Restart MySQL Service
Command: systemctl restart mysql4. Check if BinLog is Enabled
After restarting the service, you can log into the MySQL server and execute the following commands to check if binlog is correctly enabled:
SHOW VARIABLES LIKE 'log_bin'; SHOW VARIABLES LIKE 'binlog_format';

3. Installation and Deployment in Linux Environment
1. Install Java Environment
Command: yum install java-1.8.0-openjdk-devel java -version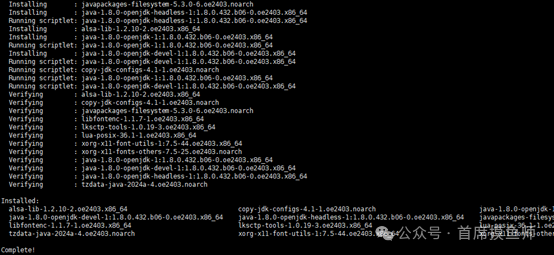

2. Install RabbitMQ Service
Refer to our previous articles3. Upload Maxwell Installation Package
Since we are using jdk1.8, we will use maxwell-1.29.2.tar.gz
4. Extract to the Specified Directory
Command: tar -zxvf maxwell-1.29.2.tar.gz -C /usr/local/
5. Initialize Maxwell Metadata Database
Create a maxwell database in MySQL to store Maxwell's metadata CREATE DATABASE maxwell;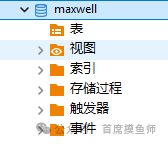
6. Start Maxwell Service
It is recommended to create a new account in MySQL for Maxwell, but we will not create one this time.
Command: bin/maxwell --user='root' --password='123456' --host='192.168.2.121' --producer=stdout--user: MySQL user to connect --password: Password for the MySQL user --host: Hostname where MySQL is installed --producer: Producer mode (stdout: console) Started successfully!
7. Modify MySQL Data Verification
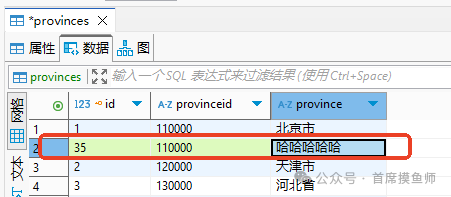
 At this point, Maxwell has printed the added records.
{"database":"ruoyi","table":"sys_role","type":"update","ts":1747902909,"xid":4436,"commit":true,"data":{"role_id":1,"role_name":"超级管理员","role_key":"admin","role_sort":1,"data_scope":"1","menu_check_strictly":1,"dept_check_strictly":1,"status":"0","del_flag":"0","create_by":"admin","create_time":"2018-03-17 11:33:00","update_by":"ry","update_time":"2018-03-16 11:33:00","remark":"超级管理员"},"old":{"create_time":"2018-03-16 11:33:00"}}8. Customize Maxwell Process Startup
Command: cp config.properties.example config.properties vim config.properties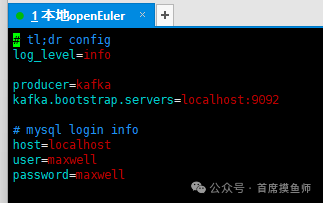 Modify to the following:
Startup command: bin/maxwell --config ./config.properties
9. Configure Maxwell to Push to RabbitMQ
Modify the config.properties configuration file
Command: vim config.propertiesModify as follows:
producer=rabbitmq rabbitmq_host=192.168.2.121 rabbitmq_vhost=/ rabbitmq_port=5672 rabbitmq_user=test rabbitmq_password=test rabbitmq_exchange=MaxwellExchange rabbitmq_exchange_type=direct rabbitmq_exchange_durable=true rabbitmq_routing_key=Maxwellkey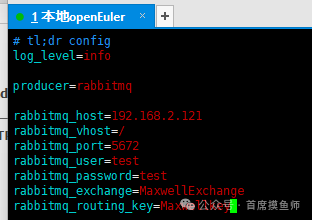
Startup command: bin/maxwell --config ./config.properties Check the RabbitMQ page:
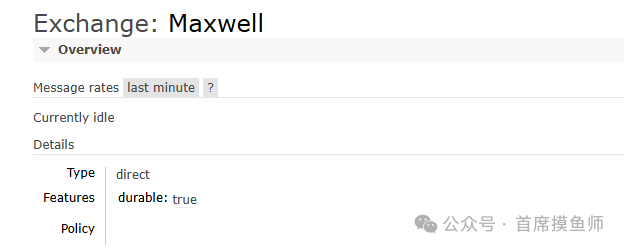
At this point, the exchange in RabbitMQ has also been automatically created!
10. Modify Database Record Verification

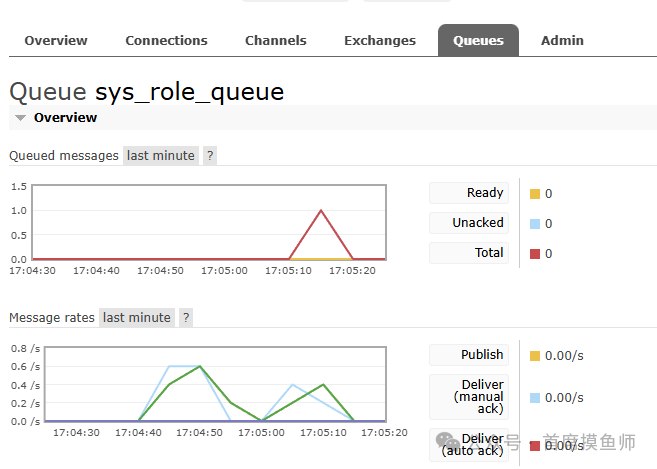
You can see that the message has been pushed up.
4. Using Clickhouse to Receive RabbitMQ Messages and Automatically Store Records
We need to use Clickhouse to automatically receive messages from RabbitMQ to achieve table synchronization. However, all our messages are under the same exchange and routing key, making it impossible to distinguish which table’s records have been modified. Therefore, when Maxwell sends messages, they must be differentiated.
1. Modify the config.properties Configuration File
Command: vim config.propertiesModify as follows:
producer=rabbitmq rabbitmq_host=192.168.2.121 rabbitmq_vhost=/ rabbitmq_port=5672 rabbitmq_user=test rabbitmq_password=test rabbitmq_exchange=MaxwellExchange rabbitmq_exchange_type=direct rabbitmq_exchange_durable=true # Custom routing_key template rabbitmq_routing_key=${db}.${table}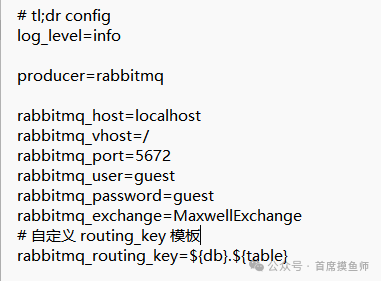 At this point, Maxwell will send messages to different routing keys in the format of database name and table name, such as: ruoyi.sys_role. Delete the old exchange and restart the Maxwell service!
2. Create a Clickhouse Engine Table Based on RabbitMQ to Handle the Provided JSON Format Data:
Since our data is a nested JSON type, Clickhouse cannot directly extract each field. Therefore, we will first store the entire data in one field and then parse it sequentially.
CREATE TABLE ruoyi_sys_role_engine (msg String) ENGINE = RabbitMQ SETTINGS rabbitmq_host_port = '192.168.2.121:5672', rabbitmq_vhost = '/', rabbitmq_exchange_name = 'MaxwellExchange', rabbitmq_exchange_type = 'direct', rabbitmq_queue_base = 'sys_role_queue', rabbitmq_routing_key_list = 'ruoyi.sys_role', rabbitmq_format = 'JSONAsString', rabbitmq_username = 'test', rabbitmq_password = 'test';3. Create Target Table
CREATE TABLE ruoyi_sys_role_final (role_id String, role_name String, role_key String, role_sort String, data_scope String, menu_check_strictly String, dept_check_strictly String, status String, del_flag String, create_by String, create_time String, update_by String, update_time String, remark String) ENGINE = ReplacingMergeTree() ORDER BY role_id;4. Configure Materialized View
To automatically synchronize records received in the ruoyi_sys_role_engine table to the final table, a Materialized View needs to be created.
CREATE MATERIALIZED VIEW mv_ruoyi_sys_role_to_final TO ruoyi_sys_role_final AS (role_id String, role_name String, role_key String, role_sort String, data_scope String, menu_check_strictly String, dept_check_strictly String, status String, del_flag String, create_by String, create_time String, update_by String, update_time String, remark String) SELECT JSONExtractString(data, 'role_id') AS role_id, JSONExtractString(data, 'role_name') AS role_name, JSONExtractString(data, 'role_key') AS role_key, JSONExtractString(data, 'role_sort') AS role_sort, JSONExtractString(data, 'data_scope') AS data_scope, JSONExtractString(data, 'menu_check_strictly') AS menu_check_strictly, JSONExtractString(data, 'dept_check_strictly') AS dept_check_strictly, JSONExtractString(data, 'status') AS status, JSONExtractString(data, 'del_flag') AS del_flag, JSONExtractString(data, 'create_by') AS create_by, JSONExtractString(data, 'create_time') AS create_time, JSONExtractString(data, 'update_by') AS update_by, JSONExtractString(data, 'update_time') AS update_time, JSONExtractString(data, 'remark') AS remark, JSONExtractString(msg, 'data') AS data FROM ruoyi_sys_role_engine;5. Modify Database Record Test View


At this point, we have completed the integration setup of Clickhouse and Maxwell. Whenever there is a change in our database, the table created in Clickhouse will automatically synchronize the data, which is very helpful for specific project requirements. Interested readers should try it out!
5. Integrating ClickHouse with SpringBoot
As mentioned earlier, ClickHouse is also a type of database, but its syntax differs slightly from MySQL, making integration very simple.
1. Add POM Dependency
<dependency> <groupId>ru.yandex.clickhouse</groupId> <artifactId>clickhouse-jdbc</artifactId> <version>0.3.1</version> </dependency>2. Modify YML Data Source
spring: datasource: driver-class-name: ru.yandex.clickhouse.ClickHouseDriver url: jdbc:clickhouse://127.0.0.1:8123/default?useUnicode=true&characterEncoding=utf8&zeroDateTimeBehavior=convertToNull&useSSL=true&serverTimezone=GMT%2B8 username: default password: clickhousemima3. It is Recommended to Use JdbcTemplate for Local Operations
/** * @author [email protected] */ @RestController @RequestMapping("/test") public class TestController { @Autowired private JdbcTemplate jdbcTemplate; @GetMapping("/test") public void test(){ List<Map<String, Object>> mapList = jdbcTemplate.queryForList("select role_id from ruoyi_sys_role_final"); System.out.println(mapList); }} The software package has also been uploaded to the public account, feel free to take it!
This tutorial ends here. I hope everyone will pay more attention and support (Chief Slacker WeChat same number), and continue to follow the latest articles!
Link: https://pan.baidu.com/s/1vr1NL2G20Jzjmrln3hmrOQ Extraction code: sxw4 Copy this content and open the Baidu Netdisk mobile app for easier operation.