1. What is CMake? According to Baidu, CMake is a cross-platform installation (compilation) tool that can describe the installation (compilation process) of all platforms with simple statements. It can output various makefiles or project files. In simple terms, it is a tool that generates corresponding compilation scripts based on different platforms.
2. How to use CMake? The CMake tool uses a file named CMakeLists.txt to describe the build process and can generate standard build files, such as Unix’s Makefile or Windows Visual C++ projects/workspaces. The CMakeLists.txt file needs to be manually written but can also be semi-automatically generated by scripting. CMake provides a more concise syntax than autoconfig. The process of using CMake to generate Makefile and compile on the Linux platform is as follows: 1) Write CMakeLists.txt. 2) Execute the command “cmake PATH” or “ccmake PATH” to generate the Makefile (where PATH is the directory where CMakeLists.txt is located). 3) Use the make command to compile.
3. Specific usage example of CMake. Writing this brings back memories of when I used CMake while installing OpenCV, so let’s take installing OpenCV as an example. 1) Download the latest OpenCV source code from the official website. 2) Extract OpenCV using tar. 3)
cd ~/opencv-x.x.x mkdir release cd release cmake -D CMAKE_BUILD_TYPE=RELEASE -D CMAKE_INSTALL_PREFIX=/usr/local .. make sudo make install
Next, continue using CMake to generate the corresponding Makefile in the OpenCV test case and verify that OpenCV has been installed successfully. 1) Create a working directory mkdir ~/opencv-lena cd ~/opencv-lena vim DisplayImage.cpp
2) Copy the following code into cpp: include <stdio.h> include <opencv2/opencv.hpp> using namespace cv; int main(int argc, char** argv) { if (argc != 2) { printf(“usage: DisplayImage.out <Image_Path>\n”); return -1; } Mat image; image = imread(argv[1], 1); if (!image.data) { printf(“No image data \n”); return -1; } namedWindow(“Display Image”, WINDOW_AUTOSIZE); imshow(“Display Image”, image); waitKey(0); return 0; }
3) Create a CMake build file vim CMakeLists.txt and write the following content: cmake_minimum_required(VERSION 2.8) project(DisplayImage) find_package(OpenCV REQUIRED) add_executable(DisplayImage DisplayImage.cpp) target_link_libraries(DisplayImage ${OpenCV_LIBS})
4) Compile cd ~/opencv-lena cmake . make
5) Execute. At this point, an executable file DisplayImage has been generated in the opencv-lena folder. Download lena.jpg and place it in the opencv-lena directory, then run ./DisplayImage lena.jpg to see the display of lena’s photo.
The most crucial aspect of using CMake is how to write the CMakeLists.txt file. Below we will analyze the various syntax and semantics of CMakeLists.txt.
How to write CMakeLists.txt for a single source file directory
If you want to systematically learn CMake, it’s best to refer to the official documentation, which is very detailed: https://cmake.org/Wiki/CMake. Since I used CMake in a project, I mainly wanted to quickly learn how to write CMakeLists.txt and understand the meanings of some specific commands. The syntax of CMakeLists.txt is relatively simple, consisting of commands, comments, and spaces, where commands are case-insensitive, and content after the symbol “#” is considered a comment. Commands consist of command names, parentheses, and parameters, with parameters separated by spaces. For example, in the previous section: cmake_minimum_required(VERSION 2.8) project(DisplayImage) find_package(OpenCV REQUIRED) add_executable(DisplayImage DisplayImage.cpp) target_link_libraries(DisplayImage ${OpenCV_LIBS})
The first line indicates the minimum version required for CMake to parse this script. The second line indicates the project name. The third line find_package indicates that it will first search for all files named FindOpenCV.cmake in the default Modules directory. If this file is not found, it will look for OpenCVConfig.cmake or OpenCV-config.cmake. These two files are hard-coded with their paths during library installation. In my project, OpenCVConfig.cmake is located in /usr/share/OpenCV. The first search becomes module mode, while the latter search becomes config mode. The REQUIRED option indicates that if it is not found, the CMake process will terminate and output a warning message. The fourth line indicates the name of the executable file to be generated and the files to be compiled. The fifth line indicates the libraries that the executable file needs to link.
– How to write CMakeLists.txt for multiple source file directories
The previous example was relatively simple since there was only one source file. Below, I’ll introduce how to write CMakeLists.txt for multiple source file directories.
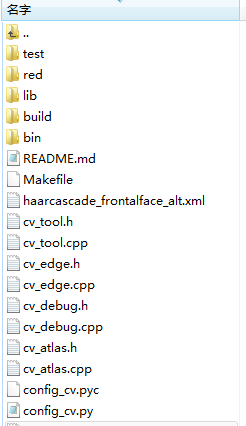
Multiple source file directories
Create a CMakeLists.txt file in the project root directory with the following content: cmake_minimum_required(VERSION 2.8) project(face_detection) find_package(OpenCV REQUIRED) message(STATUS “INC ${OpenCV_INCLUDE_DIRS} OK”)
find_package(PkgConfig) pkg_check_modules(LIBUV REQUIRED libuv) message(STATUS ” ${LIBUV_LIBRARY_DIRS} OK”)
set(Root “${CMAKE_CURRENT_SOURCE_DIR}”) set(Base64 ${Root}/lib/libb64/src)
include_directories(${OpenCV_INCLUDE_DIRS}) include_directories(${Root}) include_directories(${Root}/lib/libb64/include) include_directories(${LIBUV_INCLUDE_DIRS})
link_directories(${LIBUV_LIBRARY_DIRS})
add_library(atlas_cv STATIC cv_atlas.cpp cv_atlas.h cv_tool.h cv_tool.cpp ${Base64}/cencode.c)
set_target_properties(atlas_cv PROPERTIES ARCHIVE_OUTPUT_DIRECTORY “${CMAKE_CURRENT_LIST_DIR}/bin”)
The command message will output the content of the parameters to the terminal. If printing variables, you need to add ${}. The set command assigns values to the Root and Base64 variables. include_directories adds the relevant header file paths needed for compilation. link_directories specifies the paths to the library files that need to be linked. add_library specifies the path for the library to be generated and the names of the dependent source files. set_target_properties sets the properties of the library target, such as output name and location.